Mastering the Hearty Skillet Beef and Bean Chili
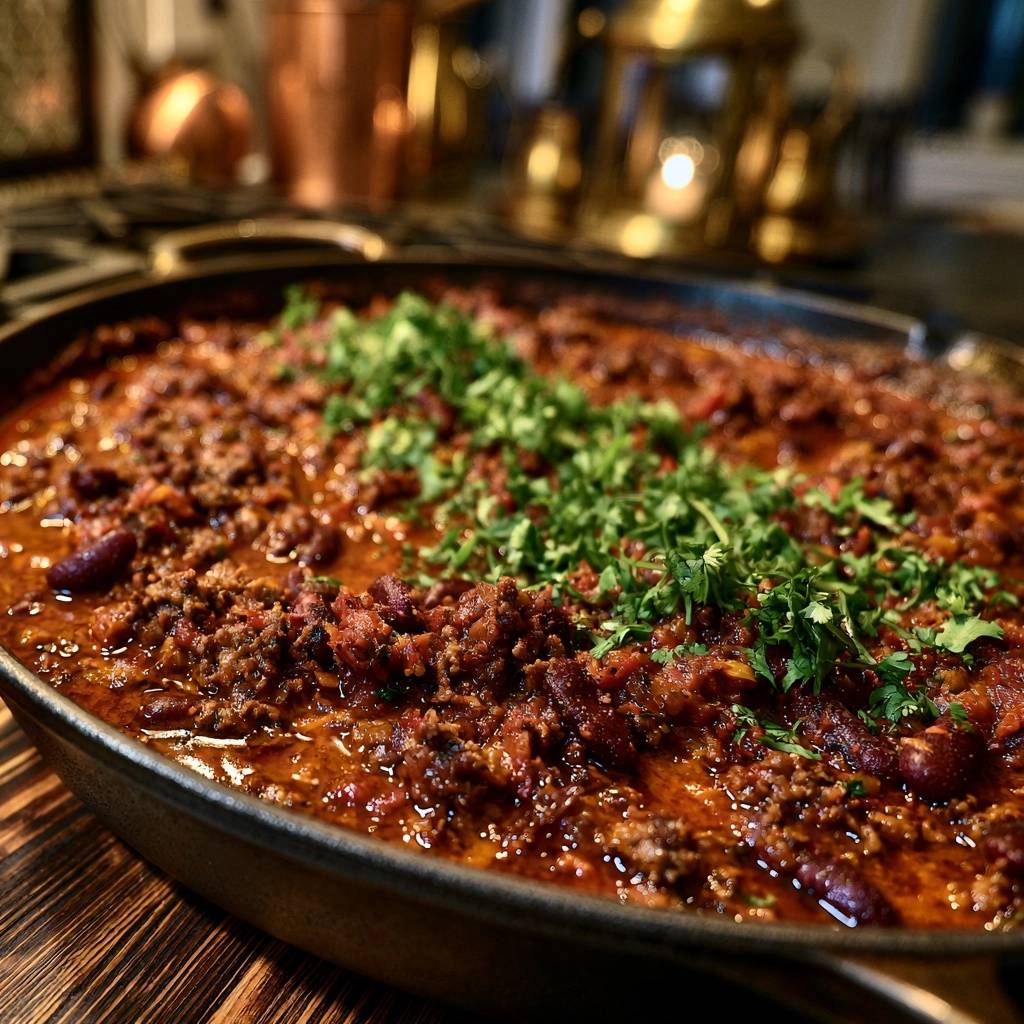
Most home cooks have faced the disappointment of a chili that looks more like a thin, greasy soup than a robust meal. You want a bowl that stands tall, where the sauce clings to the beef and the flavors feel concentrated rather than diluted. This Hearty Skillet Beef and Bean Chili solves the “watery bowl” syndrome by focusing on moisture control and natural thickeners.
The secret to a professional-grade texture isn’t found in a box of cornstarch or a flour roux. Instead, it comes down to how you treat your ingredients in the pan. By using a wide skillet and a specific bean-mashing technique, you create a velvety, rich consistency that feels indulgent without being heavy.
I’ve found that the biggest mistake people make is simmering their chili with a lid on. While it seems like you’re trapping flavor, you’re actually trapping steam that thins out your sauce. For a truly hearty result, you have to let that moisture escape so the beef broth and tomato juices can reduce into a thick, savory glaze.
The Anatomy of a Thick Chili Base
Achieving the perfect viscosity in a meat sauce is a balancing act between fat, fiber, and evaporation. When you use lean ground beef, you’re starting with a protein that won’t release an overwhelming amount of oil. This is vital because an oil slick on top of your chili prevents the water-based liquids from evaporating properly, leaving you with a broken, thin sauce.
The choice of tomatoes also dictates the final structure. Fire-roasted diced tomatoes are superior here because they’ve been charred and processed in a way that helps them hold their shape. Unlike standard diced tomatoes that can sometimes turn mushy and watery, these provide “islands” of texture within the thick tomato sauce base, giving your palate something to sink into.
Essential Pantry Staples and Fresh Aromatics
Yellow onions are the workhorse of this recipe because of their high sugar content. As they cook down in the beef fat, they undergo a beautiful caramelization that adds a hidden layer of sweetness to balance the spicy peppers. While jarred garlic is convenient, fresh cloves are non-negotiable here; the oils in fresh garlic provide a pungent, spicy kick that pre-minced versions simply lose sitting in water.
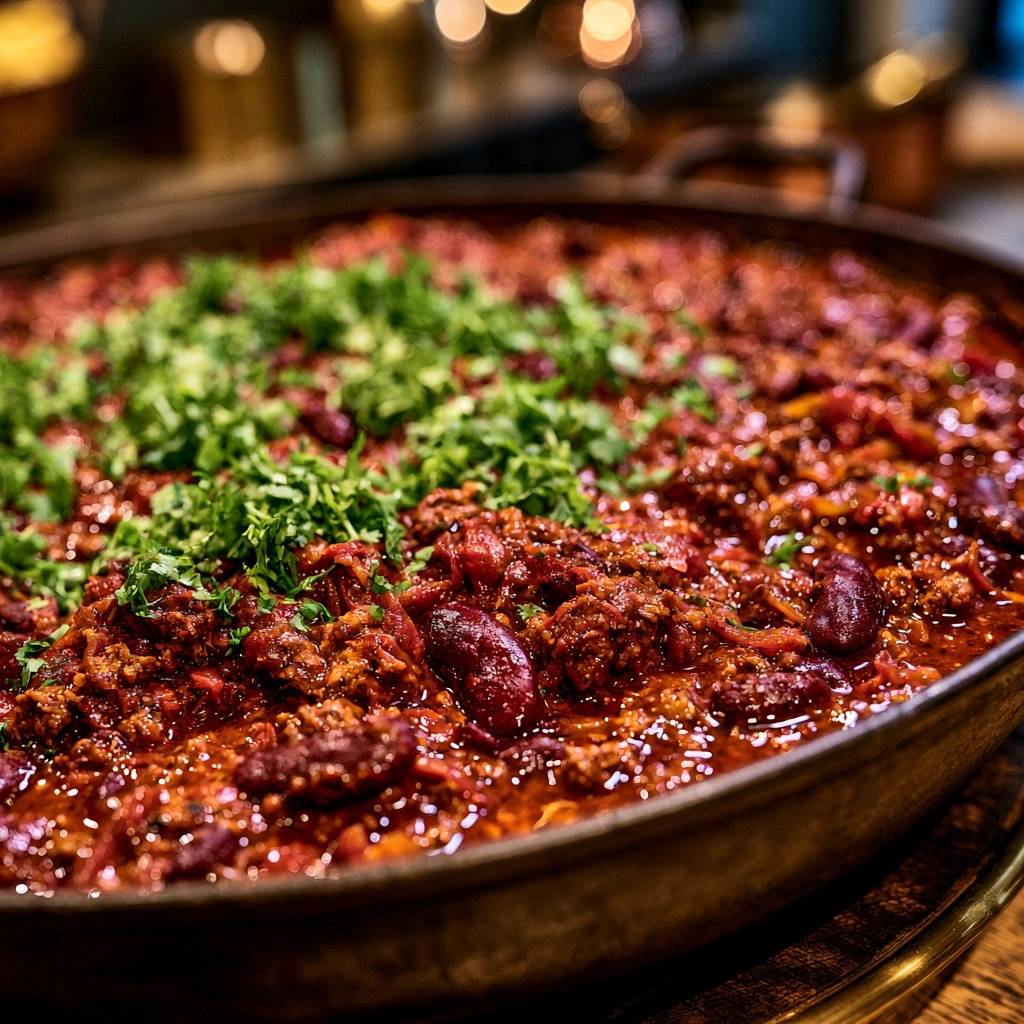
When it comes to the beans, always rinse your canned kidney beans thoroughly in a colander. The liquid inside the can is full of excess sodium and a metallic, starchy film that can dull the vibrant colors of your chili. Starting with clean, rinsed beans ensures that the only flavors in your skillet are the ones you intentionally put there.
The Spice Profile: Beyond Heat
A great chili shouldn’t just burn your tongue; it should tell a story of different flavors. Smoked paprika is the secret weapon in this blend, offering a deep, wood-fired essence that mimics the flavor of a slow-cooked brisket without needing a smoker. It provides a sophisticated “bass note” that grounds the brighter spices.
Cumin acts as the earthy backbone, providing that classic “taco” aroma that feels like home. To cut through the intense richness of the beef and tomato paste, I always include dried oregano. It adds a subtle herbal lift and a hint of bitterness that keeps the dish from feeling too heavy or one-dimensional.
Phase One: Developing Deep Maillard Flavors
If your meat looks grey when you add the onions, you’ve missed the most important flavor-building step. You want to hear a loud, aggressive sizzle the moment the beef hits the cast iron. That sound is the Maillard reaction in progress, turning proteins into a complex crust of savory goodness. If the pan is too crowded, the meat will steam in its own juices rather than sear.
Once the beef is deeply browned and crumbly, you must drain the fat. Even lean beef will release some liquid. If you leave that fat in the pan, it will coat the spices and prevent them from blooming, and it will eventually separate from the tomato sauce, creating a greasy film. Draining it ensures your final sauce is clean and concentrated.
Phase Two: Building the Concentrated Tomato Foundation
Before you pour in the broth, you have to “toast” your tomato paste. This is a chef’s trick that many home cooks skip. By stirring the paste directly into the hot beef and onions for a few minutes, you’re cooking out the raw, metallic “tin” taste. You’ll see the color shift from a bright, candy red to a dark, rusty brick red.
This chemical change does more than just improve flavor; it turns the paste into a natural emulsifier. It helps the beef broth and the tomato sauce bind together into a singular, thick liquid. If you skip this, your chili might look like beef floating in a red broth rather than a cohesive, thick stew.
Phase Three: The Starch-Release Thickening Technique
This is the “Secret of the Mashed Bean” that changes everything. Legumes like kidney beans are packed with natural starches. By taking a spoon or a potato masher and crushing just a half-cup of the beans against the side of the skillet, you release those starches directly into the sauce. It acts exactly like a cornstarch slurry but with much better flavor.
This method is superior to using flour because it maintains the integrity of the dish. It creates a creamy, velvety mouthfeel that binds the diced tomatoes and beef together. You get all the thickening power you need without diluting the beefy flavor or adding a “pasty” texture that flour can sometimes leave behind.
Phase Four: The Uncovered Reduction Process
Now comes the patience. You must leave the lid off for the entire 30-minute simmer. This allows the excess water from the broth and tomatoes to turn into steam and leave the pan. As the volume of liquid decreases, the flavors of the chili powder, cumin, and garlic become more intense and tightly packed.
You’ll know it’s ready when you can drag a wooden spoon across the bottom of the skillet and it leaves a clear “track” for a second before the chili fills it back in. This visual cue tells you the sauce has reached the perfect “clingy” consistency. The chili should look heavy and rich, not loose or runny.
Troubleshooting Common Chili Consistency Issues
If your chili still feels a bit thin after the simmering time, don’t panic. Simply mash a few more beans and give it another five minutes of high-heat simmering. The extra starch and evaporation will usually do the trick. On the flip side, if it becomes too thick and starts to stick to the bottom, stir in a splash of beef broth one tablespoon at a time until it loosens up.
Sometimes, even a thick chili can taste “flat.” This usually means it needs a hit of acidity or salt. A tiny squeeze of lime juice or a pinch more salt right at the end can wake up all the spices. It doesn’t make it salty; it just makes the beef and cumin flavors pop against the richness of the tomato.
Optimal Skillet Maintenance and Equipment Choice
A heavy cast-iron skillet is the best tool for this job because it holds heat like a battery. Once that pan gets hot, it stays hot, ensuring an even simmer across the entire surface. This prevents “hot spots” where the tomato paste might burn while the edges stay cool. The wide surface area of a skillet is also much better for evaporation than a tall, narrow stockpot.
If you don’t have cast iron, a heavy-bottomed Dutch oven is your next best bet. The key is the thickness of the metal. Thin pans will scorch the beans and beef before the sauce has a chance to reduce. A thick pan provides the gentle, consistent heat needed to transform the raw ingredients into a unified, hearty meal.
Flavor Variations and Protein Swaps
You can easily swap the ground beef for ground turkey or even ground bison. Bison is incredibly lean and flavorful, making it a perfect match for this thickening technique. If you use turkey, you might want to add an extra teaspoon of smoked paprika to compensate for the milder flavor of the poultry. The bean-mashing trick works exactly the same way regardless of the meat.
For those who like a “five-alarm” heat level, don’t just add more chili powder, which can make the dish gritty. Instead, finely dice a serrano pepper and sauté it with the onions and garlic. This builds the heat into the foundation of the dish. If you prefer a mild version, simply omit the cayenne pepper and stick to the smoky paprika and cumin.
Make-Ahead Strategies and Storage Logic
Chili is one of those rare dishes that actually tastes better the next day. As it sits in the fridge, the proteins in the beef continue to break down, and the spices “marry,” creating a more harmonious flavor profile. The starches from the mashed beans also set further, making the leftovers even thicker than the first serving.
When reheating, do it on the stovetop over medium-low heat. You’ll likely need to add a tiny splash of water or broth, as the chili will have thickened significantly in the cold. Avoid the microwave if possible, as it can heat unevenly and cause the beans to explode or the sauce to “pop” and make a mess.
Complementary Sides for a Skillet Feast
Since this chili is so rich and heavy, you want sides that offer a bit of contrast. A crunchy cabbage slaw with a lime dressing provides a bright, acidic crunch that cleanses the palate between bites of savory beef. It cuts through the density of the beans and makes the whole meal feel more balanced.
Honey-glazed cornbread is another classic choice. The sweetness of the corn pairs beautifully with the smoky paprika and earthy cumin. If you want something lighter, serve the chili over a bed of fluffy rice infused with lime zest. The rice soaks up any remaining sauce, ensuring not a single drop of that concentrated flavor goes to waste.
Expert Troubleshooting
Why is my chili bitter?
Bitterness usually comes from two things: burning the garlic or over-toasting the spices. If garlic turns dark brown, it becomes acrid. Similarly, if you “bloom” the spices for too long on high heat, they can scorch. To fix a bitter chili, add a tiny pinch of sugar or a little more tomato sauce; the sweetness and acidity will help neutralize the bitter notes.
Can I use dried beans instead of canned?
Yes, but you must cook them first. Dried kidney beans contain a natural toxin that is only destroyed by boiling. Soak them overnight, then simmer them until tender before adding them to the skillet. Never add raw dried beans directly to the chili; the acid in the tomatoes will prevent the bean skins from ever softening, leaving you with crunchy beans.
How do I increase the heat without changing the texture?
The best way to add heat without making the chili watery or gritty is to use fresh peppers or concentrated powders early in the process. Adding a lot of liquid hot sauce at the end can thin out your carefully reduced sauce. Instead, sauté diced jalapeños with your onions or increase the cayenne pepper during the spice-blooming phase.
What is the best way to freeze beef chili?
Beef chili freezes beautifully. The best method is the “flat-pack” technique: pour cooled chili into a heavy-duty freezer bag, squeeze out all the air, and lay it flat on a baking sheet to freeze. This saves space and allows the chili to thaw much faster and more evenly when you’re ready to eat it. It will stay fresh for up to three months.
Hearty Skillet Beef and Bean Chili
Course: Main CourseCuisine: AmericanDifficulty: easy6
servings15
minutes45
minutes60
Minutes440
kcalAmerican
Ingredients
2 pounds lean ground beef
2 cans (15 ounces each) kidney beans, rinsed and drained
1 large yellow onion, finely diced
3 cloves garlic, minced
1 can (14.5 ounces) fire-roasted diced tomatoes (for texture)
1 can (15 ounces) tomato sauce (for the base)
2 tablespoons tomato paste
1 cup beef broth (reduced from 2 cups to ensure thickness)
3 tablespoons chili powder
1 tablespoon ground cumin
1 teaspoon smoked paprika
1/2 teaspoon cayenne pepper
1 teaspoon dried oregano
Salt and black pepper to taste
1/2 cup fresh cilantro, chopped
2 tablespoons olive oil
Directions
- Heat the olive oil in a large, heavy cast-iron skillet or Dutch oven over medium-high heat. Add the ground beef and cook until deeply browned. The first secret to avoiding a watery sauce is to drain the excess fat thoroughly after browning. Cook until no pink remains and it reaches 160°F (71°C).
- Add the diced onion and garlic to the skillet with the beef. Saute for 5 minutes until the onions are translucent and slightly caramelized.
- Stir in the tomato paste and cook for 2 minutes. This step is crucial as it toasts the paste, deepening the color and providing a thick, concentrated base that prevents the sauce from separating later.
- Add the chili powder, cumin, smoked paprika, cayenne, and oregano. Stir for 1 minute to bloom the spices in the residual heat, which intensifies the flavor profile.
- Pour in the fire-roasted diced tomatoes, tomato sauce, and the beef broth. Bring the mixture to a rapid simmer.
- Add the kidney beans. To solve the watery sauce problem, take a potato masher or the back of a large spoon and crush about 1/2 cup of the beans directly against the side of the pan. The released starches act as a natural thickener, creating a professional, hearty texture without needing flour or cornstarch.
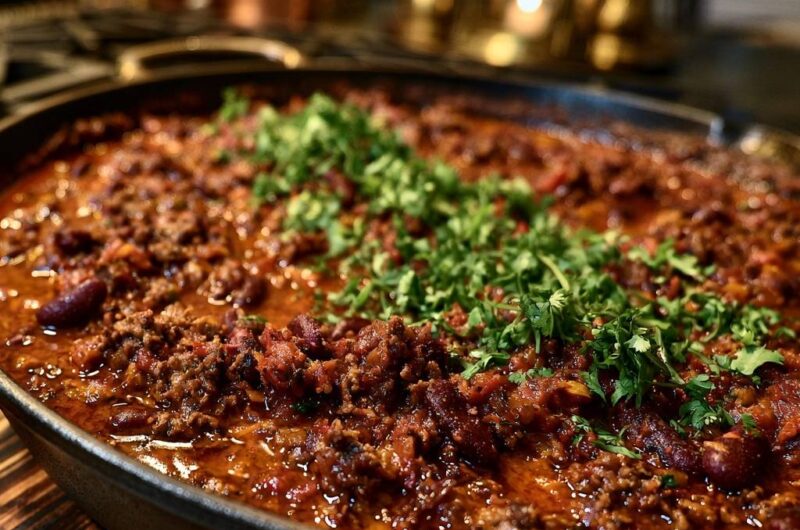
- Reduce the heat to low and simmer uncovered for 30 minutes. Simmering without a lid is essential; it allows excess moisture to evaporate, concentrating the flavors and tightening the sauce to the thick consistency seen in the image.
- Once the chili has reached a rich, heavy consistency, season with salt and pepper to taste. Top generously with a thick layer of fresh chopped cilantro across the center before serving directly from the skillet.
Notes
- Simmering without a lid is essential to prevent a watery consistency. Mashing a portion of the beans acts as a natural thickener instead of using flour or cornstarch.