Mastering Slow-Braised Beef Ragu over Creamy Polenta
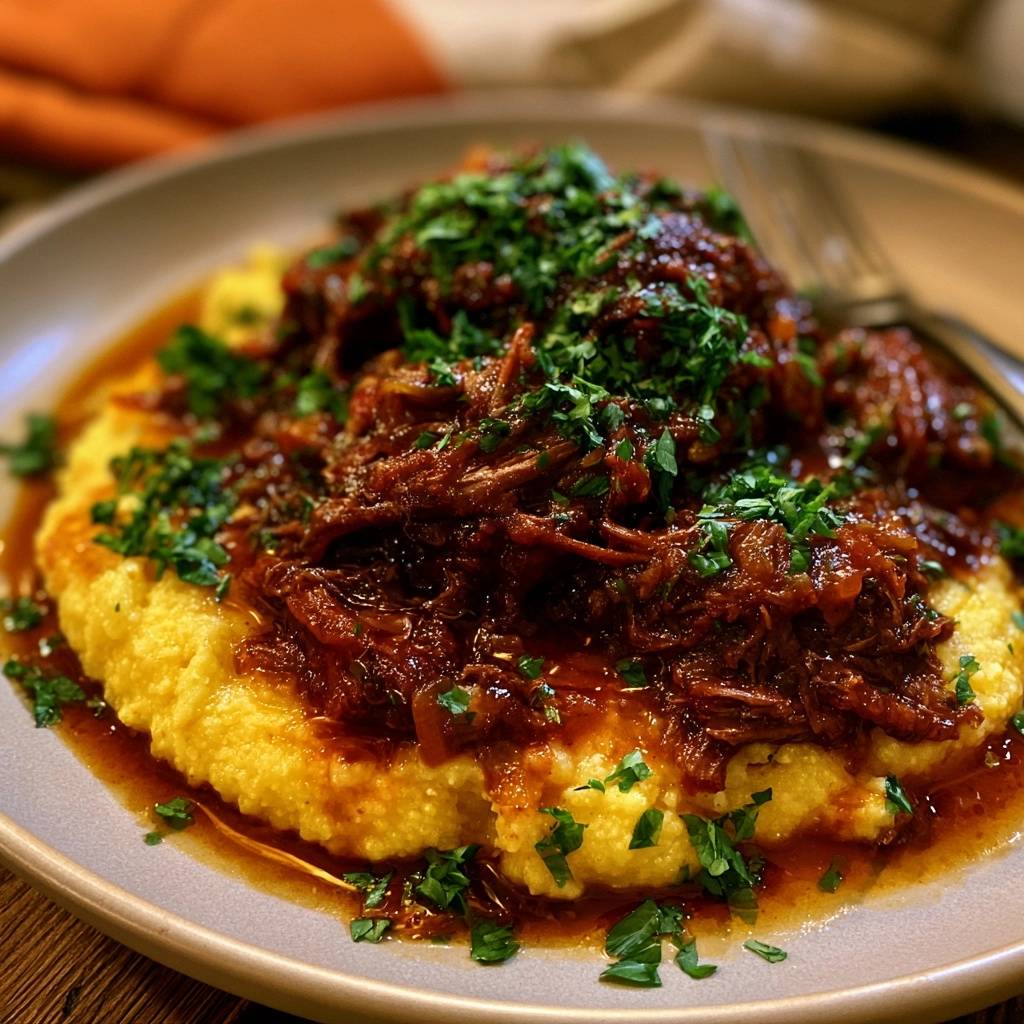
You’ve likely experienced the heartbreak of a Sunday roast that looks beautiful but eats like a piece of shoe leather. It’s frustrating when you spend hours in the kitchen only to serve beef that’s stringy, dry, and stuck in your teeth. This recipe changes that narrative by focusing on the science of the braise to ensure every bite of beef literally melts away.
We’re moving beyond basic stewing to a technique that transforms a humble, tough cut of meat into a rich, mahogany-colored masterpiece. By the time this hits the table, the beef will be swimming in a thick, savory sauce that has developed deep layers of flavor over several hours. It’s the ultimate comfort food that feels sophisticated enough for a dinner party but cozy enough for a quiet night in.
The secret to this success lies in the moisture management during the initial sear. I’ve found that most home cooks skip the paper towel step, but surface moisture is the enemy of the Maillard reaction. If your meat is damp, it steams instead of browning, and you lose that essential umami base that defines a world-class ragu. Dry that beef until it’s bone-dry before it hits the oil, and you’ll see a massive difference in the final depth of color.
The Science of Tender Braised Beef
Braising isn’t just about cooking meat; it’s a biological transformation. Beef chuck is loaded with collagen, a tough connective tissue that makes the meat chewy if cooked quickly. However, when you maintain a steady, low heat, that collagen slowly converts into gelatin. This gelatin coats the muscle fibers, providing that luxurious, lip-smacking mouthfeel we crave.
To achieve this, you need to hit the thermal sweet spot of 300°F. At this temperature, the connective tissue breaks down efficiently without the internal moisture of the meat evaporating too rapidly. If you boil the meat at a high temperature, the muscle fibers will tighten and squeeze out all their juices, leaving you with meat that is technically “done” but incredibly dry.
We also use acidity to our advantage here. The balsamic vinegar and the natural acids in the tomatoes act as gentle tenderizers. They help weaken the protein bonds during the long simmer, ensuring the beef reaches a state where it can be shredded with nothing more than a light touch of a fork.
Selecting the Right Cut for Ragu
You might be tempted to buy a leaner, more expensive cut like sirloin or round roast, but that’s a mistake for a long braise. Lean cuts lack the intramuscular fat and connective tissue needed to survive three hours of heat. Without that fat, the meat will become incredibly tough and grainy.
Beef chuck roast is the undisputed king for this dish. It features a beautiful web of marbling that bastes the meat from the inside out as it cooks. Short ribs are another fantastic option if you want an even richer, fattier sauce, though they require more skimming of oil at the end. Stick with chuck for a perfectly balanced, shreddable texture.
Why Searing Creates Deep Umami
That dark, caramelized crust you see on the beef after searing isn’t just for looks; it’s the foundation of the entire sauce’s flavor profile. This is the Maillard reaction in action, where amino acids and sugars react under high heat to create hundreds of different flavor compounds. Without a proper sear, your ragu will taste flat and one-dimensional.
To get this right, you must avoid crowding the pan. If you put too many beef chunks in at once, the temperature of the Dutch oven drops, and the meat starts to release juices. Instead of searing, the beef ends up gray and boiled. Work in batches, giving each piece enough space to breathe so the heat can work its magic on the surface.
Essential Components for the Ragu Base
The quality of your liquid base determines the final elegance of the dish. While water would technically cook the meat, it adds zero flavor. Using a high-quality beef bone broth provides a boost of protein and minerals, contributing to a thicker, more velvety sauce that clings to the polenta rather than running off the plate.
When it comes to tomatoes, crushed tomatoes offer the best balance of texture. They provide enough body to make the sauce feel substantial without the large, watery chunks found in diced tomatoes. Look for a brand that lists only tomatoes and salt on the label to avoid unnecessary additives or metallic aftertastes.
The Role of Grated Carrots and Aromatics
In traditional Italian cooking, the base of many sauces is a soffritto of onion, celery, and carrot. In this ragu, we use a specific trick: grating the carrot. By using a fine grate, the carrot essentially dissolves into the sauce during the three-hour braise. This adds a natural, earthy sweetness that balances the acidity of the tomatoes.
This technique also helps thicken the sauce naturally. As the grated carrots break down, they create a rustic, pulpy texture that gives the ragu “body.” You get all the nutritional benefits and flavor of the vegetables without having to bite into large chunks of carrot that might distract from the tender beef.
Deglazing with Broth and Balsamic Vinegar
After you sear the meat and sauté your aromatics, you’ll notice a dark, sticky film on the bottom of the pot. That is “fond,” and it is pure flavor gold. Pouring in the broth allows you to scrape those bits up and incorporate them back into the liquid. This step is non-negotiable for achieving a professional-grade sauce.
The balsamic vinegar is the secret weapon here. While the broth provides depth, the balsamic adds a bright, tangy finish and a hint of sweetness. It cuts through the heavy fats of the beef and the butter in the polenta, keeping the dish from feeling too “heavy” on the palate. It brightens the entire flavor profile just before the long simmer begins.
Step-by-Step: Executing the Three-Hour Braise
Once your ingredients are in the pot, patience becomes your most important tool. You are looking for a very gentle simmer—just a few bubbles breaking the surface every few seconds. If the liquid is rolling or boiling, the meat will toughen up. This is a slow transformation, not a race to the finish line.
Check the pot occasionally to ensure the liquid hasn’t evaporated too much. The beef should remain mostly submerged throughout the process. If the sauce looks like it’s getting too thick too early, add a splash more broth. By the end of the three hours, the meat should offer zero resistance when poked with a knife.
Managing Heat in a Dutch Oven
While you can simmer this on the stovetop, I highly recommend using the oven. A 300°F oven provides consistent, 360-degree heat that surrounds the Dutch oven. This prevents the bottom of the sauce from scorching, which can happen on a stovetop if your burner has “hot spots.”
A heavy, cast-iron Dutch oven is the best vessel for this because it retains heat so well. The thick walls ensure that even if your oven temperature fluctuates slightly, the liquid inside stays at a steady, gentle simmer. Make sure your lid fits tightly to trap all that moisture inside, which is vital for the tenderizing process.
The Importance of the Resting Period
One of the biggest mistakes you can make is shredding the beef the second it comes out of the oven. When meat is hot, the fibers are tight and can’t hold onto liquid. If you shred it immediately, all the juices will run out onto the cutting board, leaving the meat dry and stringy.
Let the meat rest in the sauce for at least 15 minutes after you turn off the heat. As the temperature drops slightly, the muscle fibers relax and begin to reabsorb the flavorful braising liquid. When you finally shred it, the meat will be incredibly juicy and fully saturated with the rich tomato sauce.
Techniques for Ultra-Smooth Creamy Polenta
Polenta is the perfect bed for a rich ragu, but it has a reputation for being finicky. The key to a velvety texture is the ratio of liquid to cornmeal. Using a mix of water and whole milk provides the best results. The water helps hydrate the cornmeal grains, while the milk adds a creamy, luxurious finish that water alone can’t achieve.
Don’t rush the cooking time for the polenta. Even “quick-cook” varieties benefit from a longer, slower hydration period. You want the grains to be completely soft, with no gritty texture remaining. It should flow slowly across the plate, rather than standing up in a stiff mound.
Preventing Lumps in Cornmeal
Lumpy polenta is a common frustration, but it’s easily avoided with the “rain-in” technique. Instead of dumping the cornmeal in all at once, whisk the boiling liquid vigorously with one hand while slowly drizzling the cornmeal in with the other. This ensures every grain is separated and surrounded by liquid.
Keep whisking for the first five minutes of cooking. This is the critical window where the starches begin to swell and gelatinize. Once the mixture has thickened slightly and is simmering steadily, you can switch to a wooden spoon and stir less frequently, but those first few minutes are vital for a smooth result.
Finishing with Butter and Parmesan
The final flourish is what takes the polenta from a simple side dish to a star component. Adding cold butter at the very end creates an emulsion that gives the polenta a glossy sheen. The fat in the butter also helps carry the flavors of the beef ragu when they meet on the plate.
Freshly grated parmesan cheese adds the necessary salt and a savory “pop.” Avoid the pre-shredded stuff in a bag, as it’s often coated in potato starch to prevent clumping, which can make your polenta feel grainy. A quick grate of a high-quality wedge will melt seamlessly into the warm cornmeal.
Troubleshooting Common Braising Obstacles
If you open your pot after three hours and the sauce looks too thin, don’t panic. Simply remove the lid and turn the heat up slightly to a simmer. Let it cook uncovered for 10 to 15 minutes. This allows excess water to evaporate, concentrating the flavors and thickening the sauce into a rich glaze that will coat the meat perfectly.
On the flip side, if the meat is still tough after three hours, it simply hasn’t cooked long enough. Every piece of beef is different, and some have more stubborn connective tissue than others. Put the lid back on and give it another 30 minutes. You cannot overcook beef in a braise as long as there is still liquid in the pot.
Fixing Overly Salty or Acidic Sauce
Sometimes, the canned tomatoes or the vinegar can leave the sauce tasting a bit too sharp or acidic. If this happens, add a tiny pinch of granulated sugar. You aren’t trying to make it sweet; the sugar simply rounds out the harsh edges of the acid. A small knob of butter stirred in at the end can also mellow out a sauce that feels too aggressive.
If the sauce tastes too salty, it’s usually because the liquid reduced more than expected. You can fix this by adding a splash of unsalted broth or even a little water. Adding a bit more of the creamy polenta to each serving can also help balance a saltier ragu, as the cornmeal is naturally quite mild.
Rescuing Lumpy or Stiff Polenta
If your polenta sits for too long while you’re finishing the beef, it will firm up and become stiff. To rescue it, place it back over low heat and whisk in a splash of warm milk or water. Use a vigorous whisking motion to break down any clumps that formed while it was sitting.
If you still have stubborn lumps, you can pass the polenta through a fine-mesh sieve or give it a quick pulse with an immersion blender. This is a bit of a “cheat” method, but it works wonders for restoring that perfectly smooth, restaurant-quality texture before serving.
Make-Ahead Strategies and Storage
This is one of those rare dishes that actually tastes better the next day. As the ragu sits in the fridge, the flavors continue to meld and deepen. The fats and aromatics have more time to penetrate the meat fibers, resulting in an even more complex taste profile when reheated.
If you’re planning a dinner party, I highly recommend making the ragu a day in advance. This not only improves the flavor but also takes the stress out of your hosting duties. You can simply reheat the sauce on the stovetop while you prepare the fresh polenta just before serving.
Freezing and Reheating Instructions
The beef ragu freezes beautifully. Store it in an airtight container or a heavy-duty freezer bag for up to three months. To reheat, let it thaw in the refrigerator overnight and then warm it gently in a saucepan over medium-low heat. You may need to add a tablespoon of water to loosen the sauce back up.
I do not recommend freezing the polenta, as the texture becomes grainy and unpleasant once thawed. Polenta is best made fresh. However, if you have leftover polenta in the fridge, you can slice it into squares and pan-fry them in a little olive oil until crispy for a completely different, delicious meal the next day.
Expert Tips for Professional Presentation
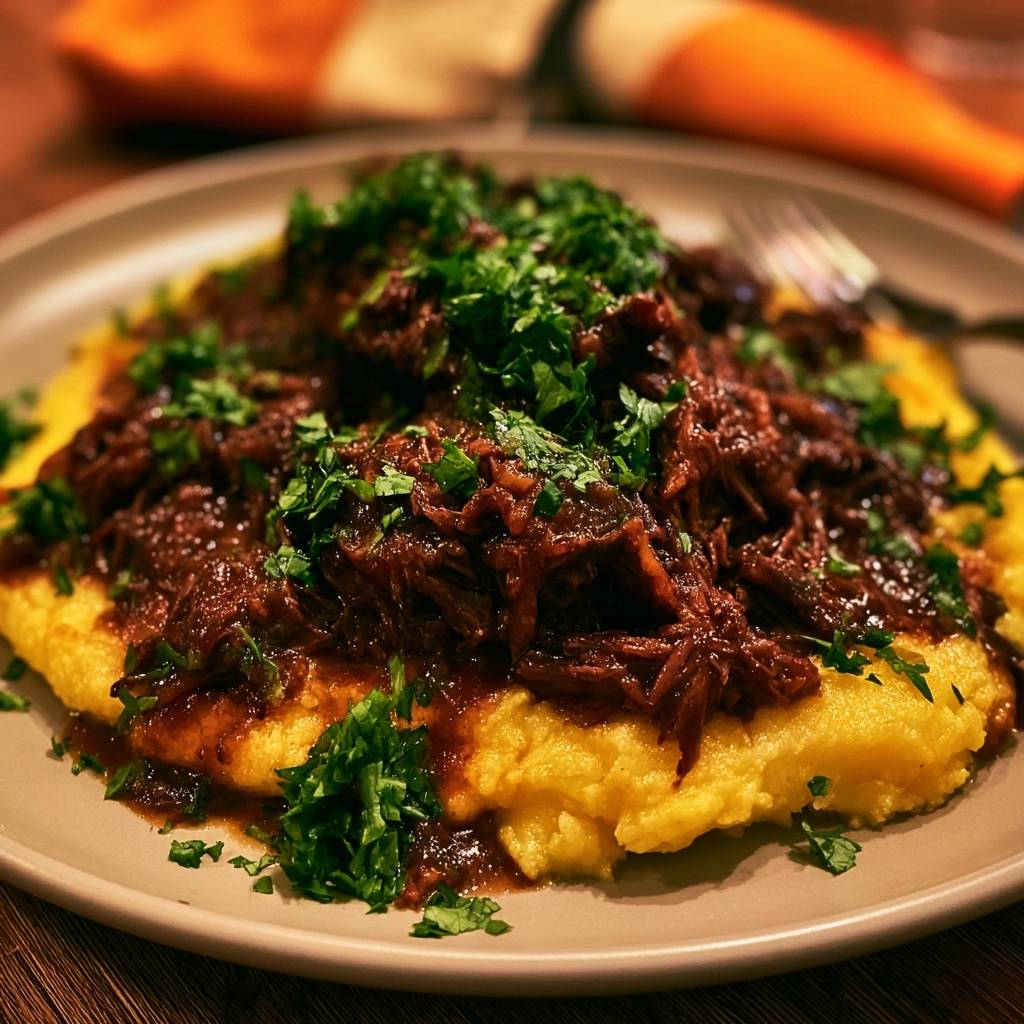
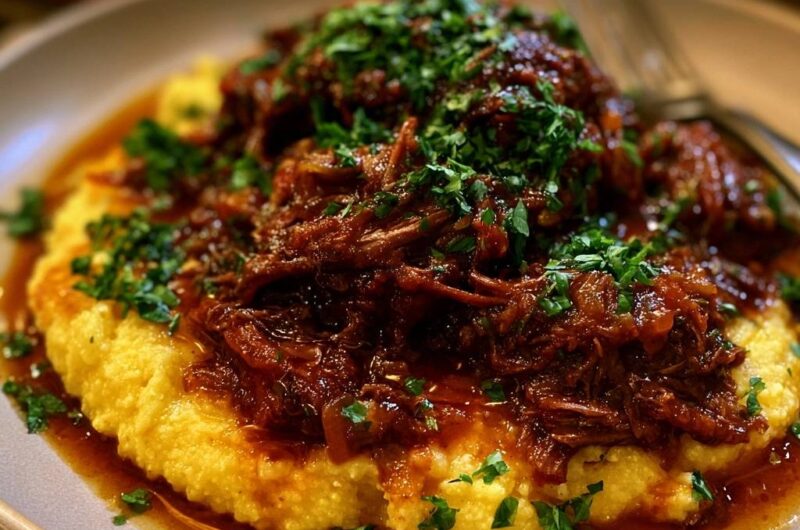
To get that high-end restaurant look, start with a wide, shallow bowl. Spoon a large pool of the creamy polenta into the center and use the back of the spoon to create a slight well. Ladle the shredded beef ragu right into that well, letting some of the dark sauce bleed into the pale polenta.
Don’t be shy with the parsley. The deep mahogany of the beef needs a pop of color to make the dish visually exciting. A heavy dusting of finely chopped flat-leaf parsley adds a fresh, herbal note that cuts through the richness. Finish with a final sprinkle of parmesan and a crack of fresh black pepper for a plate that looks as good as it tastes.
Frequently Asked Questions
Can I use a Slow Cooker or Instant Pot for this recipe?
Yes, you can adapt this for both. For a slow cooker, follow the searing and sautéing steps in a pan first, then transfer everything to the slow cooker and cook on low for 6-8 hours. Reduce the beef broth by half, as slow cookers don’t allow for evaporation. For an Instant Pot, use the sauté function for the meat and veggies, then cook on high pressure for 45-50 minutes with a natural release. Again, you may need to simmer the sauce afterward to thicken it.
How can I add more depth to the sauce?
Stir a tablespoon of pomegranate juice or cranberry juice into the beef broth. This provides extra acidity and deep color. You can also increase the balsamic vinegar by an extra teaspoon to ensure the sauce has enough brightness to balance the fat.
Why is my beef still tough after three hours?
There are usually two reasons for this. First, the heat might have been too high, causing the muscle fibers to seize up and become dry. Second, it might actually need more time. If the meat isn’t falling apart, the collagen hasn’t fully finished converting to gelatin. Give it another 30 to 45 minutes at a very low simmer. As long as there is liquid in the pot, the meat will eventually tenderize.
Can I use stone-ground grits instead of polenta?
You can, but the texture will be different. Polenta is made from flint corn, which holds its shape better and has a slightly heartier bite. Grits are usually made from dent corn and result in a much softer, mushier texture. If you use stone-ground grits, be prepared for a longer cooking time (often up to 60 minutes) and ensure you use plenty of liquid to keep them from becoming a solid block.
How do I store leftovers?
Store the beef ragu and the polenta in separate airtight containers in the refrigerator for up to four days. When reheating the polenta, you will need to add a splash of milk or water and whisk it vigorously over low heat to restore its creamy consistency, as it will firm up significantly once cold. The ragu can be reheated in a small pot or the microwave.
Is it necessary to grate the carrots?
While you can finely dice them, grating is the secret to the specific texture of this ragu. Grated carrots melt into the sauce, providing sweetness and thickness without the distraction of vegetable chunks. If you want a truly smooth, restaurant-style sauce where the beef is the star, grating is the way to go. It also saves you a lot of tedious chopping time!
Slow-Braised Beef Ragu over Creamy Polenta
Course: Main CourseCuisine: Italian-AmericanDifficulty: easy6
servings20
minutes3
hours180
Minutes620
kcalItalian-American
Ingredients
3 pounds beef chuck roast, cut into 2-inch chunks
2 tablespoons olive oil
1 large yellow onion, finely diced
1 large carrot, finely grated (for sweetness and texture)
4 cloves garlic, minced
3 tablespoons tomato paste
1 cup beef broth plus 1 tablespoon balsamic vinegar
1 cup beef bone broth
1 can (28 oz) crushed tomatoes
1 tablespoon balsamic vinegar
1 teaspoon dried oregano
2 bay leaves
Salt and black pepper to taste
1 cup coarse ground yellow cornmeal (polenta)
2 cups water
2 cups whole milk
4 tablespoons unsalted butter
1/2 cup grated parmesan cheese
1/2 cup fresh flat-leaf parsley, finely chopped (for heavy garnishing)
Directions
- To solve the tough meat problem, start by patting the beef chunks completely dry with paper towels. Season generously with salt and pepper. Moisture is the enemy of a good sear; a deep crust is essential for the rich color and flavor shown in the final dish.
- Heat olive oil in a heavy Dutch oven over medium-high heat. Sear the beef in batches, ensuring you do not crowd the pan. Brown each side for 4 to 5 minutes until a dark, caramelized crust forms. Remove beef and set aside.
- Lower the heat to medium. Add the onion and grated carrot. Cook for 5-7 minutes until softened. Add the garlic and tomato paste, stirring constantly for 2 minutes to darken the paste, which provides the deep mahogany color of the sauce.
- Pour in the 1 cup beef broth and 1 tablespoon balsamic vinegar to deglaze, scraping the bottom of the pot to release all the browned bits (fond). Let the liquid reduce by half.
- Add the beef broth, crushed tomatoes, balsamic vinegar, oregano, and bay leaves. Return the beef and any accumulated juices to the pot.
- Cover with a tight-fitting lid and reduce heat to the lowest setting to maintain a very gentle simmer (or place in a 300°F oven). Braise for 3 hours. Do not rush; the low temperature is what transforms tough collagen into tender gelatin.
- While the beef finishes, bring water and milk to a gentle boil in a separate heavy-bottomed pot. Slowly rain in the cornmeal while whisking constantly to prevent lumps. Reduce heat to low, cover, and cook for 30-40 minutes, stirring every 10 minutes. Finish by stirring in the butter and parmesan until glossy and thick.
- Once the beef is completely tender, remove the lid. If the sauce is too thin, simmer uncovered for 10 minutes. Remove the bay leaves. Let the meat rest in the sauce for 15 minutes before shredding with two forks. This allows the fibers to reabsorb the sauce.
- Serve a generous portion of the shredded ragu over the creamy polenta. Garnish heavily with the fresh chopped parsley to match the vibrant visual presentation.
Notes
- The secret to tender meat is the low temperature and the 15-minute rest period after cooking, which allows the beef fibers to reabsorb the flavorful sauce. Ensure the beef is patted dry before searing to achieve a deep crust.