Mastering Herb Roasted Root Vegetables: The Anti-Soggy Technique
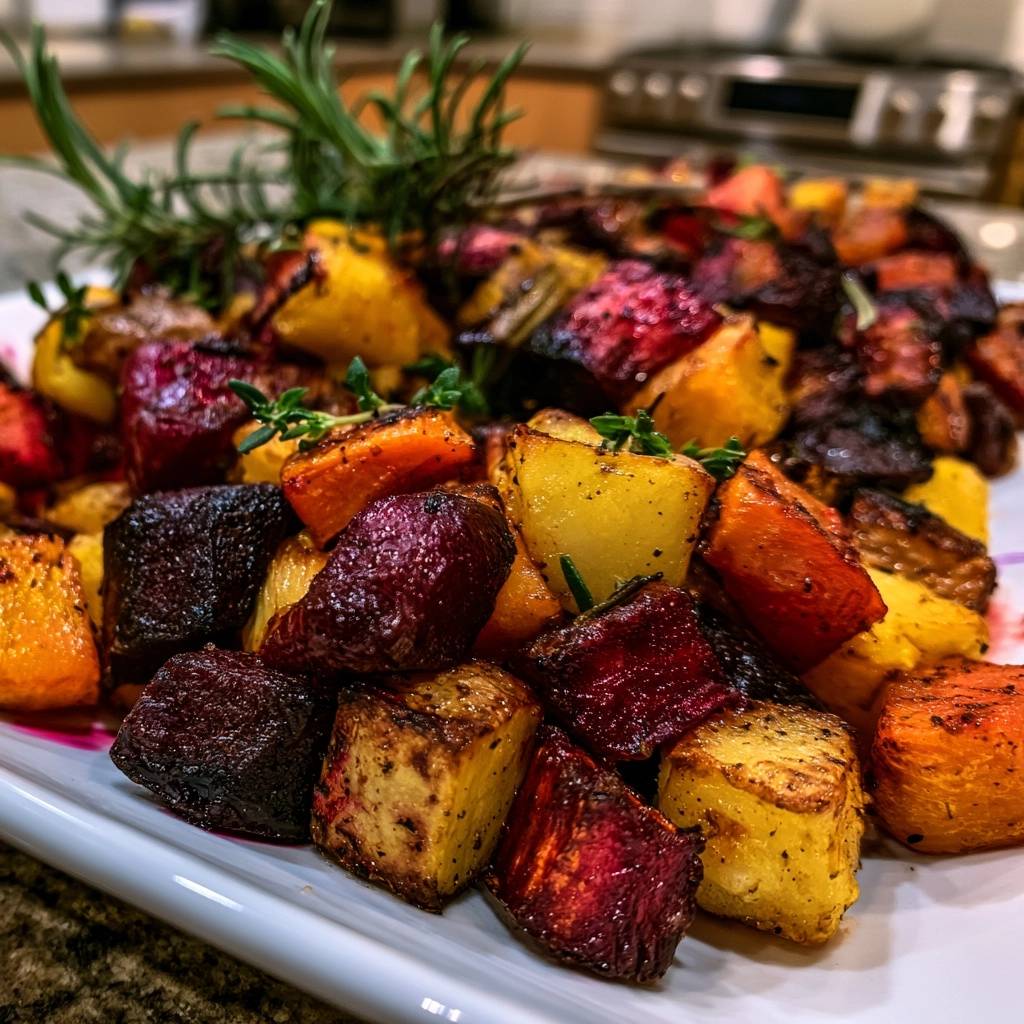
Most home cooks have experienced the disappointment of pulling a tray of roasted vegetables from the oven only to find a pile of mushy, steamed produce. You want that satisfying, caramelized crunch that shatters between your teeth, but instead, you get vegetables that stick to the pan and lack any structural integrity. It’s a common frustration that usually stems from two culprits: overcrowding and premature salting.
Perfectly roasted root vegetables should be a study in contrasts. You’re looking for a deeply browned, almost charred exterior that gives way to a creamy, buttery center. This recipe utilizes a technical approach to moisture control and heat management that I call the “Skyscraper” method. By focusing on airflow and thermal mass, we ensure every cube of beet, potato, and carrot reaches its full flavor potential.
The secret to this success lies in the pre-heated pan. Just like you wouldn’t drop a steak into a cold skillet, you shouldn’t put cold vegetables on a cold baking sheet. Starting with a screaming hot surface creates an immediate sear, locking in the natural sugars of the vegetables while preventing them from bonding to the metal. This one simple change will completely transform your roasting game.
The Physics of Caramelization in Root Vegetables
When you roast root vegetables at 425°F, you’re triggering the Maillard reaction. This is a chemical reaction between amino acids and reducing sugars that gives browned food its distinctive, savory flavor. High-starch vegetables like Yukon Gold potatoes and carrots are perfect candidates for this because they have the complex carbohydrates necessary to create a thick, golden crust.
Moisture is the absolute enemy of browning. If your oven temperature is too low, or if the vegetables are too close together, the water evaporating from the produce creates a localized steam cloud. This prevents the surface temperature from rising high enough to caramelize. By maintaining a high heat and ensuring plenty of “breathing room” on the tray, you allow that moisture to dissipate instantly.
Essential Components for Herb Roasted Root Vegetables
Quality starts with the right potato. I always reach for Yukon Golds over Russets for roasting. Yukon Golds have a medium starch content and a waxy skin, which means they hold their shape beautifully while developing a creamy interior. Russets tend to fall apart and can become grainy when subjected to the high heat required for this method.
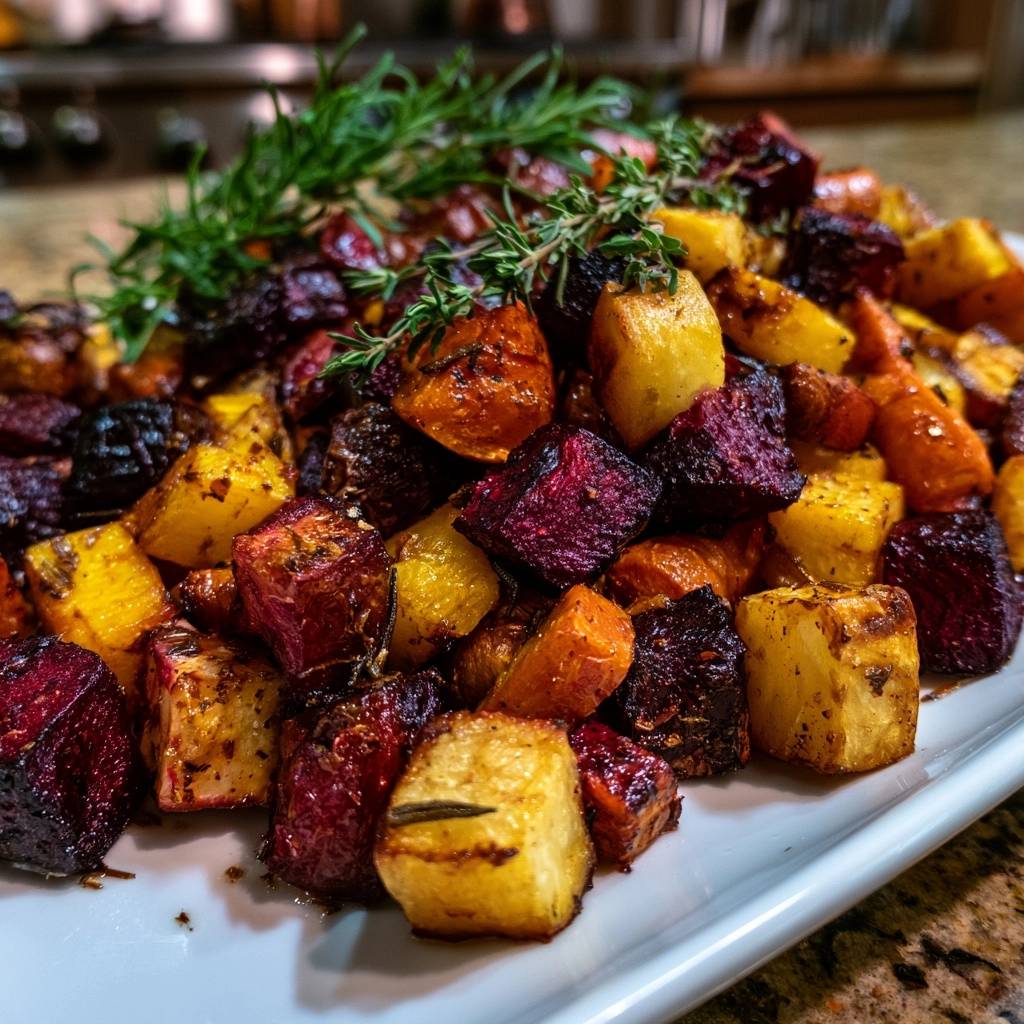
Red beets provide an earthy, mineral depth that balances the natural sweetness of the carrots. When selecting your vegetables, try to find carrots that are thick enough to be cut into one-inch chunks. Thin, spindly carrots will shrivel into nothingness before the potatoes are even halfway cooked. For the fat, use a high-quality extra virgin olive oil; it has a high enough smoke point for 425°F and adds a peppery finish.
Fresh vs. Dried: Selecting Your Woody Herbs
For high-heat roasting, woody herbs like rosemary and thyme are your best friends. Unlike delicate herbs like parsley or cilantro, which would simply burn and turn bitter in a hot oven, rosemary and thyme have sturdy leaves that can withstand the heat. They release their essential oils slowly, infusing the oil and the vegetables with a forest-like aroma.
To prepare the thyme, hold the top of the sprig and run your fingers down the stem in the opposite direction of growth to strip the leaves. For the rosemary, make sure you mince it finely. Nobody wants to bite into a whole rosemary leaf that feels like a dry pine needle. Finely chopping the herbs ensures they stick to the vegetables and distribute flavor evenly in every bite.
The Pre-Heated Pan Strategy for Instant Searing
Think of your baking sheet as a tool, not just a container. By placing an empty rimmed baking sheet in the oven while it preheats, you’re building up thermal mass. When those oiled vegetables hit the hot metal, you’ll hear a distinct sizzle. That sound is the moisture on the surface of the vegetable evaporating instantly, creating a non-stick barrier.
This technique mimics the effect of a cast-iron skillet. If you start with a cold pan, the vegetables sit in their own juices as the oven slowly climbs in temperature, which leads to that dreaded “sagging” texture. A hot pan ensures the bottoms of your potatoes and beets start crisping the very second they touch the tray.
Step-by-Step: Achieving the Perfect Roasted Texture
Preparation is all about uniformity. You want to aim for one-inch cubes across the board. If your beet chunks are twice the size of your potato cubes, you’ll end up with burnt potatoes and raw, crunchy beets. Take the extra minute to ensure your knife work is consistent so everything finishes at the exact same time.
I also highly recommend the “Beet Isolation” technique. Beets are notorious for their pigment, which can turn your entire tray a muddy pink. By tossing the beets in their own small bowl with oil before they hit the tray, you keep that vibrant red contained. You’ll only mix them with the other vegetables at the very end for a beautiful, variegated look.
Phase One: The High-Heat Initial Roast
During the first 20 minutes, the oven is doing the heavy lifting of softening the dense interiors of the root vegetables. You’ll notice the edges starting to look translucent, and the kitchen will begin to smell like toasted herbs. This is the “setting” phase where the exterior skin begins to dehydrate and firm up.
Airflow is your priority here. If you see the vegetables touching, use your spatula to push them apart. You should see the bare metal of the pan between every single piece. If your tray is too small to allow for this, it’s much better to use two separate baking sheets than to crowd everything onto one.
Phase Two: The Mid-Point Seasoning Secret
This is the most important technical tip: do not salt your vegetables at the beginning. Salt is an osmotic agent, meaning it draws water out of whatever it touches. If you salt raw vegetables, they will immediately start “sweating” in the oven, which leads to steaming rather than roasting.
By waiting until the 20-minute mark to add your sea salt and cracked black pepper, you’re applying seasoning to a surface that has already developed a protective “skin.” The salt will still adhere to the oil, but it won’t be able to pull as much moisture from the interior, keeping your vegetables crisp and structurally sound.
Avoiding Common Mistakes with Roasted Roots
If your vegetables turn out bitter, you likely over-roasted the herbs or used an oil with a very low smoke point. If they are tough, your oven might not have been fully preheated. Always give your oven at least 15 minutes after it reaches temperature to ensure the walls and the pan are truly hot.
The “Don’t Overcrowd” manifesto cannot be overstated. If you put too many vegetables on one tray, the temperature of the pan drops significantly, and the moisture has nowhere to go. When in doubt, use two pans. It’s better to have a little extra cleanup than to serve a tray of soggy carrots.
Flavor Variations and Seasonal Swaps
While beets, carrots, and potatoes are the classic trio, this method works for almost any root. In the winter, try adding parsnips for a spicy, honey-like sweetness or rutabaga for a more pungent, earthy flavor. If you want a savory punch, toss in some halved shallots or whole garlic cloves during the last 15 minutes of roasting.
If you decide to use softer vegetables like sweet potatoes or butternut squash, keep in mind they cook faster than beets. You might want to cut them into slightly larger chunks or add them to the tray 10 minutes after the harder root vegetables have started. This ensures everything reaches peak caramelization simultaneously.
Optimal Pairings for Herb-Heavy Side Dishes
These vegetables are incredibly versatile. The rosemary and thyme profile makes them a natural partner for roasted chicken or a slow-braised beef pot roast. The earthiness of the beets also pairs beautifully with hearty grain dishes, like a farro risotto or a quinoa pilaf.
To brighten the dish, you can serve these with a side of Greek yogurt mixed with a little lemon zest, or a drizzle of high-quality balsamic glaze. The acidity cuts through the richness of the roasted starches and the olive oil, making the flavors pop. It’s a simple way to turn a rustic side dish into something that feels very sophisticated.
Make Ahead, Storage, and Reheating Protocols
You can prep the vegetables up to 24 hours in advance. Just peel and cube them, then store them in airtight containers in the fridge. Keep the beets in their own container to prevent staining. Don’t toss them in oil until you are ready to roast, as the oil can cause the vegetables to break down and lose their crispness over time.
If you have leftovers, avoid the microwave at all costs. Microwaving roasted vegetables will make them rubbery and limp. Instead, spread them back out on a baking sheet and pop them into a 400°F oven for about 8 to 10 minutes. This will revive the exterior crunch. These are also fantastic cold or at room temperature in a “Power Bowl” with some fresh greens and a tahini dressing.
Troubleshooting Your Roast
Why are my beets still hard while the potatoes are soft?
Beets are significantly denser than Yukon Gold potatoes. If this happens, it usually means the beet cubes were slightly too large. Next time, try cutting the beets into 3/4-inch cubes while keeping the potatoes at a full inch. This compensates for the density difference and ensures they finish at the same time.
Why did my herbs turn black and bitter?
This usually happens if the herbs weren’t properly coated in oil. The oil acts as a heat shield. Make sure you toss the vegetables thoroughly in the bowl so every bit of rosemary and thyme is glistening. Also, ensure you aren’t using “fine” dried herbs, which burn much faster than fresh woody sprigs.
Can I use parchment paper or foil on the pan?
While you can use parchment paper for easier cleanup, you will lose about 10% of the crispness. Bare metal provides the best heat transfer. Never use foil if you want crispy vegetables; foil tends to trap a thin layer of steam between the vegetable and the metal, which softens the bottom surface.
How do I get the red color to stay only on the beets?
The key is the separate tossing and the late-stage mixing. By oiling the beets in a separate bowl and keeping them on their own side of the tray for the first 20 minutes, you prevent the raw juice from running. Only toss them together gently right before you move them to the serving platter.
What if I don’t have a rimmed baking sheet?
A flat cookie sheet will work, but be careful when flipping the vegetables so they don’t slide off. Avoid using high-sided glass casserole dishes. The high sides trap steam and prevent the dry oven air from circulating around the vegetables, which will result in a steamed texture rather than a roasted one.
The Final Presentation: Plating for Visual Impact
When you’re ready to serve, move the vegetables to a large, shallow platter rather than a deep bowl. This prevents them from stacking on top of each other and trapping steam, which would soften that crust you worked so hard to create. Use a gentle hand when tossing them together at the very end.
As you toss them, the beets will naturally release just a tiny bit of pigment, creating a beautiful “variegated bleed” effect. This creates a marbled look on the potatoes and carrots that is visually stunning. Garnish with a few fresh, un-roasted sprigs of rosemary and thyme to provide a pop of bright green and a fresh aromatic hit right before the dish hits the table.
How should I store leftovers and do they freeze well?
Store any leftover roasted vegetables in an airtight glass container in the refrigerator for up to 4 days. I do not recommend freezing them. Root vegetables have a high water content, and the freezing process breaks down their cell walls. When thawed, they become incredibly mushy and lose the caramelized texture that makes this dish special.
Why did my vegetables stick to the pan even though I used oil?
Sticking usually happens for two reasons: either the pan wasn’t hot enough when the vegetables were added, or you tried to flip them too early. Vegetables naturally “release” from the pan once a proper crust has formed. If you feel resistance when using your spatula at the 20-minute mark, give them another 3 to 5 minutes before trying to flip again.
Can I use dried herbs if I don’t have fresh ones?
You can use dried rosemary and thyme, but you must reduce the amount. Use 1 teaspoon of dried rosemary and 1/2 teaspoon of dried thyme. Be aware that dried herbs are more prone to burning at 425°F, so keep a close eye on the tray during the final 10 minutes of roasting to ensure they don’t turn black.
What is the best way to ensure even cooking if my oven has hot spots?
If your oven cooks unevenly, rotate the baking sheet 180 degrees at the 20-minute mark when you remove it to add the salt. If you are using two trays, swap their positions (top rack to bottom rack) at this time as well. This ensures that every vegetable gets equal exposure to the primary heat source.
Can I add other vegetables like broccoli or bell peppers to this mix?
I would advise against adding “soft” vegetables to this specific mix. Broccoli and peppers have a much higher water content and much shorter cook times (usually 15-20 minutes). If you want to include them, wait until the final 15 minutes of the root vegetable roasting time before adding them to the tray, otherwise they will burn to a crisp.
Herb Roasted Root Vegetables
Course: Side DishCuisine: AmericanDifficulty: easy6
servings15
minutes40
minutes55
Minutes185
kcalAmerican
Ingredients
2 large red beets, peeled and cubed (1-inch pieces)
2 large Yukon Gold potatoes, cubed (1-inch pieces)
3 large carrots, peeled and cut into 1-inch thick chunks
3 tablespoons extra virgin olive oil
1 teaspoon sea salt
1/2 teaspoon cracked black pepper
2 sprigs fresh rosemary, chopped
4 sprigs fresh thyme, leaves removed from stems
Extra fresh herb sprigs for garnish
Directions
- Place your empty rimmed baking sheet into the oven and preheat to 425 degrees F (220 degrees C). Heating the pan first is the secret to an instant sear that prevents sticking and ensures the bottoms get crispy immediately.
- While the oven heats, place your cubed beets in a separate small bowl and toss with 1 tablespoon of oil. Keeping the beets separate initially prevents their deep red pigment from bleeding into and staining the yellow potatoes and orange carrots during the prep stage.
- In a large mixing bowl, toss the potatoes and carrots with the remaining 2 tablespoons of olive oil, rosemary, and thyme. Do not add the salt yet.
- Carefully remove the hot baking sheet from the oven. Spread the potato and carrot mixture on one side and the beets on the other. Ensure there is visible space between the vegetable pieces; if they are touching, they will steam rather than roast.
- Roast for 20 minutes. Remove the tray and use a metal spatula to flip the vegetables. Now, sprinkle the sea salt and cracked black pepper evenly over everything. Adding salt halfway through ensures the vegetables have already developed a “skin” so they don’t release excess water and become soggy.
- Return to the oven for another 15 to 20 minutes until the edges are deeply browned, slightly charred, and crisp.
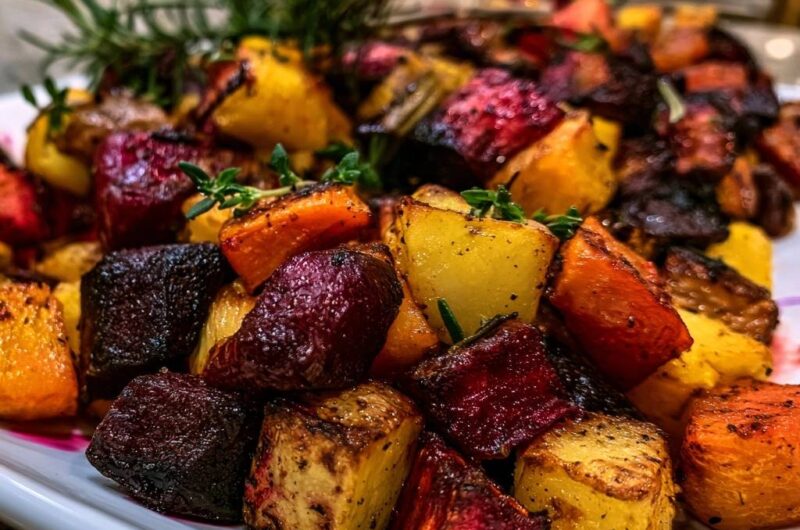
- Toss together gently just before serving on a platter. The beets will naturally bleed slightly at this stage, creating the beautiful variegated colors seen in the image. Garnish with extra fresh rosemary and thyme sprigs.
Notes
- Preheating the baking sheet is essential for an instant sear. Adding salt halfway through the roasting process prevents the vegetables from releasing excess moisture and becoming mushy.