Mastering Golden Blueberry Butter Scones: The Secret to a Light, Airy Crumb
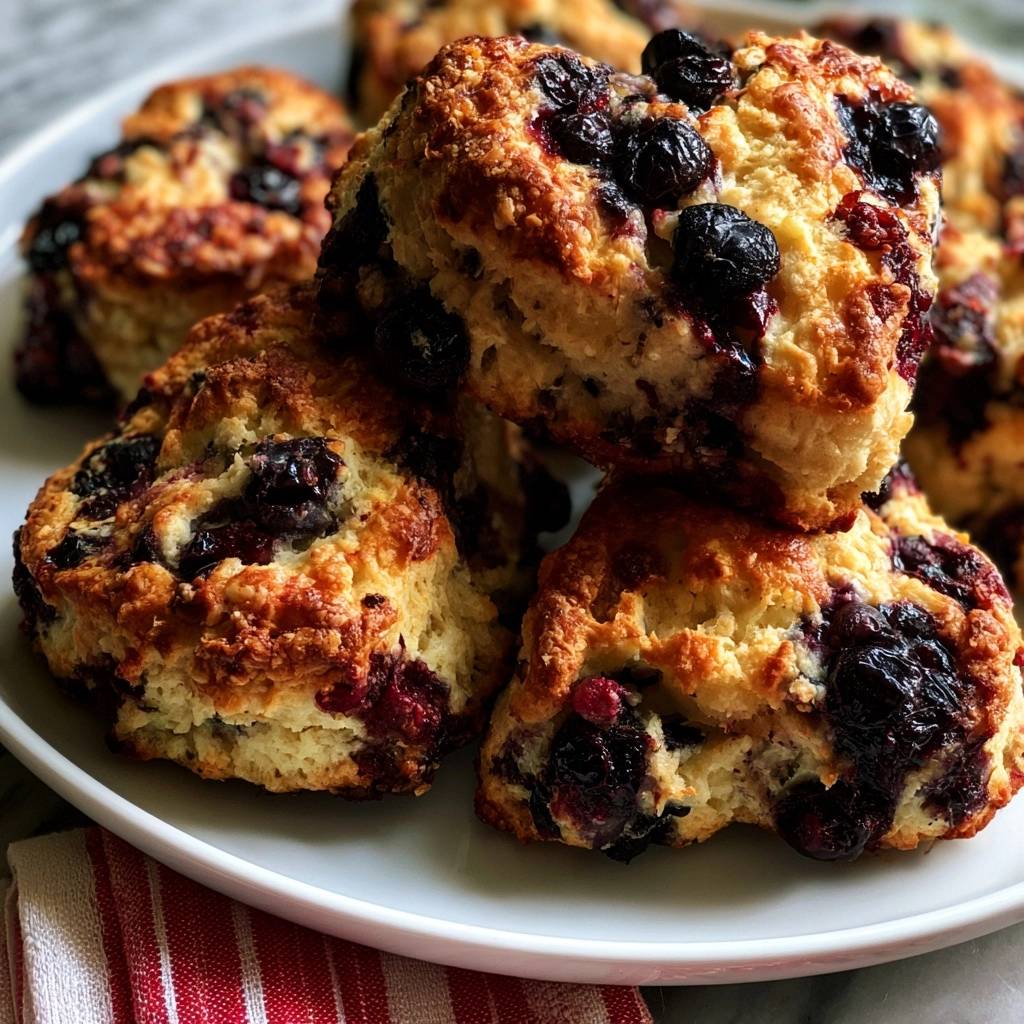
Most homemade scones end up as heavy, leaden bricks or soggy messes because the fruit bleeds and the dough is overworked. You’ve likely experienced that disappointment—biting into a scone that feels more like a dry hockey puck than a bakery-style treat. This recipe changes that by focusing on a specific folding technique and frozen butter grating to ensure a sky-high rise and a light, airy crumb that shatters when you bite into it.
The secret to this “Muffin Trick” philosophy is achieving a tender, pillowy interior without the dense weight of a traditional biscuit. We aren’t just mixing ingredients; we’re engineering a texture that balances a crisp, golden exterior with a soft, blueberry-studded center. It’s about creating a pastry that feels substantial yet melts away the moment it hits your tongue.
I’ve found that the absolute key to success is keeping everything cold, especially your hands. If you notice the dough getting sticky or the butter starting to soften, pop the whole bowl in the fridge for ten minutes. That small pause preserves the tiny pockets of fat that are responsible for the flaky, professional-grade lift you see in high-end coffee shops.
The Chemistry of Flaky Golden Blueberry Butter Scones
Baking is a science, and these scones rely on a specific chemical reaction to achieve their height. The tablespoon of baking powder acts as the primary leavening agent, reacting instantly when it hits the moisture of the heavy cream and the intense heat of the oven. This reaction produces carbon dioxide bubbles that expand, pushing the dough upward before the structure sets.
Protein content plays a massive role in the final mouthfeel. All-purpose flour is the superior choice here because it has just enough protein to provide structure for the heavy berries, but not so much that the scone becomes chewy like bread. If you used cake flour, the scone would likely collapse under the weight of the fruit; if you used bread flour, it would be far too tough.
Why Frozen Butter Grating Prevents Dense Dough
This is the most critical technical step in the entire process. When you use the large holes of a box grater to shred frozen butter, you create thousands of tiny, cold shards of fat. These shards are distributed evenly throughout the flour without being fully integrated or melted into the dry ingredients.
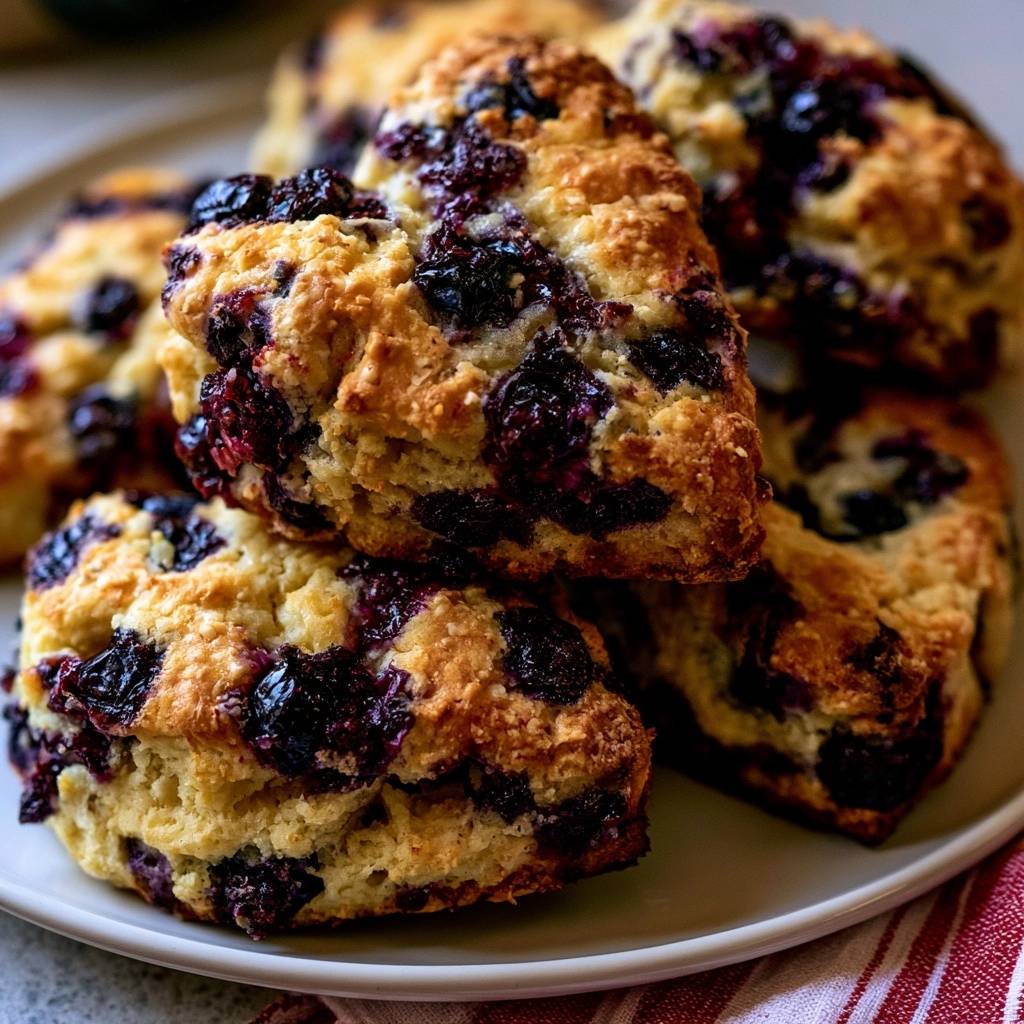
When these frozen butter shreds hit a 400°F oven, the water content in the butter evaporates instantly. This creates “steam pockets” that force the layers of dough apart, resulting in a flaky, laminated texture. If you used room-temperature butter, it would simply coat the flour particles, leading to a heavy, cake-like texture that lacks those signature air gaps.
The Role of Heavy Cream and Egg for Tenderness
Heavy cream is non-negotiable because its high fat content provides a richness that milk or even buttermilk cannot match. The fat coats the flour proteins, slowing down gluten development and ensuring the crumb stays tender. It also contributes to the beautiful golden hue of the finished pastry.
The egg acts as a crucial binder and emulsifier. The lecithin found in the egg yolk helps the fats and liquids blend smoothly, providing a more stable structure. This stability is vital because it allows the dough to hold onto the 1.5 cups of fresh blueberries without falling apart or becoming a gummy mess during the bake.
Essential Components for Golden Blueberry Butter Scones
Success starts with your ingredients, and quality matters when the list is this short. Always reach for unsalted butter so you can control the sodium levels yourself. Different brands of salted butter have varying salt concentrations, which can easily ruin the delicate balance of the sweet blueberries and vanilla.
For the topping, coarse turbinado sugar is a must-have. Unlike regular granulated sugar, these large crystals don’t melt away in the oven. They provide a professional “crunch” and a glittering finish that contrasts beautifully with the soft interior. It’s that final touch that makes these feel like they came from a professional patisserie.
Selecting the Best Blueberries: Fresh vs. Frozen
Fresh blueberries are the gold standard for this recipe because they hold their shape and don’t “bleed” as much as frozen ones. When you use fresh fruit, you get distinct pops of tart juice rather than a dough that turns entirely purple. Look for berries that are firm and dry to the touch for the best results.
If you must use frozen berries, do not thaw them first. Thawing releases excess moisture that will turn your dough into a soggy, lilac-colored paste. Instead, toss the frozen berries in a tablespoon of flour before folding them in. This creates a thin barrier that helps absorb surface moisture and prevents the color from migrating into the dough.
The Importance of High-Quality Vanilla and Salt
Vanilla extract functions as a flavor enhancer in this recipe, much like salt does in savory cooking. It rounds out the sweetness of the sugar and highlights the floral notes of the blueberries. Using a pure extract rather than imitation vanilla will give you a much deeper, more complex aroma that lingers after the first bite.
The half-teaspoon of salt might seem small, but it is essential for balancing the sugar. Without it, the scones can taste flat or cloyingly sweet. The salt sharpens the flavors, making the “golden” buttery notes stand out and ensuring the blueberries taste bright and vibrant rather than just sugary.
Step-by-Step: Engineering the Perfect Scone Rise
Creating the perfect scone is about managing the dough with a light touch. You want to move quickly to keep the ingredients cold and avoid overworking the flour. The goal is to reach a “shaggy mass” stage where the ingredients are just barely holding together before you begin the shaping process.
Gluten development is the enemy of a tender scone. Every time you stir or knead the dough, you strengthen the gluten strands, which leads to a tough, rubbery texture. By using a folding method instead of traditional kneading, you preserve the delicate crumb while still creating enough structure to help the scone rise tall in the oven.
Phase 1: Integrating Fat Without Heat Transfer
Start by whisking your dry ingredients thoroughly to ensure the baking powder is evenly distributed. Once you begin grating the frozen butter, work quickly. Use a fork to toss the butter shreds into the flour as you go, ensuring every piece of fat is coated in a layer of flour.
Avoid using your hands during this stage if possible. Your body heat is roughly 98 degrees, which is more than enough to melt those tiny butter shards. If the butter melts now, you lose the steam pockets later. A cold pastry blender or a simple fork is your best friend for keeping the fat intact and cold.
Phase 2: The “Letter Fold” Technique for Professional Layers
Once the wet and dry ingredients form a shaggy dough, turn it onto a floured surface. Instead of kneading, you will perform a “letter fold.” Pat the dough into a rectangle, fold the right third over the center, and then the left third over that. Rotate the dough and repeat this process just once more.
This technique is the “Skyscraper” element of the recipe. It creates physical layers of fat and flour, similar to how puff pastry is made. These layers act as internal scaffolding, forcing the scones to grow upward rather than spreading outward like a cookie. It’s the secret to those craggy, professional-looking edges.
Phase 3: Shaping and the “Burst Berry” Aesthetic
Gently pat the folded dough into a disc or square that is exactly one inch thick. This height is the magic number; any thinner and they won’t have that impressive bakery look, any thicker and the center might remain doughy while the outside burns. Use a sharp knife or bench scraper to cut the dough into eight clean wedges.
To get that “burst berry” look, take a few extra blueberries and press them firmly into the tops of the wedges before baking. As the scones rise and the heat intensifies, these surface berries will pop and sizzle, creating beautiful streaks of juice across the golden crust. It makes the final product look as good as it tastes.
Critical Baking Parameters for a Shatter-Crisp Crust
The oven temperature is the final piece of the puzzle. A high heat of 400°F is the sweet spot for scones. It provides the immediate thermal shock needed to trigger the steam lift from the butter, but it isn’t so hot that the sugar topping burns before the interior is fully baked through.
Make sure your oven is fully preheated before the scones go in. If the oven is still warming up, the butter will slowly melt rather than flash-steaming, resulting in a flat, greasy scone. Use an oven thermometer if you have one to ensure you are hitting that 400-degree mark accurately.
The Heavy Cream Wash and Sugar Topping
Before the scones hit the heat, brush the tops generously with an extra tablespoon of heavy cream. The proteins and sugars in the cream facilitate the Maillard reaction, which is the chemical process responsible for browning and flavor development. This is what gives the scones their deep, appetizing golden color.
After baking for 18 to 22 minutes, the edges should be crisp and the tops deeply browned. It is vital to let them rest on the hot baking sheet for at least five minutes after removal. This carry-over cooking allows the internal crumb to set properly so the scone doesn’t crumble apart when you try to eat it.
Troubleshooting Common Scone Failures
Even experienced bakers run into trouble sometimes. If your scones didn’t turn out quite right, it’s usually due to a small temperature or measurement error. Understanding what went wrong will help you nail the texture the next time you bake a batch.
Most issues stem from the dough becoming too warm or being handled too much. If you ever feel like the dough is becoming difficult to work with or feels “slumped,” don’t hesitate to put it in the freezer for five minutes. Cold dough is the foundation of a successful scone.
Why Did My Scones Spread and Flatten?
If your scones look more like flat cookies, the butter likely melted before the dough had a chance to set. This happens if the butter wasn’t frozen, if you handled the dough too much with warm hands, or if your oven wasn’t hot enough. The butter needs to stay solid until it hits that high heat.
Another culprit could be over-mixing the wet and dry ingredients. Over-mixing creates a soft, batter-like consistency rather than a sturdy dough. Next time, stop mixing as soon as no more dry flour streaks remain. The dough should look a bit messy and “shaggy” before you start the folding process.
Correcting a Dry or Crumbly Interior
A dry scone is usually the result of too much flour. If you scoop your measuring cup directly into the flour bag, you are likely packing it down and using up to 25% more flour than the recipe calls for. Always use the “spoon and level” method or a kitchen scale for accuracy.
If the dough feels extremely dry and won’t hold together even after folding, you can add an extra teaspoon or two of heavy cream. However, be cautious. The blueberries will release moisture as they bake, so a slightly dry-looking raw dough often results in a perfectly moist finished scone.
Make-Ahead Strategies and Storage Solutions
Scones are undoubtedly at their peak about ten minutes after they come out of the oven. However, you don’t have to wake up at dawn to enjoy them fresh. You can prepare the dough in advance and bake them off whenever the craving strikes, making them perfect for brunch hosting.
Proper storage is key to maintaining that delicate balance of a crisp exterior and soft interior. Never store scones in the refrigerator, as the cold air will dry out the crumb and make them taste stale almost instantly. Keep them at room temperature in a container that isn’t completely airtight to preserve the crust.
Freezing Unbaked Scone Wedges for Fresh Mornings
You can freeze the raw, shaped scone wedges for up to three months. Place the cut triangles on a baking sheet and freeze them until solid, then transfer them to a freezer-safe bag. This prevents them from sticking together and allows you to bake just one or two at a time.
When you are ready to bake, there is no need to thaw them. Simply place the frozen wedges on a parchment-lined sheet, brush with cream, and sprinkle with sugar. Bake them at the usual 400°F, but add an extra 2 to 3 minutes to the total baking time to account for the frozen center.
Reviving Day-Old Scones Without Microwave Sogginess
If you have leftovers, avoid the microwave at all costs. The microwave turns the butter into oil and makes the crust soft and rubbery. Instead, preheat your oven or a toaster oven to 350°F and warm the scones for about 5 to 7 minutes.
This brief stint in the oven restores the exterior crunch while gently softening the butter inside. It makes a day-old scone taste almost as good as one fresh from the oven. You can even split them in half before warming to get a little extra crispness on the interior faces.
Expert Tips for Scone Customization
Once you master the base dough, you can experiment with different flavors while keeping the “Golden” profile. Adding the zest of one lemon to the dry ingredients provides a bright acidity that cuts through the richness of the butter. It pairs perfectly with the blueberries for a classic summer flavor.
If blueberries aren’t in season, you can swap them for blackberries or even chopped strawberries. If you prefer dried fruit, like cranberries or currants, soak them in a little warm water for ten minutes and pat them dry before adding. This prevents the dried fruit from sucking moisture out of the dough during the bake.
Frequently Asked Questions
Can I use a food processor instead of a box grater?
While a food processor is faster, it often pulses the butter into pieces that are too small and uniform. The box grater creates long, irregular shreds that produce a much better flaky texture. If you do use a processor, use very short pulses and be careful not to turn the mixture into a fine meal.
Why is my dough purple?
Purple dough is a sign that the blueberries have broken open and bled their juice into the flour. This usually happens from over-mixing or using thawed frozen berries. To keep the dough golden, fold the berries in very gently at the very last second and try not to squash them as you shape the disc.
Can I substitute the heavy cream with half-and-half?
You can use half-and-half in a pinch, but you will lose a significant amount of richness and tenderness. Heavy cream has about 36% milk fat, while half-and-half only has about 10-18%. If you make the switch, the scones will be slightly leaner and may dry out faster, so keep a close eye on the baking time.
How do I get perfectly straight edges on my wedges?
The key to clean, straight edges is using a very sharp knife or a bench scraper and pressing straight down in one firm motion. Do not saw back and forth, as this seals the edges of the dough and prevents the layers from expanding upward. Dusting your blade with a little flour between cuts also helps prevent sticking.
How should I store leftover scones?
Store leftover scones in a container with a loose-fitting lid at room temperature for up to two days. If the container is too airtight, the moisture from the berries will soften the crust and make it soggy. For longer storage, wrap them individually in plastic wrap and freeze for up to a month, reheating in the oven when ready.
Why were my scones dry even though I followed the recipe?
Dryness is almost always caused by over-baking or over-measuring the flour. Check your oven temperature with a thermometer to ensure it isn’t running hot. Also, ensure you are letting the scones rest for 5 minutes on the pan; if you eat them immediately, the steam hasn’t finished hydrating the crumb, which can make them seem drier than they actually are.
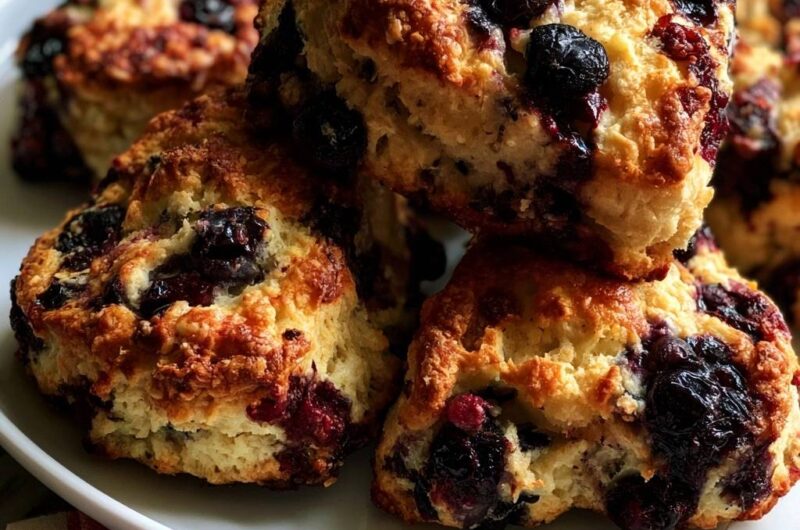
Golden Blueberry Butter Scones
Course: Breakfast and BrunchCuisine: AmericanDifficulty: easy8
scones15
minutes20
minutes35
Minutes310
kcalAmerican
Ingredients
2 cups all-purpose flour
1/2 cup granulated sugar
1 tablespoon baking powder
1/2 teaspoon salt
1/2 cup unsalted butter, frozen
1/2 cup heavy cream, cold (plus 1 tablespoon for brushing)
1 large egg
1 teaspoon vanilla extract
1 1/2 cups fresh blueberries
1 tablespoon coarse turbinado sugar for topping
Directions
- Preheat your oven to 400 degrees F (200°C) and line a baking sheet with parchment paper.
- In a large bowl, whisk together the flour, sugar, baking powder, and salt.
- To solve the density issue, use the large holes of a box grater to grate the frozen butter directly into the flour mixture. This creates tiny pockets of fat that steam during baking, creating a flaky lift rather than a dense mass. Toss gently with a fork to coat the butter shreds until the mixture resembles coarse crumbs.
- In a separate small bowl, whisk the heavy cream, egg, and vanilla.
- Pour the wet ingredients into the dry. Use a spatula to fold the mixture just until a shaggy dough begins to form. Do not overmix or the gluten will develop and make the scones tough.
- Gently fold in the blueberries. To achieve the look in the image where berries are bursting on the surface, press a few extra berries into the top of the dough after shaping.
- Turn the dough onto a lightly floured surface. Instead of kneading, pat the dough into a 1-inch thick rectangle. Fold the right third over the center, then the left third over that (like a letter). Rotate 90 degrees and repeat this process once more. This “letter fold” method creates the professional layers and craggy texture seen in the image.
- Pat the dough into a 7-inch disc or square. Cut into 8 triangles or wedges and place them on the baking sheet, spaced 2 inches apart.
- Brush the tops with the remaining tablespoon of heavy cream and sprinkle generously with coarse sugar.
- Bake for 18 to 22 minutes until the tops are deeply golden brown and the edges are crisp. Let cool on the pan for 5 minutes before serving to allow the crumb to set.
Notes
- To prevent the dough from becoming tough, do not overmix. The letter-fold method is essential for creating professional layers and a craggy texture.