Mastering Slow Braised Shredded Beef and Onions
Most home cooks have experienced the disappointment of a pot roast that looks beautiful but eats like a bundle of dry rubber bands. You spend hours waiting, only to find the meat is stringy and gets stuck in your teeth. This happens because the muscle fibers have seized up from high heat or improper liquid ratios, leaving you with a dinner that requires a steak knife and a lot of chewing.
The secret to meltingly tender beef that pulls apart with a dull spoon is all about the low and slow braising temperature combined with a tight seal. We aren’t just making a stew; we are performing a culinary transformation. By using a heavy cast iron pot and a specific liquid ratio, we break down tough connective tissue into silky collagen for a result that is never chewy.
I’ve found that the real trick lies in the “partial submerge” technique. If you cover the meat entirely in liquid, you are boiling it, which results in that dreaded stringy texture. However, by letting the meat peek out of the liquid, the steam and the braising liquid work together to soften the fibers while keeping the flavor concentrated. It’s the difference between a cafeteria roast and a five-star bistro meal.
The Science of Tenderness: Why Braising Works
Braising is a combination cooking method that uses both dry heat (searing) and moist heat (simmering). When you take a tough cut of meat like chuck roast, you are dealing with a high concentration of collagen. At high temperatures, this collagen shrinks and squeezes out moisture, making the meat tough. Therefore, we must stay in the low-temperature zone to achieve success.
The magic happens when the meat stays at a gentle simmer for several hours. Around 160°F to 180°F, the collagen begins to melt into gelatin. This gelatin coats the individual muscle fibers, providing that rich, mouth-coating sensation we crave. If you rush this process by turning up the heat, the fibers will tighten into knots before the collagen has a chance to melt.
Collagen vs. Muscle Fiber
Think of muscle fibers like long, thin straws bundled together by rubber bands (the collagen). If you cook the meat quickly, those rubber bands snap tight, making the straws impossible to separate. Slow cooking at 300°F (150°C) allows those “rubber bands” to dissolve into a luscious sauce. This is why a chuck roast, which is normally too tough for a quick sear, becomes the most tender bite on the plate after three hours.
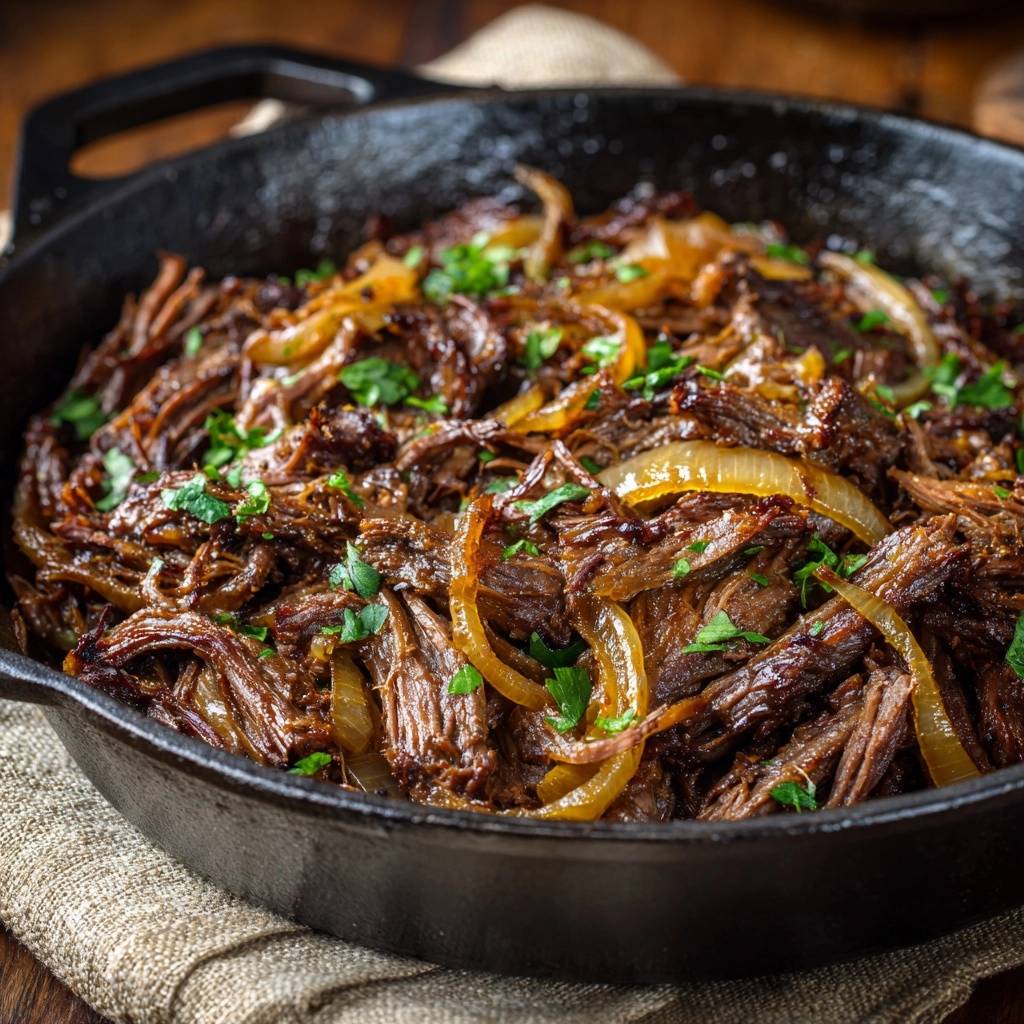
Essential Components for Shredded Beef and Onions
Every ingredient in this pot serves a structural or chemical purpose. We use yellow onions because they have a high sugar content, which provides the body and sweetness for the gravy. In addition, the balsamic vinegar isn’t just for flavor; the acidity helps break down the surface proteins and adds a deep, mahogany color to the final sauce.
Quality beef broth is another non-negotiable factor. Since we are reducing the liquid to a thick glaze at the end, using water would result in a thin, bland finish. A rich broth provides the base notes that support the aromatics. If you have a choice, always reach for a low-sodium version so you can control the salt levels as the liquid evaporates.
Selecting the Right Cut: Why Chuck is King
When you’re at the butcher counter, look for a chuck roast with plenty of white “marbling” throughout the meat. These flecks of intramuscular fat are what keep the beef moist during the long haul in the oven. Avoid lean cuts like round roast or sirloin tip for this recipe, as they lack the fat and connective tissue needed to create a shredded texture.
Chuck comes from the shoulder of the cow, an area that does a lot of work. This means it has deep flavor but is naturally very tough. However, that toughness is exactly what makes it the “king” of braising. As the fat renders out, it bastes the meat from the inside out, ensuring every shred is juicy.
The Aromatics: Onions, Garlic, and Thyme
Yellow onions are the workhorse of this dish. As they cook for 15 minutes before the beef returns to the pan, they lose their sharp bite and turn into a sweet, jammy base. This creates a natural thickness in the sauce that you just can’t get from flour or cornstarch. Garlic and dried thyme add earthy layers that prevent the dish from being one-dimensionally salty.
Phase One: The Maillard Reaction and Searing
The Maillard reaction is a chemical reaction between amino acids and reducing sugars that gives browned food its distinctive flavor. You cannot skip the searing step! If you put raw beef directly into the liquid, you miss out on hundreds of flavor compounds that only develop at high heat. This is where the “beefy” soul of the dish is born.
To get a perfect sear, you must work in batches. If you crowd the pan, the temperature drops and the meat starts to release juices, which then boil the beef instead of browning it. Give each chunk of beef its own space in the hot oil. You are looking for a dark, caramelized crust on every single side before you move on.
The Importance of Surface Moisture Removal
Before the beef even touches the oil, you must pat it bone-dry with paper towels. Any moisture on the surface of the meat will immediately turn to steam in the hot pan. Steam acts as a barrier that prevents the meat from reaching the temperatures needed for browning. If your meat is gray instead of brown, it’s likely because it wasn’t dry enough.
Building the Fond: Those Brown Bits Matter
After searing the beef, you’ll notice a layer of dark brown bits stuck to the bottom of your Dutch oven. This is called “fond,” and it is pure flavor gold. Do not wash the pan! These bits will eventually dissolve into your braising liquid, giving the sauce its deep color and intense savory profile. Just be careful not to let the heat get so high that the fond turns black, as that will make the sauce bitter.
Phase Two: Caramelizing Onions and Deglazing
Once the beef is out of the pan, the onions go in to pick up all that leftover flavor. This isn’t a quick five-minute sauté. You want to cook them for at least 12 to 15 minutes until they are soft and golden. This slow cook allows the natural sugars in the onions to caramelize, which provides the backbone for the entire sauce.
Integrating Tomato Paste and Garlic
Adding the tomato paste directly to the hot onions and oil is a technique called “blooming.” It toasts the paste, removing that raw, metallic canned taste and deepening its color. When you add the garlic, only let it cook for about 60 seconds. Garlic burns easily, and burnt garlic will ruin the entire three-hour investment with a harsh, acrid flavor.
Deglazing with Balsamic and Beef Broth
Deglazing is the act of adding liquid to a hot pan to loosen the fond. As you pour in the balsamic vinegar and beef broth, use a wooden spoon to scrape the bottom of the pot vigorously. You’ll see the liquid turn a rich brown as the caramelized bits dissolve. This step ensures that every ounce of flavor you created during the searing phase ends up in the final dish.
If you enjoy the deep beefy flavor that deglazing brings, try it in this hearty beef stew with thyme dumplings.
Phase Three: The Low-Temperature Braise
Now comes the most important part: the liquid ratio. Return the beef to the pan, but ensure the liquid only comes about halfway up the meat. This allows the top half of the beef to be cooked by the trapped steam, while the bottom half simmers in the flavorful broth. This dual-action cooking is what creates the perfect shredded texture.
The Physics of the Tight-Fitting Lid
A tight seal is mandatory because it keeps the moisture inside the pot. If steam escapes, the liquid level will drop too low and the meat will dry out. If your lid feels a bit loose, place a piece of aluminum foil over the pot before putting the lid on. This creates a “gasket” effect that locks in every drop of moisture, forcing it back into the meat fibers.
Oven vs. Stovetop: Choosing Your Heat Source
While you can do this on the stovetop, I highly recommend using a 300°F (150°C) oven. An oven provides consistent, 360-degree radiant heat that surrounds the entire pot. On a stovetop, the heat only comes from the bottom, which can lead to scorching if your burner is even slightly too high. The oven is a “set it and forget it” method that yields much more reliable results.
Troubleshooting Common Braising Obstacles
If you check your beef after three hours and it’s still tough, don’t panic! It simply hasn’t cooked long enough. Every piece of meat is different, and some roasts have more stubborn connective tissue than others. Put the lid back on and give it another 30 to 45 minutes. It will eventually hit that “sweet spot” where it collapses under the pressure of a fork.
Another common issue is a sauce that feels too thin. If the meat is tender but the liquid looks like soup, remove the meat and simmer the liquid uncovered on the stovetop for 10 minutes. This reduces the water content and concentrates the flavors into a thick, glossy glaze that will cling to the shredded beef beautifully.
Correcting a Thin or Weak Braising Liquid
Reduction is your best friend here. By simmering the sauce without a lid at the very end, you are intensifying the salt, acidity, and savory notes. You don’t need flour or thickeners if you have enough onions in the base. The softened onions will naturally break down and thicken the sauce as it reduces, keeping the dish gluten-free and naturally rich.
Optimal Pairings for Shredded Beef and Onions
This beef is incredibly rich, so you want side dishes that can either soak up the gravy or provide a bright contrast. A creamy starch is the traditional choice, as it acts as a canvas for the savory onion sauce. However, don’t forget to add something green to the plate to balance out the heavy flavors of the braise.
Starch Bases: Polenta, Mash, or Crusty Bread
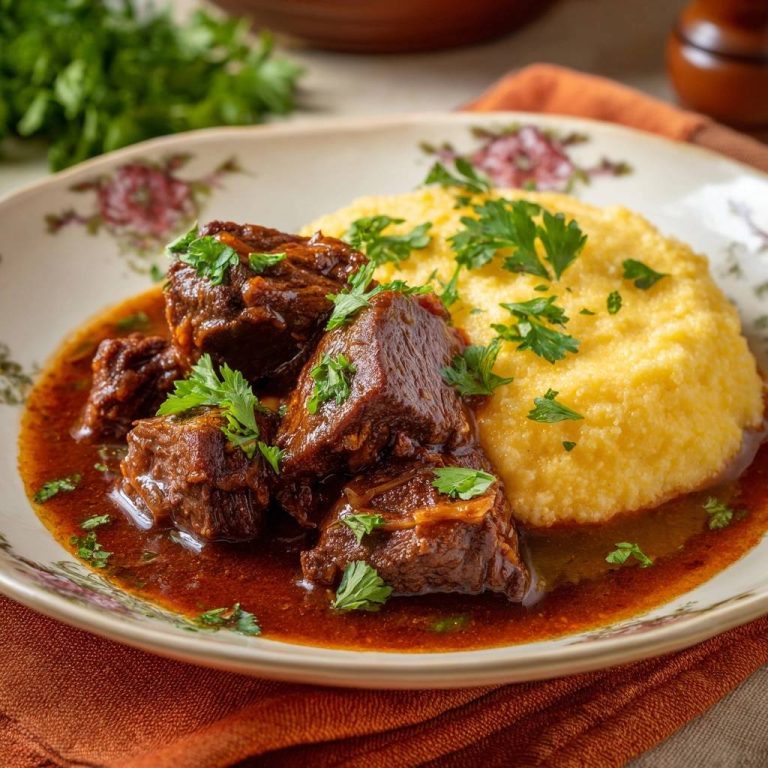
Buttery mashed potatoes are the classic partner for shredded beef, but don’t overlook soft polenta. The corn flavor pairs beautifully with the sweetness of the caramelized onions. If you want something simpler, a thick slice of toasted sourdough bread is perfect for mopping up the extra juices. The tang of the bread cuts through the richness of the beef fat perfectly.
Vegetable Accompaniments
To balance the deep, savory notes, try serving this with roasted broccolini or a simple arugula salad tossed in lemon juice. The bitterness of the greens and the acidity of the lemon provide a much-needed “reset” for your palate between bites of the rich beef. Steamed green beans with a little garlic are also a fantastic, light option.
Storage, Reheating, and Make-Ahead Strategies
This is one of those rare dishes that actually tastes better the next day. As the beef sits in the sauce overnight, the flavors continue to penetrate the meat fibers. If you are making this for a dinner party, feel free to cook it a day in advance. Just let it cool completely before putting it in the fridge to ensure it stays safe and fresh.
Freezing and Thawing Guidelines
This beef freezes exceptionally well because the sauce protects the meat from freezer burn. Place the shredded beef and all its juices into a freezer-safe bag or airtight container. It will stay at peak quality for up to three months. When you’re ready to eat, thaw it in the fridge overnight and reheat it gently in a covered pan with a splash of broth to loosen the sauce.
Expert Troubleshooting and Technical FAQ
Can I use a slow cooker for this recipe?
Yes, you can use a slow cooker, but you must still sear the meat and caramelize the onions in a pan first. Because slow cookers don’t allow for evaporation, reduce the beef broth to 1 cup instead of 1.5 cups. Cook on the “Low” setting for 7 to 8 hours for the best results. Avoid the “High” setting, as it can sometimes boil the meat and make it stringy.
Why is my beef stringy instead of meltingly tender?
Stringy beef is usually a sign that the meat was boiled rather than braised. This happens if the liquid level was too high (covering the meat completely) or if the temperature was too high. When beef boils, the muscle fibers tighten and the moisture is squeezed out. Next time, ensure the liquid only reaches halfway up the meat and keep the oven at 300°F.
Can I substitute the balsamic vinegar?
If you don’t have balsamic vinegar, you can use red wine vinegar or sherry vinegar. You may want to add a teaspoon of brown sugar to mimic the natural sweetness of the balsamic. The acidity is crucial for balancing the heavy fats in the chuck roast, so don’t skip the vinegar entirely. It also helps provide that deep, dark color to the gravy.
Do I really have to sear the meat in batches?
Yes, batch searing is non-negotiable. If you put all the meat in at once, the temperature of the oil drops instantly. Instead of searing, the meat will release its juices and begin to gray and steam. You will lose the Maillard reaction, which means your final sauce will lack depth and that characteristic “roasted” flavor. Take the extra ten minutes to do it in two or three rounds.
How do I store leftovers safely?
Transfer the beef and onions into an airtight container within two hours of cooking. It will stay fresh in the refrigerator for up to four days. When reheating, do so over low heat on the stovetop. Adding a tablespoon of water or broth helps to re-emulsify the sauce, as the gelatin will have thickened significantly while cold.
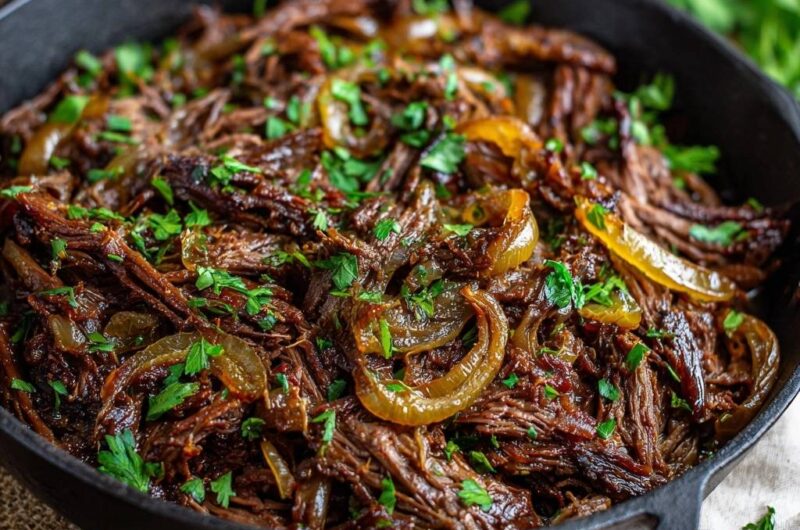
Shredded Beef
Course: Main CourseCuisine: AmericanDifficulty: medium6
servings15
minutes3
hours410
kcal195
MinutesA foolproof method for cooking beef chuck roast that results in silky, fork-tender meat. By searing the beef and braising it at a low temperature with onions and a savory broth, the connective tissues break down into a rich glaze.
Ingredients
3 pounds beef chuck roast, cut into large chunks
3 large yellow onions, sliced into thick rings
3 tablespoons vegetable oil
1.5 cups beef broth
2 tablespoons Worcestershire sauce
1 tablespoon tomato paste
1 tablespoon balsamic vinegar (for color and acidity)
4 cloves garlic, minced
1 teaspoon dried thyme
Salt and black pepper to taste
1/2 cup fresh parsley, chopped for garnish
Directions
- Pat the beef chunks completely dry with paper towels. This is crucial because moisture on the surface creates steam, preventing the deep brown crust that locks in flavor. Season generously with salt and pepper.
- Heat the oil in a large heavy Dutch oven or cast iron skillet over medium-high heat. Sear the beef in batches until a dark, caramelized crust forms on all sides. Remove beef and set aside.
- In the same pan, add the sliced onions. Cook for 12 to 15 minutes, stirring occasionally, until they are deeply softened and golden brown. Stir in the garlic and tomato paste, cooking for 1 minute until fragrant.
- Pour in the beef broth, Worcestershire sauce, and balsamic vinegar. Use a wooden spoon to scrape up every bit of the browned flavor bits (fond) from the bottom of the pan.
- Return the beef to the pan. The liquid should only come about one-third to halfway up the meat. This is the key to the braising technique: if you submerge the meat entirely, you are boiling it, which leads to a stringy texture.
- Cover with a very tight-fitting lid (or a layer of foil under the lid). Turn the heat to the lowest possible setting to maintain a very gentle simmer, or place in a 300°F (150°C) oven. Cook for 3 to 3.5 hours. Do not lift the lid. Keeping the steam trapped ensures the meat fibers relax rather than tighten.
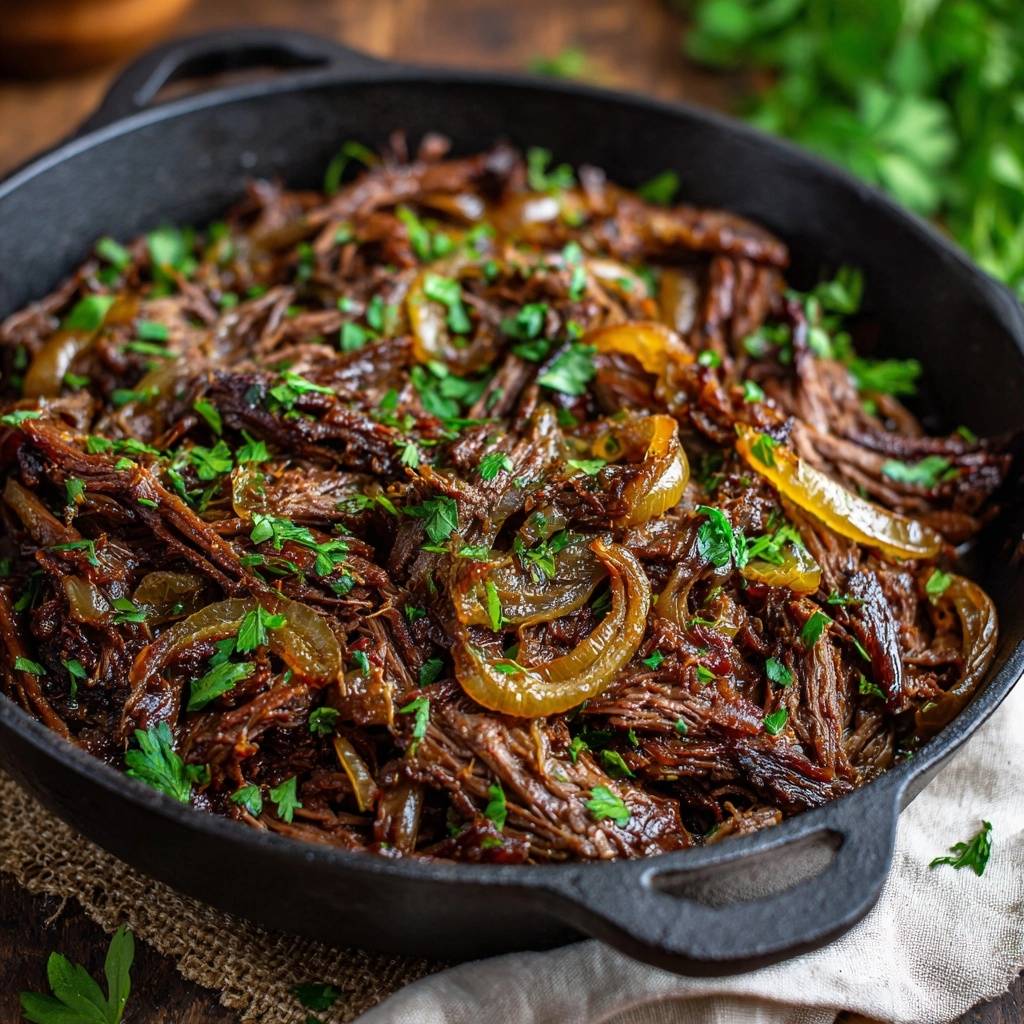
- Once the beef is fork-tender, remove the lid. If there is too much liquid, simmer uncovered for 10 minutes to reduce it into a thick glaze. Shred the meat directly in the pan, tossing it thoroughly with the caramelized onions and concentrated juices.
- Garnish heavily with fresh parsley and serve directly from the cast iron for the best presentation.
Notes
- The key to avoiding stringy meat is to ensure the beef is not fully submerged in liquid and to keep the lid tightly sealed to trap steam.