Mastering Caramelized Brown Sugar Pineapple Bites
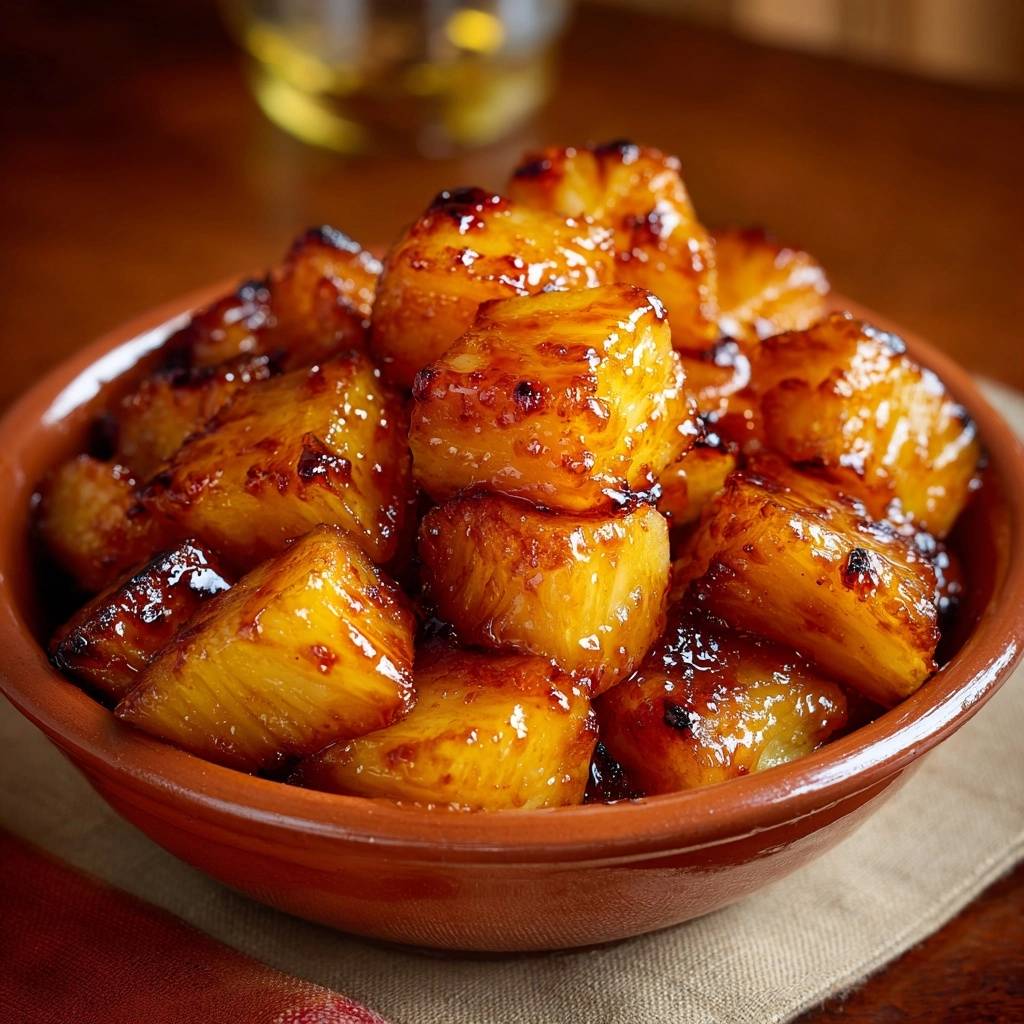
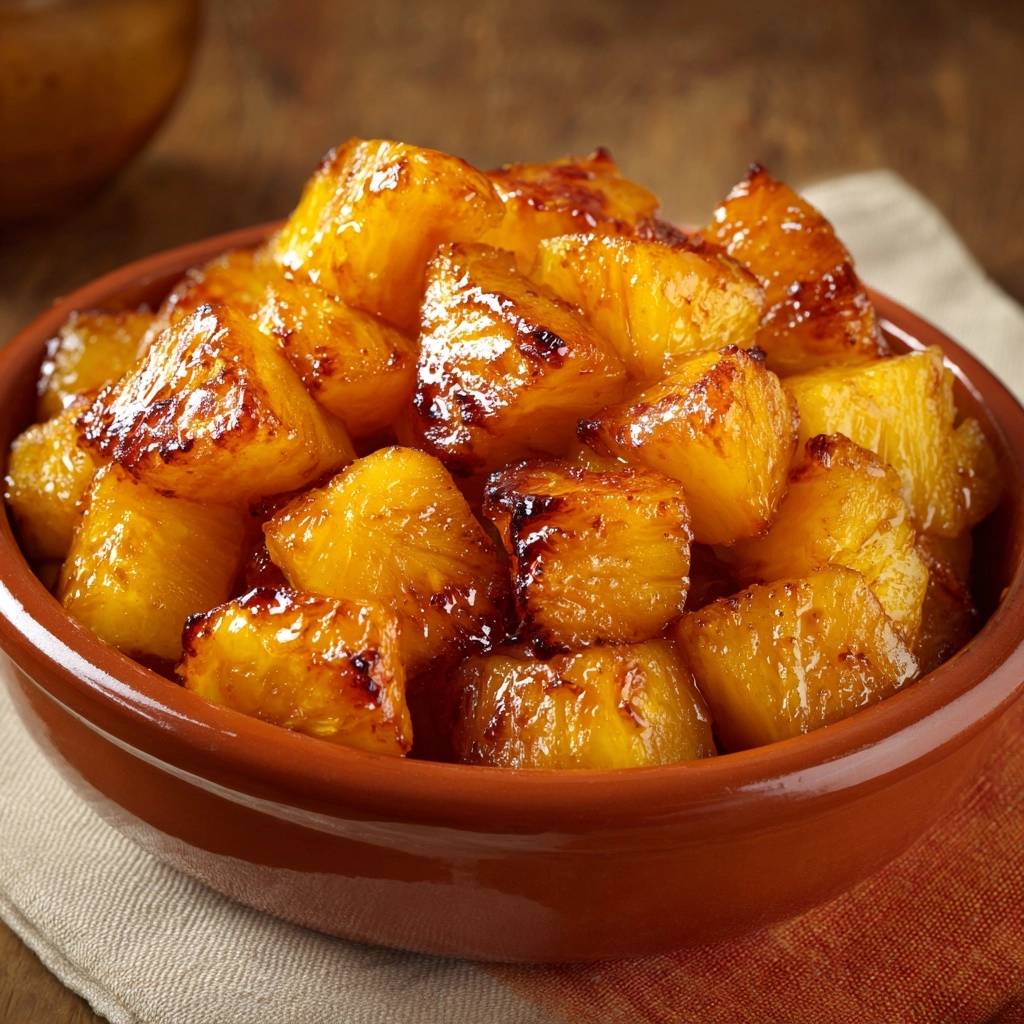
Imagine biting into a warm cube of pineapple where the exterior has been transformed into a shattered-glass layer of burnt sugar and cinnamon. The first sensation is the crunch of a deep, mahogany crust, followed immediately by a burst of hot, tart juice from the fruit’s center. Unlike typical roasted fruit that collapses into a weeping mess, these bites maintain a structural integrity that feels substantial and sophisticated.
The frustration of mushy fruit usually stems from a lack of temperature control and surface moisture management. When pineapple sits in a pool of its own liquid, it steams rather than sears, resulting in a soft, unappealing texture. This method solves that problem by utilizing a high-heat technique that flash-caramelizes the exterior before the internal fibers have a chance to break down.
The secret to this success lies in the “dry-rub” approach and the immediate application of heat. By treating the pineapple like a high-quality steak rather than a delicate garnish, you create a candy-like shell that locks in the juices. You’ll need a heavy pan and a bit of speed to pull this off, but the result is a masterclass in the balance of heat, sugar, and acid.
The Physics of Fruit Caramelization
Caramelization is a complex chemical process where heat breaks down sugar molecules, creating new compounds that offer a nutty, toasted flavor. In this recipe, we are dealing with two types of sugar: the natural fructose within the pineapple and the sucrose from the added brown sugar. Because pineapple is naturally acidic, it helps speed up the breakdown of these sugars, leading to a faster color change.
Pineapple is the perfect candidate for this high-heat treatment because of its dense, fibrous structure. Unlike a peach or a berry, which would disintegrate under intense heat, the pineapple’s core-like fibers hold their shape. However, you must account for bromelain, an enzyme in pineapple that breaks down proteins. Heat eventually deactivates this enzyme, but during the short searing window, our goal is to use heat to create a barrier before the fruit’s own juices can dissolve the sugar coating.
Controlling moisture is the most vital part of the physics here. If there is water on the surface of the fruit, the energy from your stove goes into evaporating that water (turning it into steam) rather than browning the sugar. This is why a “sear” can quickly turn into a “steam” if the pan isn’t hot enough or the fruit is too wet. By removing surface moisture, you allow the temperature to spike high enough to trigger the Maillard reaction and caramelization simultaneously.
Essential Components for the Perfect Glaze
Every ingredient in this short list serves a structural or chemical purpose. We aren’t just adding sweetness; we are building a glaze that has enough viscosity to cling to the fruit while it’s being tossed in a hot pan. Using the right type of sugar and fat ensures that the glaze doesn’t break or become grainy during the cooking process.
Dark brown sugar is the MVP of this recipe because of its high molasses content. Molasses adds moisture and acidity, which helps the sugar stick to the fruit better than granulated white sugar. Furthermore, the deep flavor of molasses provides a smoky undertone that mimics the taste of a charcoal grill, even if you’re just using a standard kitchen skillet.
Salt might seem counterintuitive in a sweet dish, but it is essential for balancing the intense sugar and the natural tartness of the pineapple. It also helps to draw out just a tiny amount of juice to help the cinnamon and sugar form a paste. We use a neutral oil alongside the butter to raise the smoke point. Butter alone would burn at the temperatures required for a hard sear, but the oil acts as a buffer, allowing you to get the flavor of butter without the bitter, blackened milk solids.
Selecting the Ideal Fresh Pineapple
A great dish starts with the raw material, and for this recipe, ripeness is everything. Look for a pineapple that feels heavy for its size, which indicates a high juice content. The skin should be more golden-yellow than green, though a little green at the top is fine. Give the base of the fruit a sniff; it should smell intensely like pineapple nectar. If it smells fermented or like vinegar, it’s overripe and will be too soft to sear.
For a perfect pairing, try our Mastering the Deep Dish Golden Apple Pie.
Another trick is to tug on one of the inner leaves at the crown. If it pops out with very little resistance, the fruit is ready to eat. Avoid canned pineapple for this specific method. Canned versions are stored in liquid and are far too soft; they will never achieve the “candy crust” we are looking for and will likely fall apart in the pan.
Why Fat Choice Impacts the Crust
Using a combination of unsalted butter and neutral oil is a deliberate choice for texture and flavor. Butter contains milk solids that brown beautifully, providing that classic “toffee” flavor profile. However, butter has a low smoke point. If you used only butter, the pan would be smoking and the fat would be bitter before the pineapple even hit the surface.
By adding a tablespoon of avocado or vegetable oil, you stabilize the fat. This allows you to crank the heat to medium-high. The oil coats the pineapple cubes, ensuring even heat distribution, while the butter foams up and creates a bubbly environment for the sugar to melt into a thick, glossy lacquer.
Preparation: The Secret to Firm Texture
The preparation phase is where most people lose the battle against mushiness. The moment sugar touches fruit, osmosis begins. The sugar wants to pull the water out of the pineapple cells to create a syrup. If you let the sugared fruit sit on the counter, you’ll end up with a bowl of juice and naked fruit. Speed is your best friend here.
The Critical Importance of Surface Moisture
You must pat the pineapple cubes extremely dry with paper towels. I’m talking bone-dry. If you skip this, the sugar will immediately dissolve into a watery mess the second it hits the fruit. Think of it like searing a steak; you wouldn’t put a wet steak in a pan and expect a crust. The same logic applies to fruit.
When the surface is dry, the sugar can sit on top of the fruit like a powder. When that powder hits the hot oil and butter, it flash-melts into a caramel. If the fruit is wet, that sugar becomes a liquid before it even touches the pan, and you’ll end up boiling the pineapple in sugar-water instead of frying it.
Cubing Techniques for Even Cooking
Aim for uniform 1-inch cubes. If your pieces are different sizes, the small ones will turn into mush before the large ones have even started to brown. Uniformity ensures that every piece finishes at the exact same time.
When cutting, make sure to remove the entire core. While the core is edible, it has a much denser texture that won’t soften at the same rate as the flesh. Removing it ensures that every bite is consistently tender-crisp. Use a sharp chef’s knife to make clean cuts; dull knives bruise the fruit and release more juice, which we want to avoid.
Step-by-Step: Searing the Pineapple Bites
Once your pan is hot, the process moves very quickly. You should have your tongs ready and your serving plate nearby. This isn’t a “set it and forget it” kind of recipe; it requires your full attention for the five minutes the fruit is in the skillet.
For a perfect pairing, try our Mastering the Cinnamon Sugar Apple Bundt Cake.
Managing Pan Temperature and Crowding
The biggest mistake you can make is dumping all the fruit into the pan at once. This causes the temperature of the skillet to plummet. When the temperature drops, the fruit starts to leak juice, and the searing process stops. You want to hear a loud, aggressive sizzle the moment the pineapple touches the fat.
If you don’t have a large enough skillet to keep at least a half-inch of space between the cubes, work in batches. It is better to have two batches of perfect, crispy pineapple than one big batch of soggy fruit. Wait for the butter to stop bubbling and start to turn a light nut-brown before you add the first piece.
Achieving the Charred Edge Finish
The “undisturbed” sear is the hardest part for most home cooks. You will be tempted to stir the pan, but don’t. Let the cubes sit in the hot fat for at least two minutes. You want the sugar to burn just a little bit at the edges—this “char” provides a bitter contrast to the sweetness that makes the dish taste professional.
Use tongs to flip each piece individually. A spatula can scrape the delicate sugar crust off the fruit, but tongs allow you to grip the sides and turn them gently. You’re looking for a deep amber color. If it looks pale yellow, it needs more time. If it smells like it’s burning, turn the heat down slightly, but don’t stop the process.
Troubleshooting Common Searing Obstacles
If you notice a lot of liquid pooling in the pan, your heat is too low or you crowded the pan. Immediately turn the heat to high and, if necessary, use a crumpled paper towel held with tongs to carefully dab away the excess moisture. It sounds crazy, but removing that liquid can save the sear.
If the sugar is smoking excessively but the fruit isn’t browning, your pan is too hot. Slide the skillet off the burner for thirty seconds to let the temperature stabilize, then return it to a slightly lower flame. If the cinnamon starts to smell acrid, it means the butter has burned; you may need to wipe the pan and start a new batch with fresh fat.
Flavor Variations and Aromatic Swaps
While cinnamon is the classic choice, you can easily pivot the flavor profile. Ground ginger adds a sharp, spicy kick that cuts through the sugar beautifully. If you want something more exotic, try ground cardamom or even a tiny pinch of cloves. For those who like a “sweet and heat” combination, a dusting of cayenne pepper or red chili flakes in the sugar mix is incredible.
Citrus is another great way to add depth. Grate some fresh lime or orange zest over the bites the second they come out of the pan. The residual heat will release the citrus oils, providing a bright, floral aroma that lifts the heavy caramel flavors. You can also swap the vanilla extract for almond extract for a cherry-like undertone.
Serving Suggestions and Pairing Profiles
These bites are versatile enough to move between the dessert and savory worlds. For a simple treat, serve them over a scoop of cold vanilla bean ice cream. The contrast between the scorching hot, crunchy pineapple and the melting cream is a classic sensory delight. You can also pile them on top of thick, strained Greek yogurt with a handful of toasted macadamia nuts for a textured breakfast.
What’s Next?
Try these delicious pairings:
- Caramelized Pineapple Chunks: Skillet Perfection Without Watery Glaze
- Glazed Sweet Potatoes and Pineapple: Caramelized Perfection
On the savory side, these caramelized bites are a fantastic accompaniment to grilled proteins. They pair exceptionally well with charred lamb chops or roasted chicken. The acidity in the pineapple helps cut through the fat of the meat, while the cinnamon glaze acts as a bridge between the savory and sweet elements of the meal.
Storage and Reheating for Optimal Texture
Caramelized fruit is best enjoyed immediately. As the fruit cools, the sugar crust will naturally begin to absorb moisture from the pineapple and soften. If you do have leftovers, store them in a single layer in an airtight container in the refrigerator for up to two days. Do not stack them, or they will become a sticky block.
To reheat, avoid the microwave at all costs; it will turn the pineapple into a rubbery, soggy mess. Instead, use an air fryer at 400°F for about 3 minutes, or place them under a broiler for 1-2 minutes. This high, dry heat will help re-crystallize the sugar and bring back some of that essential crunch.
Expert Caramelization Troubleshooting
Why did my sugar turn into a watery syrup instead of a crust?
This usually happens for two reasons: the pineapple wasn’t dried thoroughly or the pan wasn’t hot enough. If the surface of the fruit is wet, the sugar dissolves into the water before it can caramelize. Additionally, if the pan temperature is too low, the fruit’s internal juices leak out and create a boiling liquid rather than a searing environment. Always pat the fruit dry and wait for the butter to foam before adding the cubes.
Can I use a cast-iron skillet versus a non-stick pan?
A cast-iron skillet is actually preferred over non-stick for this recipe. Cast iron holds heat much better, which means the temperature won’t drop as significantly when you add the fruit. This consistent high heat is what creates that “candy crust.” Non-stick pans are fine, but they often don’t get the same level of deep, dark caramelization that a heavy-bottomed stainless steel or cast-iron pan can provide.
How do I prevent the cinnamon from tasting bitter?
Cinnamon can turn bitter if it is scorched at very high temperatures for too long. To prevent this, ensure you are using a neutral oil with your butter to keep the temperature stable. Also, make sure you aren’t cooking the bites for more than 5-6 minutes total. The goal is a quick sear. If you find the flavor too strong, you can reduce the cinnamon to a half-teaspoon or add it to the butter at the very end instead of tossing it with the raw fruit.
Is it possible to make these ahead of time for a party?
You can prep the pineapple by peeling and cubing it up to 24 hours in advance. However, you should not toss them in the sugar mixture until the very moment you are ready to cook. If you sugar them early, they will release all their juice and become mushy. For the best texture, sear them right before serving. If you must make them ahead, use the broiler method mentioned in the storage section to crisp them back up before guests arrive.
What is the best way to core a pineapple without losing too much fruit?
Start by slicing off the top and bottom of the pineapple so it stands flat. Slice the skin off in strips, following the curve of the fruit. To save the most flesh, use a small paring knife to “V-cut” out the brown “eyes” rather than slicing deep into the fruit. Finally, cut the pineapple into quarters vertically and slice the woody core off the tip of each wedge. This leaves you with four clean planks of fruit ready to be cubed.
Caramelized Pineapple
Course: DessertCuisine: AmericanDifficulty: easy4
servings10
minutes15
minutes145
kcal25
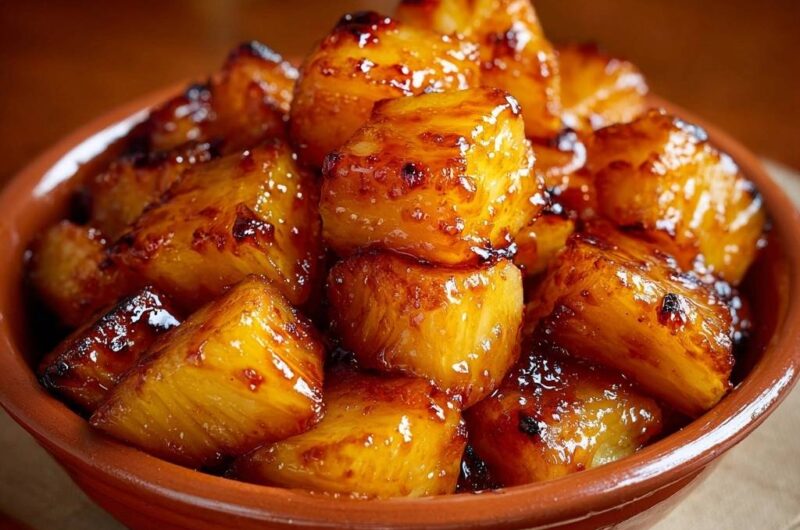
MinutesA quick and delicious way to prepare fresh pineapple by searing it with brown sugar and cinnamon. This method ensures a crispy, caramelized exterior without the fruit becoming mushy or watery.
Ingredients
1 large fresh pineapple, peeled, cored, and cut into 1-inch cubes
1/2 cup packed dark brown sugar
1 teaspoon ground cinnamon
1/4 teaspoon salt
2 tablespoons unsalted butter
1/2 teaspoon vanilla extract
1 tablespoon neutral oil (such as avocado or vegetable oil)
Directions
- Pat the pineapple cubes extremely dry with paper towels. This is the most important step to prevent mushiness. If the surface is wet, the sugar will turn into a watery syrup rather than a crust.
- In a large bowl, whisk together the brown sugar, cinnamon, and salt.
- Add the dried pineapple cubes to the bowl and toss quickly to coat. Do not let them sit in the sugar for more than a minute before cooking, or the sugar will draw out too much internal moisture.
- Heat a large heavy-bottomed skillet or cast-iron pan over medium-high heat. Add the oil and the butter. Once the butter is foamy and just starting to brown, stir in the vanilla extract.
- Place the pineapple cubes in the skillet in a single layer. Ensure there is significant space between each piece. If your pan is small, cook in two batches. Overcrowding the pan drops the temperature and causes the fruit to steam in its own juice.
- Let the cubes sear undisturbed for 2 to 3 minutes until a dark, caramelized golden crust forms on the bottom.
- Use tongs to flip the pieces and cook for another 2 minutes. The high heat will rapidly caramelize the sugar coating and create the charred edges seen in the image before the heat can break down the internal fibers of the fruit.
- Remove from the heat immediately once the edges are slightly charred and the sugar has formed a thick, bubbling glaze. Serve warm.
Notes
- The most important step is to pat the pineapple extremely dry and avoid overcrowding the pan to ensure a proper sear instead of steaming.