Mastering Slow Cooker Pasta e Fagioli Without Mushy Noodles
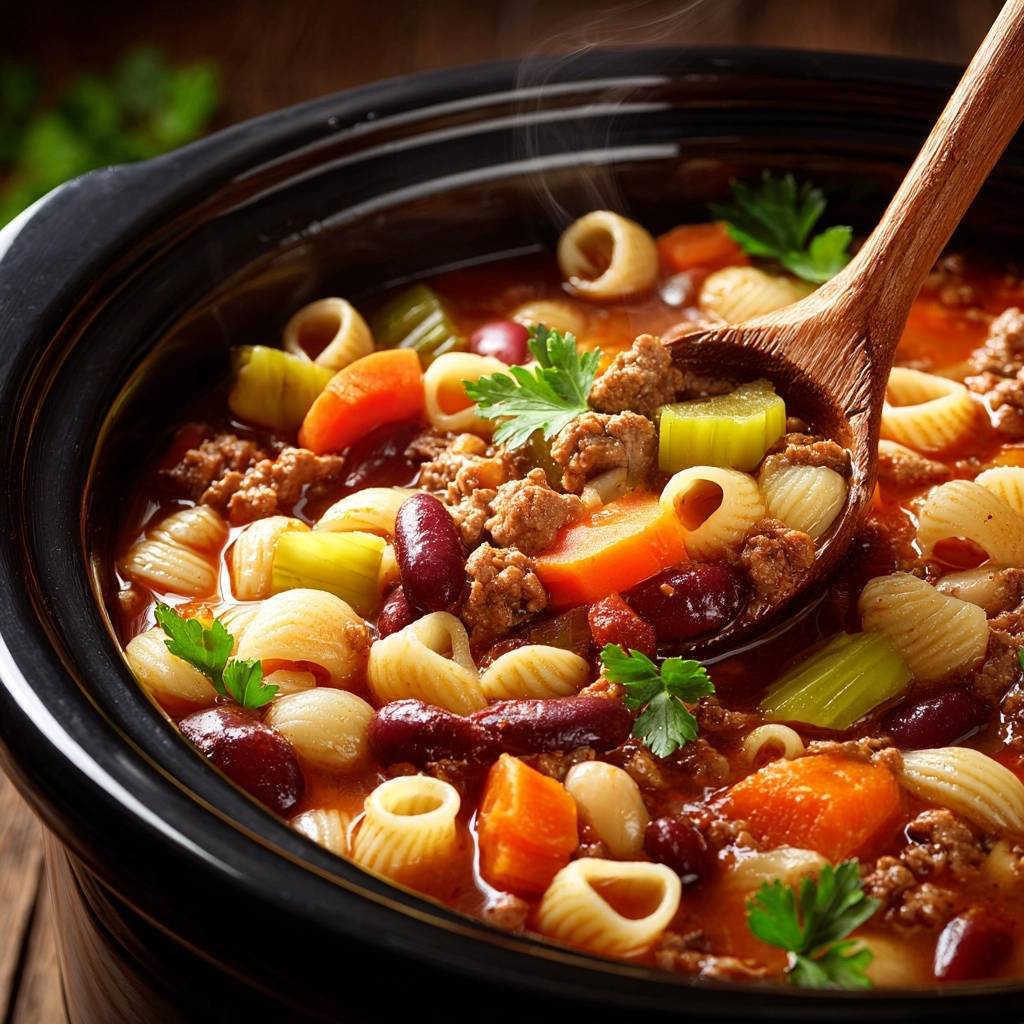
Nothing ruins a cozy dinner faster than a bowl of soup where the pasta has dissolved into a gummy, unidentifiable mess. While the slow cooker is a champion of convenience, it’s often the enemy of the noodle, turning what should be a hearty Italian classic into a thick porridge. This recipe changes that by focusing on the structural integrity of every ingredient, ensuring your meal tastes just as vibrant as a stovetop version.
Pasta e Fagioli, traditionally known as a “peasant dish,” relies on the humble combination of beans and pasta to create a filling, nutrient-dense meal. The magic lies in the contrast between the creamy legumes and the firm bite of the pasta. By mastering a simple timing shift, you can enjoy the deep, slow-simmered flavors of the beef and broth without sacrificing the texture of the shells.
The secret to success is the staggered pasta method. Most recipes tell you to toss everything in at once, but that’s a recipe for disaster. Instead, you’ll wait until the very end of the cooking cycle to add your dry shells. This ensures they cook in the seasoned broth just long enough to reach a perfect al dente state, holding their shape even when leftovers are tucked away for the next day.
The Anatomy of a Hearty Italian Bean Soup
A great Pasta e Fagioli is all about balance. You have the bright acidity from the marinara sauce playing against the deep, savory notes of the beef broth. This creates a complex base that doesn’t feel heavy, despite being incredibly filling. The mirepoix—a mix of carrots, celery, and onion—provides an aromatic foundation that sweetens slightly during the long simmer.
This dish is also a nutritional powerhouse. By combining beef with two types of beans, you’re getting a massive hit of protein and fiber. The vegetables add essential vitamins, while the pasta provides the comforting carbohydrates that make this a complete, one-pot meal. It’s the kind of food that sticks to your ribs and warms you from the inside out.
Selecting the Right Legumes for Structural Integrity
We use a combination of dark red kidney beans and white cannellini beans for a specific reason. Kidney beans are robust and hold their shape beautifully under heat, providing a meaty texture. Cannellini beans, on the other hand, are much creamier and tend to soften slightly more, which helps naturally thicken the broth without needing a flour-based roux.
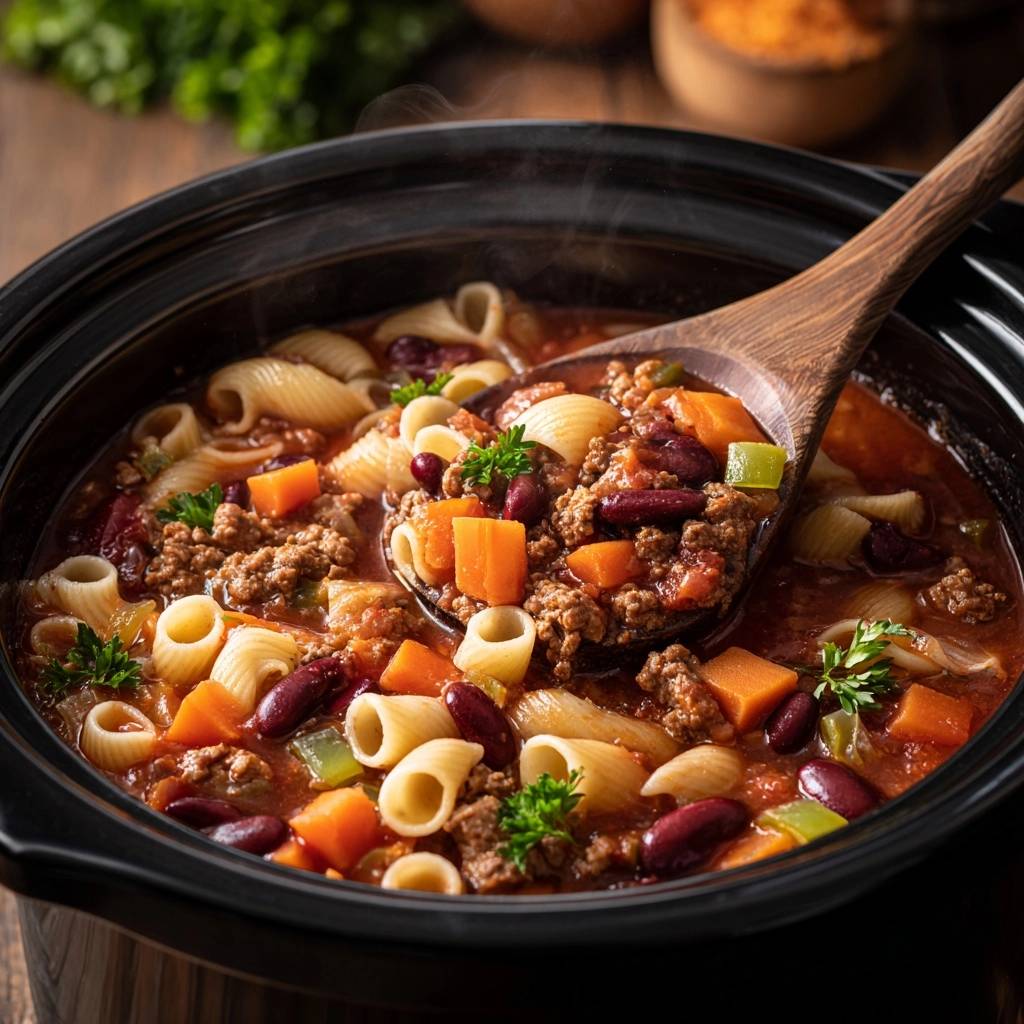
Always make sure to drain and rinse your canned beans thoroughly before adding them to the slow cooker. The liquid inside the can is often loaded with excess sodium and metallic-tasting starches. Rinsing them ensures your soup broth stays clear, vibrant, and tastes exactly like the seasonings you’ve added rather than the can they came in.
Why Lean Ground Beef Outperforms Fattier Blends
When you’re cooking in a slow cooker, there is nowhere for excess fat to go. If you use a high-fat ground beef, you’ll end up with a thick, oily film floating on top of your soup. Choosing a lean blend, like 90/10 or 93/7, keeps the broth clean and allows the flavors of the herbs and garlic to shine through without being masked by grease.
Don’t skip the browning step in the skillet! This is where the Maillard reaction happens, creating those deep, caramelized flavors that a slow cooker simply can’t replicate on its own. Searing the meat before it hits the crockpot adds a layer of umami that makes the entire dish taste like it’s been simmering on a grandmother’s stove all day.
Essential Components for Slow Cooker Pasta e Fagioli
Every ingredient in this pot has a job to do. For instance, we slice the carrots into thick half-moons rather than thin coins. This ensures they maintain a slight “snap” after six hours of cooking instead of turning into mush. The celery is chopped into half-inch pieces to provide a consistent texture in every spoonful alongside the beans.
Using beef broth instead of water is a non-negotiable for depth of flavor. Water would dilute the richness of the beans and beef, whereas broth acts as a flavor multiplier. It ties the earthy beans and the acidic tomatoes together into a cohesive, savory liquid that you’ll want to soak up with a piece of crusty bread.
The Role of Marinara vs. Crushed Tomatoes
While many traditional recipes call for crushed tomatoes, using a high-quality jarred marinara sauce is a fantastic shortcut. Marinara is already simmered with onions, garlic, and herbs, which adds an immediate layer of complexity to your soup. It provides a smoother, more seasoned base than raw canned tomatoes ever could.
Look for a marinara that doesn’t have a lot of added sugar. You want the natural sweetness of the tomatoes to come through, but the overall profile should remain savory. If you prefer a chunkier texture, you can certainly use crushed tomatoes, but you may need to increase your Italian seasoning slightly to compensate for the lack of pre-simmered flavor.
Aromatic Foundations: Garlic and Italian Seasoning
You might be tempted to sauté the garlic with the beef, but adding it directly to the slow cooker is actually better for long-term flavor. The gentle heat of the crockpot allows the garlic to infuse the broth slowly without the risk of burning it in a hot skillet. This keeps the garlic flavor mellow and sweet rather than bitter.
The Italian seasoning is your “all-in-one” flavor booster. It typically contains a blend of oregano, basil, rosemary, and thyme. These dried herbs are perfect for slow cooking because they need time and moisture to release their essential oils. By the time the six hours are up, the herbs will have fully permeated every bean and piece of beef.
Phase One: Searing and Slow Simmering
The first phase of this recipe is all about building the foundation. Once your beef is browned and your vegetables are chopped, the slow cooker takes over the heavy lifting. This “low and slow” approach allows the fibers in the vegetables to break down gently while the beans absorb the seasoned broth, becoming tender and flavorful.
You’ll know the first phase is done when the carrots are tender enough to be pierced with a fork but aren’t falling apart. The onion should be completely translucent, having melted into the background of the sauce. At this point, the kitchen should smell incredible, and you’re ready for the final, most important step: the pasta.
Browning the Beef for Maximum Flavor Extraction
When you’re browning the beef in your skillet, let it sit for a minute or two before breaking it up. You want to see those dark brown, crispy edges. That’s where the concentrated flavor lives! If the meat looks grey, it’s steaming in its own juices rather than searing, so turn up the heat and let it get some color.
After the beef is cooked, drain the fat into a heat-safe container. Even with lean beef, there will be some liquid. Removing this ensures your Pasta e Fagioli has a silky, clean mouthfeel. Once drained, the beef is ready to be the star of your slow cooker show.
Setting the Timer: Low vs. High Heat
If you have the time, always choose the “Low” setting for 6 to 7 hours. This gentler heat prevents the beans from bursting and allows the flavors to marry more deeply. The vegetables retain a better shape, and the beef stays tender rather than becoming stringy.
However, if you’re in a pinch, the “High” setting for 3 to 4 hours works perfectly well. Just keep an eye on the liquid levels, as higher heat can cause more evaporation. Regardless of the setting you choose, the most important part is switching to “High” right before you add the pasta to ensure the liquid is hot enough to cook the shells quickly.
The Staggered Pasta Method for Al Dente Results
This is the secret that separates amateur soup from restaurant-quality Pasta e Fagioli. Starch is a sponge; if you put pasta in at the beginning, it will absorb all the broth and then begin to disintegrate. By waiting until the last 30 minutes, you control exactly how much liquid the pasta takes in.
When you add the dry shells, you’re essentially poaching them in a highly seasoned liquid. This means the pasta itself becomes flavorful, rather than just being a bland filler. The 20 to 25-minute window is the “sweet spot” where the pasta reaches a perfect texture without releasing enough starch to turn the soup into a thick paste.
Why Medium Shells (Conchiglie) are the Superior Choice
Medium shells are the perfect vessel for this soup because of their shape. The hollow interior of the shell acts like a little scoop, catching a bean or a bit of beef in every single bite. This creates a much more satisfying eating experience than flat noodles or small ditalini.
The surface area of the shell also helps it stand up to the heat of the slow cooker. While smaller pasta shapes might overcook in the blink of an eye, the medium shell has enough “body” to stay firm. It provides a satisfying chew that contrasts beautifully with the soft beans and tender vegetables.
The 20-Minute Texture Check
At the 20-minute mark after adding your pasta, take a shell out and taste it. It should be tender on the outside but still have a tiny bit of resistance in the center. This is al dente. Remember, the soup is incredibly hot, and the pasta will continue to cook for a few minutes even after you turn the power off.
If the pasta is still too crunchy, give it another five minutes. If you wait too long, the shells will start to bloat and lose their distinct shape. Precision here is what guarantees that perfect, professional finish. Once you’re happy with the bite, it’s time for the final adjustments.
Adjusting Consistency and Final Seasoning
Pasta is thirsty! You might notice that after the shells cook, the soup looks much thicker than it did before. This is perfectly normal. If you prefer a brothier soup, simply stir in a half-cup of hot beef broth or water until it reaches your desired consistency. Do this gently so you don’t break the beans.
Before serving, give the broth one last taste. The pasta and beans may have absorbed some of the salt, so you might need a final pinch to make the flavors pop. A few cracks of fresh black pepper at this stage add a nice, subtle heat that cuts through the richness of the beef.
The Importance of Fresh Flat-Leaf Parsley
Never underestimate the power of fresh herbs. While dried herbs are great for the long simmer, a handful of fresh flat-leaf parsley added right before serving provides a “pop” of color and a grassy brightness. It wakes up the palate and makes the whole dish feel fresh rather than heavy.
Make sure to use flat-leaf (Italian) parsley rather than the curly variety. Flat-leaf parsley has a much more robust flavor and a better texture for stirring into soups. It adds a hit of chlorophyll that balances the savory, earthy notes of the beans and beef perfectly.
Troubleshooting Common Slow Cooker Soup Issues
If your broth ends up too salty, don’t panic. You can drop a peeled, halved potato into the pot for the last 30 minutes to absorb some of the salt, then discard it before serving. Alternatively, adding a splash of water or more unsalted broth can help dilute the saltiness without losing the flavor profile.
If your vegetables are still crunchy after six hours, your slow cooker might not be reaching the correct temperature, or the lid might not be sealing properly. Ensure the lid is seated correctly and avoid “peeking” during the cook time, as every time you lift the lid, you lose about 20 minutes of accumulated heat.
For a soup that feels a little bland, the fix is usually acidity. A tiny splash of balsamic vinegar or a squeeze of fresh lemon juice can work wonders. The acid acts as a flavor highlighter, making the savory notes of the beef and the earthiness of the beans stand out much more clearly.
Storage and Reheating Without Losing Texture
Storing Pasta e Fagioli can be tricky because the pasta will continue to soak up liquid as it sits in the fridge. By the next day, your soup might look more like a pasta dish. When reheating, always add a splash of broth or water to loosen it back up into a soup consistency.
If you are meal prepping this for the week, consider cooking the pasta separately on the stovetop and adding it to individual bowls as you serve. This keeps the noodles perfectly firm for days. If you’ve already mixed it all together, just be prepared for a softer noodle on day two—it will still taste delicious, just with a different texture.
Freezing Guidelines for Bean-Based Soups
This soup freezes beautifully, but only if you freeze the base without the pasta. The freezing and thawing process will almost certainly turn cooked pasta into mush. To freeze, follow the recipe up until the point where you would add the shells. Let the soup cool completely, then transfer it to freezer-safe bags or containers.
When you’re ready to eat, thaw the soup in the fridge overnight. Bring it to a simmer in a pot on the stove, then add your dry pasta and cook until tender. This way, your “frozen” meal tastes exactly like it was made fresh that day. The beans and beef hold up perfectly to freezing, maintaining their flavor and structure.
Complementary Sides for an Italian Feast
While this soup is a meal on its own, the right side dishes can turn it into a full Italian feast. You want sides that offer a contrast to the soft, warm textures of the soup. Think crunchy, fresh, or acidic to balance out the hearty beans and pasta.
For a perfect pairing, try our Classic Spaghetti with Rich Meat Sauce: Unforgettable Flavor.
Serving this to guests? A simple spread of bread and a bright salad makes the table feel complete. It allows people to customize their meal, using the bread to clean their bowls and the salad to refresh their palates between spoonfuls of the rich, savory broth.
Crusty Breads and Garlic Infusions
A loaf of crusty Ciabatta or a tangy sourdough is the perfect companion for Pasta e Fagioli. You want a bread with a sturdy crust and an airy interior that can soak up the tomato-rich broth without falling apart. Warming the bread in the oven for a few minutes before serving makes it even better.
If you want to go the extra mile, rub a raw clove of garlic over the toasted bread. The heat of the toast will mellow the garlic just enough to create a fragrant, savory side that mirrors the flavors inside the soup pot. It’s a simple touch that feels incredibly gourmet.
Bitter Green Salads for Balance
Because the soup is quite rich and savory, a salad made with bitter greens like arugula or radicchio is a fantastic pairing. The slight bitterness of the leaves cuts through the fat of the beef and the starch of the beans. It keeps the meal from feeling too heavy.
Toss your greens with a very simple lemon vinaigrette—just fresh lemon juice, olive oil, salt, and pepper. The sharp acidity of the lemon acts as a palate cleanser, making every bite of the warm soup taste just as good as the first one. It’s the ultimate balance for a cozy, home-cooked dinner.
How do I prevent the pasta from getting mushy in the slow cooker?
The only way to prevent mushy pasta is to avoid adding it at the beginning of the cooking process. Dry pasta only needs about 20 to 25 minutes in a hot slow cooker to reach the perfect al dente texture. By switching the cooker to “High” and adding the shells at the very end, you ensure they cook through without breaking down into the broth.
Can I use different types of beans for this soup?
Yes, you can substitute the beans based on what you have in your pantry. Great Northern beans or Navy beans work well in place of Cannellini beans. If you don’t have kidney beans, pinto beans are a sturdy alternative. The key is to use at least one “creamy” bean and one “firm” bean to maintain the traditional texture of the dish.
Is it possible to make this recipe on the stovetop instead?
Absolutely. To make this on the stove, brown the beef in a large Dutch oven, add the vegetables and aromatics, then pour in the broth, beans, and sauce. Simmer on low for about 45 to 60 minutes until the carrots are tender. Add the pasta during the last 10 to 12 minutes of simmering, following the package directions for al dente results.
Why is my soup so thick the next day?
Pasta contains starch that continues to release and absorb liquid even after the heat is turned off. If you have leftovers, the shells will naturally soak up the broth, turning the soup into a thick stew. To fix this, simply add a splash of beef broth or water when reheating to bring it back to your preferred consistency.
Can I use a different pasta shape?
While medium shells are ideal for “trapping” the beans and beef, you can use other small shapes like ditalini, elbow macaroni, or even broken pieces of spaghetti. Just keep in mind that smaller shapes like ditalini will cook faster, so start checking for doneness at the 15-minute mark to ensure they don’t overcook.
What is the best way to reheat leftovers?
The best way to reheat this soup is on the stovetop over medium-low heat. This allows you to monitor the texture of the pasta and add extra liquid as needed. Avoid using the microwave for long periods, as it can heat unevenly and cause the pasta to become rubbery. If you must use a microwave, heat in short 30-second bursts and stir in between.
Pasta e Fagioli
Course: Main CourseCuisine: Italian and AmericanDifficulty: medium6
servings15
minutes6
hours385
kcal375
MinutesThis protein and fiber rich soup features lean ground beef, two types of beans, and fresh vegetables. The recipe uses a specific pasta-staggering technique to maintain the perfect texture of the shells in a rich tomato and beef broth.
Ingredients
1 pound lean ground beef
2 cans (15 oz each) kidney beans, drained and rinsed
1 can (15 oz) white cannellini beans, drained and rinsed
3 large carrots, sliced into thick half-moons
3 stalks celery, chopped into 1/2-inch pieces
1 small onion, finely diced
3 cloves garlic, minced
1 jar (24 oz) marinara sauce or crushed tomatoes
4 cups beef broth
1 tablespoon Italian seasoning
1 teaspoon salt
1/2 teaspoon black pepper
1.5 cups dry medium pasta shells (conchiglie)
Fresh flat-leaf parsley for garnish
Directions
- In a large skillet over medium-high heat, brown the ground beef until fully cooked and slightly caramelized. Drain any excess fat thoroughly to ensure your soup broth stays clear and flavorful.
- Transfer the cooked beef to your slow cooker. Add the kidney beans, white beans, carrots, celery, onion, garlic, marinara sauce, beef broth, and seasonings. Stir well to combine.
- Cover and cook on low for 6 to 7 hours or on high for 3 to 4 hours, until the carrots and celery are tender.
- To solve the mushy pasta problem, do not add the dry shells at the beginning. Instead, wait until 30 minutes before you are ready to serve. Turn the slow cooker to the high setting.
- Stir in the dry pasta shells. Ensure they are fully submerged in the liquid. Cover and cook for exactly 20 to 25 minutes. Check the pasta at the 20-minute mark; it should be tender but still have a firm “bite” (al dente). This prevents the starch from breaking down and clouding the broth.
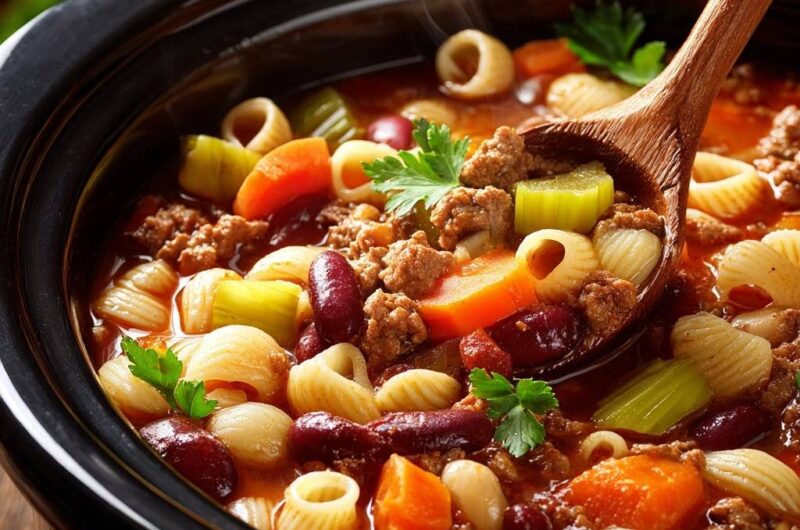
- Turn off the heat immediately once the pasta is done. If the soup is too thick, stir in a splash of hot water or extra broth to reach the consistency shown in the image.
- Garnish generously with fresh parsley sprigs and serve right away to maintain the perfect texture.
Notes
- To prevent mushy pasta, add the dry shells only during the last 20 to 25 minutes of cooking on the high setting. If the soup becomes too thick, thin it with a splash of hot water or extra beef broth before serving.