Mastering the Cinnamon Streusel Coffee Cake: The Anti-Soggy Method
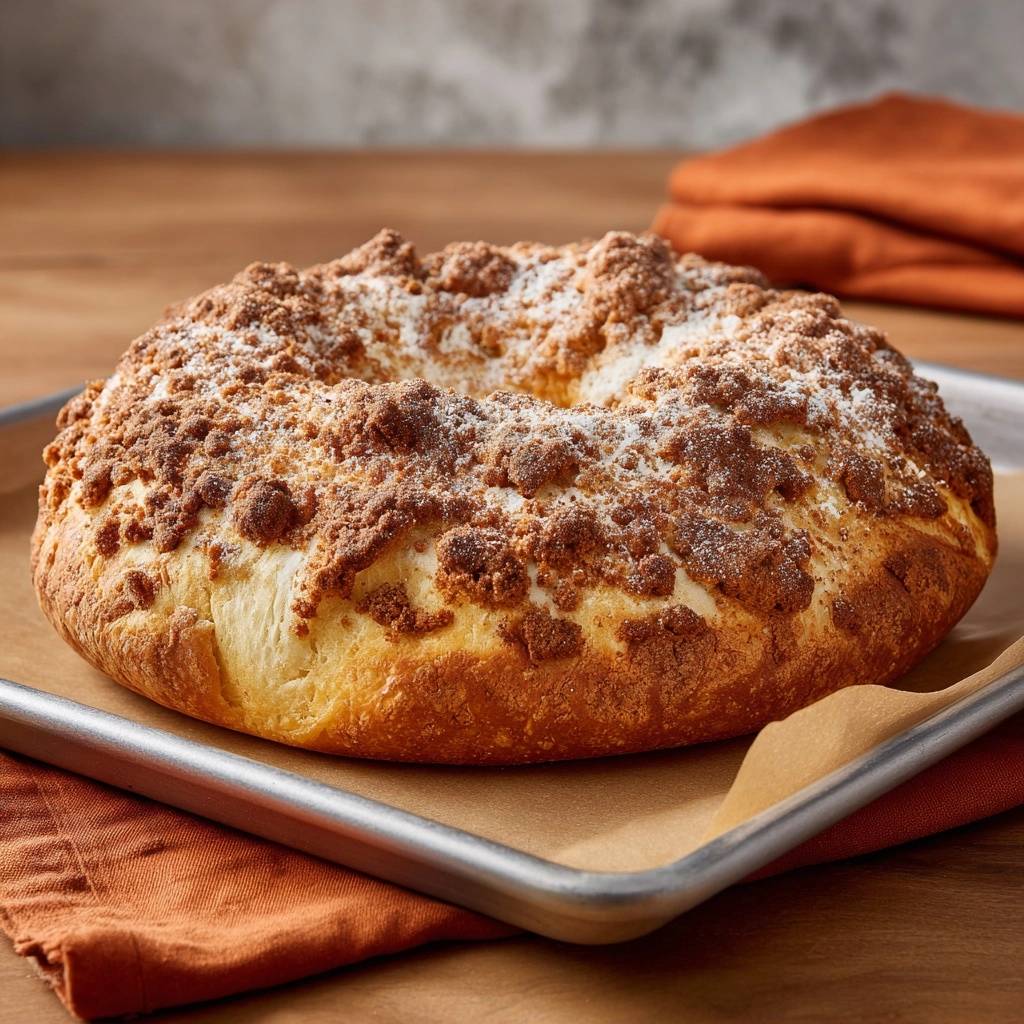
Imagine pulling a golden, cinnamon-scented masterpiece from the oven, only to cut into it and find a heavy, gummy layer of unbaked dough hiding beneath the crumbs. It’s a heartbreak many bakers know too well. Most coffee cakes suffer from “moisture migration,” where the sugar in the topping melts into the batter, creating a wet, dense interface that never quite sets.
The secret to avoiding this culinary pitfall isn’t just in the ingredients, but in the physics of the bake. By moving away from deep cake pans and utilizing a unique mounding technique on a flat sheet, we change how heat hits the batter. This ensures the center reaches the perfect temperature at the exact same moment the streusel reaches its peak crunch.
I’ve found that the real trick to a professional-grade crumb is the temperature of your topping. You must keep your streusel in the refrigerator until the very second it touches the batter. This prevents the butter from softening prematurely, which is the primary reason toppings sink and create that dreaded soggy bottom.
The Anatomy of a Perfect Cinnamon Streusel Coffee Cake
A truly great coffee cake relies on a structural contrast between a soft, velvety crumb and a jagged, mountainous topping. In this recipe, we ditch the traditional deep pan for a rimmed baking sheet. This increases the surface area, allowing the oven’s heat to penetrate the cake from all sides simultaneously rather than struggling to reach the center of a deep tin.
When you mound the batter into a thick circle, you create a shape that encourages the heat to wrap around the cake. This engineering choice prevents the center from staying raw while the edges overcook. You’ll notice the texture is significantly airier because the steam can escape more efficiently through the mounded sides.
The sensory experience is unmatched. You get a high ratio of crunchy, buttery streusel in every single bite. Instead of a flat, uniform square, you’re serving thick, rustic wedges that look like they came straight from a high-end artisan bakery.
Essential Components for the Cake Base
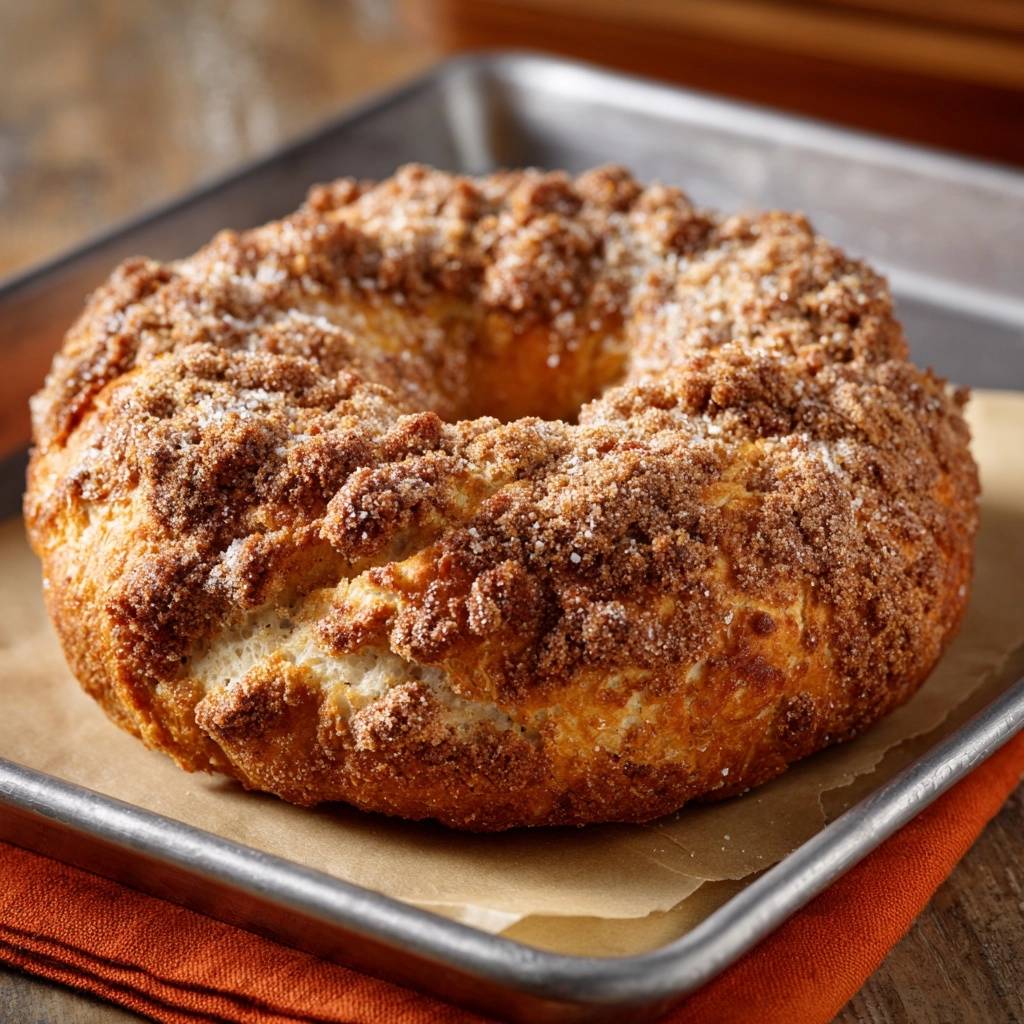
The foundation of this cake requires a specific balance of proteins and leavening agents. We use a full tablespoon of baking powder because the streusel topping is heavy. Without that extra boost of carbon dioxide, the weight of the brown sugar and butter would collapse the air bubbles, leading to a dense, leaden texture.
All-purpose flour is the best choice here because it provides enough gluten to support the “mound” shape without making the cake tough. I always recommend using whole milk for the liquid component. The fat in whole milk coats the flour proteins, ensuring the crumb remains tender and moist without becoming greasy.
Don’t skimp on the salt, either. It might seem like a small amount, but salt is what wakes up the vanilla and cinnamon flavors. Without it, the cake will taste flat and sugary rather than complex and rich.
Temperature Matters: Softened Butter vs. Cold Milk
Emulsification is the key to a smooth, professional batter. When you beat softened butter with sugar, you’re creating tiny air pockets. However, if you pour ice-cold milk or drop cold eggs into that creamed butter, the fat will seize up and curdle. This results in an uneven bake and a grainy texture.
To prevent this, try to pull your milk and eggs out of the fridge about 30 minutes before you start. If you forget and the batter looks “broken” or curdled, don’t panic. Simply continue adding your dry ingredients gradually; the flour will help pull the emulsion back together and smooth out the texture.
The Science of the “Anti-Soggy” Streusel Topping
The streusel is where most recipes go wrong. We use the “Cold Butter Principle” to ensure success. By cutting cold, cubed butter into the sugar and flour, you create tiny beads of fat coated in dry ingredients. In the oven, these beads melt slowly, releasing steam that puffs up the topping while the flour and sugar bake into a crisp shell.
Brown sugar is hygroscopic, meaning it loves to pull moisture from the air and the batter. If the topping is warm when it goes into the oven, it immediately starts absorbing moisture from the cake base. By keeping the streusel chilled, you create a thermal barrier that protects the cake’s surface during the initial stages of baking.
If you enjoy that crunchy streusel topping, you will love the tender crumb and citrus glaze on this glazed blueberry lemon bundt cake.
This temperature control is the difference between a crisp crumble and a melted sugar glaze. You want those distinct, rocky boulders of cinnamon goodness, not a flat layer of brown syrup that has soaked into the top inch of your cake.
Achieving the Pea-Sized Crumb Texture
When mixing your topping, less is definitely more. Use a pastry cutter or a fork to work the butter into the dry ingredients until you see large, pea-sized clumps. If you use your hands, the warmth from your palms will melt the butter, turning your beautiful streusel into a greasy paste.
Stop mixing the moment the flour is mostly incorporated. Those “chunky boulders” are what provide the satisfying crunch. Interestingly, the cinnamon acts as more than just a flavor; it provides a bit of structural stability to the sugar, helping the crumbs hold their shape under the heat of the oven.
Step-by-Step: Mixing for Maximum Aeration
When you begin mixing the dry ingredients into the wet, do it gradually. Adding the flour mixture in two or three stages prevents the batter from becoming lumpy. You’re looking for a visual cue of “smooth and thick”—it should be much heavier than a standard pancake batter but more fluid than a cookie dough.
Be extremely careful not to over-mix once the flour is added. Over-mixing develops the gluten in the flour, which is great for chewy bread but terrible for a delicate coffee cake. Stop the mixer as soon as you see no more streaks of white flour. This ensures the cake stays light and melts in your mouth.
The batter should have a slight sheen to it. This indicates that the butter and milk have fully emulsified with the sugar. If the batter looks dull or overly stiff, you may have measured your flour too heavily. Always spoon flour into your measuring cup rather than scooping it directly from the bag.
The Mounding Technique: Engineering Heat Distribution
Using a rimmed baking sheet is a game-changer. When you transfer the batter, don’t spread it thin like a sheet cake. Instead, pile it into the center and gently shape it into an 8-inch circular mound. This thickness is vital for achieving that classic coffee cake height without the drawbacks of a deep pan.
The most important step is creating the “well.” Use the back of a large spoon to make a slight indentation in the center of your mound. This isn’t just for looks; it compensates for the way heat travels. Since the edges of the cake cook faster, the center often stays raw. The well ensures the center is slightly thinner, allowing it to finish baking at the same time as the perimeter.
This indentation also acts as a “cradle” for your streusel. It prevents the heavy crumbs from sliding off the sides of the cake as it rises in the oven. It’s a simple engineering trick that guarantees a perfectly even bake every single time.
Applying the Topping Without Compromising the Rise
Once your mound is shaped, take your chilled streusel out of the fridge. Sprinkle it heavily over the top and the sides. Use a light touch here. If you press the crumbs into the batter, you are essentially forcing moisture into the topping, which leads to that gummy layer we are trying to avoid.
Let the crumbs sit lightly on the surface. As the cake rises, it will naturally “grab” the streusel. Covering the sides of the mound is also a pro tip; it creates a protective, crunchy crust all the way around the cake, which helps maintain the structural integrity of the wedge when you slice it.
Think of the streusel as a blanket. It should be thick and even, but it shouldn’t be packed down. This allows the heat to circulate between the crumbs, crisping them up from all angles while the cake underneath stays fluffy.
If you love the nutty richness of the streusel topping, you will also enjoy the deep cocoa flavor in this flourless dark chocolate torte.
Precision Baking and the Toothpick Test
Oven calibration is everything. Set your oven to 350°F and make sure it is fully preheated before the cake goes in. This temperature is the “Goldilocks” zone—hot enough to activate the baking powder and crisp the butter, but cool enough to bake the thick center without burning the sugar on top.
The toothpick test is your best friend, but you have to do it right. Insert the toothpick into the thickest part of the mound. If it comes out with “wet crumbs” or any liquid batter, it needs more time. You are looking for a completely clean toothpick or a few dry, cakey crumbs.
If the top is browning too quickly but the center isn’t done, don’t lower the temperature. Instead, tent a piece of foil loosely over the cake. This reflects some of the direct heat while allowing the internal temperature to continue rising. Five extra minutes can be the difference between a success and a soggy failure.
The Critical 15-Minute Resting Period
The hardest part of this recipe is waiting. When the cake comes out of the oven, the internal structure is still setting. There is a lot of steam trapped inside the crumb. If you cut into it immediately, that steam escapes instantly, causing the delicate air pockets to collapse and turn gummy.
Letting the cake rest on the baking sheet for at least 15 minutes allows for “carry-over cooking.” The residual heat finishes the very center of the cake while the steam redistributes, ensuring a moist but firm texture. This resting period is the final step in the anti-soggy protocol.
Once the cake has settled, the streusel will also have time to firm up. A hot streusel is soft and fragile, but a slightly cooled streusel is crunchy and satisfying. Patience here pays off in the form of a perfect, clean slice.
Troubleshooting Common Coffee Cake Failures
If your streusel slid off the sides during the bake, it usually means the “well” in the center wasn’t deep enough or the batter was too thin. Make sure you measure your flour accurately to maintain that thick, mounded consistency. Next time, exaggerate the indentation in the center a bit more.
A dry cake is often the result of over-baking or over-mixing. If you find the crumb is more like bread than cake, try mixing the batter by hand next time to ensure you don’t overwork the gluten. Also, check your oven temperature with an external thermometer; many ovens run 25 degrees hotter than the dial suggests.
If the bottom of your cake is wet while the top is perfect, your oven rack might be too high. Heat rises, and if the cake is too close to the top element, the streusel will bake long before the bottom of the mound. Move your rack to the center or lower-third position for a more balanced heat distribution.
Finally, if the cinnamon flavor feels muted, check the age of your spices. Cinnamon loses its aromatic oils quickly. Using a fresh jar of high-quality cinnamon will make a world of difference in the final aroma and taste of your coffee cake.
Flavor Variations and Ingredient Substitutions
While this recipe is perfected for the classic cinnamon experience, you can certainly tweak it. If you want a bit more tang, you can substitute the whole milk with an equal amount of Greek yogurt or sour cream. This will result in an even more tender, tight crumb, though you may need to bake it for an extra 5 minutes due to the added density.
For those who love texture, adding a half-cup of toasted pecans or walnuts to the streusel topping is a fantastic move. The nuts provide a savory contrast to the sweet brown sugar. Just be sure to chop them finely so they don’t make the topping too heavy and cause it to sink.
What to Serve with Your Coffee Cake
This cinnamon streusel coffee cake works well as a brunch centerpiece, but you might want a few extras on the table to round out the spread.
- Something creamy and cheesy balances the sweet spice: try this Classic Baked Mac & Cheese for a rich, sliceable side that holds its own without turning mushy.
- If you’re after more soft, yeasted treats, these Sweet Glazed Buns share a similar tender crumb and make a great option for guests who want another handheld pastry.
If you need to go gluten-free, a high-quality 1-to-1 baking flour blend usually works well here. However, because gluten-free flours absorb moisture differently, keep a close eye on the “mound” shape. If it starts to spread too much on the sheet, add an extra tablespoon of the flour blend to stiffen the batter.
Storage, Freezing, and Reheating Protocols
To keep that streusel topping crisp, never wrap a coffee cake in plastic wrap while it’s still warm. The plastic traps steam, which will turn your crunchy topping into a soft, sticky mess. Once completely cool, store the cake in an airtight container at room temperature for up to three days.
This cake freezes beautifully. I recommend slicing it into wedges first. Wrap each wedge tightly in parchment paper and then place them in a freezer-safe bag. They will stay fresh for up to two months. This is perfect for those mornings when you want a gourmet treat without the prep work.
When you’re ready to eat, avoid the microwave if possible. Microwaves tend to make the cake rubbery and the streusel soft. Instead, pop a slice into a toaster oven or a regular oven at 300°F for about 5 to 8 minutes. This restores the “just-baked” crunch to the topping and warms the center perfectly.
Expert Tips for Professional Results
For the absolute lightest crumb, take the time to sift your flour and baking powder together. This breaks up any clumps and aerates the dry ingredients, making it easier to incorporate them into the wet ingredients without over-mixing. It’s a small step that makes a huge difference in the final mouthfeel.
I highly recommend using a heavy-gauge baking sheet. Thin, cheap pans warp in the oven and conduct heat unevenly, which can lead to burnt bottoms. A heavy pan provides a steady, consistent heat source that helps the mound rise evenly and prevents the sugar from scorching.
Try the “Double Dusting” method for a beautiful presentation. Dust the cake with powdered sugar about 10 minutes after it comes out of the oven. Some of it will melt into the warm streusel, creating a sweet glaze. Then, right before serving, give it a second, light dusting for that snowy, picture-perfect finish.
Frequently Asked Questions
Can I bake this in a standard 9×9 pan?
You can, but you must be careful. A 9×9 pan is much deeper than a baking sheet, which means the heat will take longer to reach the center. You will likely need to increase the bake time by 10 to 15 minutes. There is a higher risk of the center being gummy, so the toothpick test becomes even more critical. If you use a pan, do not create the “mound” shape; spread the batter evenly to the edges.
Why did my streusel melt into the cake?
This usually happens for two reasons: the butter in the streusel was too soft, or you pressed the topping into the batter. Always use cold, cubed butter and keep the prepared streusel in the fridge until the very last second. When applying it, sprinkle it gently. If the butter is cold, it will form a crust before it has a chance to melt and sink into the cake base.
How do I prevent the bottom from browning too quickly?
If your oven runs hot from the bottom, try “double-panning.” Place your baking sheet on top of a second, identical baking sheet. This creates a thin layer of air between the two pans, which acts as an insulator and slows down the heat transfer to the bottom of the cake. Alternatively, move your oven rack to the upper third of the oven.
Can I add fresh fruit like blueberries to this recipe?
Adding fresh fruit introduces extra moisture, which can fight against our “anti-soggy” goal. If you want to add berries, toss them in a tablespoon of flour first to absorb excess juice and prevent them from sinking. Use no more than one cup of fruit, and be prepared for the cake to need an extra 5 minutes in the oven to account for the added moisture.
What is the best way to serve this for a crowd?
Because of the mounded shape, this cake looks stunning when sliced into thick, triangular wedges, much like a scone or a round loaf of bread. It is quite rich, so it pairs perfectly with unsweetened black coffee or a strong tea. The bitterness of the drink balances the sweet, buttery cinnamon topping beautifully. Serve it slightly warm for the best texture.
Coffee Cake
Course: Dessert and BreakfastCuisine: AmericanDifficulty: medium10
servings20
minutes45
minutes385
kcal65
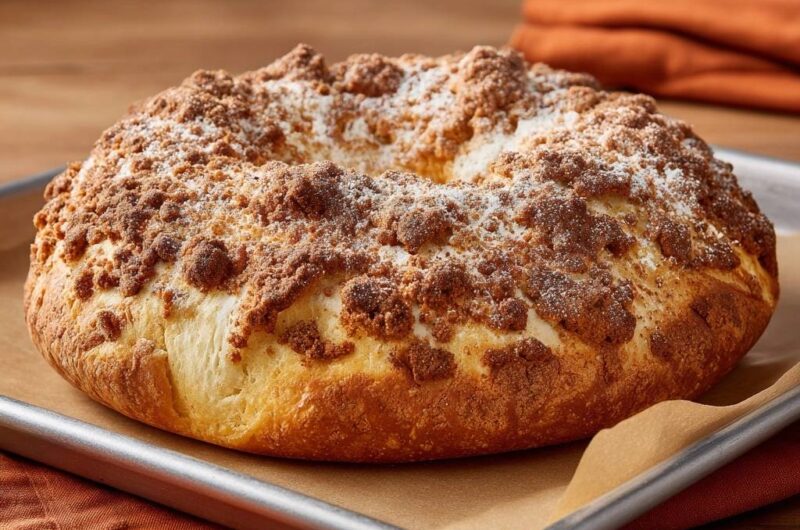
MinutesThis coffee cake solves the common problem of soggy bottoms and sinking streusel. By using cold butter for the topping and a specific mounding technique, you achieve a light, airy cake with a perfectly crisp cinnamon topping.
Ingredients
For the Cake:
2 cups all-purpose flour
1 cup granulated sugar
1 tablespoon baking powder
1/2 teaspoon salt
1/2 cup unsalted butter, softened
1 cup whole milk
2 large eggs
1 teaspoon vanilla extract
For the Streusel Topping:
1 cup brown sugar, packed
1/2 cup all-purpose flour
1 tablespoon ground cinnamon
1/2 cup cold unsalted butter, cubed
Powdered sugar for dusting
Directions
- Preheat your oven to 350 degrees F. Line a large rimmed baking sheet with parchment paper.
- In a large bowl, whisk together the flour, sugar, baking powder, and salt.
- In a separate bowl, beat the softened butter, milk, eggs, and vanilla until combined. Gradually add the dry ingredients to the wet ingredients. Beat on medium speed until the batter is smooth and thick.
- To prevent the soggy bottom, the streusel must be prepared correctly. In a separate bowl, combine the brown sugar, flour, and cinnamon. Use a fork or pastry cutter to work in the cold cubed butter until the mixture forms large, pea-sized clumps. Keep this mixture in the refrigerator until the exact moment you are ready to top the cake. Using cold butter prevents the topping from melting into the batter too quickly.
- Transfer the batter onto the center of the prepared baking sheet. Use a spatula to spread it into a thick, 8-inch circular mound. Use the back of a spoon to create a slight indentation (a “well”) in the center of the mound to encourage even rising and prevent the streusel from sliding off.
- Sprinkle the cold streusel heavily over the top and sides of the mound. The key to the perfect texture is not to press the crumbs into the batter; let them sit lightly on the surface.
- Bake for 40 to 45 minutes. To ensure it is not soggy, insert a toothpick into the center; it must come out completely clean with no wet crumbs.
- Let the cake cool on the baking sheet for at least 15 minutes. This resting period allows the internal steam to settle, which is the final step in preventing a gummy texture.
- Dust with powdered sugar before serving.
Notes
- Keep the streusel mixture in the refrigerator until the exact moment of topping to prevent it from melting into the batter. Allow the cake to rest for 15 minutes after baking to let internal steam settle.