Mastering Strawberry Cream Shortcake Cookies: The Anti-Soggy Method
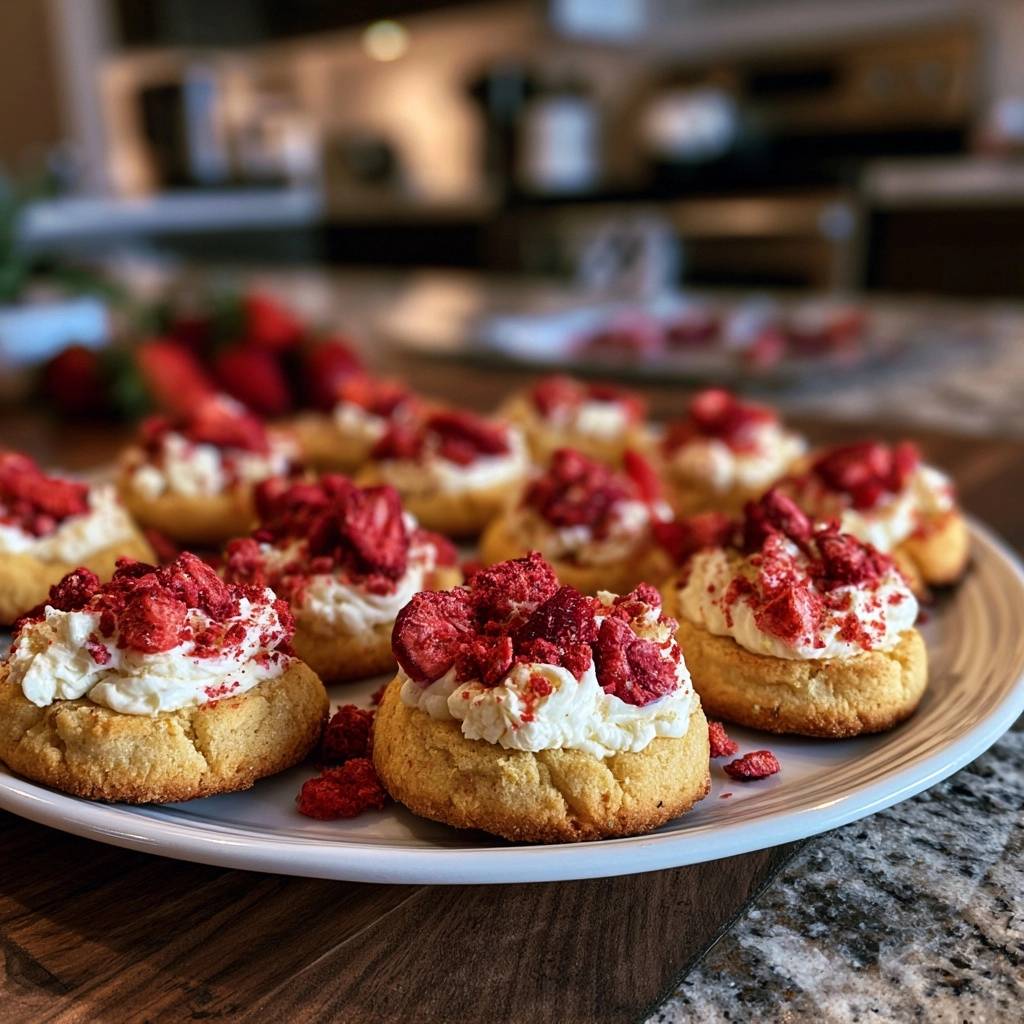
Imagine biting into a cookie that captures the exact essence of a summer strawberry shortcake, but without the inevitable mushy collapse. Most fruit-based cookies start out beautiful and end up as a weeping, soggy mess within an hour of assembly. It’s a common frustration that turns a labor of love into a kitchen disappointment.
The secret to a perfect Strawberry Cream Shortcake Cookie lies in controlling moisture before it ever touches the dough. By moving away from watery fresh berries and embracing a “fat-barrier” technique, you can create a cookie that stays crisp and sturdy. This isn’t just about mixing ingredients; it’s about engineering a dessert that holds its structural integrity from the first bite to the last.
I’ve found that the real game-changer is the white chocolate seal. By painting a thin layer of melted white chocolate inside the cookie well, you create a waterproof shield. This prevents the moisture in the cream from migrating into the starch of the cookie, ensuring that signature shortcake crunch remains intact even after hours of sitting out.
The Science of Moisture Control in Baking
Baking is essentially a battle against unwanted water migration. When you place a high-moisture topping, like whipped cream or fresh fruit, onto a dry baked good, the sugar and flour in the cookie act like a sponge. They naturally pull water from the topping into the crumb, which dissolves the delicate structure you worked so hard to build.
Traditional fresh strawberries are roughly 90% water. As soon as they are sliced and hit sugar, they begin to macerate, releasing juices that immediately soak into the cookie base. This liquid breaks down the gluten bonds and turns the crisp edges into a soft, bread-like texture that lacks the satisfying snap of a true shortcake cookie.
Why Freeze-Dried Fruit Outperforms Fresh Berries
Freeze-dried strawberries are the ultimate secret weapon for intense flavor without the structural damage. Unlike dehydrated fruit, which can be chewy and tough, freeze-drying removes moisture while keeping the cellular structure of the berry intact. This results in a light, airy crunch and a concentrated punch of acidity that cuts through the rich cream.
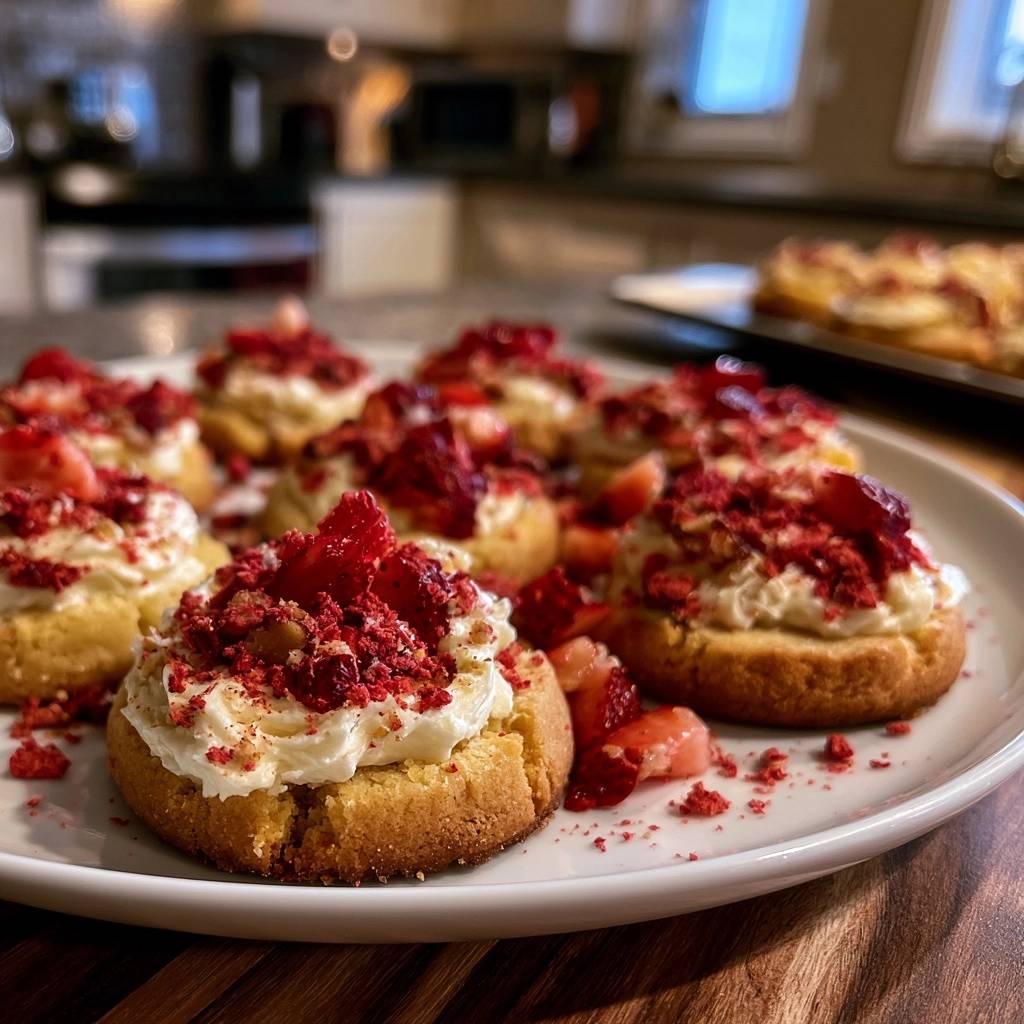
Because the water has been removed, these berries won’t bleed red juice into your white cream topping. You get all the vibrant color and tartness of a peak-season strawberry without the liquid that usually dissolves the cookie’s crumb. It’s the most effective way to ensure your cookies look as good as they taste for hours on end.
The Role of the Fat-Barrier Technique
The “Fat-Barrier” is a professional pastry chef trick used to protect tarts and cookies from getting soggy. Lipids, such as the fats found in butter and white chocolate, are naturally hydrophobic, meaning they repel water. By using a high butter-to-sugar ratio in the dough, we are already building a moisture-resistant foundation.
Adding a thin glaze of melted white chocolate to the cooled cookie well takes this a step further. Once the chocolate hardens, it forms a physical wall. The water molecules in the cream cheese topping simply cannot penetrate the chocolate layer to reach the flour, keeping the cookie base perfectly dry and crisp.
Essential Components for Strawberry Cream Shortcake Cookies
Success starts with the quality of your pantry staples. All-purpose flour provides the necessary protein content to give the cookie enough “bone” to hold the heavy topping. Using unsalted butter is also vital because it allows you to control the exact sodium level, ensuring the salt enhances the strawberry flavor rather than overpowering it.
Don’t skip the vanilla extract, as it acts as a bridge between the buttery dough and the tangy cream. If you want to experiment, you can swap the vanilla for almond extract to give the cookies a sophisticated, nutty undertone. Just remember that a little goes a long way with almond flavoring.
Selecting High-Quality Cream Cheese and Heavy Cream
When it comes to the topping, fat is your friend. You want to look for heavy whipping cream with at least 36% milkfat. This higher fat content creates a more stable foam with smaller air bubbles, which is essential for a topping that won’t deflate or “weep” liquid over time.
For the cream cheese, always use the full-fat brick variety rather than the spreadable kind in a tub. The tub versions often contain more water and air, which will make your stabilized cream too soft to hold a beautiful piped shape. The brick style provides the structural “glue” that keeps the whipped cream stiff and pipeable.
The Importance of Room Temperature Ingredients
Emulsification is the process of combining fat and water into a smooth, uniform mixture. If you try to beat cold eggs into softened butter, the fat will seize up and the mixture will look curdled. This broken emulsion leads to cookies that spread too much in the oven and have an oily, dense texture.
Take your butter, egg, and cream cheese out of the fridge at least an hour before you start. When the ingredients are at the same temperature, they bond together perfectly. This creates a light, aerated dough that bakes up with a tender, shortcake-style crumb rather than a heavy, greasy one.
Step-by-Step: Engineering the Perfect Cookie Base
Start by creaming your butter and sugar until the mixture is very pale and fluffy. You’re looking for a significant color change—it should go from yellow to a soft ivory. This process incorporates tiny air pockets that expand in the oven, giving the cookie its light, melt-in-your-mouth quality.
When you scoop the dough, make sure each ball is uniform so they bake evenly. Use the back of a measuring spoon to press a deep well into the center. Don’t be afraid to go deep; you want a substantial “bowl” to hold a generous amount of cream, but leave enough dough at the bottom to maintain structural integrity.
Baking for Structural Stability
Keep a close eye on the oven during those final minutes. You are looking for the edges to turn a beautiful golden brown while the center remains set but pale. This Maillard reaction—the browning of the sugars and proteins—provides the toasted flavor and the strength needed to support the toppings.
A slightly more “done” cookie is actually better for this specific recipe. A soft, underbaked cookie will collapse under the weight of the cream cheese mixture. Aim for a firm edge that gives a distinct “snap” when you bite into it, providing a wonderful textural contrast to the soft cream.
The Post-Bake Indentation Refinement
Cookies naturally puff up as the baking powder reacts with heat. As soon as you pull the tray out of the oven, the dough is still soft and pliable. Use a small spoon to gently re-press the center indentations while the cookies are hot.
This quick step maximizes your filling capacity without cracking the walls of the cookie. If you wait until they cool, the structure will be too brittle to move. Doing it immediately ensures a clean, professional-looking well that is ready to be sealed with chocolate and filled with cream.
Applying the Waterproof White Chocolate Glaze
Once the cookies are completely cold, melt your white chocolate chips in 20-second bursts in the microwave, stirring in between. You want it smooth and fluid. If the chocolate is too thick, a tiny drop of coconut oil can help thin it out to a paintable consistency.
Use a small pastry brush or the back of a spoon to coat the inside of the well. You don’t need a thick layer; a thin, even coating is enough to create that hydrophobic barrier. Let the chocolate set completely at room temperature or pop them in the fridge for five minutes before adding the cream.
Stabilizing the Cream Cheese Whipped Topping
The key to a topping that lasts is the order of operations. Beat the softened cream cheese and powdered sugar together first until there are absolutely no lumps. If you add the liquid cream too early, you’ll end up with “cheesy” bits that clog your piping tip.
Slowly pour in the heavy cream while the mixer is running on medium-low. Once combined, turn the speed up and whip until stiff peaks form. You’ll know it’s ready when the cream holds its shape firmly on the whisk. Be careful not to over-whip, or the fat will separate and turn into strawberry-scented butter!
Assembly: Achieving the Professional Aesthetic
To get that bakery-style look, use a piping bag fitted with a large star tip, like a 1M. Start in the center of the well and spiral outward, creating a “rose” effect. This adds height and makes the cookies look much more impressive than a simple spooned-on dollop.
Wait until the very last second to sprinkle on your chopped freeze-dried strawberries. While they are moisture-resistant, they will eventually soften if they sit in the cream for several hours. Adding them just before serving ensures they provide a bright, crunchy pop of flavor that surprises your guests.
Troubleshooting Common Shortcake Cookie Issues
If your cookies spread into flat pancakes, your butter was likely too warm or you over-creamed the mixture. Try chilling the dough balls for 15 minutes before baking next time. If the cream filling feels runny, it usually means the cream cheese wasn’t beaten enough or the heavy cream wasn’t cold when you started whipping.
A tough, bready cookie is usually the result of over-mixing the flour. Once you add the dry ingredients, mix only until the white streaks disappear. Finally, if you lose that signature crunch, it’s likely due to humidity. Store the cookies in a cool, dry place rather than a plastic bag, which can trap moisture and soften the crust.
Make-Ahead Strategies and Storage Logistics
You can easily prep the components of this recipe in advance to save time. The cookie bases can be baked and stored in an airtight container at room temperature for up to two days. You can even apply the white chocolate seal a day early to get ahead of the game.
The stabilized cream topping will hold its shape in the fridge for about 24 hours. However, for the absolute best experience, I recommend assembling the cookies “a la minute” or just an hour before your event. This ensures the textures are at their peak—crisp cookie, silky cream, and crunchy berries.
Flavor Variations and Ingredient Swaps
Once you master the base technique, the variations are endless. Try a “Lemon-Berry” version by adding fresh lemon zest to the cookie dough and a teaspoon of lemon curd to the cream cheese mixture. The citrus brightness pairs beautifully with the sweet strawberries.
You can also swap the strawberries for freeze-dried raspberries or blueberries. If you want a richer profile, use a dark chocolate “fat-barrier” instead of white chocolate. Just remember to stick with freeze-dried fruits to maintain that low-moisture principle that makes this recipe so successful.
Equipment: Tools for Precision Baking
Using parchment paper is non-negotiable here. It prevents the bottoms from over-browning and ensures the cookies slide off without breaking. While silicone mats work, parchment often results in a crispier bottom, which is exactly what we want for a shortcake-style cookie.
A heavy-duty hand mixer or stand mixer is essential for getting the cream cheese topping to the correct “stiff peak” stage. Trying to do this by hand is difficult and often results under-whipped, runny cream. Lastly, a standard cookie scoop will help you keep the portions identical, ensuring every cookie bakes at the same rate.
Frequently Asked Questions
Can I use fresh strawberries if I pat them dry?
It is not recommended. Even if the surface is dry, the internal moisture of a fresh strawberry will release as soon as it touches the sugar in the cream. This will cause the topping to thin out and the cookie to soften within an hour. Stick to freeze-dried for the best results.
Why did my cream cheese frosting turn runny?
This usually happens if the cream cheese was too warm or if you used “spreadable” cream cheese from a tub. It can also happen if you don’t whip the heavy cream long enough to reach stiff peaks. Make sure your heavy cream is ice-cold before you start whipping.
Can I substitute margarine for butter?
No, margarine has a much higher water content than butter. Using it will cause the cookies to spread too much and will prevent them from having that crisp, shortbread-like texture. Real, unsalted butter is necessary for the “fat-barrier” to work effectively.
How do I get the white chocolate to set faster?
If you are in a hurry, place the glazed cookies in the refrigerator for 5 to 10 minutes. The cold air will quickly solidify the cocoa butter in the white chocolate, creating a firm shield so you can move on to the piping stage immediately.
Can these cookies be frozen?
You can freeze the baked cookie bases (without the cream) for up to three months. However, do not freeze the assembled cookies. The cream cheese and whipped cream topping will change texture when thawed, becoming grainy and releasing moisture that will ruin the cookie.
Strawberry Cream Shortcake Cookies
Course: DessertCuisine: AmericanDifficulty: easy12
cookies20
minutes12
minutes32
Minutes240
kcalAmerican
Ingredients
1/2 cup unsalted butter, softened
3/4 cup granulated sugar
1 large egg
1 teaspoon vanilla extract
1 1/2 cups all-purpose flour
1/2 teaspoon baking powder
1/4 teaspoon salt
4 ounces cream cheese, softened
1/2 cup heavy whipping cream
3 tablespoons powdered sugar
1 cup freeze-dried strawberries, roughly chopped
1/4 cup white chocolate chips, melted (optional “moisture barrier” glaze)
Directions
- Preheat your oven to 350 degrees F. Line a baking sheet with parchment paper.
- In a large bowl, cream together the softened butter and granulated sugar until very pale and fluffy. This high butter-to-sugar ratio is the first step in creating a moisture-resistant cookie base.
- Beat in the egg and vanilla extract until smooth.
- Gradually mix in the flour, baking powder, and salt. Do not overmix, as this develops gluten and leads to a tough cookie.
- Scoop rounded tablespoons of dough onto the baking sheet. Use the back of a spoon or your thumb to create a deep indentation in the center of each dough ball, forming a “well” for the cream.
- Bake for 10 to 12 minutes or until the edges are golden brown and the centers are set.
- Immediately after removing from the oven, if the centers have puffed up, gently press the indentation again with a spoon. Let the cookies cool completely on a wire rack.
- Optional Pro-Tip: Brush a thin layer of melted white chocolate inside the cooled cookie well. Let it harden; this creates a physical waterproof barrier between the cream and the cookie.
- While cookies cool, make the stabilized topping. Beat the cream cheese and powdered sugar together first until smooth. Slowly pour in the heavy cream and whip until stiff peaks form. The cream cheese acts as a stabilizer, preventing the cream from “weeping” liquid into the cookie.
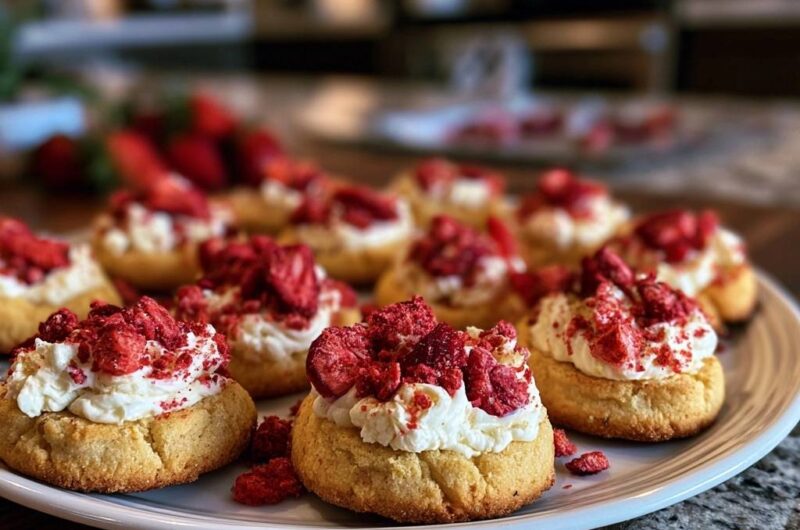
- Once the cookies are cold, pipe the cream mixture into the center indentations using a star tip to match the textured look in the image.
- Top generously with the roughly chopped freeze-dried strawberries. Using freeze-dried fruit is the ultimate secret: you get intense strawberry flavor and vibrant color without the excess water content of fresh berries that typically causes cookies to soften and dissolve.
- Serve immediately for the best crunch.
Notes
- Using freeze-dried fruit is the ultimate secret to prevent water content from fresh berries from softening the cookie. The white chocolate layer acts as a physical waterproof barrier between the cream and the cookie base.