Mastering the Honey Garlic Chicken and Vegetable Stir Fry
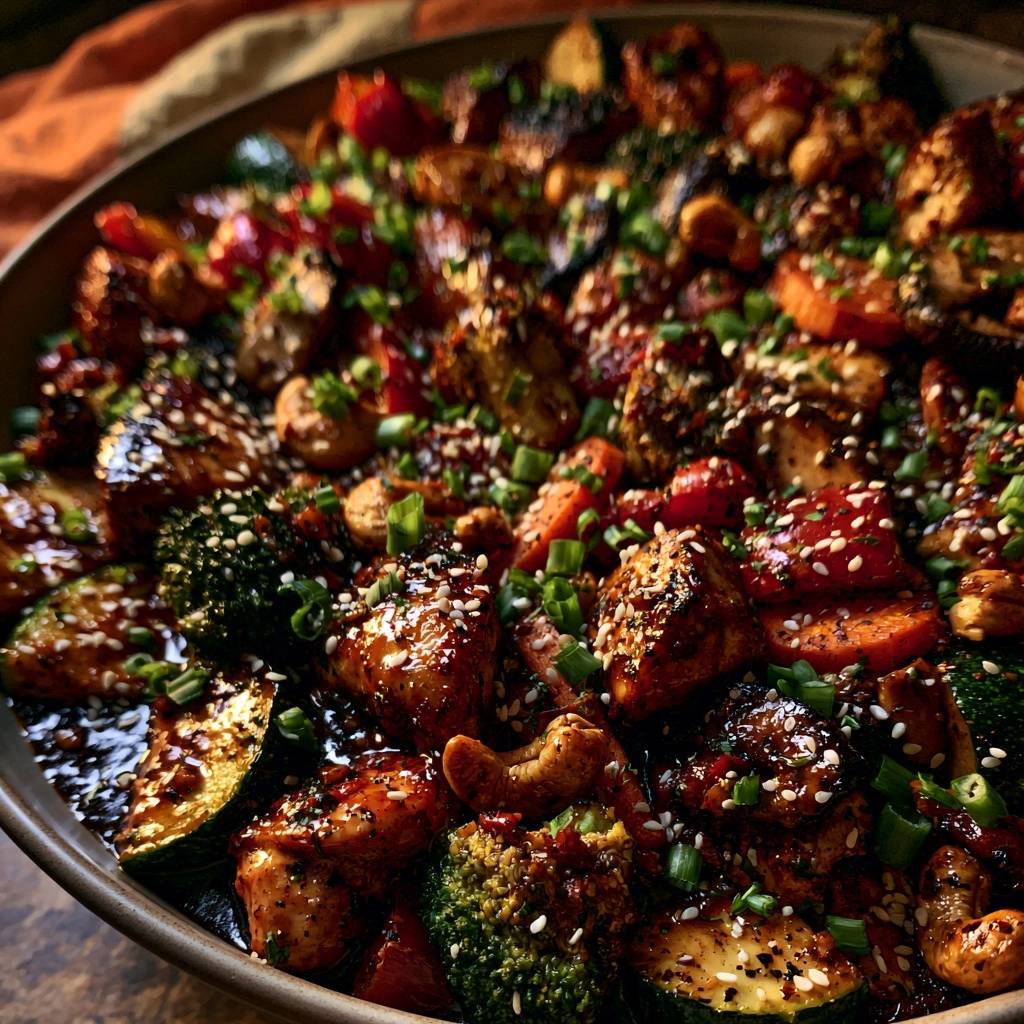
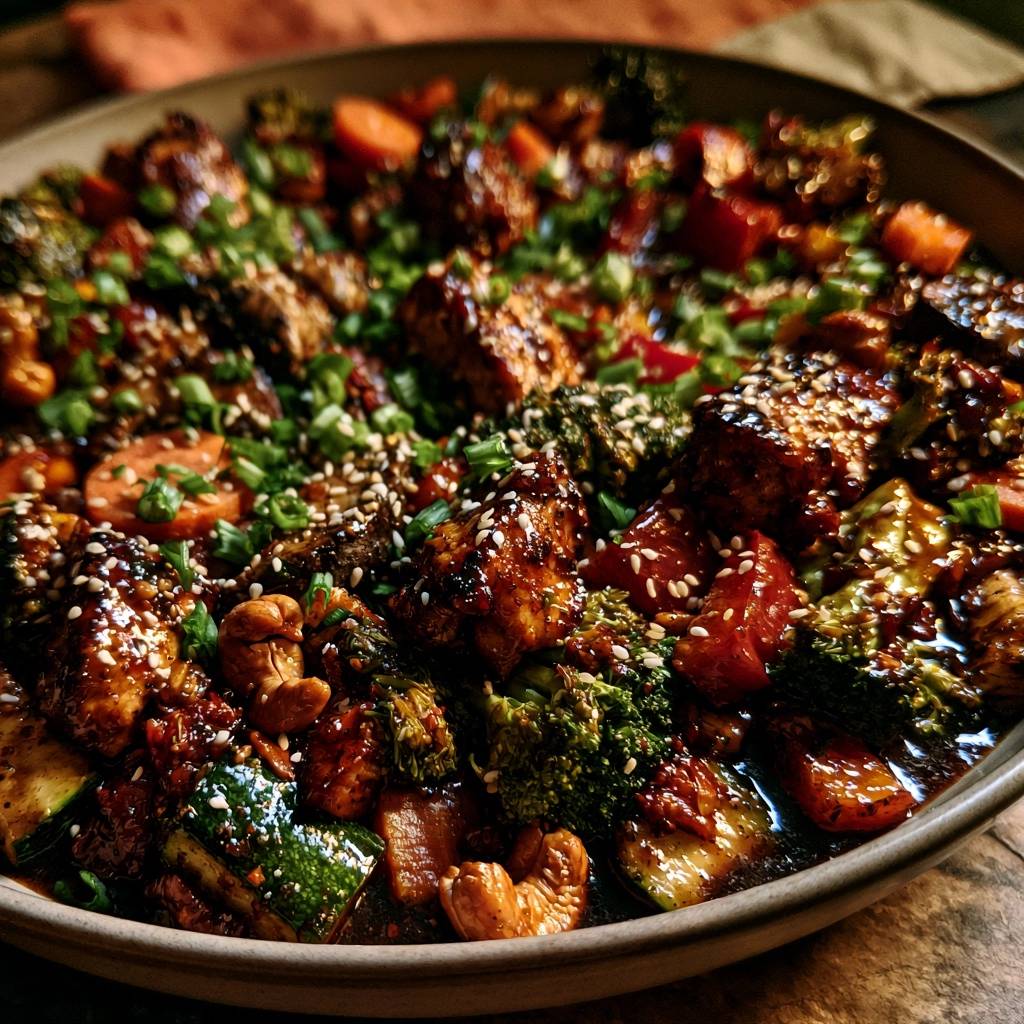
Imagine a plate of chicken so glossy it looks like it was dipped in liquid mahogany. You pick up a piece of broccoli, and instead of a limp, soggy mess, you find a vibrant green floret with dark, charred edges that snap when you bite. The sauce doesn’t pool at the bottom of your plate in a watery puddle; instead, it clings to every nook and cranny of the chicken and cashews like a savory lacquer.
Most home cooks struggle with stir-fries because they end up steaming their food rather than searing it. When you crowd a lukewarm pan with cold vegetables, they release their juices, and you lose that beautiful caramelization. This recipe changes that by focusing on high-heat mechanics and a concentrated glaze that guarantees a restaurant-quality finish every single time.
The secret to this “Never Watery” promise lies in the cornstarch slurry and the order of operations. By searing the chicken first and removing it, you allow the pan to regain the intense heat necessary to blister the vegetables. I’ve found that whisking the cornstarch directly into the cold sauce ingredients before they hit the pan creates a stable emulsion that thickens instantly upon contact with the heat.
The Physics of a Non-Watery Stir Fry Sauce
Achieving a thick, shell-like glaze requires understanding the Maillard reaction. This is the chemical process where amino acids and sugars react under high heat to create those deep brown colors and complex flavors. If your pan is too cool, the chicken will simply grey and leak moisture, which dilutes your sauce and ruins the texture of your vegetables.
High heat is non-negotiable when you’re working with high-moisture vegetables like zucchini and bell peppers. You want the exterior to sear and caramelize before the interior cells break down and release their water. If you see liquid bubbling at the bottom of your wok before you’ve added the sauce, your heat isn’t high enough or you’ve put too much in the pan at once.
Cornstarch acts as our primary stabilizer here. When it hits the boiling point, the starch granules swell and absorb the liquid, turning a thin juice into a thick syrup. Because we use honey and hoisin, which are already viscous, the cornstarch doesn’t have to do all the heavy lifting. This combination creates a lacquer that stays put even after the dish is plated.
Why Hoisin and Honey Create the Perfect Glaze
Honey provides a floral sweetness and a sticky quality that granulated sugar simply can’t match. However, honey alone can be one-dimensional. That’s where the hoisin sauce comes in. It adds a fermented depth, a dark garnet color, and a natural thickness that helps the sauce coat the ingredients rather than running off them.
Using a concentrated slurry technique means we aren’t adding excess water to the pan. Every ingredient in the sauce serves a purpose, whether it’s the acidity of the rice vinegar to cut the sugar or the aromatics for fragrance. This ensures the final result is a punchy, intense coating rather than a diluted soup.
Essential Components for Honey Garlic Chicken and Vegetables
Success starts with how you prep your ingredients. You want to cut your chicken breast into uniform 1-inch cubes. If the pieces are uneven, the small ones will turn into rubber by the time the large ones are safe to eat. The same logic applies to your vegetables; slicing the zucchini into thick half-moons ensures they hold their shape against the intense heat.
I always recommend using low-sodium soy sauce for this specific dish. Since we are reducing the sauce down to a thick glaze, the saltiness becomes very concentrated. Regular soy sauce can quickly become overwhelming, whereas low-sodium allows the garlic and ginger to shine through without making you reach for a gallon of water.
Don’t forget the cashews! They add a buttery crunch that contrasts beautifully with the tender chicken. Adding them toward the end of the cooking process allows them to toast slightly in the residual oil, which wakes up their natural oils and makes them incredibly fragrant.
Selecting the Right Aromatics: Ginger and Garlic
Freshness is everything when it comes to aromatics. While the jars of pre-minced garlic are convenient, they often have a metallic or acidic aftertaste that can ruin a delicate honey glaze. Freshly minced garlic and ginger contain volatile oils that react with the hot oil to create a scent that will fill your entire house.
When you grate fresh ginger, you get the juice along with the fiber, which adds a spicy heat that balances the sweetness of the honey. If you’re in a pinch, you can use a microplane to turn the ginger into a paste, ensuring it distributes evenly throughout the sauce so you don’t bite into a large, woody chunk.
Vegetable Selection for Maximum Texture
We use broccoli, carrots, and bell peppers because they all have different structural integrities. Carrots take the longest to soften, so they go in first. Broccoli florets act like little sponges, soaking up the sauce in their tops while the stems provide a satisfying crunch. Bell peppers add a pop of color and a bright, watery sweetness.
A pro tip for the best texture: make sure your vegetables are bone-dry after you wash them. If you toss wet broccoli into a hot wok, the water will immediately turn to steam. This lowers the temperature of the pan and prevents those beautiful charred bits from forming on the edges of your zucchini.
Step-by-Step: Achieving the Restaurant-Style Sear
Before you even turn on the stove, make sure your “mise en place” is ready. Stir-frying happens fast, and you won’t have time to chop a carrot once the oil starts smoking. You need your chicken prepped, your vegetables sliced, and your sauce whisked and sitting right next to the stove.
Start by heating your oil until it just begins to shimmer and show wisps of smoke. This is the signal that the pan is ready for the chicken. If the oil isn’t hot enough, the chicken will stick to the bottom and tear when you try to flip it. Patience in the first two minutes is the difference between a golden crust and a shredded mess.
Once the chicken is seared, remove it. This is a crucial step that many people skip. If you leave the chicken in while you cook the vegetables, the meat will overcook and become dry. Removing it also gives the vegetables more room to make contact with the hot surface of the pan, ensuring they get that smoky, charred flavor.
Phase 1: Developing the Golden-Brown Chicken Crust
When you add the chicken to the pan, spread it out and then leave it alone. It’s tempting to start tossing it immediately, but the meat needs undisturbed contact with the heat to develop a crust. This crust not only tastes better but also helps the sauce “grip” the meat later on.
After about two or three minutes, you’ll see the edges turning opaque and a deep brown color creeping up the sides. That’s your cue to flip. The second side only needs a minute or so; remember, the chicken will go back into the pan at the end to finish cooking in the sauce.
Phase 2: High-Heat Vegetable Charring Techniques
Add your carrots and broccoli first, as they are the “hard” vegetables. You want to see the tips of the broccoli turn dark brown or even slightly black. This isn’t burnt; it’s flavor. Keep the heat at the maximum setting and keep the vegetables moving so they don’t sit in one spot for too long.
Add the zucchini and peppers last. These have a higher water content and cook much faster. You’re looking for the zucchini to become slightly translucent while the skin remains bright green and firm. If the vegetables start to look dull or mushy, you’ve gone too long.
The Lacquer Finish: Thickening the Sauce to a Shell
This is the most exciting part of the process. Once you return the chicken to the pan, give your sauce bowl one last whisk to redistribute the cornstarch that might have settled at the bottom. Pour it right into the center of the pan where the heat is most intense.
Within seconds, the liquid will start to bubble and turn from a cloudy brown to a clear, deep mahogany. Stir everything rapidly. You want every single piece of chicken and every floret of broccoli to be coated in the glaze. The sauce should be so thick that it doesn’t run; it should look like a shiny shell.
As soon as the sauce reaches that glossy state, pull the pan off the heat. The honey in the sauce can burn quickly if left over the flame too long, which will turn your sweet and savory glaze bitter. The residual heat of the pan will finish the job perfectly.
Troubleshooting Common Stir Fry Pitfalls
If your sauce is too thin, it’s usually because the pan wasn’t hot enough when the liquid was added. The cornstarch needs to reach a simmer to activate its thickening power. If this happens, keep the heat high and stir for another 30 seconds, but be careful not to overcook your vegetables in the process.
Dry chicken is usually the result of cutting the pieces too small or leaving them in the pan while the vegetables cook. Stick to the 1-inch rule and always remove the protein during the vegetable phase. If your vegetables are mushy, you likely overcrowded the pan, which caused them to steam in their own juices.
If you find the honey is starting to smell like it’s burning, add a tiny splash of water or extra rice vinegar to the pan immediately. This will lower the temperature of the sugar and give you a few extra seconds to get the food out of the pan and onto a serving platter.
Flavor Variations and Protein Swaps
This method works beautifully with other proteins as well. You can swap the chicken for thin strips of flank steak or even large shrimp. If using shrimp, they only need about 90 seconds of total sear time before you remove them, as they cook incredibly fast and can become rubbery if overhandled.
For those who like a bit of heat, adding a teaspoon of sambal oelek or sriracha to the sauce mixture provides a nice kick. If you need a nut-free option, toasted sunflower seeds or even water chestnuts can provide that essential crunch without the allergy risk of cashews.
You can also vary the vegetables based on what’s in your fridge. Snap peas, baby corn, or bok choy are all excellent additions. Just remember the rule of density: add the hardest, crunchiest vegetables first and the leafy or watery ones last to ensure everything finishes at the same time.
Optimal Pairings for a Balanced Meal
Because the honey garlic sauce is so rich and bold, you want a side dish that can soak up the extra glaze without competing for flavor. A bowl of fluffy jasmine rice is the classic choice; its subtle floral aroma complements the ginger and garlic perfectly.
If you’re looking for something heartier, brown rice adds a nutty element that pairs well with the toasted cashews. For a lower-carb version, cauliflower rice works surprisingly well, though I recommend sautéing it separately so it doesn’t get lost in the main stir fry sauce.
To balance the sweetness of the honey, a quick side of sliced cucumbers tossed in rice vinegar and a pinch of salt provides a refreshing, acidic contrast. This cleanses the palate between bites and makes the savory notes of the chicken stand out even more.
Expert Tips for Preparation and Storage
The most important tip for any stir fry is to have your “mise en place” ready. This isn’t just a fancy culinary term; it’s a necessity. Once that oil starts smoking, you are in a race against time. Having your sauce pre-mixed and your veggies chopped in separate bowls makes the process stress-free and fun.
If you have leftovers, store them in an airtight container in the fridge for up to three days. While the vegetables will lose some of their initial snap, the flavors of the ginger and garlic actually deepen overnight. It makes for a fantastic lunch the next day that’s much better than anything you’d find in a food court.
When reheating, I recommend using a skillet over medium-high heat with a tiny splash of water. This helps loosen the glaze and prevents the chicken from drying out in the microwave. Just a minute or two in the pan will bring back that glossy sheen and keep the textures as close to fresh as possible.
How do I store leftovers and does this freeze well?
Store any leftovers in an airtight container in the refrigerator for up to 3 days. When you’re ready to eat, reheat it in a skillet over medium heat with a tablespoon of water to loosen the sauce. I do not recommend freezing this dish. The zucchini and bell peppers have high water content and will become very mushy and watery once thawed, ruining the texture of the glaze.
Why is my stir fry sauce watery instead of thick and glossy?
A watery sauce usually happens for two reasons: low heat or excess moisture from the vegetables. If your pan isn’t hot enough, the cornstarch won’t reach the temperature needed to thicken. Additionally, if you wash your vegetables and don’t dry them completely, that extra water dilutes the sauce. Make sure your pan is smoking hot and your veggies are dry before they hit the oil.
Can I use a different sweetener if I don’t have honey?
Yes, you can substitute the honey with maple syrup or brown sugar. Maple syrup will provide a similar viscosity but a slightly different flavor profile. If you use brown sugar, you may need to add a teaspoon of water to the sauce mixture to help it dissolve. Avoid using granulated white sugar alone, as it won’t provide the same sticky, lacquer-like finish that honey or hoisin creates.
What is the best way to prevent the chicken from sticking to the pan?
The secret to non-stick chicken is a combination of high heat and patience. You must wait for the oil to reach its smoke point before adding the meat. Once the chicken is in the pan, do not touch it for at least two minutes. The meat will naturally release from the pan once a proper golden-brown crust has formed. If you try to flip it too early, it will tear.
Can I make this recipe gluten-free?
Absolutely. To make this dish gluten-free, you need to swap the soy sauce for tamari or liquid aminos. You also must ensure your hoisin sauce is labeled gluten-free, as many traditional brands use wheat flour as a thickener. The cornstarch used in the recipe is naturally gluten-free and will still provide that beautiful thick glaze.
Is it possible to use frozen vegetables for this stir fry?
While you can use frozen vegetables, the result won’t be the same. Frozen vegetables release a significant amount of water as they thaw in the pan, which will steam the chicken and prevent the sauce from thickening into a lacquer. If you must use them, thaw them completely and pat them very dry with paper towels before cooking, and be prepared for a softer texture.
Honey Garlic Chicken and Vegetable Stir Fry
Course: Main CourseCuisine: Asian-AmericanDifficulty: easy4
servings15
minutes15
minutes30
Minutes395
kcalAsian-American
Ingredients
1.5 lbs chicken breast, cut into 1-inch cubes
2 cups broccoli florets (cut small)
1 large zucchini, sliced into thick half-moons
1 red bell pepper, chopped into 1-inch squares
1 large carrot, peeled and sliced into thin rounds
1/2 cup raw cashews
1/4 cup soy sauce (low sodium preferred for color control)
3 tablespoons honey
1 tablespoon hoisin sauce (for that deep dark color and thickness)
1 tablespoon rice vinegar
1 tablespoon fresh ginger, minced
3 cloves garlic, minced
1/2 teaspoon red pepper flakes (optional, for the visible red flecks)
1 tablespoon cornstarch
3 tablespoons vegetable oil, divided
1 tablespoon toasted sesame seeds
1/4 cup green onions, finely sliced
Directions
- Prepare the Glaze: In a small bowl, whisk together the soy sauce, honey, hoisin, rice vinegar, ginger, garlic, red pepper flakes, and cornstarch. Ensure the cornstarch is fully dissolved. This concentrated mixture is the key to the “Never Watery” promise.
- Sear the Chicken: Heat 1.5 tablespoons of oil in a large wok or heavy cast-iron skillet over high heat until it begins to smoke slightly. Add the chicken in a single layer. Do not crowd the pan; work in batches if necessary. Let the chicken sear undisturbed for 2-3 minutes until a deep golden-brown crust forms. Flip and cook for 1 more minute. Remove chicken from the pan and set aside. The chicken is done when it reaches 165°F (74°C) in the thickest part.
- Char the Vegetables: Add the remaining oil to the hot pan. Toss in the carrots and broccoli first, stir-frying for 2 minutes. Add the zucchini and bell peppers. Continue to stir-fry over maximum heat for 3 minutes. The goal is to achieve charred, dark edges on the zucchini and broccoli while keeping the centers crisp.
- Toast Cashews: Add the cashews to the pan with the vegetables and toss for 1 minute until they are fragrant and slightly browned.
- The Lacquer Finish: Return the chicken and any accumulated juices to the pan. Give the sauce mixture a final whisk and pour it directly into the center of the pan.
- Thicken: Stir everything rapidly for 60-90 seconds. The high heat will cause the sauce to bubble and instantly thicken into a dark, glossy glaze that coats the chicken and vegetables like a shell.
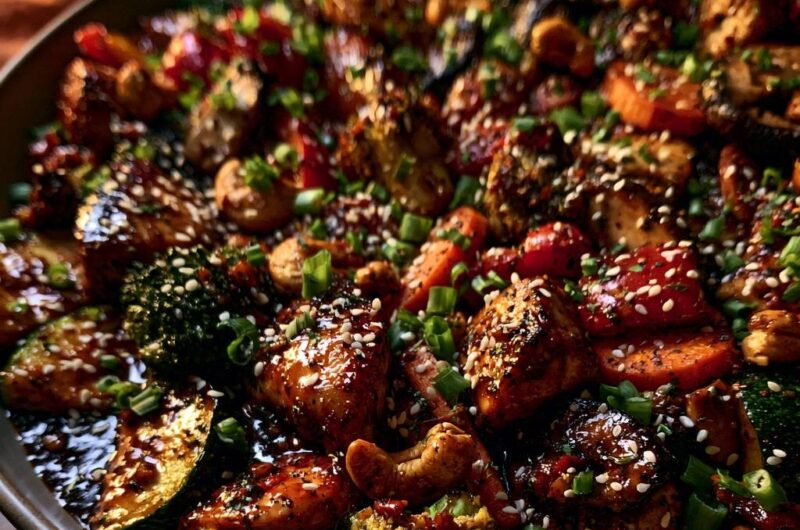
- Garnish and Serve: Remove from heat immediately to prevent the honey from burning. Transfer to a platter and garnish generously with toasted sesame seeds and sliced green onions to match the vibrant, textured finish shown in the image.
Notes
- To ensure the sauce is never watery, sear the chicken and vegetables at extreme heat to prevent moisture release and whisk the sauce thoroughly before adding to the pan.