Mastering the Airy Cinnamon Snickerdoodle Cupcakes
Imagine biting into a cloud that tastes exactly like your favorite childhood cookie. The perfect snickerdoodle cupcake should be light, airy, and possess that signature tangy sweetness, yet so many recipes turn out dense and heavy. Most home bakers end up with something closer to a spiced muffin than a delicate dessert, leaving them wondering where that bakery-style crumb went wrong.
The secret to fixing that “brick-like” texture isn’t just about the ingredients; it’s about the physics of the mix. By moving away from traditional creaming and embracing the reverse-creaming method, you change how the fat interacts with the flour. This creates a velvety, tight crumb that stays moist for days while remaining incredibly light on the palate.
I’ve found that the real magic happens when you coat the flour particles in fat before any liquid touches the bowl. This simple technical shift prevents the gluten from toughening up, ensuring every bite melts away instantly. If you’ve ever struggled with cupcakes that feel gummy or tough, this specific approach is going to be your new best friend in the kitchen.
The Science of the Reverse Creaming Method
Traditional recipes usually ask you to cream butter and sugar together first, but we’re flipping the script here. In the reverse-creaming method, you mix your dry ingredients and then beat in the softened butter. This process ensures that every tiny grain of flour is thoroughly coated in a thin layer of fat before you introduce the milk and eggs.
Why does this matter so much? Gluten only starts to develop when flour meets water-based liquids. By “waterproofing” the flour with butter first, you physically limit the gluten’s ability to form long, tough strands. Therefore, you end up with a cupcake that has a tender, delicate structure rather than a chewy, bread-like consistency. It’s a foolproof way to guarantee a professional, soft-crumb finish every single time.
Why Room Temperature Ingredients are Non-Negotiable
Temperature is the silent partner in successful baking. If you add cold milk or eggs to your beautifully softened butter, the fat will immediately seize and clump up. This creates an uneven batter that won’t emulsify properly, often leading to a greasy texture or a sunken middle. However, room temperature ingredients blend seamlessly, creating a stable emulsion that traps air efficiently.
If you’re in a rush, don’t worry about waiting hours for eggs to warm up. Simply place your cold eggs in a bowl of warm (not hot!) water for about five to ten minutes. For the milk, a quick ten-second zap in the microwave will take the chill off. These small steps ensure your batter stays smooth and creamy, which is the foundation of a perfect rise.
Essential Components for Cinnamon Snickerdoodle Cupcakes
The flavor profile of a snickerdoodle relies heavily on the quality of your spices and the balance of your leavening agents. While many recipes use cream of tartar for that classic “tang,” we are relying on a precise amount of baking powder and salt to provide the lift and flavor contrast. This ensures the cupcakes rise high and stay fluffy without becoming overly acidic.
Ground cinnamon is the undisputed star of the show here. I highly recommend using a high-quality Saigon cinnamon if you can find it, as it has a much higher oil content and a more intense, sweet-spicy punch than standard grocery store varieties. Because we are using a full tablespoon in the batter, the quality of the spice will directly dictate the depth of the final flavor.
Selecting the Right Flour and Fat
While cake flour is often touted for delicate bakes, all-purpose flour actually works better for this specific reverse-creaming technique. It provides just enough protein to support the high swirl of frosting we’ll add later, while the mixing method keeps it from getting tough. It’s the perfect middle ground for a sturdy yet soft cupcake.
Always reach for unsalted butter so you can control the salt levels yourself. Different brands of salted butter vary wildly in their sodium content, which can easily ruin the delicate balance of a sweet cinnamon batter. Using unsalted butter allows the creamy, dairy notes to shine through without being overshadowed by a salty aftertaste.
Step-by-Step: Achieving the Perfect Aerated Batter
When you begin adding the butter to your dry ingredients, keep your mixer on a low speed. You aren’t looking to whip it; you’re looking to incorporate it. Watch the bowl closely as the butter breaks down into the flour mixture. You’ll see it transition from a dusty powder to a texture that looks exactly like fine, damp sand.
This “sandy” stage is your visual cue that the flour is properly coated. If you see large chunks of butter remaining, keep mixing for another thirty seconds. You want a uniform consistency throughout the bowl before you even think about touching the liquid ingredients. This step is the primary defense against a dense, heavy cupcake.
The 60-Second Aeration Rule
Once you pour in the first half of your liquid mixture, it’s time to turn up the speed. Beating the batter on medium-high for exactly 60 seconds is a critical step that many bakers skip. This minute of high-speed mixing isn’t just about blending; it’s about building the physical structure of the cake.
During this minute, you are aerating the batter and strengthening the tiny bit of gluten allowed to form. This creates the “skeletal” system of the cupcake, allowing it to hold all those air bubbles as it bakes. After the 60 seconds are up, add the rest of the liquid and mix only until smooth. Over-mixing at the very end is a common mistake that leads to tunnels in your cake.
Creating the Signature Craggy Cinnamon Crust
What truly defines a snickerdoodle is that slightly crunchy, crackled top. To achieve this in cupcake form, we use a generous sprinkle of cinnamon sugar over the raw batter. As the cupcakes heat up in the oven, the sugar draws moisture from the surface of the batter, creating a concentrated syrup that eventually crystallizes.
This process creates a beautiful, craggy crust that provides a wonderful textural contrast to the soft cake underneath. Don’t be shy with the topping! A thick layer ensures that even as the cupcake expands and rises, you’ll still have plenty of that golden-brown cinnamon goodness covering the entire surface. It smells absolutely incredible as it caramelizes in the oven.
Baking Times and Temperature Precision
Oven temperature can make or break this recipe. At 350°F, the exterior sugar crust has enough time to set and “shatter” while the interior stays moist and tender. If your oven runs too hot, the tops will brown before the middle is set; too cool, and the cupcakes will dry out before they finish rising. I always suggest using an oven thermometer to be sure.
Start checking your cupcakes at the 18-minute mark. Use a toothpick and insert it into the center of the largest cupcake. You’re looking for a few moist crumbs or a clean toothpick. If you see wet batter, give them another two minutes. Be careful not to over-bake, as the high sugar content in the crust can cause the edges to become hard if left in too long.
Whipping the Spiced Buttercream Frosting
The frosting for these cupcakes needs to be as light as the cake itself. Start by beating your softened butter on its own for at least three minutes. You’ll notice the color change from a deep yellow to a very pale, almost white ivory. This indicates that you’ve whipped enough air into the fat to create a truly fluffy base.
When adding the powdered sugar, do it gradually to avoid a sugar cloud in your kitchen. The addition of heavy cream is the final touch that transforms the frosting from a heavy paste into a silky, pipeable dream. The hint of cinnamon in the frosting base ties everything together, echoing the flavors found in the cake and the crust.
The Art of the High Star-Tip Swirl
To get that iconic bakery look, use a large star tip like a 1M. Start in the center of the cupcake, move to the outer edge, and spiral inward and upward in one fluid motion. Keep the pressure steady and consistent. If you find the frosting is too soft to hold its shape, pop the piping bag in the fridge for five minutes to firm up the butter.
A high swirl doesn’t just look impressive; it provides the perfect “landing pad” for your garnishes. By building height, you create more surface area for that final dusting of cinnamon sugar to cling to. It makes the cupcakes look professional and inviting, like they just came out of a high-end pastry shop window.
Troubleshooting Common Snickerdoodle Baking Issues
If your cupcakes sink in the middle after you pull them out of the oven, it’s usually due to one of two things: over-mixing the batter after the final liquid addition or using expired baking powder. Always check the date on your leavening agents! If the batter is overworked at the end, it traps too much air that then collapses as the cake cools.
Another common issue is a “soggy” cinnamon top. This usually happens if you live in a very humid environment or if you cover the cupcakes while they are still slightly warm. The steam gets trapped and dissolves the sugar crust. To prevent this, ensure the cupcakes are completely cool to the touch before you even think about putting them in a container or adding frosting.
Make-Ahead Strategies and Storage Solutions
These cupcakes are fantastic for parties because you can easily make them in stages. You can bake the bases a day in advance and store them in a ventilated container at room temperature. Keeping them in a completely airtight container can sometimes soften the cinnamon crust too much, so a slightly loose lid is actually better for maintaining that crunch.
If you need to store them longer, the unfrosted bases freeze beautifully. Wrap them individually in plastic wrap and place them in a freezer bag for up to three months. When you’re ready to serve, let them thaw at room temperature before frosting. I don’t recommend freezing the fully frosted cupcakes, as the buttercream can lose its airy texture and the cookie garnish will get soft.
Expert Tips for Professional Presentation
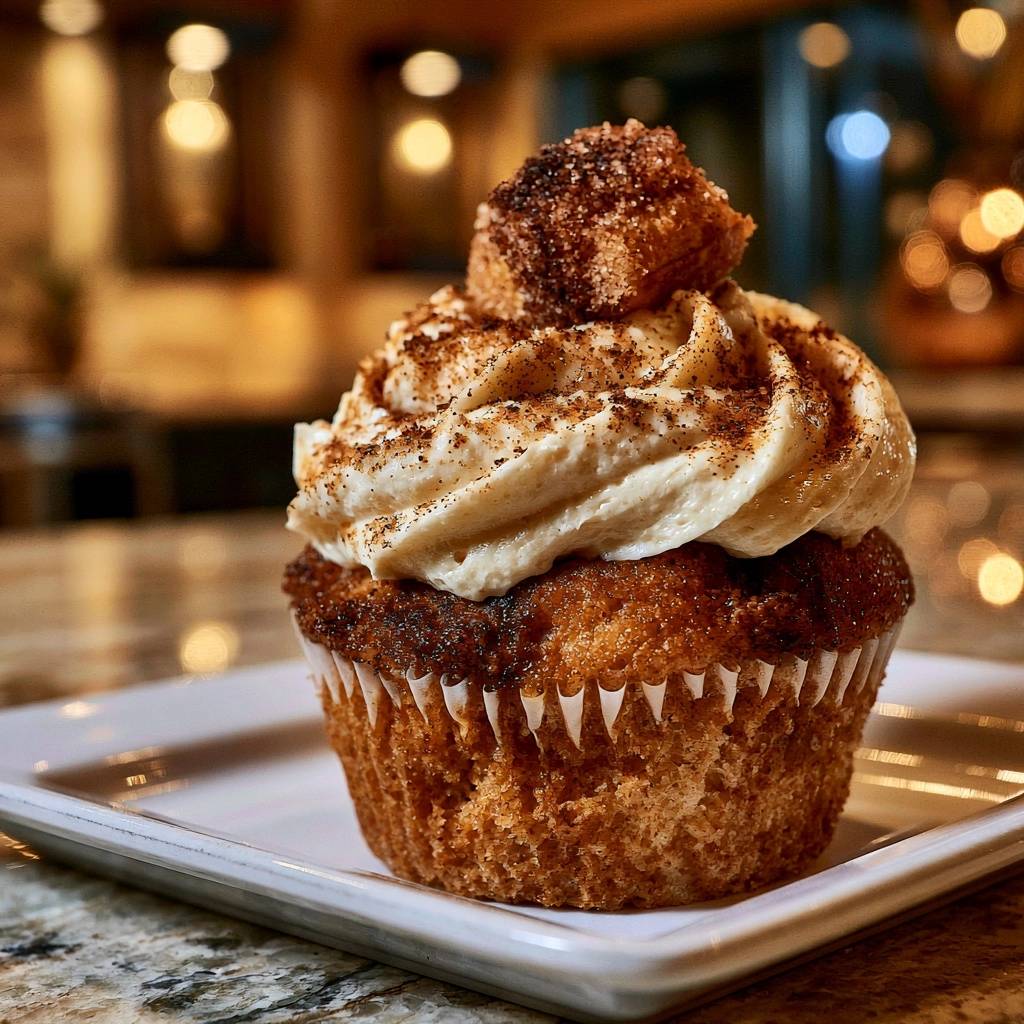
The final garnish is what takes these from “home-baked” to “show-stopper.” Placing a mini snickerdoodle cookie on top isn’t just a visual cue for the flavor; it adds a crunchy element that complements the soft frosting. I like to press the cookie in at a slight angle so it sits securely in the buttercream swirl.
For the final dusting of cinnamon sugar, hold your sifter or spoon high above the cupcakes. This allows the sugar to fall evenly like snow, preventing clumps and ensuring a beautiful, shimmering finish. It’s these small, intentional details that make people ask which bakery you bought them from!
Flavor Variations: Beyond the Standard Spice
While the classic cinnamon profile is hard to beat, you can easily tweak this recipe to suit your taste. Adding a quarter teaspoon of ground nutmeg or cardamom to the dry ingredients adds a sophisticated, floral depth to the spice mix. It makes the cupcakes feel a bit more “grown-up” while keeping the nostalgic snickerdoodle soul intact.
For an even richer flavor, try browning the butter for the frosting. Melt the butter in a saucepan until it smells nutty and turns golden brown, then let it solidify back to room temperature before whipping. This adds a toasted, caramel-like dimension that pairs perfectly with the cinnamon crust. It’s a simple change that makes a massive impact on the final taste.
How should I store these cupcakes to keep the tops crunchy?
To maintain the signature craggy crust, store the cupcakes in a container with a slightly loose lid at room temperature. If the container is completely airtight, the moisture from the cake will soften the sugar topping. They are best enjoyed within 2-3 days. Avoid refrigerating them, as the cold air can dry out the sponge and make the butter in the frosting too hard.
Why did my cupcakes turn out dense even though I followed the recipe?
Density usually comes down to two factors: ingredient temperature and mixing time. If your eggs or milk were cold, they likely caused the butter to clump, preventing a smooth emulsion. Additionally, make sure you are beating the batter for the full 60 seconds during the aeration step. This specific timing is what builds the structure needed for a light, airy crumb.
Can I use a different type of flour if I don’t have all-purpose?
You can use cake flour if necessary, but the cupcakes will be much more delicate and may struggle to hold the weight of the high frosting swirl. If you use cake flour, increase the amount by two tablespoons to compensate for the lower protein content. Avoid using bread flour, as the high protein will make the cupcakes tough and rubbery.
What is the best way to get the “sandy” texture with the butter?
The key is using butter that is truly at room temperature—it should be soft enough that your finger leaves an easy indentation, but not so soft that it’s melting or oily. Add the butter one tablespoon at a time while the mixer is on low. This allows the fat to coat the flour evenly rather than clumping into large balls of dough.
Can I make these without the mini cookie garnish?
Absolutely! While the mini snickerdoodle cookie adds a nice visual touch and a bit of crunch, the cupcakes are flavorful enough to stand on their own. You can simply finish them with a generous dusting of cinnamon sugar or even a drizzle of caramel sauce if you want to add a different flavor element.
My frosting is too runny to pipe, how can I fix it?
If your frosting feels too soft, it’s likely because the butter was too warm or you added a bit too much cream. Try chilling the entire mixing bowl in the refrigerator for 10-15 minutes, then whip it again. If it’s still too thin, add more powdered sugar, one tablespoon at a time, until it reaches a stiff, pipeable consistency that holds its shape.
Cinnamon Snickerdoodle Cupcakes
Course: DessertCuisine: AmericanDifficulty: easy12
servings20
minutes18
minutes38
Minutes380
kcalAmerican
Ingredients
1 and 1/2 cups all-purpose flour
1 cup granulated sugar
1 and 1/2 teaspoons baking powder
1/2 teaspoon salt
1 tablespoon ground cinnamon
1/2 cup unsalted butter, softened to room temperature
2 large eggs, room temperature
1/2 cup whole milk, room temperature
2 teaspoons vanilla extract
For the Cinnamon Sugar Topping (Visual Crust):
2 tablespoons granulated sugar
1 teaspoon ground cinnamon
For the Frosting:
1 cup unsalted butter, softened
3 cups powdered sugar
1 teaspoon vanilla extract
1 tablespoon heavy cream
1/2 teaspoon ground cinnamon (for the frosting base)
Extra cinnamon sugar for dusting
12 mini snickerdoodle cookies (for garnish)
Directions
- Preheat your oven to 350 degrees F and line a cupcake tin with paper liners.
- To solve the density issue, start by whisking the flour, sugar, baking powder, salt, and cinnamon in a large bowl. Add the softened butter one tablespoon at a time while mixing on low speed. Continue mixing until the mixture resembles fine, sandy crumbs. This coats the flour in fat first, which is the ultimate trick to preventing a tough, dense texture.
- In a separate small bowl, whisk the room temperature eggs, milk, and vanilla.
- Pour half of the liquid mixture into the dry ingredients and beat on medium-high for exactly 60 seconds. This aerates the batter and builds the structure without overworking the gluten. Add the remaining liquid and mix on low just until combined and smooth.
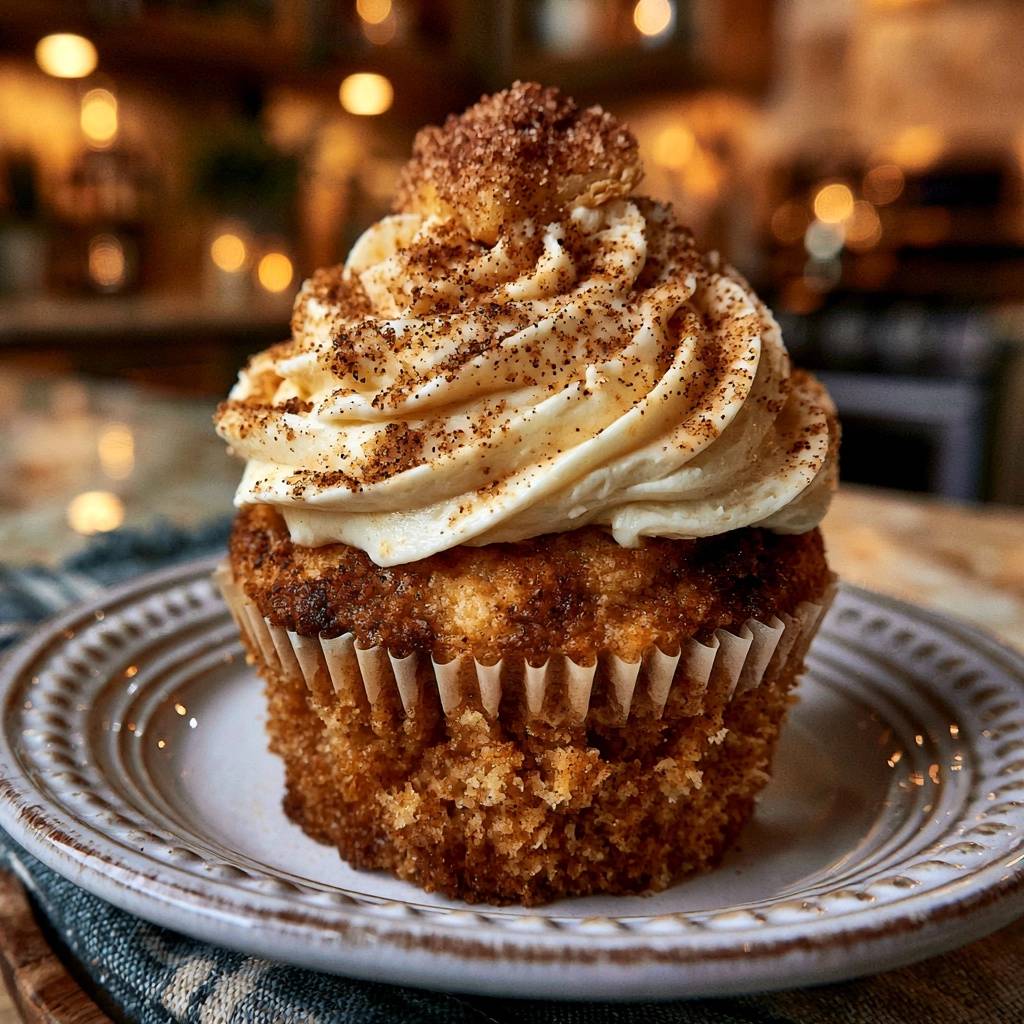
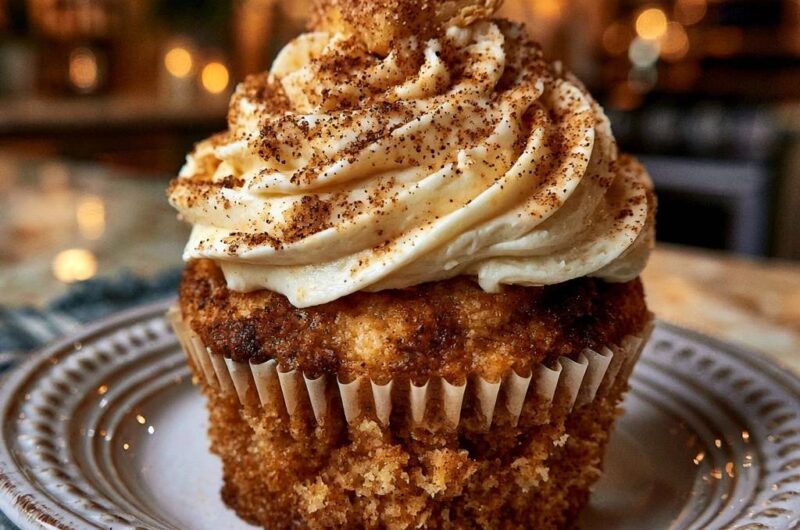
- Fill the liners about two-thirds full. Before baking, combine the 2 tablespoons sugar and 1 teaspoon cinnamon for the topping. Sprinkle a generous layer over the raw batter in each cup; this creates the craggy, golden-brown cinnamon crust seen in the image.
- Bake for 18 to 20 minutes or until a toothpick comes out clean. Let them cool completely on a wire rack.
- For the frosting, beat the softened butter and 1/2 teaspoon cinnamon until pale and fluffy. Gradually add powdered sugar, vanilla, and cream, whipping for at least 3 minutes to ensure a light, airy consistency.
- Using a star tip, pipe the frosting onto the cooled cupcakes in a high, tight swirl. Finish with a heavy dusting of cinnamon sugar and place a small snickerdoodle cookie on the very top to match the visual presentation.
Notes
- The secret to the light texture is using the reverse-creaming method and ensuring all dairy and eggs are at room temperature to prevent over-developing gluten.