Mastering the Raspberry Cream Choux Pastry
Watching a tray of golden cream puffs deflate into flat, soggy pancakes the moment they leave the oven is a heartbreak every baker knows. That “deflated pastry syndrome” usually happens because moisture gets trapped inside the shell, turning your crisp masterpiece into a wet sponge. When you get it right, however, the contrast is incredible. You get a shatteringly crisp, buttery shell that gives way to a cloud of tart raspberry and sweet vanilla cream.
The secret to avoiding the dreaded collapse lies in a specific steam-release trick and a dual-layer filling technique. This Raspberry Cream Choux Pastry relies on a precise balance of evaporation and structural strength. By mastering the moisture levels, you ensure your pastries stay tall, hollow, and ready to hold that luscious fruit filling without softening prematurely.
I’ve found that the most common mistake is fear of the oven door. To get that professional, airy rise, you have to trust the heat and leave the door shut. The “Fail-Safe Rise Technique” I use involves a tiny, strategic incision right after baking. This simple move allows internal steam to escape instantly, which is the only way to keep the interior walls from collapsing under their own weight.
The Physics of the Perfect Choux Rise
Pâte à Choux is a unique beast in the baking world because it doesn’t rely on baking soda or yeast to rise. Instead, it uses the power of steam. When the high-moisture dough hits the intense heat of a 425°F oven, the water in the batter rapidly turns into vapor. This steam pushes the dough outward and upward, creating a massive internal cavity.
However, steam alone isn’t enough to keep the pastry upright. You need a strong gluten structure to trap that steam like a balloon. As the flour cooks on the stovetop, the starches gelatinize, creating a flexible web. When you add the eggs, you’re adding protein that sets as it bakes. This protein acts like the “scaffolding” of the puff, hardening into a permanent shape while the steam expands the center.
If the oven temperature is too low, the steam won’t have enough force to push the dough up before the proteins set. Conversely, if the dough is too weak, the steam will simply leak out, leaving you with a flat disc. Success depends on that perfect handoff between the expanding steam and the setting egg proteins.
Why Moisture Control Dictates Success
The first real test of your pastry happens at the stovetop. When you stir the flour into the boiling water and butter, you’re looking for a specific visual cue: a thin, white film on the bottom of the pan. This isn’t just a mess to clean up; it’s a sign that you’ve cooked off enough excess water.
Removing this moisture is vital because it makes room for the eggs later. If the dough is too wet at this stage, it won’t absorb the eggs properly, and your puffs will “weep” in the oven. You want a concentrated, thick paste that smells slightly nutty and looks completely smooth before you even think about reaching for the eggs.
Essential Components for Raspberry Cream Choux Pastry
Quality ingredients make a massive difference when the list is this short. You must use room-temperature eggs for this recipe. Cold eggs will shock the warm butter-and-flour paste, causing it to curdle rather than emulsify. When the eggs are at room temperature, they blend seamlessly into the dough, creating that signature glossy finish.
I always reach for unsalted butter because it allows me to control the salt levels perfectly. Since we’re filling these with a delicate raspberry cream, you don’t want a salty shell overpowering the fruit. For the filling, your heavy whipping cream must be very cold, ideally chilled to at least 40°F. Cold fat globules in the cream bond together much more easily, which gives you the stiff, stable peaks needed to support the weight of the pastry lid.
Selecting and Preparing Fresh Raspberries
Fresh raspberries are the star here, but they bring a lot of water to the party. To keep your filling from becoming a “soupy” mess, you have to prep the berries correctly. After mashing them, I always press them through a fine-mesh sieve. This removes the seeds and, more importantly, allows you to discard any watery runoff.
By straining the berries, you’re left with a concentrated raspberry essence. This thick puree provides a punchy, tart flavor and a vibrant pink color without breaking the structure of your whipped cream. If you skip the straining, the excess liquid will deflate the air bubbles you worked so hard to whip into the cream.
Step-by-Step: Crafting the Choux Dough
Start by bringing your water, butter, and salt to a rolling boil. Don’t just wait for a few bubbles; it needs to be active. Once it’s boiling, dump the flour in all at once. This “all at once” method ensures the flour hydrates evenly. Stir vigorously with a wooden spoon until the dough pulls away from the sides and forms a cohesive ball.
After the dough cools for about five minutes, it’s time for the eggs. Add them one by one, beating thoroughly after each addition. The dough will look like it’s breaking and becoming chunky at first, but keep going. It will eventually smooth out into a thick, shiny paste. You’ll know it’s ready when you lift your spoon and the dough falls off in a slow, steady “V” shape. If it stays stuck to the spoon, it’s too dry; if it runs off like liquid, it’s over-mixed.
Piping Techniques for Uniform Mounds
While you can use a spoon, a piping bag gives you much better control over the height of your puffs. Aim for high, rounded mounds rather than wide, flat circles. High mounds encourage the pastry to grow upward, which creates a larger, more defined hollow center for your filling.
Space the mounds at least two inches apart on your parchment paper. These little guys will triple in size as they bake, and they need plenty of room for the hot air to circulate around them. If they’re too crowded, the sides will stay soft and pale instead of getting that deep, golden crunch.
Precision Baking and the Steam-Release Trick
Baking choux is a two-act play. You start at 425°F to create that initial blast of steam for the rise. After 15 minutes, you drop the heat to 375°F to dry out the shells and firm up the structure. Whatever you do, do not open the oven door during the first 20 minutes. Even a quick peek lets out the heat and steam, which can cause the fragile shells to collapse instantly.
The Paring Knife Technique for Structural Integrity
The moment those puffs come out of the oven, you have to act fast. Use a small paring knife to poke a tiny slit or a small hole in the side of each shell. You’ll actually see a little puff of steam escape. This is the “Fail-Safe Rise Trick” that separates pros from amateurs.
If you leave that steam trapped inside, it will condense as the pastry cools, turning the crisp walls soft and soggy from the inside out. By letting the steam escape, the interior air dries out, leaving you with a sturdy, hollow shell that stays crisp for hours. Let them cool completely on a wire rack so air can circulate underneath them as well.
Constructing the Dual-Layer Raspberry Filling
To make the filling, whip your chilled heavy cream with powdered sugar and vanilla until it reaches stiff peaks. You want it firm enough that it holds its shape when you lift the whisk. If it’s too soft, the weight of the pastry top will just squeeze the cream out the sides.
Gently fold your raspberry puree into half of the whipped cream. Use a wide spatula and a “cut and fold” motion. Don’t stir aggressively, or you’ll knock the air out of the cream. You’re looking for a uniform, pale pink color that looks light and airy.
Achieving the Signature Two-Tone Aesthetic
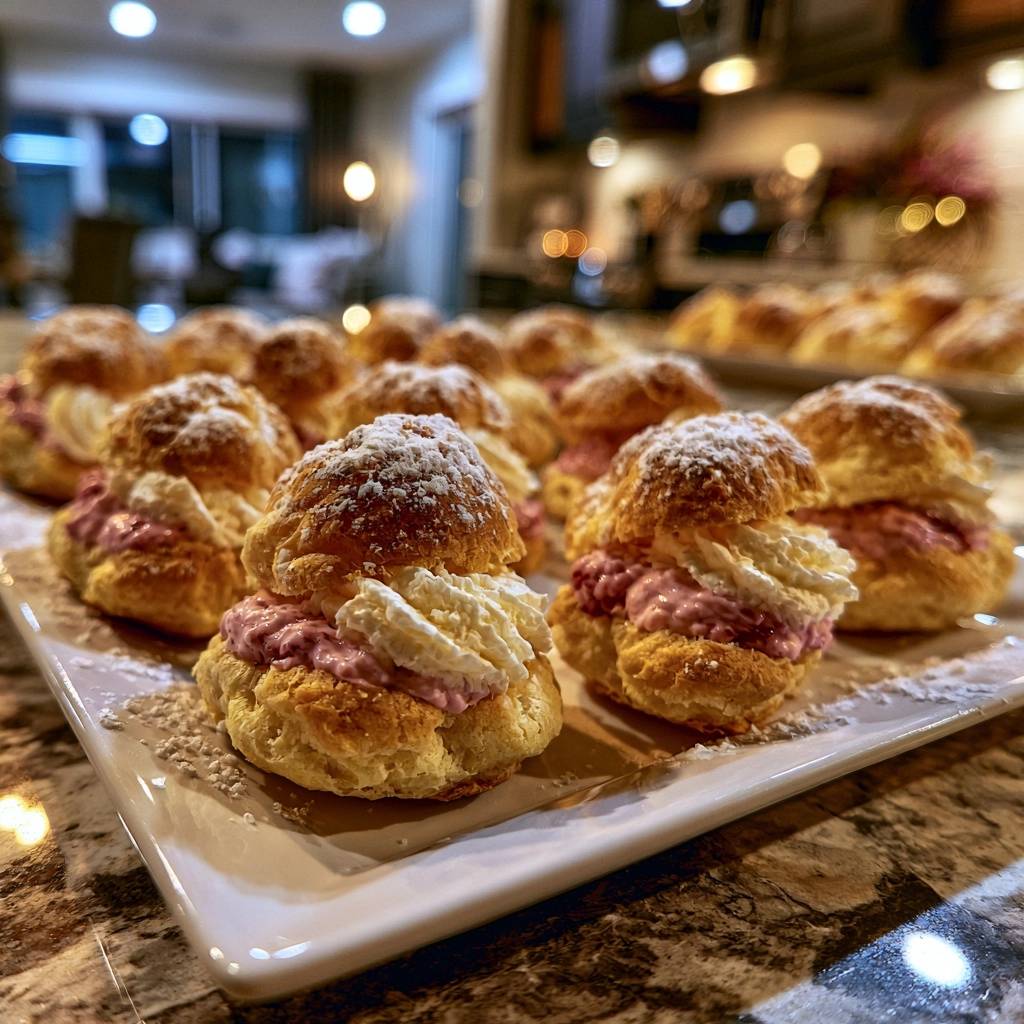
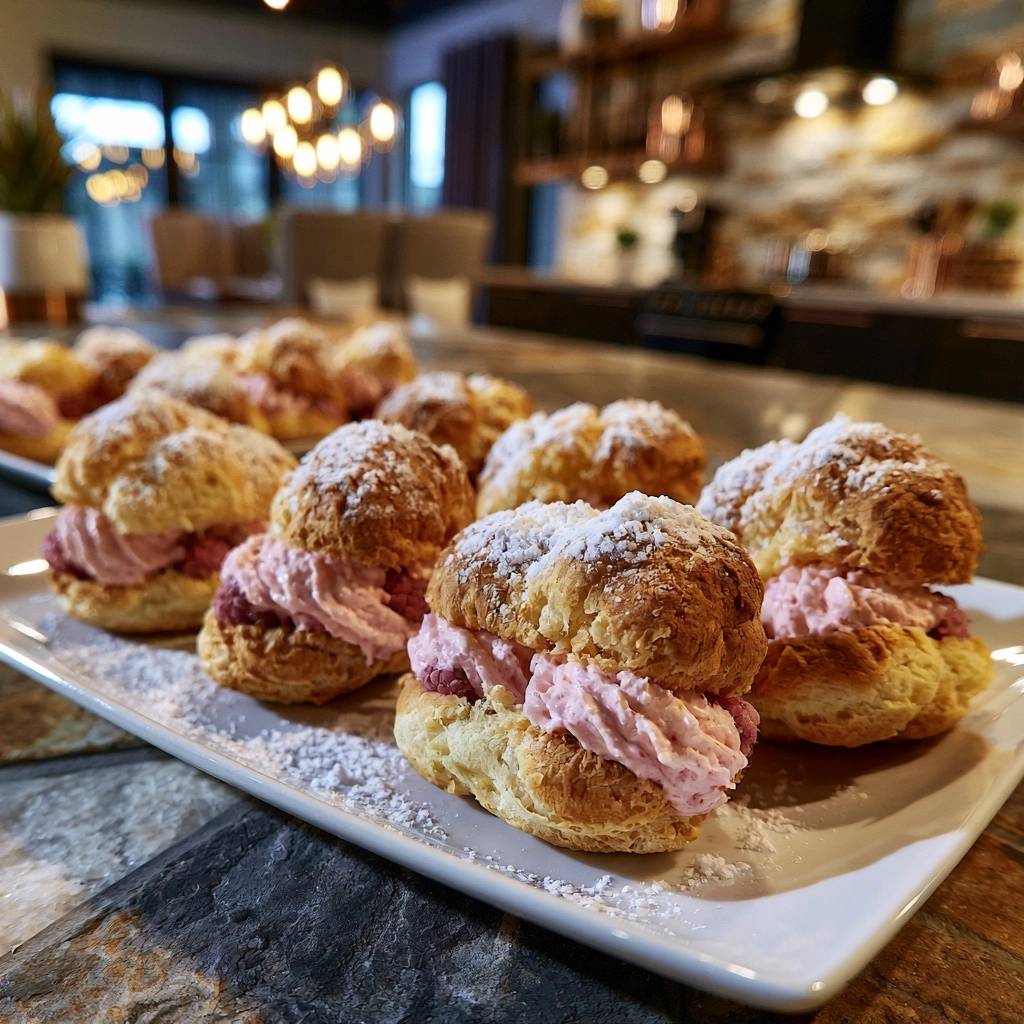
For a professional look, use two different piping bags. Pipe a generous layer of the pink raspberry cream into the bottom of the sliced shell first. Then, pipe a layer of the white vanilla cream directly on top. This creates a beautiful color contrast when you look at the pastry from the side.
Since both creams have the same base, they share the same density. This prevents the layers from bleeding into each other or sinking. It creates a clean, tiered look that makes the dessert look like it came straight from a high-end French patisserie.
Troubleshooting Common Choux Pastry Obstacles
If your dough is too runny, you likely added the eggs too quickly or used eggs that were too large. Unfortunately, you can’t just add more raw flour to fix it. You would need to make a small half-batch of the cooked flour paste and mix it in. To avoid this, always whisk your last egg in a bowl and add it a teaspoon at a time until you hit that “V” shape.
If the puffs didn’t rise, check your boiling process. If the water wasn’t at a rolling boil when the flour was added, the starches won’t gelatinize correctly. Also, ensure your oven is truly at 425°F before the tray goes in. An oven thermometer is a baker’s best friend here.
For puffs that collapse after cooling, the culprit is almost always under-baking or skipping the steam-release slit. The shells should feel firm and light, not soft or squishy, when you pull them out. If your filling feels grainy, you’ve over-whipped the cream. Once it starts to look dull and clumpy, you’re seconds away from making butter. Stop as soon as the peaks stand straight up.
Make-Ahead Strategies and Storage Standards
You can actually make the choux shells up to two days in advance. Store the unfilled, cooled shells in an airtight container at room temperature. If they lose their crunch, just pop them back into a 350°F oven for about 5 minutes to crisp them up again. Let them cool before filling.
Once filled, these pastries should be eaten within a few hours. The moisture from the cream will eventually soften the shells, no matter how well you baked them. If you have leftovers, store them in the fridge, but know that the pastry will lose its signature crunch by the next day. Do not freeze the filled pastries, as the cream will separate and the shell will become mushy upon thawing.
Expert Tips for Professional Presentation
When you’re ready to serve, use a fine-mesh sieve to dust the tops with powdered sugar. This creates a light, even “snow” effect that looks much better than clumps of sugar. It also hides any minor imperfections on the surface of the pastry.
Always use a serrated knife (like a bread knife) to slice your puffs in half. A straight blade will often crush the delicate, crispy walls before it cuts through them. A gentle sawing motion with a serrated blade ensures a clean cut, keeping that beautiful hollow center intact for your raspberry and vanilla layers.
How do I store leftover Raspberry Cream Choux Pastry?
Filled pastries must be kept in an airtight container in the refrigerator. They are best enjoyed within 4 hours of assembly to maintain the crispness of the shell. After that, the moisture from the cream will begin to soften the pastry. Unfilled shells can be stored at room temperature in a sealed container for 2 days or frozen for up to a month.
Why did my cream puffs turn out flat?
Flat puffs usually happen for three reasons: the water and butter didn’t reach a full boil, the oven door was opened too early, or the dough had too much liquid. Ensure you cook the flour paste until a film forms on the pan to evaporate enough water. Also, never open the oven during the first 20 minutes of baking, as the sudden drop in temperature will cause the steam to collapse before the structure is set.
Can I use frozen raspberries for the filling?
Yes, you can use frozen raspberries, but you must thaw them completely and drain all excess liquid first. Frozen berries tend to release more water than fresh ones, so it is even more important to strain the puree through a fine-mesh sieve. If the puree is still too watery, simmer it in a small pan for a few minutes to reduce it into a thicker concentrate before folding it into the cream.
What is the best way to reheat the shells?
If your unfilled shells have gone soft, place them on a baking sheet in a preheated 350°F oven for 5 to 8 minutes. This will evaporate any absorbed moisture and restore the crunch. Let them cool completely on a wire rack before filling, or the heat will melt your whipped cream immediately.
Can I substitute the all-purpose flour with cake flour?
It is not recommended to use cake flour for choux pastry. Cake flour has a lower protein content, which results in a weaker structure. You need the higher protein found in all-purpose flour (or even bread flour) to create the strong gluten walls that hold the steam and keep the puff from collapsing.
Why is my raspberry cream curdled or runny?
This usually happens if the raspberry puree was too warm when added or if you over-mixed the cream. Ensure the strained raspberry liquid is completely cold before folding it into the stiffly whipped cream. Use a gentle folding motion rather than a whisk to combine them to keep the air bubbles intact.

Raspberry Cream Choux Pastry
Course: DessertCuisine: FrenchDifficulty: easy12
servings25
minutes30
minutes55
Minutes210
kcalFrench
Ingredients
1/2 cup unsalted butter
1 cup water
1/4 teaspoon salt
1 cup all-purpose flour
4 large eggs, room temperature
1 1/2 cups heavy whipping cream, chilled
1/2 cup fresh raspberries, mashed and strained (to remove excess liquid)
4 tablespoons powdered sugar, divided
1 teaspoon vanilla extract
Extra powdered sugar for dusting
Directions
- Preheat your oven to 425 degrees F. Line a large baking sheet with parchment paper.
- In a medium saucepan, combine butter, water, and salt. Bring to a rolling boil over medium-high heat.
- Add the flour all at once and stir vigorously with a wooden spoon. Continue stirring for about 2 minutes over medium heat until the dough forms a smooth ball and a thin film appears on the bottom of the pan. This step is crucial to cook off excess moisture.
- Transfer the dough to a bowl and let cool for 5 minutes. Add eggs one at a time, beating thoroughly after each addition (using a spoon or electric mixer) until the dough is glossy and falls off the spoon in a slow “V” shape.
- Pipe or spoon 12 high mounds onto the baking sheet. Bake at 425 degrees F for 15 minutes, then reduce heat to 375 degrees F for another 10 to 15 minutes until deep golden brown and firm to the touch. Do not open the oven door during the first 20 minutes.
- THE FAIL-SAFE RISE TRICK: Immediately upon removing from the oven, use a small paring knife to poke a tiny slit in the side of each puff. This allows the internal steam to escape instantly, preventing the moisture from softening the walls and causing a collapse. Let them cool completely on a wire rack.
- While cooling, whip the heavy cream, 3 tablespoons of powdered sugar, and vanilla until very stiff peaks form.
- Divide the whipped cream into two bowls. In the first bowl, gently fold in the mashed raspberries to create the pink raspberry cream. Leave the second bowl as plain white vanilla cream.
- Slice the cooled puffs in half horizontally. To achieve the visual look in the image, pipe a generous layer of the pink raspberry cream into the bottom half, then pipe a layer of the white vanilla cream directly on top.
- Place the pastry tops back on, and dust generously with powdered sugar before serving.
Notes
- The fail-safe rise trick involves poking a small slit in the side of each puff immediately after baking to allow steam to escape and prevent collapsing.