Mastering the Hearty Beef and Cabbage Soup
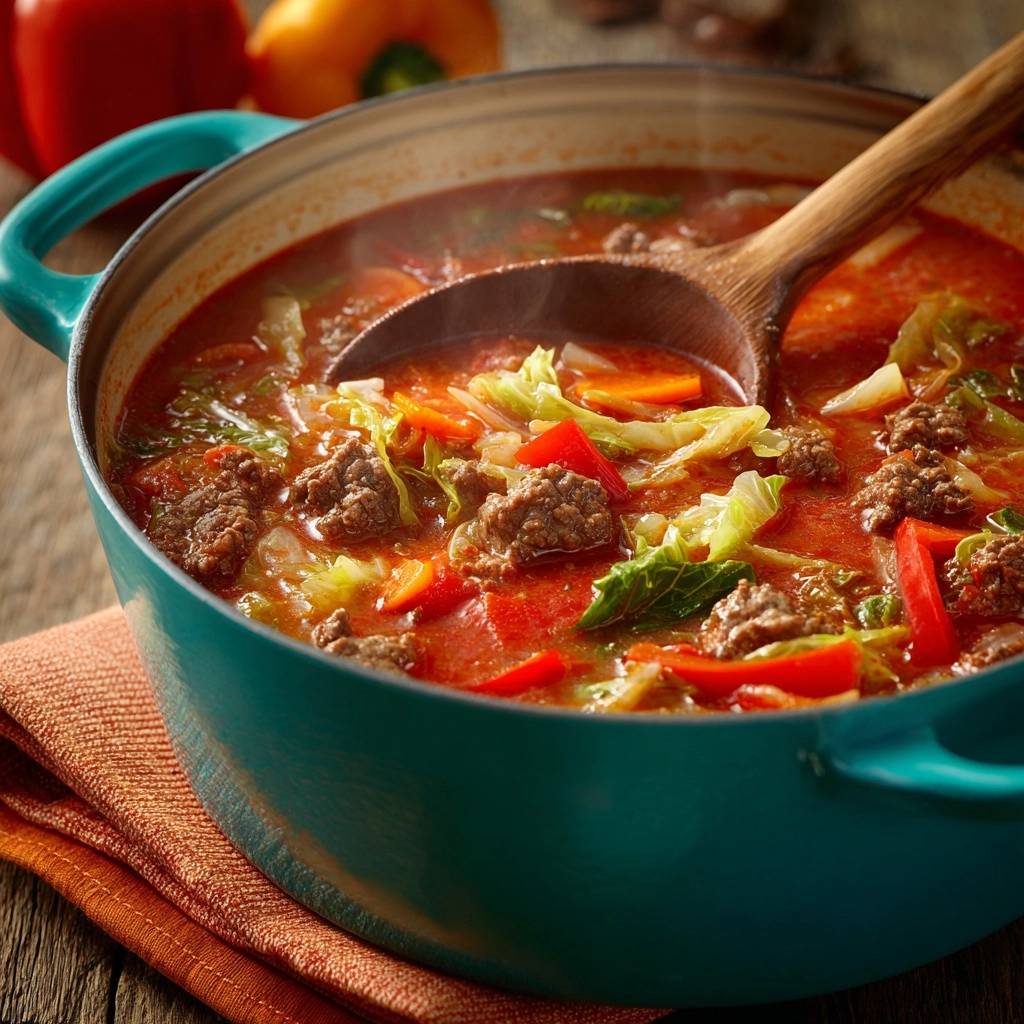
Most cabbage soups suffer from a common, unappetizing fate: they turn into a gray, soggy mess where the vegetables have lost all their personality. You’ve likely had that version before, where the cabbage is slimy and the broth feels thin and uninspired. This Hearty Beef and Cabbage Soup changes that narrative entirely by focusing on a specific, staggered cooking method that keeps every bite vibrant.
The secret to a truly great soup isn’t just the ingredients you toss into the pot; it’s the order in which they arrive. By treating the beef, the root vegetables, and the leafy greens as individuals with different needs, you create a bowl that feels like a complete, structured meal. It’s the difference between a muddy stew and a bright, savory masterpiece that actually looks as good as it tastes.
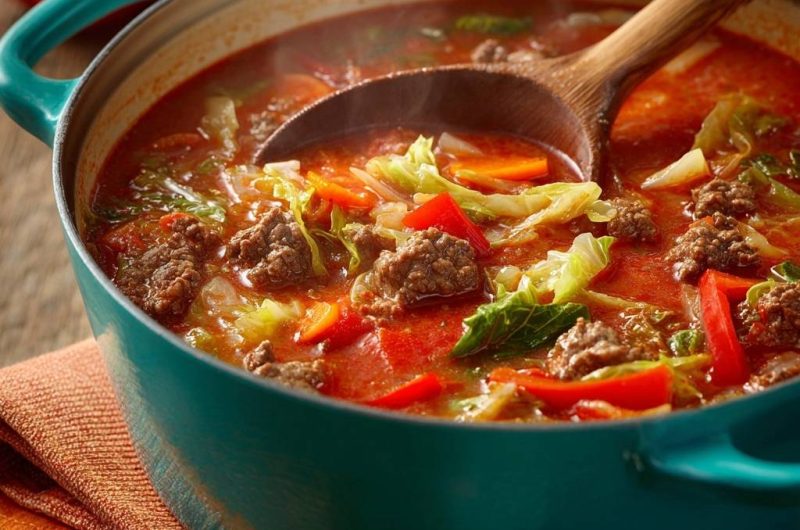
I’ve found that the real trick to professional-level soup is the “rustic chunk” method for the beef. Instead of pulverizing the meat into tiny grains, you want to leave it in larger, bite-sized pieces. This provides a meaty “chew” that stands up against the wide ribbons of cabbage, ensuring the beef doesn’t just disappear into the liquid. Let’s dive into how to layer these flavors for the best bowl of soup you’ve ever made.
The Anatomy of a Non-Mushy Cabbage Soup
Vegetable cell walls are finicky things, especially when it comes to cabbage and bell peppers. Cabbage is mostly water and cellulose; if you boil it for thirty minutes, those cell walls collapse completely, resulting in that “mushy” texture everyone hates. However, carrots and onions are much denser and require a longer stay in the heat to release their natural sugars and soften their fibers.
To achieve the “Tender-Crisp” benchmark, we use a staggered approach. We give the carrots a head start to ensure they aren’t crunchy, while holding the cabbage back until the final ten minutes. This timing allows the cabbage to become translucent and tender while still maintaining enough structural integrity to provide a satisfying mouthfeel. It’s a simple bit of kitchen science that makes a world of difference.
Essential Components for a Rich Savory Base
The foundation of this soup relies heavily on the quality of your beef and tomatoes. I recommend using a lean ground beef, specifically a 90/10 blend. While fat adds flavor, too much of it will create an oily film on top of your broth that masks the delicate herbs. A leaner cut provides plenty of umami without making the soup feel heavy or greasy.
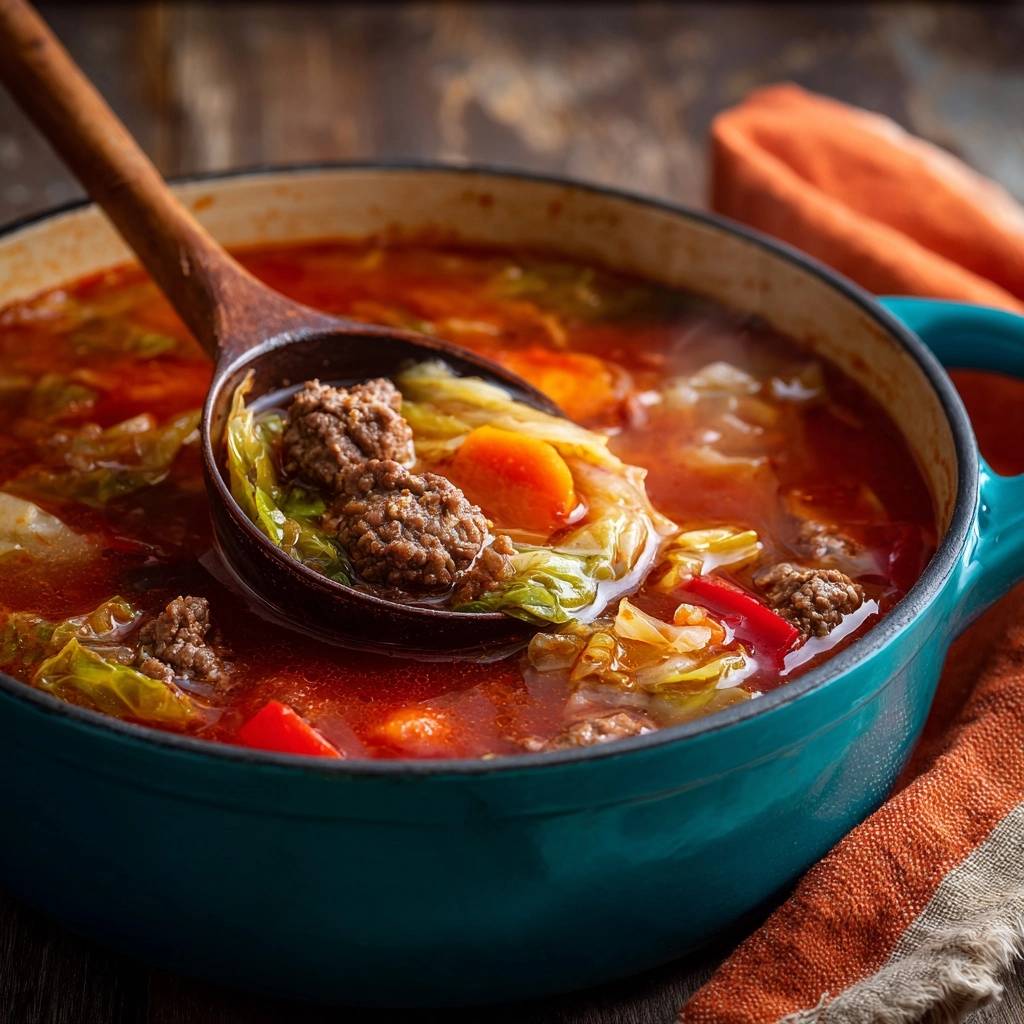
For the tomatoes, crushed tomatoes are the secret to a velvety consistency. Unlike diced tomatoes, which are often treated with calcium chloride to help them keep their shape, crushed tomatoes break down into the beef broth. This creates a thicker, more cohesive liquid that clings to the cabbage ribbons rather than just sitting at the bottom of the bowl.
Selecting the Right Cabbage Variety
While there are dozens of cabbage varieties at the market, standard Green Cabbage is the undisputed champion for this recipe. It has thick, sturdy leaves that can withstand the heat of a simmering beef broth without disintegrating into nothingness. Savoy cabbage is a bit too delicate and tends to wilt too quickly, while Napa cabbage is better suited for quick stir-frys or kimchi.
When you’re prepping your green cabbage, aim for one-inch ribbons. These long, wide strips mimic the shape of a noodle, making the soup feel much heartier. If you chop the cabbage too small, it loses its ability to provide that essential “snap” that balances the soft, simmered beef.
The Role of Aromatics and Dried Herbs
In a soup that simmers for over half an hour, dried oregano is actually superior to fresh. Dried herbs have concentrated oils that need time and heat to bloom. As the soup simmers, the oregano slowly infuses the broth with an earthy, floral note that pairs perfectly with the sweetness of the cooked onions and garlic.
Garlic and onions act as the “aromatic spine” of the dish. By sautéing them early on, you remove the sharp, raw bite and replace it with a mellow sweetness. This creates a complex flavor profile that makes the broth taste like it’s been simmering on the stove for hours rather than just thirty-five minutes.
Phase One: Searing Beef for Maximum Umami
The first step is all about the Maillard reaction. This is the chemical reaction between amino acids and reducing sugars that gives browned food its distinctive flavor. When you hit that ground beef in a hot Dutch oven with olive oil, don’t be in a rush to move it around. Let it sit for a minute or two until a deep, brown crust forms on the bottom.
Use your wooden spoon to break the meat into large, rustic chunks. You aren’t making taco meat here; you want substantial pieces of beef that you can actually stab with a spoon. Once the meat is deeply browned and the fat has rendered, you’ve created the flavor base that will carry the entire soup.
Phase Two: Building the Foundation with Root Vegetables
After the beef is browned, it’s time to bring in the onions and carrots. These root vegetables need about five to seven minutes of direct contact with the heat and the beef fat. You’re looking for the onions to turn translucent and the carrots to take on a slightly glossy appearance. This step is crucial because it begins the softening process for the carrots, which are the hardest ingredient in the pot.
As the vegetables cook, they will pick up the “fond”—those little brown bits of beef stuck to the bottom of the pot. This is liquid gold. The moisture from the onions will help deglaze the pan naturally, incorporating all that concentrated beef flavor back into the vegetable mix.
Phase Three: Toasting the Tomato Paste
Adding tomato paste is a critical technical moment. Many people make the mistake of stirring the paste into the broth, but that often results in a raw, metallic taste. Instead, clear a small spot in the center of your pot and drop the paste directly onto the hot surface. Stir it constantly for about two minutes.
You will watch the color shift from a bright, candy red to a dark, moody brick red. You’ll also notice the smell change from “tinny” to toasted and sweet. This caramelization process removes the acidity and deepens the color of your final broth, giving it that rich, professional look.
Phase Four: The Simmer and The Staggered Addition
Once your broth, crushed tomatoes, and herbs are in, let the soup simmer uncovered for fifteen minutes. This allows the liquid to reduce slightly and the flavors to marry. However, the most important part of this recipe is what you *don’t* do: do not add the cabbage yet. Keeping the cabbage out of the pot during this initial simmer is what prevents the “mushy” disaster.
In the final ten minutes, stir in your cabbage ribbons and red bell pepper strips. The cabbage should only cook until it’s just barely translucent. The bell peppers should stay bright red and retain a slight snap. As soon as you hit that point, kill the heat. The carry-over heat in the Dutch oven will finish the job without overcooking the greens.
Troubleshooting Common Soup Consistency Issues
If you find your broth is a bit thinner than you’d like, don’t panic. You can easily thicken it by letting it simmer uncovered for an extra five minutes before you add the cabbage. This evaporates excess water and concentrates the tomato base. Conversely, if it’s too thick, a splash of extra beef broth or even water will loosen it right up.
If you accidentally overcook the cabbage, the best fix is to add a fresh element right before serving. A handful of fresh parsley or a squeeze of lemon juice can distract the palate from the softer texture by providing a bright, acidic contrast. If the soup tastes too salty, the old “potato trick” works wonders—drop a peeled, halved potato into the pot for five minutes to soak up the excess salt, then discard it.
Flavor Variations and Dietary Swaps
This soup is incredibly versatile. If you want a different protein profile, ground lamb adds a wonderful richness, while ground bison offers a leaner, slightly sweeter flavor. For those who like a bit of heat, adding a teaspoon of red pepper flakes during the aromatic stage will give the broth a “zesty” kick that warms you from the inside out.
You can also lean into an “earthy” profile by adding a teaspoon of smoked paprika along with the oregano. This gives the soup a subtle, wood-fired flavor that complements the beef beautifully. Just remember to keep the ratios the same so the cabbage remains the star of the show.
Make-Ahead Strategies and Storage Logistics
Like most stews, this soup actually tastes better the next day. As it sits in the fridge, the garlic, oregano, and beef flavors continue to permeate the cabbage. It will stay fresh in an airtight container for up to four days. When reheating, do it gently on the stove over medium-low heat. Avoid the microwave if possible, as it can “hot spot” and turn the cabbage mushy during the second heat cycle.
For long-term storage, this soup freezes beautifully. Use heavy-duty freezer bags and squeeze out as much air as possible to prevent freezer burn. It will last for up to three months. Just be sure to thaw it in the refrigerator overnight before reheating to maintain the best possible texture.
Optimal Pairings for a Complete Meal
Because this soup has a rich, tomato-based acidity, it pairs perfectly with something crusty and absorbent. A thick slice of toasted sourdough is ideal for mopping up the last bits of broth. The tang of the bread cuts through the savory beef fat in a way that feels incredibly balanced.
For a perfect pairing, try our Unstuffed Cabbage Roll Soup: Crisp Texture Mastery.
If you want to keep things lighter, a sharp green salad with a simple lemon vinaigrette is a great choice. The bright citrus notes in the salad dressing act as a palate cleanser between spoonfuls of the hearty soup. Roasted root vegetables, like parsnips or turnips, also make a great side if you want to double down on the rustic, autumnal vibes.
Expert Tips for Professional Results
Firstly, never let the soup reach a rolling boil once the cabbage has been added. A gentle simmer is all you need; high heat will tear the cabbage ribbons apart and ruin the texture. Secondly, give the soup a five-minute “resting period” after you turn off the burner. This allows the temperature to stabilize and the flavors to settle.
Thirdly, try adding a tiny splash of apple cider vinegar right before you serve. You won’t taste the vinegar itself, but the acid will “wake up” the heavy beef flavors and make the whole dish pop. Finally, always ribbon-cut your cabbage. Dicing it might be faster, but those long, elegant strips provide a much better eating experience and look far more professional in the bowl.
Frequently Asked Questions
Can I use a slow cooker for this recipe?
You can, but you have to be very careful. If you put the cabbage in at the beginning of a 6-hour slow cooker cycle, it will turn into a flavorless paste. To use a crockpot, cook the beef and broth base on low for 6 hours, then stir in the cabbage and peppers during the last 30 minutes of cooking only.
How do I store leftovers without the vegetables getting soggy?
The best way is to cool the soup as quickly as possible before refrigerating. Transfer the soup to shallow containers rather than one deep pot; this stops the cooking process immediately. When you reheat, do it quickly over high heat just until it’s hot, rather than letting it simmer for a long time.
Can I substitute the ground beef for stew meat?
Yes, but you will need to adjust your timeline. Stew meat (like chuck roast) needs at least 60 to 90 minutes of simmering to become tender. You would brown the meat, add the broth, and simmer until tender before finally adding your cabbage and peppers at the very end.
Is this soup suitable for meal prep?
It is excellent for meal prep because the flavors develop over time. However, if you plan on eating it over 4 or 5 days, consider undercooking the cabbage slightly on day one. This way, when you reheat your portions throughout the week, the cabbage reaches perfect tenderness rather than becoming overdone.
What is the best way to reheat this without losing the vibrant red color?
Reheat the soup in a small saucepan over medium heat. Avoid boiling it vigorously, as this can cause the fats to emulsify and turn the broth cloudy or orange. A gentle heat preserves the clarity of the broth and the bright red hue of the bell peppers.
Beef and Cabbage Soup
Course: Main CourseCuisine: AmericanDifficulty: easy6
servings15
minutes35
minutes310
kcal50
MinutesThis recipe solves the common problem of mushy cabbage soup by searing beef for deep flavor and adding delicate vegetables at the end of the cooking process. The result is a hearty, nutrient-dense meal with a vibrant texture and a robust tomato-beef broth.
Ingredients
1 pound lean ground beef
1/2 head green cabbage, chopped into 1-inch ribbons
2 large carrots, sliced into thin rounds
1 red bell pepper, sliced into thin strips
1 yellow onion, diced
3 cloves garlic, minced
1 can (28 oz) crushed tomatoes
6 cups beef broth
2 tablespoons tomato paste
1 teaspoon dried oregano
1 teaspoon salt
1/2 teaspoon black pepper
2 tablespoons olive oil
Fresh parsley for garnish (optional)
Directions
- Heat olive oil in a large Dutch oven over medium-high heat. Add the ground beef and cook until deeply browned. Use a wooden spoon to break the meat into large, rustic chunks rather than fine crumbles to maintain the hearty texture shown in the image. Drain any excess fat. Cook until no pink remains and it reaches 160°F (71°C).
- Add the diced onion and sliced carrots to the pot. Sauté for 5 to 7 minutes. This initial sauté builds a flavor base and ensures the harder root vegetables start softening before the liquid is added.
- Stir in the garlic and tomato paste. Cook for 2 minutes, stirring constantly, until the paste turns a deep brick red and smells toasted. This step is vital to prevent a raw, metallic tomato taste and creates the rich red broth color.
- Pour in the crushed tomatoes, beef broth, oregano, salt, and pepper. Bring the mixture to a rolling boil, then reduce heat to low and simmer uncovered for 15 minutes to allow the flavors to meld.
- To solve the mushy vegetable problem, add the chopped cabbage and the red bell pepper strips only during the last 8 to 10 minutes of cooking. Stir them into the hot broth.
- Simmer just until the cabbage is translucent and the bell peppers are bright red and tender but still retain a slight snap. Remove from heat immediately to stop the cooking process. Serve hot in deep bowls, ensuring each serving has a mix of large beef chunks and vibrant vegetables.
Notes
- To maintain the hearty texture, break the ground beef into large chunks rather than fine crumbles. Adding the cabbage and bell peppers in the final 10 minutes is the key to preventing a mushy consistency.