Mastering Lemon Garlic Shrimp and Quinoa
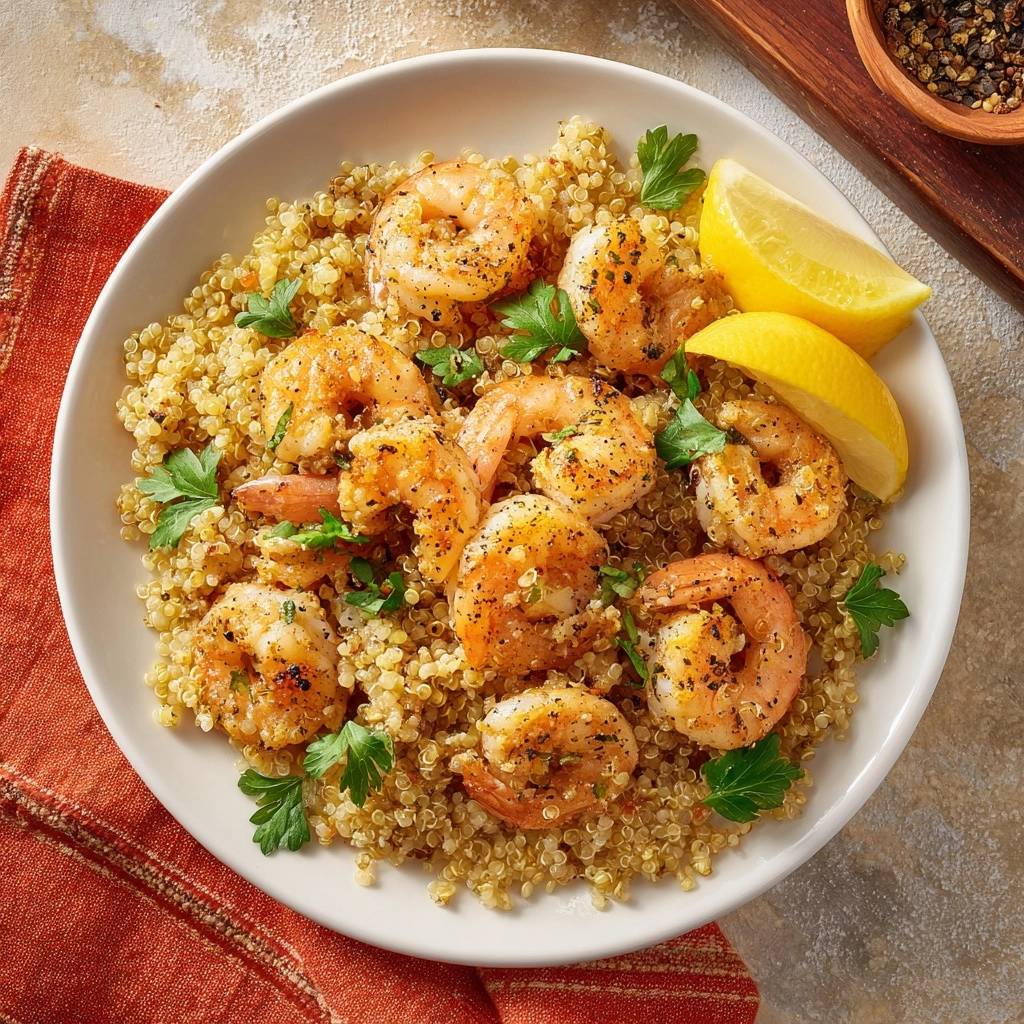
Most people think of “health food” as a chore to eat, usually picturing a bowl of bland, mushy grains and rubbery protein. It’s a common frustration when you’re trying to eat well but end up with a textureless mess that leaves you reaching for the takeout menu. This Lemon Garlic Shrimp and Quinoa recipe changes that narrative by focusing on the one thing most recipes ignore: structural integrity.
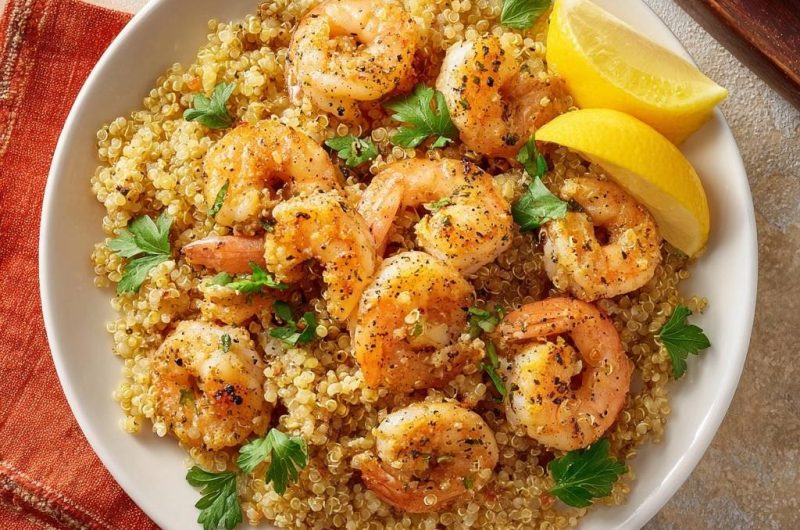
The secret to this dish lies in the “Steam-Dry” method, a simple technique that transforms quinoa from a soggy porridge into a light, fluffy base with a satisfying pop. When you pair those perfected grains with succulent shrimp, you get a meal that hits every sensory note. You’ll experience the bright zing of fresh citrus, the pungent aroma of toasted garlic, and a bold kick from cracked black pepper.
I’ve found that the biggest mistake home cooks make is using too much liquid and peeking under the lid. By reducing the water ratio slightly and using a kitchen towel to trap excess moisture, you ensure every grain stays separate. This isn’t just a healthy dinner; it’s a gourmet experience that proves nutritious food can have incredible mouthfeel and deep, savory flavor.
The Science of Non-Mushy Quinoa
To understand why quinoa often turns into a gummy clump, you have to look at the anatomy of the grain itself. Each tiny seed is coated in saponin, a natural bitter compound that protects the plant from insects. If you don’t rinse this off thoroughly, that bitterness lingers and the starch on the surface becomes sticky during the cooking process.
The “Steam-Dry” technique is your best defense against the dreaded mush. After the quinoa has simmered and absorbed the bulk of the liquid, there is still residual moisture clinging to the grains and the underside of the lid. If you leave it alone, that steam condenses into water droplets that drip back down, saturating the quinoa and making it heavy.
If you follow the same approach of keeping the filling just right, this method works beautifully for stuffed bell peppers with shrimp and rice too.
By placing a clean kitchen towel between the pot and the lid during the final resting phase, you create a moisture trap. The fabric absorbs that rising steam, allowing the grains to firm up and separate. This results in a texture that is light and airy rather than dense and waterlogged, providing the perfect canvas for your garlic-infused oil.
Toasting Grains for Structural Integrity
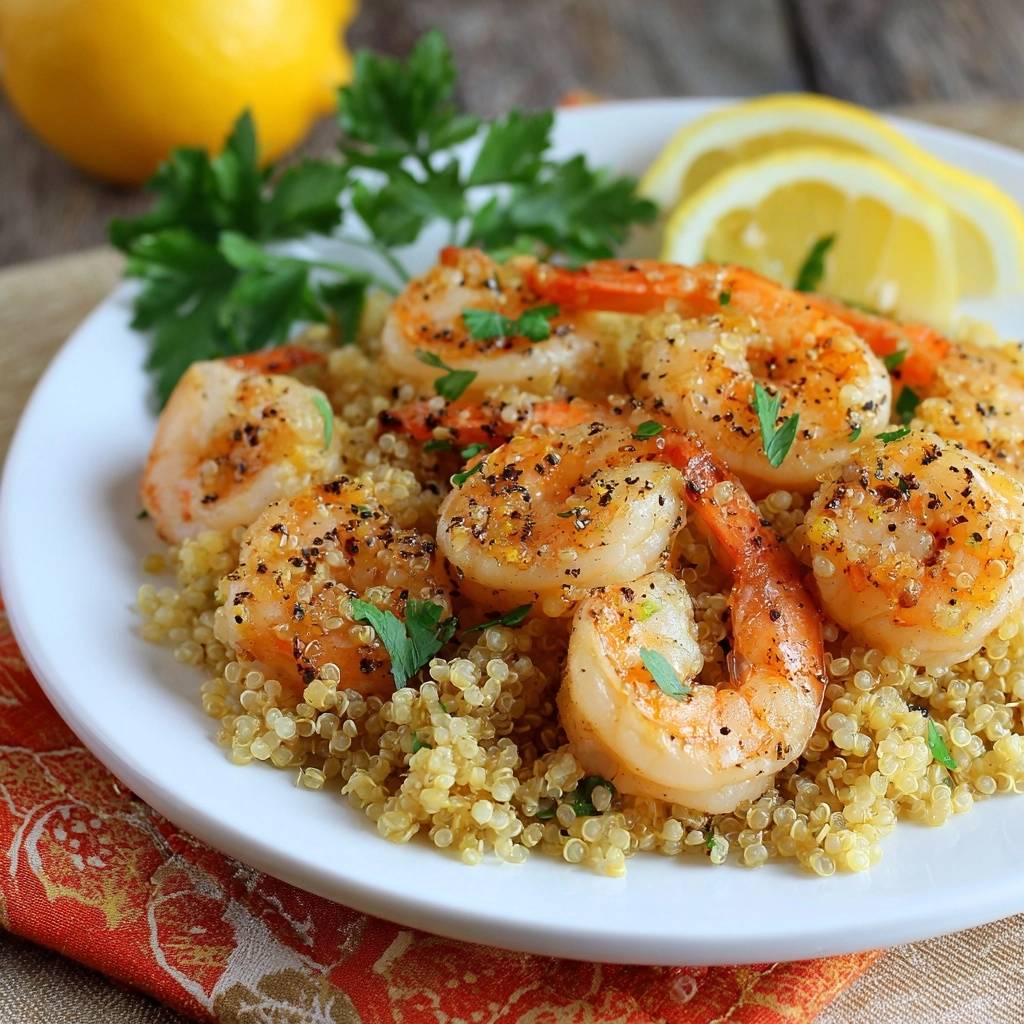
Before a single drop of liquid hits the pan, you should always toast your dry quinoa. This process triggers the Maillard reaction, which is the same chemical reaction that gives seared steak or toasted bread its complex flavor. As the grains heat up in the dry pot, they release a nutty aroma that adds a whole new dimension to the finished dish.
Beyond flavor, toasting serves a vital structural purpose. The heat strengthens the outer hull of the seed, essentially “locking” the starch inside. This prevents the grains from bursting and becoming mushy while they simmer. You’ll know it’s ready when the grains start to make a faint popping sound and turn a shade darker.
Essential Components for Lemon Garlic Shrimp
When it comes to the shrimp, size definitely matters. I recommend using “Large” or “Jumbo” shrimp, typically labeled as 16/20 count, which means there are 16 to 20 shrimp per pound. These larger specimens are much more forgiving in a hot skillet, allowing you to get a gorgeous golden sear on the outside without overcooking the center into a rubbery texture.
Fresh garlic is another non-negotiable element of this recipe. Jarred minced garlic often sits in a preservative liquid that dulls its flavor and adds a strange metallic aftertaste. Fresh cloves provide that sharp, spicy bite that mellows into a buttery sweetness when it hits the olive oil. It’s the backbone of the entire flavor profile.
For the herbs, always reach for flat-leaf parsley (also known as Italian parsley) over the curly variety. Flat-leaf parsley has a much more robust, peppery flavor and a softer texture that integrates beautifully into the dish. Curly parsley is often tough and flavorless, better suited as a 1980s steakhouse garnish than a primary seasoning ingredient.
Selecting the Right Quinoa Variety
While you can find quinoa in white, red, and black varieties, white quinoa is the gold standard for this specific recipe. It has the most delicate texture and expands the most when cooked, making it the fluffiest option. It acts like a sponge, soaking up the lemon juice and garlic oil much more effectively than its colorful counterparts.
Red and black quinoa have a thicker outer skin, which gives them a distinct “snap” and an earthier flavor. While they look beautiful in a salad, they don’t have the same absorption capacity. If you want that classic, comforting grain-bowl feel where the sauce coats every bite, stick with the white variety for the best results.
The Role of High-Quality Broth
Water is fine in a pinch, but using a high-quality chicken or vegetable broth is an easy way to inject flavor from the inside out. As the quinoa simmers for 15 minutes, it drinks up the liquid, seasoning the very center of every grain. This creates a savory foundation that makes the dish taste complete even before you add the shrimp.
If you’re using store-bought broth, look for low-sodium options so you can control the salt level yourself. The goal is to enhance the natural nuttiness of the quinoa, not overwhelm it. If you only have water on hand, be sure to add a generous pinch of sea salt to the pot to ensure the grains aren’t flat and tasteless.
Step-by-Step: Executing the Perfect Sear
The most important rule for cooking shrimp is the “Pat Dry” rule. Moisture is the absolute enemy of a good sear. If your shrimp are even slightly damp when they hit the oil, they will immediately release steam. Instead of a golden-brown crust, you’ll end up with grey, boiled shrimp sitting in a pool of liquid.
Take a few extra seconds to lay your peeled shrimp on a layer of paper towels and press another towel firmly on top. They should be bone-dry to the touch. Once they are dry, season them immediately with the salt and cracked black pepper. The pepper creates a beautiful visual crust that contrasts perfectly with the pink meat of the shrimp.
Heat your olive oil until it’s shimmering but not smoking. When you add the shrimp, you should hear a loud, aggressive sizzle. If the pan is quiet, it’s not hot enough. Arrange them in a single layer, giving each shrimp its own space. Overcrowding the pan drops the temperature instantly, which leads back to that unwanted steaming effect.
Let them sit undisturbed for a full two minutes. Resist the urge to move them around! This stillness is what allows the sugars and proteins to caramelize against the hot metal. You’re looking for a vibrant pink color on the bottom edge and a distinct golden-brown ring before you even think about flipping them over.
If you enjoy this quick-cooking shrimp dish, try the same tender, juicy shrimp in this creamy pepper shrimp over rice for a different sauce.
Timing the Garlic Addition
Garlic is delicate and burns incredibly fast, especially at the high temperatures needed to sear shrimp. If you add the minced garlic at the beginning, it will be bitter and black by the time the shrimp are done. The pro move is to wait until you’ve flipped the shrimp to the second side.
Once you flip, toss the garlic into the center of the pan with that final tablespoon of olive oil. It only needs about 60 to 90 seconds to release its aroma and turn a light golden color. This timing ensures the garlic stays sweet and fragrant, perfectly complementing the bright lemon rather than overpowering it with burnt notes.
Watch the shape of the shrimp as a guide for doneness. A perfectly cooked shrimp curls into a gentle “C” shape. If it tightens into a closed “O,” it’s overcooked and will likely be tough. Remove the pan from the heat the moment they hit that “C” shape, as the residual heat will finish the job.
The Final Emulsion: Lemon and Olive Oil
After you pull the pan off the burner, the magic happens. Squeeze fresh lemon juice directly into the hot skillet. The juice will deglaze the pan, picking up all those toasted garlic bits and browned shrimp juices. When this acidic juice hits the warm olive oil, it creates a light, un-thickened emulsion.
This isn’t a heavy, cream-based sauce; it’s a vibrant, thin glaze that coats the shrimp and eventually seeps into the quinoa. The heat of the pan mellows the sharpest bite of the lemon while preserving its fresh, sunny character. It’s this simple combination that ties the earthy grains and the savory seafood together into one cohesive bite.
Troubleshooting Common Texture Issues
Even with the best intentions, things can sometimes go sideways in the kitchen. If you find that your quinoa is still a bit crunchy after the resting period, don’t panic. Simply add one tablespoon of broth or water, put the lid back on tightly, and let it sit on the warm (but turned off) burner for another five minutes.
If your shrimp end up a bit rubbery, it’s almost always a result of overcooking. Remember that shrimp continue to cook for a minute or two after they leave the pan due to carry-over heat. Next time, try removing them from the skillet about 30 seconds before you think they are fully done. They will reach perfection on the plate.
Flavor Variations and Ingredient Swaps
This recipe is a fantastic base that you can easily adapt to what’s in your pantry. If you want a bit more acidity and color, toss some cherry tomatoes into the pan with the garlic; they’ll blister and release a sweet juice that pairs beautifully with the lemon. You can also swap the parsley for fresh cilantro and use lime juice for a bright, Southwestern flair.
For those looking for a plant-based version, chickpeas make an excellent substitute for the shrimp. Simply drain and pat the chickpeas dry, then roast or pan-fry them with the same garlic and pepper seasoning until they are crispy. The quinoa method remains exactly the same, providing a high-protein, vegan-friendly meal that doesn’t sacrifice texture.
Sides That Work With Lemon Garlic Shrimp
If you’re putting together a meal with that lemony shrimp and quinoa, here are two recipes that fit the buttery, herby vibe without stealing the spotlight.
- Soak up any leftover garlic butter with warm Soft Buttery Garlic Herb Dinner Rolls – the same garlic and herb notes make them a natural match.
- For a cool, creamy contrast that still
Optimal Side Dish Pairings
Since the quinoa and shrimp cook relatively quickly, you want side dishes that don’t require constant attention. High-heat roasted vegetables are the perfect companion. Asparagus spears or thin broccolini stalks can be tossed with olive oil and salt and popped into a 400°F oven right when you start the quinoa simmer.
By the time the quinoa has finished its “Steam-Dry” rest and you’ve seared the shrimp, the vegetables will be tender with crispy, charred tips. The bitterness of roasted greens balances the richness of the garlic butter sauce beautifully. A simple arugula salad with a light vinaigrette also works well if you prefer something cold and crisp.
Expert Tips for Meal Prep and Storage
This dish holds up surprisingly well for meal prep, lasting about three days in the refrigerator. To keep the quinoa from drying out, store it in an airtight container and wait to add the final squeeze of lemon until you’re ready to eat. Keeping the lemon wedges separate prevents the acid from “cooking” the shrimp further while they sit.
When reheating, avoid the microwave if possible, as it tends to turn shrimp into rubber balls. Instead, warm the quinoa and shrimp in a skillet over low heat with a tiny splash of water or broth. Cover the pan for a minute to let the steam gently revive the grains and protein without toughening the meat. It’ll taste almost as fresh as the day you made it.
Frequently Asked Questions
Can I use frozen shrimp for this recipe?
Yes, you can absolutely use frozen shrimp, but they must be completely thawed before you start. The best way to thaw them is overnight in the refrigerator. If you’re in a rush, place them in a sealed bag and submerge them in cold water for about 20 minutes. Most importantly, you must pat them extremely dry with paper towels after thawing, or they won’t sear properly.
Why is my quinoa still bitter after cooking?
Bitterness is caused by the saponin coating on the outside of the quinoa. Even if the package says “pre-washed,” it is always a good idea to give the grains a thorough rinse in a fine-mesh strainer under cold running water. Rub the grains with your fingers while rinsing until the water runs clear and no longer looks soapy or bubbly.
Is there a substitute for the red pepper flakes?
If you want a milder heat, try using Aleppo pepper or a pinch of Urfa Biber for a smoky, raisin-like undertone. If you want the flavor without any heat at all, smoked paprika is a great alternative. It provides a beautiful red color and a deep, woodsy aroma that complements the charred garlic without the spicy sting.
How do I scale this for a large dinner party?
When doubling or tripling this recipe, the biggest challenge is the pan size. You should never crowd the shrimp, so you will need to sear them in multiple batches. Keep the first batch of shrimp on a warm plate covered with foil while you cook the rest. For the quinoa, you can use a larger pot, but keep the liquid-to-grain ratio the same and ensure your lid is very tight-fitting.
Lemon Garlic Shrimp
Course: Main CourseCuisine: AmericanDifficulty: easyYields4
servingsPrep Time10
minutesCook Time20
minutesCalories340
kcalTotal Time30
MinutesA vibrant and healthy dish featuring succulent seared shrimp seasoned with cracked black pepper and garlic, served over perfectly fluffy, toasted quinoa. This recipe focuses on specific techniques to ensure the quinoa is never soggy and the shrimp are perfectly seared.
Ingredients
1 cup white quinoa, rinsed thoroughly
1.75 cups chicken broth or water
1 pound large shrimp, peeled and deveined (tail-on for presentation)
3 tablespoons olive oil, divided
4 cloves garlic, minced
1.5 teaspoons cracked black pepper (extra for garnish)
1/2 teaspoon sea salt
1/4 teaspoon red pepper flakes
1/4 cup fresh flat-leaf parsley, roughly chopped
1 fresh lemon, cut into wedges
Directions
- To solve the mushy quinoa problem, start by toasting the rinsed and drained quinoa in a dry pot over medium heat for 2-3 minutes until it smells nutty and the water has evaporated. This strengthens the outer hull.
- Add the broth and bring to a boil. Immediately reduce heat to the lowest setting, cover with a tight-fitting lid, and simmer for exactly 15 minutes.
- Crucial Step: Turn off the heat and do not open the lid. Let the quinoa sit for 5 minutes. Then, remove the lid, place a clean kitchen towel over the pot, and replace the lid for 2 more minutes. The towel absorbs excess steam, ensuring the grains stay separate and fluffy rather than gummy.
- While the quinoa rests, pat the shrimp completely dry with paper towels. This is the only way to get a good sear without boiling the meat in its own juices.
- Heat 2 tablespoons of olive oil in a large skillet over medium-high heat. Season the shrimp generously with salt, 1 teaspoon of the cracked black pepper, and red pepper flakes.
- Add shrimp to the hot pan in a single layer. Sear for 2 minutes. Flip the shrimp, then add the minced garlic and the remaining tablespoon of olive oil. Cook for 1-2 more minutes until the shrimp are pink and opaque and the garlic is fragrant but not burnt.
- Fluff the perfected quinoa with a fork and divide into bowls. Top with the garlic shrimp, ensuring you drizzle the seasoned oil and toasted garlic bits from the pan over the grains.
- Garnish with a generous amount of fresh parsley, an extra sprinkle of cracked black pepper to match the visual crust, and lemon wedges for squeezing.
Notes
- To avoid mushy quinoa, use the steam-dry method: after simmering, let the pot sit covered for 5 minutes, then place a clean kitchen towel under the lid for 2 minutes to absorb excess moisture. Always pat shrimp dry before searing to achieve a golden crust.