Mastering the Honey Roasted Peach and Ricotta Tart
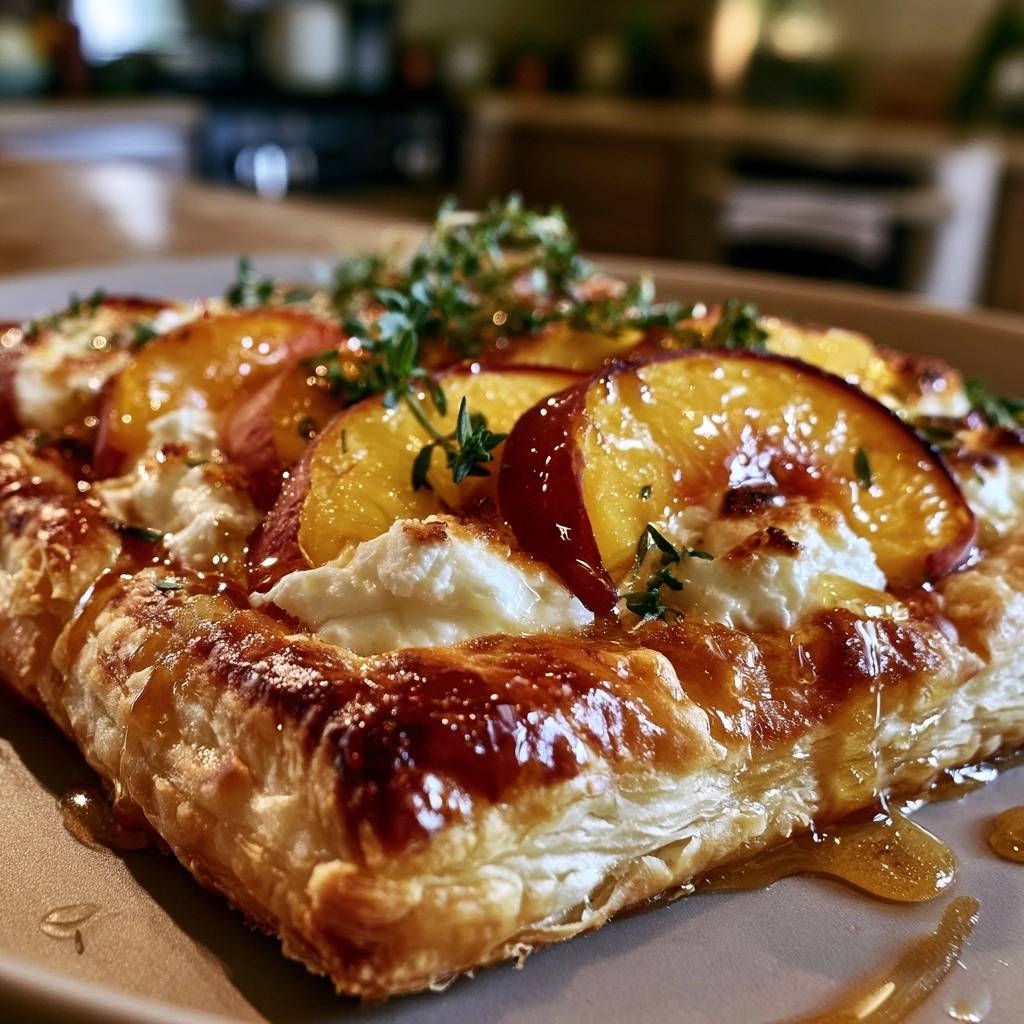
Imagine biting into a layer of puff pastry so crisp it shatters like glass, followed immediately by the velvet warmth of honey-soaked peaches. The contrast between the salty, creamy ricotta and the caramelized fruit creates a profile that feels sophisticated yet deeply comforting. However, the real triumph of this dish isn’t just the flavor; it’s the structural integrity of a crust that stays firm from the first bite to the last.
Most home bakers struggle with fruit tarts because the juices from the produce inevitably turn the delicate pastry into a soggy, leaden mess. We solve this by using a specific thermal shock technique that seals the dough before the fruit has a chance to weep. By managing moisture and heat with precision, you ensure the base remains a sturdy, golden vessel for the toppings.
The secret to this success lies in the preheated baking sheet. By sliding your cold pastry onto a screaming-hot surface, you trigger an immediate sear on the bottom of the dough. This creates an instant moisture barrier, much like searing a steak, which prevents the peach juices from migrating into the flour layers. Don’t skip the preheating step; it’s the difference between a professional-grade pastry and a limp disappointment.
The Architecture of a Crisp Fruit Tart
Puff pastry relies on hundreds of microscopic layers of fat trapped between sheets of dough. When the heat hits, the water in the fat turns to steam, forcing the layers apart to create that signature lift. If moisture from the peaches seeps into these layers before they set, the steam can’t escape, and the pastry collapses into a gummy layer.
The “Anti-Soggy Bottom” method is a structural necessity for any high-moisture fruit tart. We treat the pastry like a building foundation, ensuring it is reinforced through docking and high-temperature setting. This allows the edges to puff into a light frame while the center stays thin, crisp, and capable of supporting the weight of the ricotta mounds.
Why High Heat Prevents Pastry Collapse
Baking at 425°F (218°C) might seem aggressive, but it’s essential for the physics of the dough. This high-heat blast sets the starch in the flour almost instantly. By the time the peaches begin to release their natural sugars and water, the pastry has already formed a rigid, toasted crust that resists absorption.
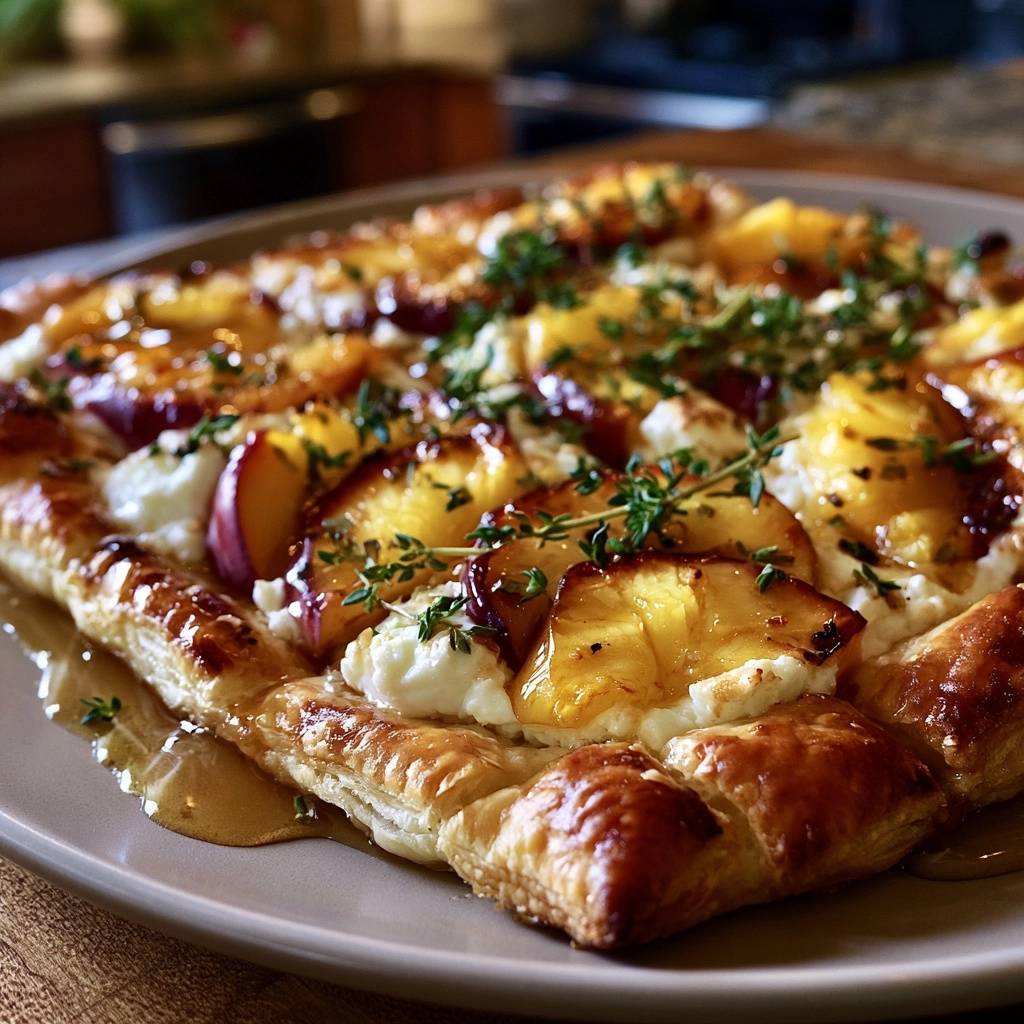
Lower temperatures often result in the butter melting out of the pastry before the steam can lift the layers. This leads to a greasy, flat tart. The intense heat ensures the fat works for you, creating air pockets that provide the crunch you crave.
The Role of the Preheated Baking Sheet
A cold baking sheet acts as a heat sink, slowing down the cooking process exactly where you need it most: the bottom. By placing a heavy tray in the oven during the preheat cycle, you create a conductive heat source. When the parchment-lined tart hits that hot metal, the bottom crust begins cooking at the same rate as the top.
This “searing” effect creates a toasted underside that acts as a shield. Even if your peaches are particularly ripe and juicy, that bottom layer remains impervious. It’s a simple professional trick that yields a tart you can actually pick up with your hands without it folding over.
Essential Components for the Peach and Ricotta Tart
Success starts with ingredient selection, as there are very few places to hide in such a simple recipe. You want ingredients that can stand up to the intense heat of the oven without losing their identity. Quality markers here aren’t just about taste; they are about how the food behaves under pressure.
Selecting Peaches for High-Heat Roasting
Look for peaches that are “firm-ripe.” If you squeeze them, they should have just a tiny bit of give but still feel solid. Overly soft, mushy peaches contain too much water and will disintegrate into a jam-like consistency during the 22-minute bake, which threatens the crispness of your crust.
Firm-ripe peaches maintain their beautiful wedge shape and offer a slight tartness that balances the heavy honey drizzle. As they roast, the edges will soften and caramelize, but the center of the slice will retain enough texture to provide a satisfying mouthfeel against the soft ricotta.
Ricotta Preparation: The Straining Requirement
Whole milk ricotta is non-negotiable because the fat content provides a creamy, stable base that won’t turn watery. However, even the best ricotta contains excess whey. To prevent a soggy center, place your ricotta in a fine-mesh sieve or cheesecloth for at least 15 minutes before using it.
Removing that tablespoon or two of liquid ensures the cheese stays in thick, pillowy mounds rather than spreading into a thin, wet film. This creates “pockets” of flavor and texture, allowing the pastry between the mounds to breathe and crisp up properly.
Puff Pastry Temperature Management
The golden rule of puff pastry is to keep it cold until the very second it enters the oven. You want the pastry thawed enough to roll out without cracking, but it should still feel chilled to the touch. If the dough becomes warm and floppy, the butter layers will merge, and you’ll lose the flaky texture.
If you find the dough getting too soft while you’re slicing the peaches, pop it back into the fridge for ten minutes. Working with cold dough ensures that the “shatter” factor is maximized once it hits the hot oven air.
Step-by-Step: Constructing the Honey Roasted Peach and Ricotta Tart
Building the tart is a technical process that requires a light touch. You aren’t just throwing toppings on dough; you’re engineering a balance of moisture and air. Each step in the preparation serves a specific purpose in the final architecture of the dish.
Preparing the Pastry Foundation
Once you’ve rolled your pastry into a 10-inch square, use a sharp knife to score a one-inch border. You aren’t cutting through; you’re just creating a “hinge” that allows the edges to rise high while the center stays weighted down. This creates a natural frame for your fruit.
Next, “dock” the center by pricking it all over with a fork. These tiny holes allow steam to escape from the middle section, preventing it from puffing up and dumping your peaches off the side. It keeps the center flat and concentrated, making it the perfect stage for the toppings.
Strategic Placement of Ricotta and Fruit
Instead of spreading the ricotta like pizza sauce, dollop it in thick mounds. This technique is vital because it leaves gaps of exposed pastry. These gaps allow steam to escape from the dough below, ensuring the entire center of the tart gets toasted rather than steamed.
Nestle the peach wedges into and around these mounds. The ricotta acts as a delicious “glue,” holding the fruit in place as it softens. By leaving some of the ricotta exposed, you also allow the oven to toast the tops of the cheese, adding a nutty, savory depth to the sweet tart.
The Glaze and Garnish Sequence
We use a two-stage honey application to maximize flavor. The first tablespoon is mixed into the ricotta to provide a base sweetness that mellows during the bake. The remaining honey is drizzled over the tart while it’s still hot from the oven.
This second drizzle provides a bright, floral top note that hasn’t been muted by high heat. If you’re using apricot preserves, whisk them into the warm honey first. This adds a professional sheen and a hint of acidity that makes the peach flavor pop against the earthy thyme.
Troubleshooting Common Pastry Failures
Even with the best intentions, pastry can be finicky. The most common issue is uneven browning, where the edges look perfect but the bottom is still pale and soft. If this happens, your oven might have a heat distribution issue, or your baking sheet wasn’t heavy enough.
Correcting an Underbaked Center
To check for doneness, gently lift a corner of the tart with a spatula. The underside should be a deep, uniform golden brown. If it looks pale or feels flexible, slide the tart (still on its parchment) directly onto the bottom rack of the oven for another two to three minutes.
The bottom rack is closest to the heating element and will provide the final push of heat needed to crisp the base. Don’t be afraid of a dark crust; a “mahogany” color indicates caramelization, which translates to flavor and a superior crunch.
Managing High-Moisture Fruit
If your peaches are exceptionally juicy, they might release too much liquid despite your best efforts. You can mitigate this by slicing the peaches and letting them sit on a paper towel for five minutes before assembly. Pat the tops dry to remove surface moisture.
Another trick is to sprinkle a teaspoon of almond flour or breadcrumbs over the docked pastry before adding the ricotta. These will act as a “sponge,” absorbing any stray juices and preventing them from reaching the dough layers.
Flavor Variations and Ingredient Swaps
While peaches and ricotta are a classic pairing, the structural rules of this tart apply to many other ingredients. You can easily adapt this recipe to suit the season, provided you maintain the balance of moisture and fat.
Alternative Stone Fruits and Herbs
Nectarines make a seamless substitute for peaches and don’t require peeling. Plums are another excellent choice, though they are more acidic and may require an extra drizzle of honey. If you use plums, try swapping the thyme for a sprig of rosemary for a more piney, savory aroma.
Fresh basil is another fantastic herb choice, but it should be added after the tart comes out of the oven. The residual heat will wilt the basil just enough to release its oils without turning the leaves black and bitter in the high-heat bake.
Infusing Honey for Depth
You can elevate the final drizzle by infusing your honey with extra aromatics. Gently warm the honey in a small saucepan with a few cracks of black pepper or a scraped vanilla bean. The pepper adds a subtle heat that cuts through the richness of the whole milk ricotta.
Let the honey sit for ten minutes to steep, then strain it before drizzling. This adds a layer of complexity that makes the tart taste like it came from a high-end bistro rather than your home kitchen.
Equipment: Why a Heavy Baking Sheet Matters
A thin, flimsy cookie sheet will warp in a 425°F oven, which can cause your toppings to slide to one side. More importantly, thin metal doesn’t hold heat well. As soon as you put the cold pastry on it, the temperature of the tray drops, defeating the purpose of preheating.
Use a heavy-gauge aluminum half-sheet pan or even a cast-iron pizza stone. These materials have high thermal mass, meaning they stay hot even when in contact with cold dough. This consistent, intense heat is what guarantees that shatteringly crisp bottom crust.
Serving and Preservation Guidelines
Patience is a key ingredient. When the tart first comes out of the oven, the juices are thin and the cheese is molten. If you cut into it immediately, the honey and peach nectar will run everywhere, potentially softening the crust you worked so hard to keep crisp.
Optimal Temperature for Service
Let the tart rest for at least five minutes. During this time, the pectin in the fruit juices begins to set, and the honey thickens into a glossy glaze. The ricotta also firms up slightly, making for much cleaner slices.
This dish is best served warm. At this temperature, the pastry is at its peak crispness, and the peaches are fragrant. As the tart cools to room temperature, the butter in the pastry begins to solidify, changing the texture from “shatter” to “crunch.” Both are good, but the warm experience is superior.
Storage and Reheating for Maximum Crunch
If you have leftovers, store them in an airtight container in the refrigerator for up to two days. Whatever you do, do not use a microwave to reheat this tart. The microwave will turn the puff pastry into a rubbery, soggy mess in seconds.
To revive the tart, use a toaster oven or a standard oven at 350°F for about five to seven minutes. An air fryer also works beautifully at 325°F for three minutes. These methods dry out the surface moisture and reactivate the fats in the pastry, returning it to its original glory.
Expert Tips for a Professional Finish
To get that “bakery window” look, pay attention to the final minutes of the bake. If the pastry looks golden but the peaches and cheese still look pale, move the tray to the top rack for the last two minutes. The intense heat at the top of the oven will caramelize the sugars quickly.
Look for “mahogany” edges on the pastry. You want a deep, dark brown, not just a light tan. This indicates that the sugars in the flour have fully caramelized, providing a complex, toasted flavor that balances the sweet honey.
The Importance of Sea Salt in Sweet Tarts
A final pinch of flaky sea salt is the “secret” ingredient that ties everything together. Salt is a flavor enhancer; it suppresses bitterness and amplifies the floral notes of the honey and the natural acidity of the peaches.
Without that hit of salt, the tart can taste one-dimensionally sweet. The salt creates a “spark” on the tongue that makes the creamy ricotta taste richer and the peaches taste brighter. Use a high-quality flaky salt for the best texture.
Using Turbinado Sugar for Texture
Before the tart goes into the oven, we sprinkle the egg-washed border with turbinado sugar. Unlike granulated sugar, which melts away, turbinado has large crystals that remain intact during the bake. This provides a delightful “crunch” factor to the crust.
The sugar also aids in browning, helping you achieve that dark, professional color. It creates a beautiful sparkling effect that makes the tart look as good as it tastes, providing a textural contrast to the soft fruit and creamy cheese inside.
Frequently Asked Questions
Can I use frozen peaches for this tart?
Fresh peaches are significantly better for this recipe. Frozen peaches are blanched before freezing, which breaks down their cell walls. When they thaw and bake, they release a massive amount of water all at once, which will almost certainly result in a soggy crust. If you must use frozen, thaw them completely and pat them very dry with paper towels, but expect a softer texture.
How do I prevent the honey from burning in the oven?
This recipe uses a two-stage process to prevent burning. We only bake one tablespoon of honey inside the ricotta, where the moisture of the cheese protects it. The rest of the honey is drizzled on after the tart is baked. Honey has a low smoke point and will turn bitter if exposed to 425°F for the full 22 minutes, so the post-bake drizzle is essential for flavor.
Can I make this tart ahead of time?
You can prepare the components in advance, but for the best results, assemble and bake it just before serving. You can slice the peaches and strain the ricotta up to 24 hours in advance. However, once the wet ingredients touch the puff pastry, the clock starts ticking. For a party, you can score and dock the pastry, keep it in the fridge, and then add the toppings and bake right as guests arrive.
Why didn’t my puff pastry rise properly?
There are usually two culprits: dough temperature or oven calibration. If the pastry was too warm before it went in, the butter layers melted together instead of creating steam. Alternatively, if your oven isn’t actually reaching 425°F, the “blast” of heat won’t be strong enough to lift the layers. Use an oven thermometer to ensure your temperature is accurate, and always keep the dough chilled until the last moment.
Can I use a different type of cheese?
If you don’t like ricotta, goat cheese is a fantastic alternative. It has a lower moisture content and a tangy flavor that pairs beautifully with honey. You could also use mascarpone for a richer, more dessert-like experience, though it is much heavier. Avoid using “wet” cheeses like fresh mozzarella, as they will release too much liquid and ruin the pastry’s crispness.
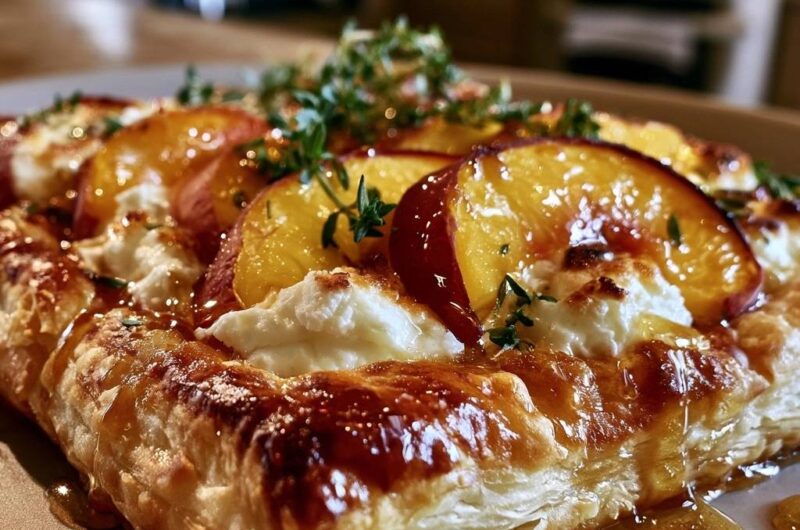
Honey Roasted Peach and Ricotta Tart
Course: DessertCuisine: French Inspired AmericanDifficulty: easy4
servings15
minutes22
minutes37
Minutes340
kcalFrench Inspired American
Ingredients
1 sheet frozen puff pastry, thawed but cold
2 large ripe peaches, sliced into 1/2-inch wedges
3/4 cup whole milk ricotta cheese (strained of excess liquid)
1/4 cup honey (divided)
1 tablespoon apricot preserves (optional, for glaze)
2 teaspoons fresh thyme sprigs
1 egg, beaten with 1 teaspoon water (egg wash)
1 tablespoon turbinado or granulated sugar
Pinch of sea salt
Directions
- Preheat your oven to 425°F (218°C). Place a heavy baking sheet inside the oven while it preheats. This hot surface is the secret to searing the bottom of the pastry instantly, preventing fruit juices from soaking in.
- Roll out the puff pastry on a piece of parchment paper into a 10-inch square. Use a sharp knife to lightly score a one-inch border around the edge, being careful not to cut all the way through.
- To prevent a soggy center, prick the area inside the border multiple times with a fork.
- In a small bowl, whisk the ricotta with 1 tablespoon of the honey and a pinch of salt. Dollop the ricotta in thick mounds inside the scored border rather than spreading it thin; this creates the visual “pockets” of cheese seen in the image and prevents the crust from being weighed down.
- Arrange the peach slices over and around the ricotta mounds.
- Brush the outer pastry border generously with the egg wash and sprinkle the border with the sugar for a dark, caramelized crunch.
- Carefully slide the parchment paper with the tart onto the preheated baking sheet.
- Bake for 20 to 22 minutes. If the peaches haven’t caramelized at the edges, move the tray to the top rack for the final 2 minutes. The pastry should be deep mahogany brown and the cheese should have golden toasted spots.
- While warm, whisk the remaining honey with the apricot preserves (if using) and drizzle generously over the peaches and cheese.
- Garnish with fresh thyme sprigs and a final pinch of sea salt. Let it sit for 5 minutes before slicing to allow the honey and juices to thicken.
Notes
- The secret to the anti-soggy bottom is placing the tart directly onto a preheated heavy baking sheet to sear the pastry instantly.