Mastering Salted Chocolate Chip Blondies: The Anti-Soggy Bottom Method
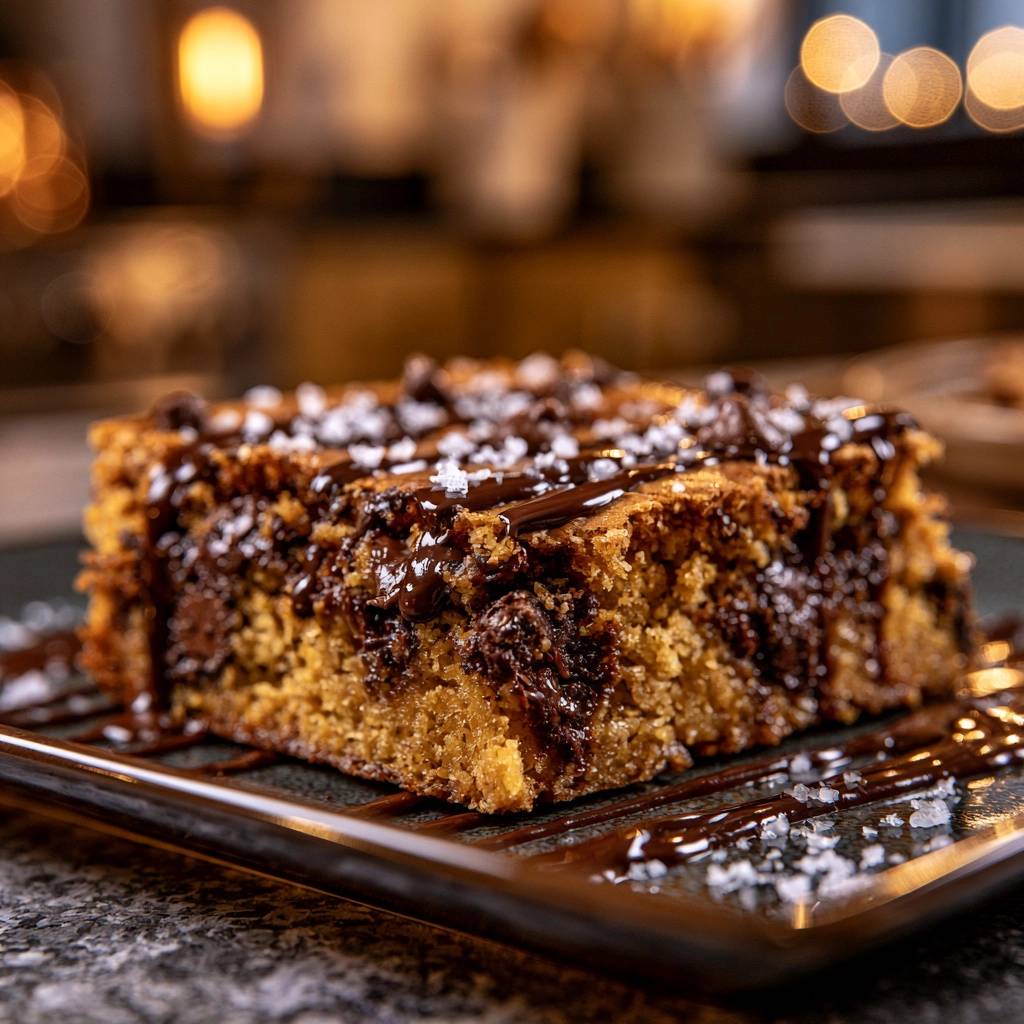
Stop settling for blondies that turn out greasy on the bottom or raw in the middle. Most people treat blondies like a simple “dump and stir” dessert, but that is exactly why they end up with a mushy mess. The secret to a perfect, uniform crumb and a crackly top lies in the temperature of your butter and the specific aeration of your sugars.
This “Anti-Soggy Bottom” philosophy focuses on structural integrity through a specific emulsification technique. By controlling how the fats and sugars bond, you create a sturdy yet chewy base that holds up to a heavy chocolate drizzle without collapsing. The contrast of the flaky sea salt against the rich dark chocolate creates a professional-grade flavor profile right in your home kitchen.
The real trick to success here is the two-minute whisking rule. You aren’t just mixing ingredients; you are building a stable emulsion. If you see oil streaks in your bowl, your blondies will likely separate in the oven. Keep whisking until the mixture looks like smooth, thick caramel, and you will be rewarded with the best texture of your life.
The Anatomy of a Perfect Salted Chocolate Chip Blondie
A blondie is often misunderstood as just a “blonde brownie,” but it is actually its own distinct category of dessert bar. While brownies rely on cocoa powder or melted chocolate for structure, a blondie is all about the brown sugar and butter. This creates a deep butterscotch flavor that feels more like a high-end cookie bar than a cake.
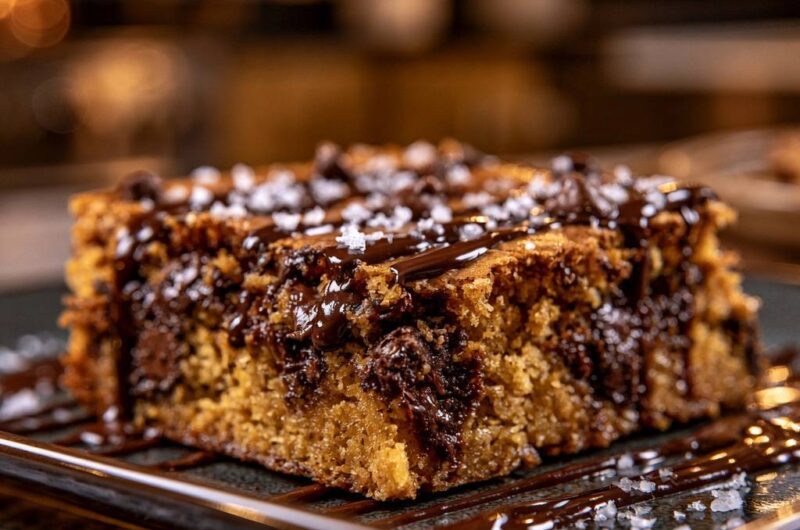
The desired texture is a dense, fudgy center paired with a crackly, meringue-like top. You want a bite that offers resistance before melting away. The high ratio of brown sugar is the hero here, providing the moisture and molasses notes that define the classic blondie profile. When done right, the edges should be chewy and caramelized while the center remains soft.
Essential Components for the Salted Chocolate Chip Blondies Base
Every ingredient in this list serves a structural purpose. We use a combination of light brown sugar and granulated white sugar to get the best of both worlds. The brown sugar provides that essential chew and moisture, while the white sugar helps create the crisp, papery crust on top. Without the white sugar, the bars would stay too soft and lose that satisfying surface crunch.
Using room-temperature eggs is a non-negotiable step for a successful emulsion. Cold eggs will cause your melted butter to seize up and clump, which ruins the smooth texture of the batter. When the eggs are at room temperature, they incorporate seamlessly into the fat, allowing for better aeration and a more stable rise during the baking process.
For the chocolate, semi-sweet chips are the gold standard. They provide a punchy cocoa flavor that isn’t overly sugary, which is vital because the blondie base itself is quite sweet. This bitterness balances the rich butter and the finishing salt perfectly. If you use milk chocolate, the entire bar can become cloying and lose its sophisticated edge.
Why Room Temperature Butter is Non-Negotiable
You must melt the butter to get that fudgy texture, but you cannot use it while it is piping hot. If the butter is too hot when it hits the sugars, it will melt the sugar crystals prematurely and lead to a greasy, oily finish. You want the butter to be “cooled but liquid,” meaning it should feel barely warm to the touch.
Look for a visual cue: the butter should be opaque rather than clear. If it looks like yellow oil, let it sit for another five minutes. This temperature control ensures the sugar stays suspended in the fat rather than dissolving into a syrup, which is the primary cause of the dreaded soggy bottom.
Selecting the Right Flour and Leavening Agents
All-purpose flour is the best choice here because it has a moderate protein content. This provides enough “backbone” to hold the chocolate chips in place without making the bars tough. If you used cake flour, the blondies would be too fragile; if you used bread flour, they would become unpleasantly bready.
We use a very small amount of baking powder—just one teaspoon. This provides a tiny bit of lift to keep the bars from being leaden, but it isn’t enough to turn them into a “cakey” bar. The goal is a dense, concentrated crumb that feels substantial when you hold it.
The Science of Emulsification: Preventing the Soggy Bottom
The most common failure in blondie baking is the separation of fat during the bake. This happens when the butter and sugar aren’t properly emulsified before the flour is added. When you whisk the melted butter and sugars for a full two minutes, you are performing a chemical dance. The fat in the butter and the molasses in the brown sugar need time to bind together into a stable state.
As you whisk, you will notice the mixture transform from a grainy, oily mess into a pale, thickened paste. This aeration is what prevents the fat from leaking out of the batter and pooling at the bottom of your pan. If you skip this step, the heat of the oven will cause the butter to break away from the sugar, resulting in a bar that is oily on the bottom and dry on top.
Furthermore, this process creates a “matrix” that supports the weight of the chocolate chips. A well-emulsified batter is thick and viscous, which keeps your mix-ins from sinking to the bottom. This ensures that every single bite has an even distribution of chocolate and salt, rather than a layer of chips stuck to the parchment paper.
Step-by-Step: Mixing and Aerating for a Crackled Top
Phase one is the sugar-butter emulsion. Use a sturdy whisk and some elbow grease. You are looking for a texture that resembles thick caramel sauce. Once that is achieved, move to phase two: the egg aeration. When you add the eggs and vanilla, whisk vigorously until the batter lightens in color. This step incorporates tiny air bubbles that rise to the surface in the oven, creating that signature “papery” top.
Phase three requires a completely different touch. Put the whisk away and grab a spatula for the gentle fold. Add your flour, baking powder, and salt all at once. Fold the mixture just until the last white streak of flour disappears. Overmixing at this stage develops too much gluten, which will turn your chewy blondies into tough, rubbery squares. Stop the moment it looks uniform.
Choosing Your Gear: Why Metal Pans Beat Glass
The pan you choose is just as important as the ingredients. Glass is an insulator, meaning it takes a long time to heat up and a long time to cool down. This often results in blondies with burnt, hard edges and a center that is still raw. Metal, however, is a conductor. It distributes heat rapidly and evenly across the entire surface of the batter.
I always recommend a light-colored metal pan. Dark metal pans can absorb too much heat and brown the bottom too quickly. To make your life easier, use the “parchment sling” technique. Line the pan with parchment paper, leaving an overhang on two sides. This allows you to lift the entire block of blondies out of the pan once they are cool, making for perfectly clean slices.
Precision Baking: The Jiggle Test and Carry-Over Cooking
Knowing when to pull the blondies out of the oven is an art form. At the 22-minute mark, give the pan a gentle shake. The edges should be firm and golden brown, pulling slightly away from the sides of the pan. The center, however, should still have a very slight jiggle. It shouldn’t look like liquid, but it shouldn’t look fully set either.
Do not use the “clean toothpick” test here. If a toothpick comes out clean, you have already overbaked them, and they will be dry once they cool. Trust in “carry-over cooking.” The blondies will continue to cook from the residual heat of the pan for several minutes after they leave the oven. This process finishes the center perfectly while keeping the base moist and fudgy.
The Finishing Touch: Chocolate Drizzle and Salt Distribution
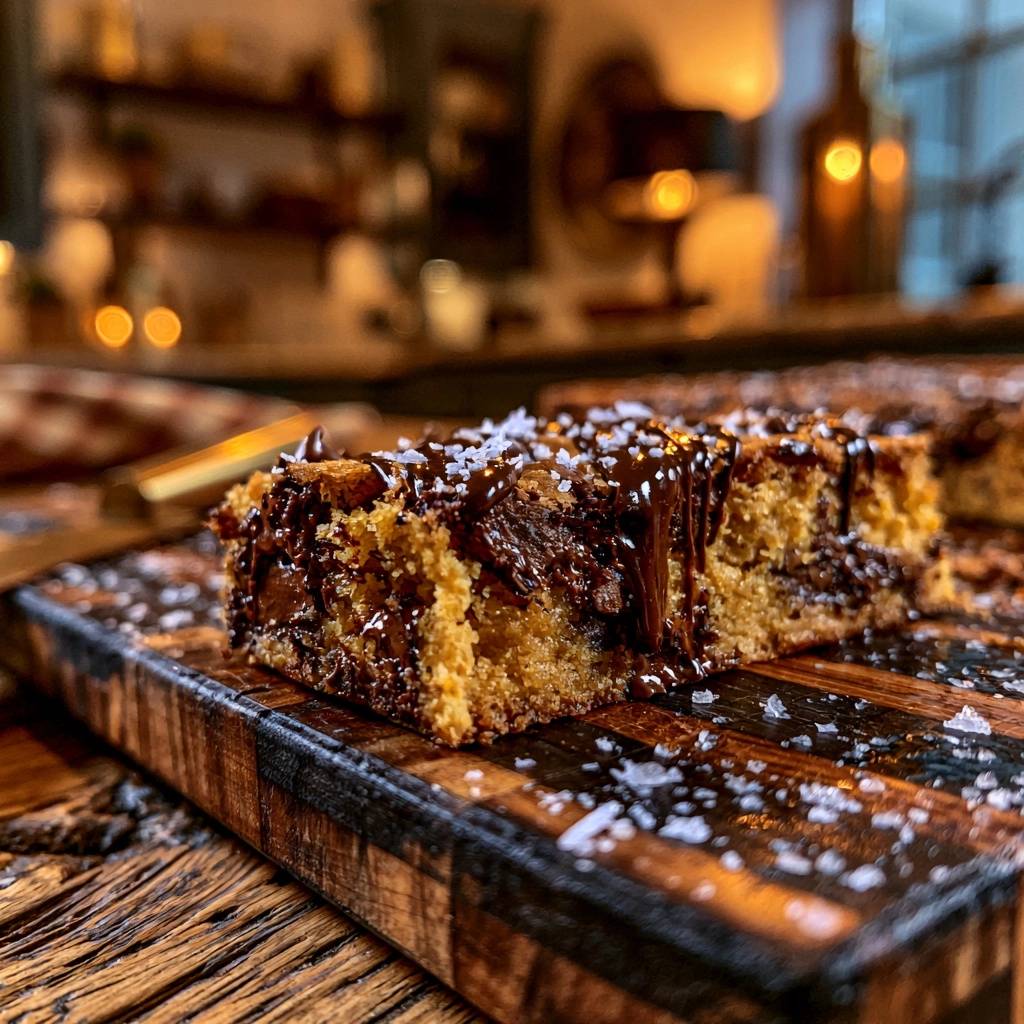
Once the blondies are completely cool, it is time for the finishing touches. Melt your dark chocolate sauce until it is fluid but not watery. Drizzle it in a zig-zag pattern across the top. This adds a layer of bitterness that cuts through the sweetness of the butterscotch base. It also acts as a “glue” for your salt crystals.
The choice of salt is critical. Do not use standard table salt; it is too fine and will simply make the bars taste salty. Use coarse sea salt or Maldon flakes. These large crystals provide a crunch and a concentrated burst of salt that hits the palate at different times. This interaction heightens the flavor of the chocolate and makes the butter taste even richer.
Troubleshooting Common Blondie Textural Issues
If your blondies turned out oily, the culprit is almost always the butter temperature or a lack of whisking. Ensure the butter is cooled and that you hit that two-minute whisking mark. If they are dry or crumbly, you likely overbaked them or packed your flour too tightly in the measuring cup. Always spoon flour into the cup rather than scooping it directly from the bag.
A dull top instead of a shiny, crackled one usually means the eggs weren’t whisked enough with the sugar. That “meringue” top is a result of dissolved sugar and egg proteins rising to the surface. Finally, if your chocolate chips all sank to the bottom, your batter was likely too thin. This happens if the butter was too hot or if the eggs weren’t properly emulsified into the fat.
Flavor Variations and Ingredient Swaps
Once you master the base, you can start experimenting. For a deeper, nuttier profile, try browning the butter before letting it cool. This adds toasted notes that pair beautifully with the brown sugar. You can also add a half-cup of toasted pecans or walnuts for extra crunch. The fat in the nuts won’t mess with the structure as long as they are folded in at the very end.
If you want a “malted” version, add two tablespoons of malt powder to your dry ingredients. This gives the blondies a nostalgic, “whopper-like” flavor. Regardless of what you add, always maintain the “Anti-Soggy” rules: watch your butter temperature and don’t skimp on the whisking time. These rules are the foundation that allows for all other variations.
Storage Logistics: Maintaining the Chewy Texture
Blondies are best stored at room temperature in an airtight container. They will stay fresh and chewy for up to four days. Avoid refrigerating them if possible, as the cold air can dry out the crumb and make the butter go hard, losing that fudgy mouthfeel. If you must keep them longer, they freeze exceptionally well.
To freeze, wrap individual squares tightly in plastic wrap and place them in a freezer bag. They will last for up to three months. When you are ready to eat one, let it thaw at room temperature for an hour. For a “just-baked” experience, pop a thawed blondie into a 300-degree oven for five minutes to soften the chocolate and crisp up the top again.
Expert Tips for Professional-Grade Squares
The secret to those perfectly clean, sharp edges you see in bakeries is patience. Never slice blondies while they are warm. They are still setting, and the knife will just tear through the soft center. For the best results, chill the entire pan in the fridge for an hour before slicing. This firms up the fats and allows the knife to glide through cleanly.
Use a large chef’s knife and wipe it clean with a damp cloth between every single cut. This prevents chocolate smears from ruining the look of the next square. If you need to scale this recipe for a crowd, you can double the ingredients and use a 9×13 metal pan. Just keep an eye on the bake time; it usually takes about 5 to 8 minutes longer to reach that perfect “jiggle” stage.
How should I store these blondies to keep them from getting hard?
Store your blondies in an airtight container at room temperature for up to 4 days. To keep them extra soft, you can place a piece of white bread in the container; the blondies will absorb the moisture from the bread. Avoid the refrigerator, as it tends to dry out the crumb and makes the butter-heavy base too firm. For long-term storage, wrap individual squares in plastic wrap and freeze them in a heavy-duty freezer bag for up to 3 months.
Why did my blondies turn out greasy or oily on the bottom?
A greasy bottom is usually caused by one of two things: the butter was too hot when mixed with the sugar, or the mixture wasn’t whisked long enough. If the butter is piping hot, it breaks down the sugar structure rather than incorporating with it. You must whisk the melted butter and sugars for at least 2 full minutes until the mixture is pale and looks like thick caramel. This creates a stable emulsion that keeps the fat from separating during the baking process.
Can I use gluten-free flour for this recipe?
Yes, you can substitute the all-purpose flour with a high-quality “1-to-1” gluten-free flour blend. Look for a blend that already contains xanthan gum, as this provides the necessary “stretch” that gluten usually offers. Because gluten-free flours can sometimes be grittier, let the batter sit in the pan for 15 minutes before baking. This allows the flour to hydrate, resulting in a smoother texture that won’t be crumbly.
What is the best way to get a crackly, shiny top on my blondies?
The crackly top is actually a thin layer of meringue created by the reaction between the eggs and the sugar. To achieve this, you must whisk the eggs and vanilla into the butter-sugar mixture very vigorously. You are looking for the batter to lighten in color and become somewhat fluffy. This aeration brings the sugar to the surface during baking, where it dries out into that beautiful, papery crust.
My blondies are too cakey instead of fudgy. What went wrong?
Cakey blondies are usually the result of overmeasuring the flour or overmixing the batter once the flour is added. When you overmix, you develop gluten, which creates a bread-like structure. Additionally, make sure you aren’t using too much baking powder. To keep them fudgy, fold in the flour gently with a spatula just until the streaks disappear, and always use the “spoon and level” method for measuring your flour to avoid packing too much into the cup.
Can I substitute the light brown sugar with dark brown sugar?
Absolutely. Using dark brown sugar will give the blondies a deeper, more intense molasses flavor and a slightly chewier texture. Because dark brown sugar contains more moisture than light brown sugar, the center may stay a bit softer. If you make this swap, you might need to add an extra 2 minutes to the baking time to ensure the center sets properly without becoming too mushy.
Salted Chocolate Chip Blondies
Course: DessertCuisine: AmericanDifficulty: easy12
servings15
minutes25
minutes40
Minutes285
kcalAmerican
Ingredients
1 cup unsalted butter, melted and cooled to room temperature
1 cup light brown sugar, packed
1/2 cup granulated white sugar
2 large eggs, room temperature
2 teaspoons vanilla extract
2 cups all-purpose flour
1 teaspoon baking powder
1/2 teaspoon salt
1 1/2 cups semi-sweet chocolate chips
1/4 cup dark chocolate sauce for drizzling
1 tablespoon coarse sea salt for finishing
Directions
- Preheat your oven to 350 degrees F. Line an 8×8 inch metal baking pan with parchment paper, leaving an overhang on two sides. Avoid glass pans as they hold heat unevenly and cause the edges to overcook before the center is set.
- In a large bowl, whisk the melted butter with the brown and white sugars for at least 2 full minutes. This is the critical step to prevent a soggy bottom. You must emulsify the fat and sugar until the mixture looks like thick caramel and no oil streaks remain.
- Add the eggs and vanilla extract. Whisk vigorously until the batter lightens in color. This aeration creates the signature papery, crackled top.
- Gently fold in the flour, baking powder, and salt using a spatula. Do not overmix. Stop as soon as the last streak of flour disappears to keep the texture chewy rather than cakey.
- Fold in 1 cup of the chocolate chips. Spread the batter evenly into the prepared pan. Top with the remaining 1/2 cup of chocolate chips.
- Bake for 22 to 25 minutes. The center should still have a very slight jiggle when shaken, but the edges should be golden brown and pulling away from the sides.
- Remove from the oven and let cool completely in the pan. This carry-over cooking time is what finishes the center without drying out the base.
- Once cool, drizzle with chocolate sauce and sprinkle generously with coarse sea salt before slicing into squares.
Notes
- Avoid glass pans as they hold heat unevenly. The 2-minute whisking step is critical to prevent oil streaks and ensure a perfect crumb.