Mastering the Triple Chocolate Ganache Cheesecake
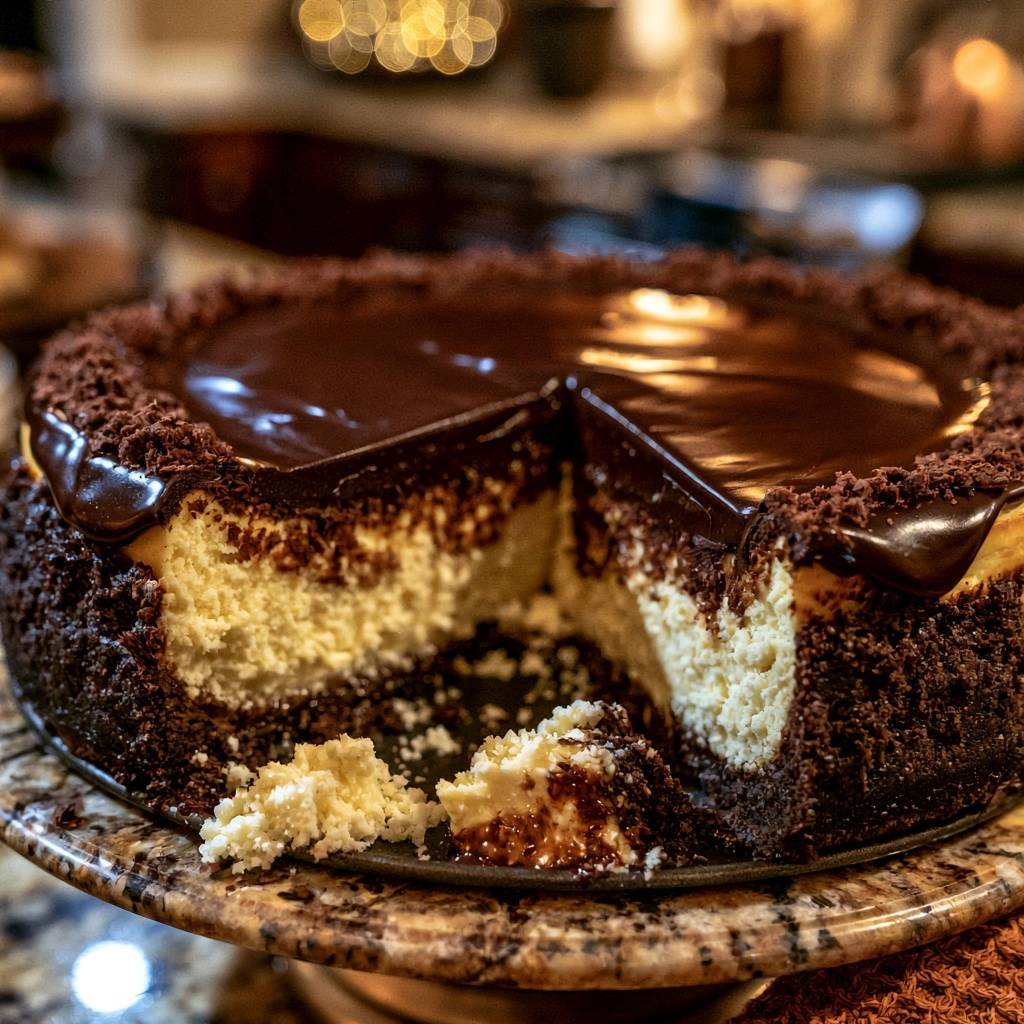
Imagine a dessert so decadent it stops the conversation at the dinner table. This Triple Chocolate Ganache Cheesecake is that showstopper, featuring a deep cocoa-rich crust, a velvety cream cheese body, and a silky, dark ganache pour. It hits every sensory note from the crunch of the high-walled cookie base to the melt-in-your-mouth richness of the chocolate topping.
Many home bakers fear the dreaded cheesecake crack or a rubbery, overbaked texture that feels more like a sponge than a custard. You don’t need to worry about those pitfalls here because we’ve removed the guesswork. We’re trading the stressful, splashing water bath for a controlled residual heat method that guarantees a professional finish.
The secret to this recipe’s success lies in the cooling process, not just the baking. By allowing the cake to rest in a receding heat environment, we protect the delicate proteins from thermal shock. This ensures your cheesecake remains perfectly level and incredibly creamy from the first bite to the last.
The Architecture of a Triple Chocolate Masterpiece
This cheesecake is built like a fortress of flavor, starting with a high-walled chocolate cookie crust. Unlike standard crusts that stop at the base, this one climbs the sides of the pan to create a deep reservoir. This structural choice allows the ganache to pool deeply across the surface without spilling over the edges.
We use semi-sweet chocolate chips for the ganache because they provide the perfect balance of bitterness and sugar. When paired with full-fat sour cream in the batter, you get a signature tang that cuts through the richness. The sour cream also softens the protein structure of the cream cheese, resulting in a denser, more luxurious mouthfeel.
Selecting the Right Cocoa Components
For the crust, you want a cookie crumb that packs tightly. Standard chocolate sandwich cookies (with the filling removed) offer a darker, more intense cocoa flavor than chocolate graham crackers. The higher fat content in sandwich cookies also helps the crust stay crisp against the moist filling.
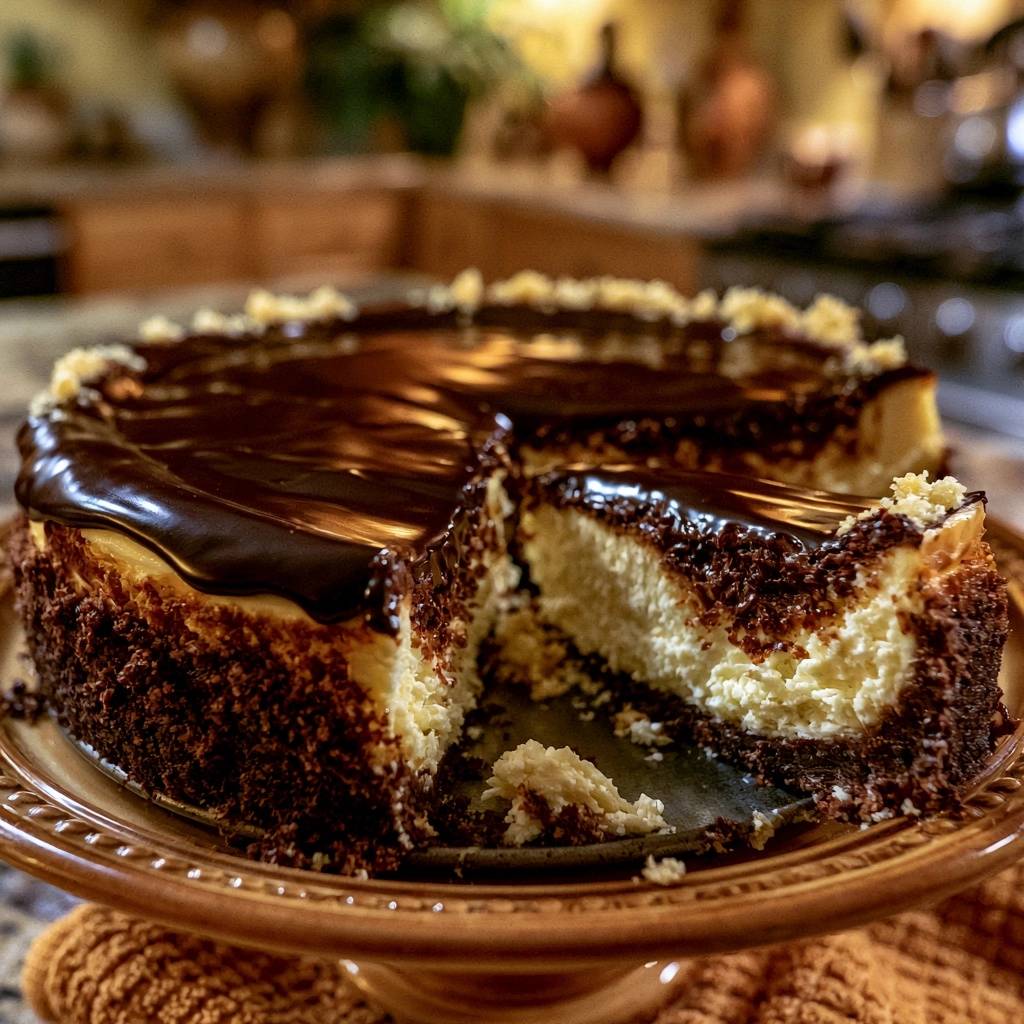
When it comes to the visual finish, chocolate shavings or curls are more than just a garnish. They add a delicate, airy texture that contrasts with the dense ganache. Using a vegetable peeler on a room-temperature block of dark chocolate is the easiest way to achieve those professional-looking curls.
Dairy Temperature and Emulsification
Temperature is the most important factor in cheesecake chemistry. If you use cold cream cheese, you’ll end up with tiny “beads” of fat that refuse to break down. These lumps remain in the batter even after baking, leaving you with a grainy, unpleasant texture that no amount of mixing can fix.
Similarly, eggs must be at room temperature to emulsify properly with the fats in the cheese and sour cream. Cold eggs can cause the batter to seize or break, leading to an uneven bake. Take your ingredients out of the fridge at least two hours before you plan to start mixing.
Essential Tools for a Flawless Bake
A 9-inch springform pan is non-negotiable for this recipe. You need the removable sides to reveal the high-walled crust without damaging the delicate ganache. Ensure your pan is in good condition and the latch is tight to prevent any butter from leaking during the crust’s blind bake.
You’ll also need a simple wooden spoon to prop open the oven door during the cooling phase. This low-tech tool is the key to preventing cracks. For the ganache, a glass bowl is superior to plastic because it retains the heat of the cream longer, ensuring every chocolate chip melts into a smooth liquid.
Constructing the High-Walled Chocolate Crust
The ratio of 3 cups of crumbs to 8 tablespoons of butter creates a mixture that feels like wet sand. When you press this into the pan, don’t stop at the bottom. Use the back of a measuring cup to firmly push the crumbs all the way up the sides of the springform pan.
This “blind bake” for 10 minutes at 325°F is a vital step you shouldn’t skip. It sets the butter and sugar in the crumbs, creating a moisture barrier. This prevents the crust from becoming soggy once you pour in the heavy cheesecake batter, keeping that essential crunch intact.
The Science of Aeration in Cheesecake Batter
Air is the enemy of a perfect cheesecake. When you beat eggs at high speed, you incorporate thousands of tiny bubbles. In the oven, these bubbles expand, causing the cake to rise like a souffle. Once you remove it from the heat, the air escapes and the cake collapses, creating deep fissures.
To avoid this, always set your mixer to the lowest possible speed when adding the eggs. You want to stir them in rather than whip them. Stop the mixer the very second you can no longer see streaks of yellow yolk. This “stop immediately” rule is your best defense against a cracked surface.
Executing the No-Crack Cooling Method
Knowing when to stop baking is an art form. You aren’t looking for a firm center; you want the “Jell-O wobble.” When you gently nudge the pan, the outer two inches should be stable, but the center should jiggle as one cohesive unit. If the center is firm, it’s already overbaked.
Once you hit that wobble, turn off the oven and prop the door open just one inch with your wooden spoon. This gradual temperature decline allows the protein structure to firm up slowly. It prevents the cake from “shocking,” which is when the batter shrinks faster than the crust, causing the middle to tear.
The Knife Release Technique
After the cheesecake has rested in the oven for an hour, it’s still quite fragile. Before it goes into the fridge, run a thin, flexible knife around the inside edge of the crust. This ensures the cake isn’t physically bonded to the sides of the springform pan.
As the cheesecake chills, it will naturally shrink a small amount. If the edges are stuck to the pan, the tension will pull the center apart, creating a crack. By releasing the edges early, you allow the entire cake to contract inward toward the center safely.
Crafting the Perfect Silk Ganache
The ganache uses a simple but effective ratio of chocolate to heavy cream to create a pourable glaze that sets into a fudge-like consistency. After pouring the hot cream over the chips, let it sit undisturbed for five minutes. This allows the heat to penetrate the core of the chocolate.
When you start stirring, begin in the very center of the bowl with small circular motions. Slowly work your way outward. This technique creates a stable emulsion without whisking in air, resulting in a glossy, mirror-like finish. Only pour the ganache once the cheesecake is completely chilled.
Troubleshooting Common Cheesecake Obstacles
If your crust crumbles when you try to slice it, you likely didn’t press the crumbs firmly enough into the pan. Next time, use more pressure with a flat-bottomed glass. If you forgot to soften your cream cheese and the batter is lumpy, you can pass the mixture through a fine-mesh sieve before adding the eggs.
Should a crack appear despite your best efforts, don’t panic. The thick layer of chocolate ganache acts as a perfect “spackle” to fill and hide any surface imperfections. If your ganache looks grainy or “broken,” the cream was likely too hot. Let it cool slightly next time before pouring it over the chocolate.
Make-Ahead Strategies and Storage Standards
Cheesecake is the ultimate make-ahead dessert because the flavor and texture actually improve after 24 to 48 hours. The moisture redistributes, and the tang of the sour cream mellows into the chocolate. Always store it in the refrigerator in an airtight container to prevent it from absorbing fridge odors.
If you need to freeze the cake, flash-freeze the whole thing on a tray for an hour until the ganache is rock hard. Then, wrap it tightly in two layers of plastic wrap and one layer of heavy-duty foil. Thaw it in the fridge overnight, and add the fresh chocolate shavings just before serving for the best texture.
Expert Tips for Professional Presentation
To get those clean, restaurant-style edges, use the “hot knife” technique. Dip a long, thin knife into a tall glass of very hot water, wipe it completely dry, and make one clean slice. Repeat the dipping and wiping process for every single cut to prevent the ganache from smearing into the cheesecake layer.
For a dramatic visual finish, press your chocolate shavings into the top edge of the ganache while it’s still slightly tacky. You can also press them against the outer walls of the crust. This creates a high-contrast look that highlights the different textures of the triple chocolate components.
Customizing the Chocolate Profile
If you want to deepen the chocolate flavor without changing the texture, add a teaspoon of espresso powder to the cream cheese batter. The coffee won’t make it taste like mocha; instead, it acts as a flavor enhancer for the cocoa. It makes the chocolate taste “darker” and more complex.
For a more sophisticated, less sweet profile, swap the semi-sweet chocolate in the ganache for a 70% dark chocolate bar. The slight bitterness of the dark chocolate provides a beautiful counterpoint to the sweet, creamy filling. You can also sprinkle a tiny pinch of flaky sea salt over the ganache for a modern twist.
Frequently Asked Questions
Can I use a water bath instead of the cooling method?
You certainly can, but it isn’t necessary for this specific recipe. The high-walled crust acts as a natural insulator for the batter, and the slow-cooling method in the oven provides the same gentle temperature drop as a water bath without the risk of water leaking into your crust.
Why did my ganache not set?
Ganache usually fails to set if the ratio of cream to chocolate is too high or if the chocolate had a low cocoa butter content. Ensure you are using heavy whipping cream and high-quality chocolate chips. If it’s too soft, chill the cake longer; the cold cheesecake will eventually help firm up the fats in the ganache.
Can I substitute low-fat cream cheese?
I strongly recommend against using low-fat or “light” cream cheese. These products have a much higher water content and use fillers to mimic the texture of fat. During the long bake, that extra moisture will release, leading to a watery, grainy cheesecake that won’t set properly.
How do I prevent the crust from sticking to the bottom of the pan?
While the butter in the crust usually prevents sticking, you can place a circle of parchment paper at the bottom of the springform pan before pressing in the crumbs. This provides an extra layer of insurance, allowing you to slide the entire cake onto a serving platter with ease.
How long can this cheesecake sit at room temperature during a party?
Because of the high dairy content, you shouldn’t leave the cheesecake out for more than two hours. The ganache will also begin to soften significantly in a warm room. For the best experience, keep it chilled until about 15 minutes before you plan to serve it.
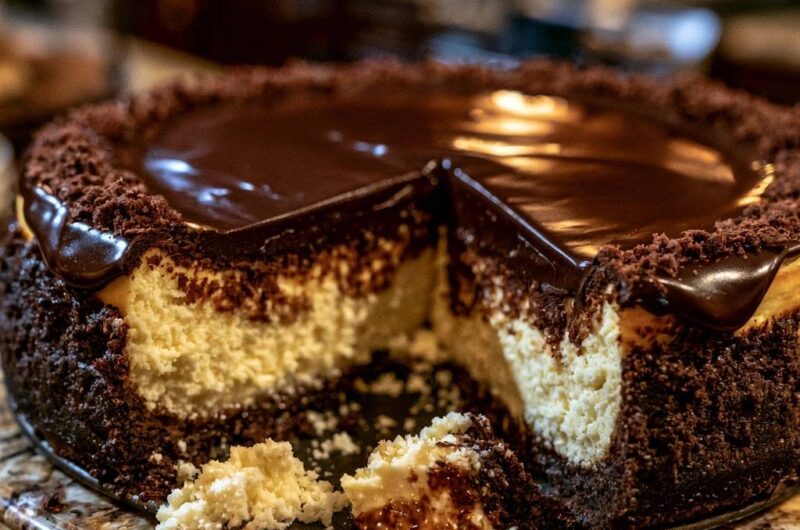
Triple Chocolate Ganache Cheesecake
Course: DessertCuisine: AmericanDifficulty: easy12
servings30
minutes1
hour5
minutes600
Minutes580
kcalAmerican
Ingredients
3 cups chocolate cookie crumbs (finely ground)
8 tablespoons unsalted butter, melted
32 ounces cream cheese, softened to room temperature
1 1/4 cups granulated sugar
1 cup full-fat sour cream, room temperature
1 tablespoon vanilla extract
4 large eggs, room temperature
1 1/2 cups semi-sweet chocolate chips
3/4 cup heavy cream
1 1/2 cups chocolate shavings or curls (for the high-walled garnish)
Directions
- Preheat your oven to 325°F (163°C). Mix chocolate cookie crumbs with melted butter. Press the mixture firmly into the bottom and all the way up the sides of a 9-inch springform pan to create a tall crust wall. Bake for 10 minutes, then set aside to cool completely.
- In a large bowl, beat the softened cream cheese and sugar on medium speed until completely smooth and silky. It is vital that the cream cheese is room temperature to avoid lumps.
- Add the sour cream and vanilla, mixing just until combined.
- Add eggs one at a time, mixing on the lowest speed possible. Stop mixing the second the yellow disappears. Over-mixing at this stage incorporates air which causes the cake to puff up and then crack as it cools.
- Pour the batter into the tall crust. Bake for 55 to 65 minutes.
- The No-Crack Secret: Stop baking when the outer 2 inches are set but the center still wobbles like Jell-O when the pan is gently nudged. Turn off the oven and crack the door open only one inch (use a wooden spoon to prop it if necessary). Leave the cheesecake inside the oven for exactly one hour. This slow temperature drop prevents the cake from shrinking too fast and cracking.
- Remove from the oven and run a thin knife around the edge of the crust to ensure it isn’t sticking to the pan. Let it cool completely on the counter before refrigerating for at least 8 hours (preferably overnight).
- For the ganache: Heat heavy cream in a small saucepan until it begins to simmer. Place chocolate chips in a glass bowl and pour the hot cream over them. Let sit for 5 minutes, then stir slowly from the center outward until glossy and thick.
- Pour the ganache over the chilled cheesecake, allowing it to pool naturally within the crust walls. Immediately press the chocolate shavings into a thick, decorative border around the top edge and against the sides of the crust to match the visual finish. Chill for another 30 minutes to set the ganache before slicing.
Notes
- The secret to a crack-free cheesecake is the slow cooling process. Turn off the oven and prop the door open for one hour before removing the cake. Ensure all dairy ingredients are at room temperature before mixing to avoid lumps and over-beating.