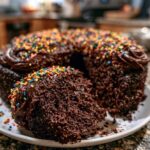
Mastering the Ultimate Moist Chocolate Cake Without Sinking
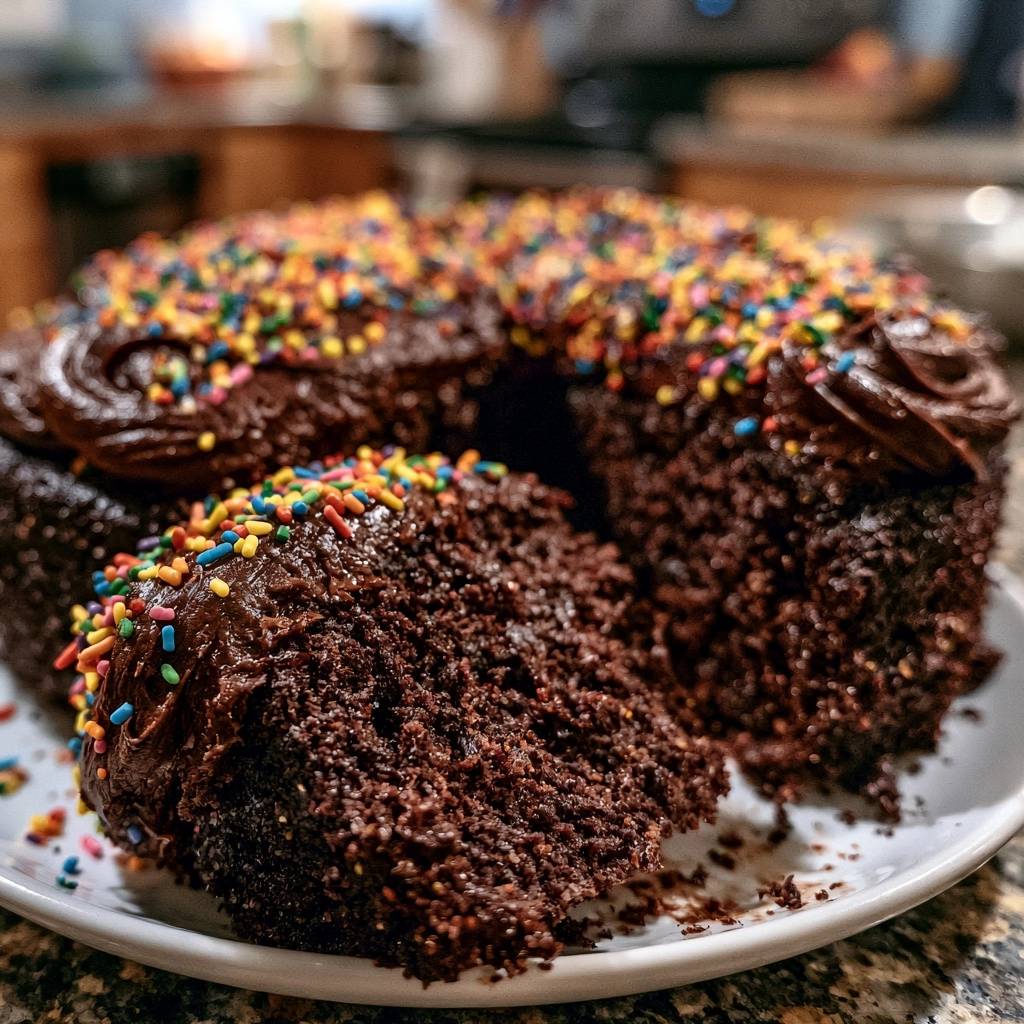
We have all been there: you pull a beautiful cake out of the oven only to watch the center collapse into a dense, gummy mess. It’s heartbreaking to spend time and money on ingredients just to end up with a cratered sponge that looks more like a brownie than a birthday treat. This sinking phenomenon usually happens because the internal structure wasn’t strong enough to support the weight of the batter as it rose.
The secret to a perfectly level, airy crumb that never sinks lies in the temperature of your liquids and the way you activate the leavening agents. This recipe uses a specific boiling water technique that blooms the cocoa for deep flavor while ensuring the structure sets perfectly every single time. You’re going to get a tall, proud cake that stays moist for days without ever losing its shape.
The real trick to success here is the “blooming” process. When you pour boiling water into your cocoa and flour mixture, it doesn’t just mix the ingredients; it actually cooks the starches slightly and releases the full flavor profile of the chocolate. This immediate heat also gives the baking soda a massive head start, creating a stable network of bubbles that hold firm while the cake bakes.
The Chemistry of a Non-Collapsing Crumb
Structural integrity is the difference between a professional-looking cake and a kitchen disaster. In this Ultimate Moist Chocolate Cake, we rely on a precise ratio of baking soda and baking powder. The baking soda reacts with the acidic buttermilk to provide an immediate lift, while the baking powder offers a second “boost” of bubbles as the heat of the oven penetrates the center of the pan.
Cakes typically sink because the cell walls of the cake are too weak to hold up the weight of the sugar and fat. This happens if you underbake the center or if the leavening agents finish their reaction before the flour has a chance to set. By using the boiling water method, we create a batter that is thin but highly reactive, allowing the heat to move through the deep-dish pan more efficiently.
Furthermore, premature cooling can cause a sudden contraction of air inside the cake. If you move the cake from a hot oven to a cold countertop too quickly, the steam inside the bubbles condenses, and the cake collapses. We solve this by ensuring the cake stays in the pan for a specific duration, allowing the starches to firm up and lock that height in place.
Why Boiling Water Prevents Sinking Centers
This is the technical core of the recipe. When you add boiling water, you are “blooming” the cocoa powder. This process dissolves the cocoa solids and releases trapped flavor compounds that cold water simply can’t reach. You’ll notice the aroma of the chocolate intensifies the second the hot liquid hits the bowl.
Beyond flavor, the heat initiates an immediate chemical reaction with the baking soda. This creates a stable network of tiny air bubbles throughout the thin batter. Because the batter starts off warm, it reaches the “setting point” in the oven much faster than a cold batter would. This prevents the leavening gases from escaping before the cake’s structure is strong enough to hold them.
The Role of Fat in Moisture Retention
While many traditional cakes use butter for flavor, this recipe relies on vegetable oil. Oil is 100% fat and remains liquid at room temperature, whereas butter contains water and milk solids that can make a cake feel dry or crumbly when cooled. Using oil ensures that every bite feels incredibly soft and lush on the tongue.
The oil coats the flour proteins, which limits gluten development. This is essential for a cake that is tender rather than chewy. Since we are baking a deep, single-layer cake, the oil provides the necessary lubrication to keep the crumb from becoming tough during the longer bake time required for a 3-inch deep pan.
Essential Components for the Ultimate Moist Chocolate Cake
Success starts with the temperature of your ingredients. You must use room temperature eggs and buttermilk. Cold ingredients will not emulsify properly with the oil, leading to a broken batter that can cause an uneven rise. If you forgot to take them out of the fridge, place the eggs in a bowl of warm water for five minutes and microwave the buttermilk for ten seconds.
The quality of your vanilla also matters. Since chocolate is the star, vanilla acts as a flavor enhancer, much like salt does in savory cooking. Use a high-quality extract to provide a floral backnote that rounds out the bitterness of the cocoa. Don’t skip the salt either; it’s the key to making the chocolate taste “bright” rather than just sweet.
Selecting the Right Cocoa Powder
For this recipe, you want to use natural unsweetened cocoa powder rather than Dutch-processed. Natural cocoa is acidic, which is necessary to react with the baking soda in the recipe. If you use Dutch-processed cocoa, which has been neutralized, you might find the cake doesn’t rise as high or has a slightly soapy aftertaste.
Natural cocoa also has a fruitier, more complex chocolate flavor that pairs beautifully with the tang of the buttermilk. When you whisk it into the dry ingredients, make sure you break up any large clumps. Cocoa is notorious for holding onto moisture and forming little balls that won’t dissolve easily in the batter.
Flour Protein and Structural Stability
We are using all-purpose flour here instead of cake flour. While cake flour makes for a very delicate crumb, it often lacks the protein strength needed to support a heavy fudge frosting and a deep-dish rise. All-purpose flour provides just enough gluten to act as the “scaffolding” for our cake.
This structural stability is what prevents the cake from falling apart when you slice it. Because the batter is so thin due to the boiling water, the slightly higher protein content in all-purpose flour helps trap the air bubbles more effectively. It ensures your cake is moist but still has a satisfying, substantial bite.
Step-by-Step: Mixing for Maximum Aeration
Mixing this cake is a two-phase process. You’ll start with a very thick, standard-looking batter and finish with something that looks almost like chocolate milk. Don’t be alarmed by the thinness of the final batter; that high moisture content is exactly what makes the cake so famous for its texture.
The goal during the first phase is to ensure every dry particle is hydrated. During the second phase, when adding the boiling water, the goal is gentle integration. You want to whisk by hand during the water stage to avoid splashing and to ensure you don’t overwork the flour at the very end.
Phase One: Integrating the Dry Base
Start by whisking the flour, sugar, cocoa, baking soda, baking powder, and salt in a large bowl. You aren’t just mixing them; you are aerating them. If your cocoa powder is particularly lumpy, I highly recommend sifting it through a fine-mesh strainer first.
Even distribution of the leavening agents is critical. If the baking soda is concentrated in one spot, you’ll get a giant bubble that will eventually pop and cause a hole or a “tunnel” in your cake. A uniform dry mix leads to a uniform crumb.
Phase Two: Emulsifying the Wet Ingredients
Add the buttermilk, oil, eggs, and vanilla to the dry base. Use an electric mixer on medium speed for about two minutes. The batter will be thick and glossy at this point. You are looking for a smooth consistency where no streaks of flour remain visible.
Once smooth, turn off the mixer and grab a hand whisk. Slowly stream in the boiling water. As you whisk, the batter will transform from a thick paste into a thin, dark liquid. This is where the “magic” happens as the cocoa blooms and the batter warms up, preparing it for the oven.
Precision Baking in Deep-Dish Pans
This recipe is designed for a 9-inch deep-dish round pan or a springform pan. Because we are baking all the batter in one single, tall layer, the pan must have at least 3-inch sides. If you use a standard shallow cake pan, the batter will overflow and create a mess in your oven.
The physics of a deep-dish cake are different than thin layers. The heat has a longer distance to travel to reach the center. This is why we bake at 350 degrees F for a full 45 to 50 minutes. The outer edges will set first, creating a protective ring that supports the center as it continues to rise and firm up.
The 40-Minute Rule: Protecting the Rise
Whatever you do, do not open the oven door before the 40-minute mark. When you open the door, the internal temperature of the oven can drop by as much as 50 degrees in seconds. For a cake that is still liquid in the center, this pressure change is the number one cause of sinking.
The cake needs a consistent environment to reach its “setting point.” This is the moment when the proteins and starches have solidified enough to hold their own weight. If you must check it, do so quickly and close the door gently. A slammed oven door can also send a vibration through the rack that collapses a fragile, rising cake.
Testing for Doneness Beyond the Toothpick
While a toothpick is a great guide, you can also look for visual cues. The cake should slightly pull away from the very edges of the pan. If you gently press the center of the cake with your finger, it should spring back rather than leaving an indentation.
If you want to be truly precise, use an instant-read thermometer. The internal temperature of a perfectly baked chocolate cake should be between 205°F and 210°F. At this temperature, the center is fully cooked through, ensuring it won’t be gummy or sink once it hits the cool air of your kitchen.
Troubleshooting Your Chocolate Cake Results
If your cake still sinks, the most common culprit is the water temperature. If the water was just “hot” and not truly boiling, it won’t activate the leavening agents fast enough. Always bring your kettle to a rolling boil right before adding it to the batter.
If the cake is dry, you likely overbaked it or measured your flour incorrectly. Always spoon flour into your measuring cup and level it off with a knife. If you scoop directly with the cup, you pack the flour down, which can result in up to 25% more flour than the recipe calls for, leading to a heavy, dry result.
Cooling and Structural Setting Techniques
Patience is a vital ingredient in this recipe. You must allow the cake to cool in the pan for at least 30 minutes. During this time, “carry-over cooking” is happening. The residual heat continues to set the very center of the cake, and the starches begin to firm up.
If you try to flip the cake out of the pan while it’s piping hot, it will likely break or slump. As the cake cools, it actually becomes stronger. Once the 30 minutes are up, you can safely move it to a wire rack to finish cooling completely. Never frost a warm cake, or the fudge frosting will melt and slide right off.
Finishing with Fudge Frosting and Sprinkles
Once the cake is stone cold, it’s time for the frosting. Use a generous 1.5 cups of chocolate fudge frosting. Start by placing a large dollop in the center of the cake and use an offset spatula to push it toward the edges. This prevents you from pulling up crumbs as you spread.
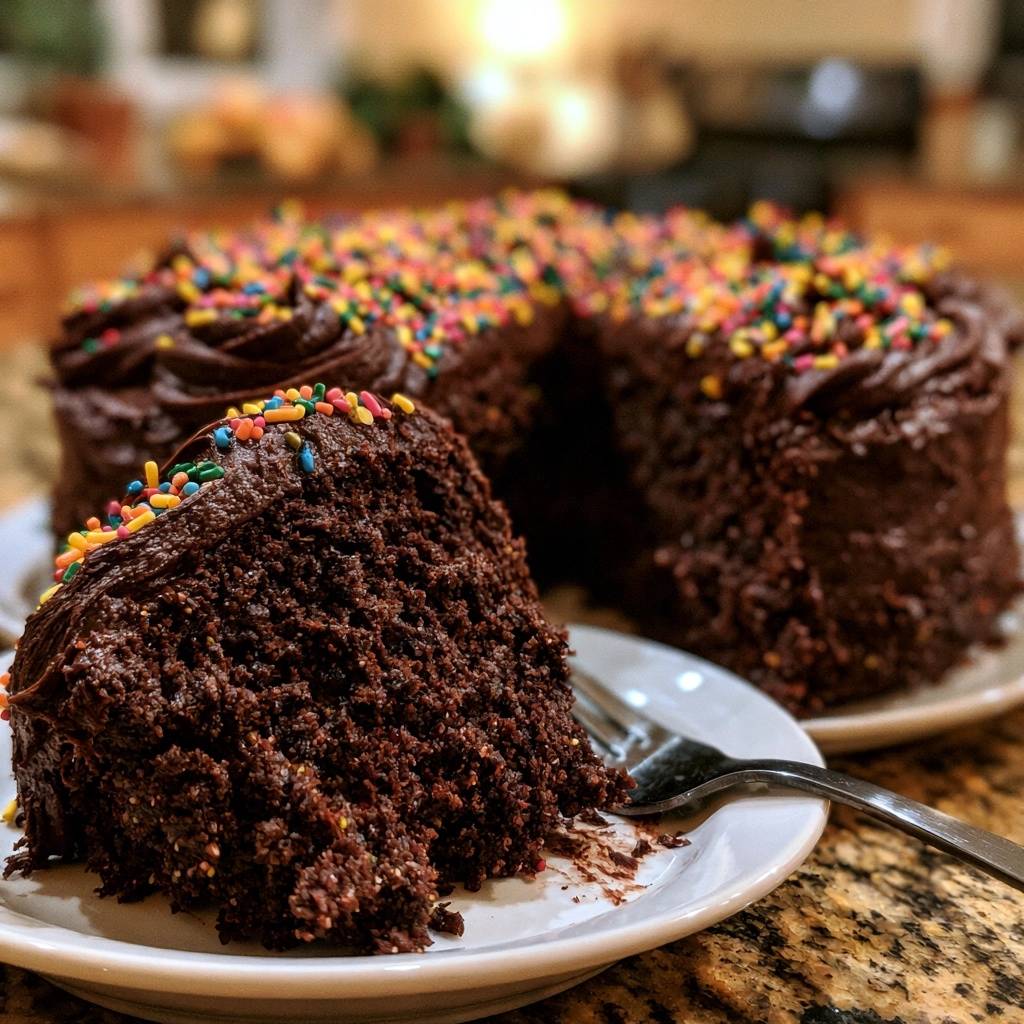
For that professional bakery look, use the tip of your spatula to create deep swirls and “swooshes” in the frosting. Immediately after frosting, cover the top with rainbow sprinkles. The sprinkles don’t just look festive; they provide a wonderful little crunch that contrasts with the incredibly soft, moist crumb of the cake.
Make-Ahead Strategies and Storage Logic
This cake is a fantastic candidate for making ahead of time. In fact, many people find the flavor improves on the second day as the moisture redistributes and the chocolate flavor deepens. You can store the frosted cake under a cake dome at room temperature for up to three days.
If you need to store it longer, you can refrigerate it, but be sure to bring it back to room temperature before serving. Because this cake is made with oil, it won’t get as hard in the fridge as a butter cake, but it’s still best enjoyed at room temp. You can also freeze individual slices wrapped tightly in plastic wrap for up to two months.
Expert Tips for Professional Results
To take this cake to the next level, try adding a teaspoon of espresso powder to your dry ingredients. You won’t taste the coffee, but it acts as a “magnifying glass” for the chocolate, making it taste much richer. It’s a classic baker’s secret that makes a huge difference.
Another tip is to use high-quality vanilla bean paste instead of extract if you have it on hand. The tiny vanilla beans add a beautiful visual element and a more intense aroma. Finally, always grease your pan with a mix of melted butter and cocoa powder instead of flour. This prevents that white, dusty film from appearing on the outside of your dark chocolate cake.
Frequently Asked Questions
Can I use a 9×13 pan instead of a deep-dish round pan?
Yes, you can bake this in a 9×13-inch rectangular pan. The baking time will likely be shorter, around 35 to 40 minutes, because the batter is spread out over a larger surface area. Start checking for doneness at the 30-minute mark. The cake will be thinner but just as moist and delicious.
What is the best buttermilk substitute if I don’t have any?
You can make a quick substitute by adding 1 tablespoon of lemon juice or white vinegar to a measuring cup and then filling the rest with room temperature whole milk. Let it sit for 5 to 10 minutes until it looks slightly curdled. This acidity is crucial for reacting with the baking soda to ensure the cake rises properly.
Why is my batter so thin? Did I do something wrong?
Don’t worry, the batter is supposed to be very thin! The addition of the boiling water thins out the mixture significantly. This high liquid content is exactly what creates the “ultimate moist” texture. As long as you measured your flour correctly, the cake will set perfectly in the oven despite the liquid consistency of the batter.
How do I prevent the bottom of the cake from sticking to the pan?
The best way to ensure a clean release is to grease the pan thoroughly and then line the bottom with a circle of parchment paper. Grease the top of the parchment paper as well. This creates a physical barrier that makes it impossible for the cake to stick, allowing you to flip it out onto a rack with total confidence.
Can I reduce the sugar in this recipe?
Sugar does more than just sweeten the cake; it also contributes to the moisture and the tender crumb. If you reduce the sugar significantly, the cake may become dry or tough. If you must reduce it, try cutting it by no more than 1/4 cup to maintain the structural integrity and mouthfeel of the recipe.
How should I store leftovers to keep them from drying out?
Store leftovers in an airtight container at room temperature for up to 3 days. If your kitchen is very warm, you can store it in the refrigerator for up to 5 days. To keep the cut sides of the cake moist, you can press a piece of plastic wrap directly against the exposed cake crumb before putting it in the container.
Ultimate Moist Chocolate Cake
Course: DessertCuisine: AmericanDifficulty: easy12
servings15
minutes50
minutes65
Minutes420
kcalAmerican
Ingredients
2 cups all-purpose flour
2 cups granulated sugar
3/4 cup unsweetened cocoa powder
2 teaspoons baking soda
1 teaspoon baking powder
1 teaspoon salt
1 cup buttermilk, room temperature
1/2 cup vegetable oil
2 large eggs, room temperature
2 teaspoons vanilla extract
1 cup boiling water
1.5 cups chocolate fudge frosting
1/2 cup rainbow sprinkles
Directions
- Preheat your oven to 350 degrees F. Grease and flour a 9-inch deep-dish round cake pan or a springform pan. (Note: The image shows a high-volume, single-layer cake; ensure your pan has at least 3-inch sides to prevent overflow).
- In a large bowl, whisk together the flour, sugar, cocoa, baking soda, baking powder, and salt until no clumps remain.
- Add the buttermilk, vegetable oil, eggs, and vanilla extract. Mix on medium speed with an electric mixer or whisk until well combined and smooth.
- To solve the sinking issue, you must use boiling water. Slowly pour the boiling water into the batter while whisking by hand. The batter will be very thin. This hot liquid “blooms” the cocoa and reacts instantly with the baking soda to create tiny air bubbles that are strong enough to hold the cake’s weight as it rises.
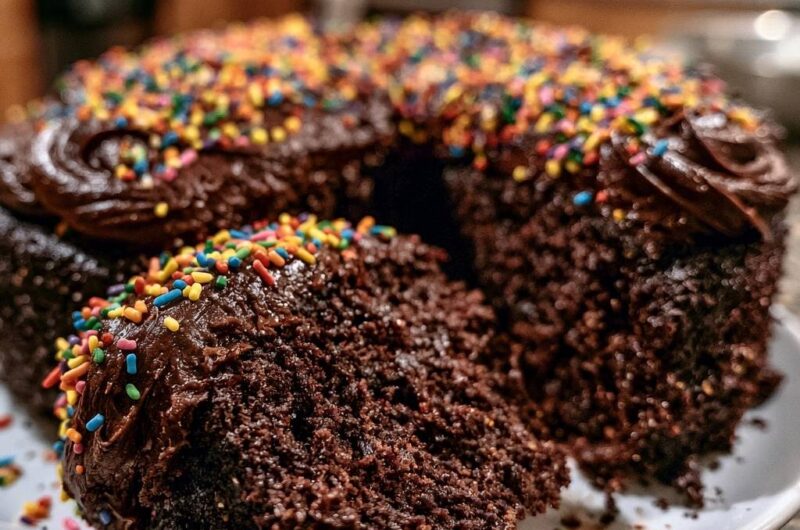
- Pour the batter into the prepared pan. Bake for 45 to 50 minutes. Because this is a deep, single-layer cake as shown in the image, it requires a longer bake time than standard layers to ensure the center is fully set.
- Crucial Step: Do not open the oven door before the 40-minute mark. Sudden temperature drops are the leading cause of sinking centers. Test with a toothpick; it must come out clean or with just a few moist crumbs.
- Allow the cake to cool completely in the pan for at least 30 minutes before transferring to a wire rack. This allows the internal structure to firm up and prevents the cake from breaking.
- Once fully cooled, use a spatula to swirl a thick, generous layer of chocolate fudge frosting over the top and sides. Finish by heavily coating the top with rainbow sprinkles to match the visual finish.
Notes
- Ensure your pan has at least 3-inch sides to prevent overflow. Do not open the oven door before the 40-minute mark to avoid temperature drops that cause sinking. Use boiling water to properly bloom the cocoa and react with the baking soda.