No-Bake Pumpkin Caramel Bars: Perfectly Firm & Creamy Layers
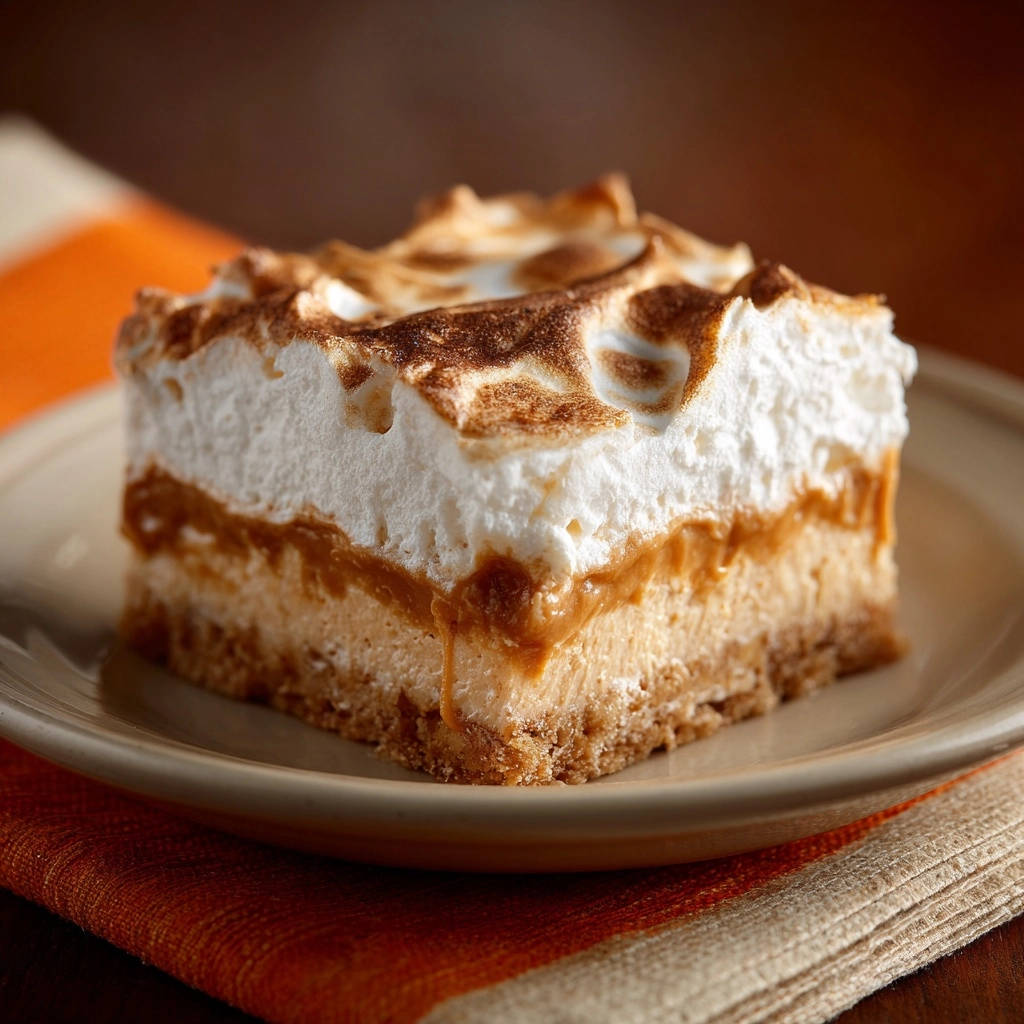
There’s nothing quite as satisfying as a layered bar dessert, but if you’ve ever dealt with a disappointing soggy crust, you know the struggle is real. I’ve been there, watching a potentially delicious treat turn into a mushy mess at the bottom. That’s why I perfected these No-Bake Pumpkin Caramel Bars with a secret technique that guarantees a perfectly firm, crunchy base every single time.
This recipe transforms a common baking frustration into pure dessert triumph, offering a truly exceptional no-bake experience. Get ready to create a stunning, confidently delicious autumn treat that will impress without fail.
Why These No-Bake Pumpkin Caramel Bars Are Your New Fall Favorite
Say Goodbye to Soggy Crusts Forever!
The primary advantage of this recipe lies in its genius crust preparation. Through specific pressing and chilling techniques, we create a dense, impenetrable barrier that moisture from the creamy filling simply cannot conquer.
This ensures every bite offers a delightful crunch against the soft, luxurious layers, eliminating the common pain point of soggy bottoms in no-bake bars.
The Effortless Elegance of a No-Bake Dessert
These bars exemplify convenience without sacrificing sophistication. The entire process requires no oven baking beyond a quick meringue toast, making them ideal for busy schedules or when you want to avoid heating up your kitchen.
Their multi-layered presentation gives the impression of a complex dessert, yet the preparation is surprisingly straightforward and stress-free, perfect for entertaining.
For a similar creamy texture and crisp base, try these creamy lemon coconut bars.
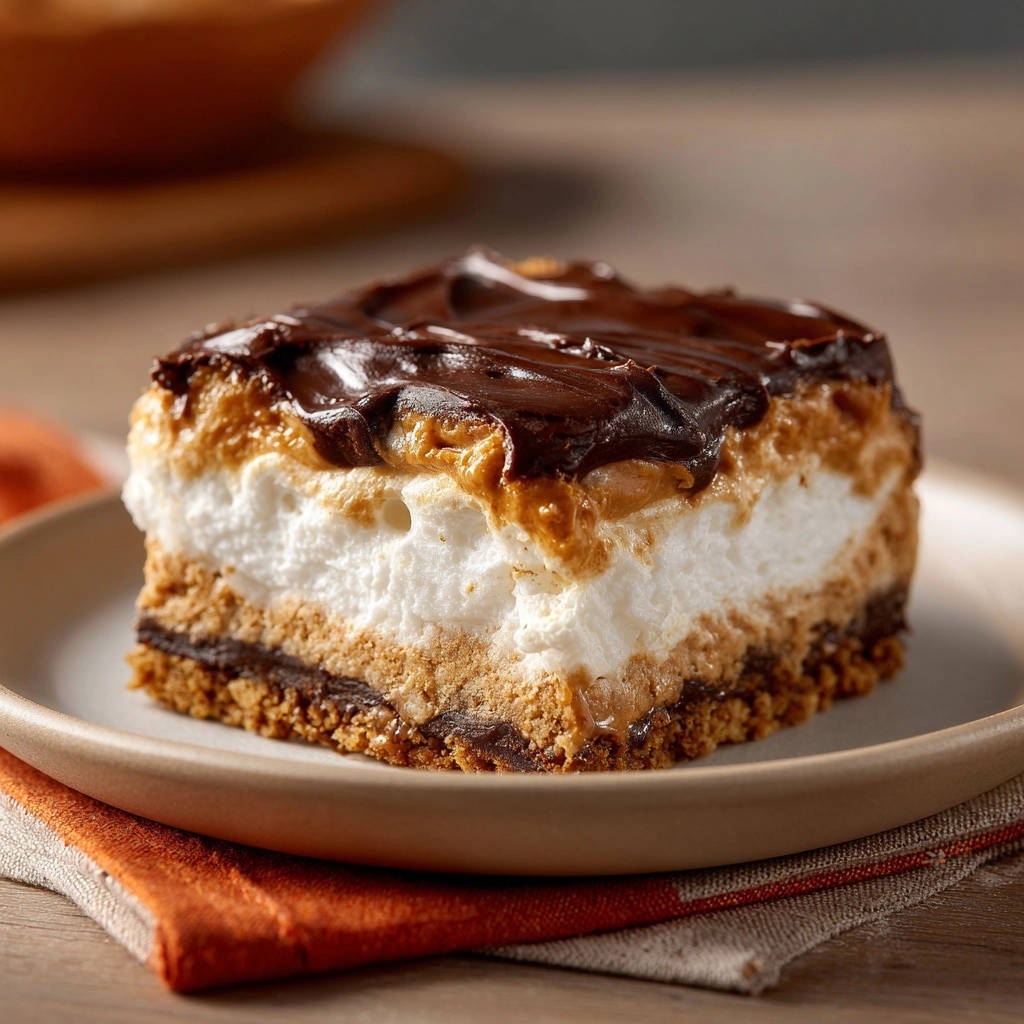
A Symphony of Autumn Flavors in Every Bite
Each layer of these no-bake pumpkin caramel bars contributes to a harmonious blend of textures and tastes. You’ll experience the spiced warmth of pumpkin, the rich sweetness of caramel, and the tangy creaminess of the filling.
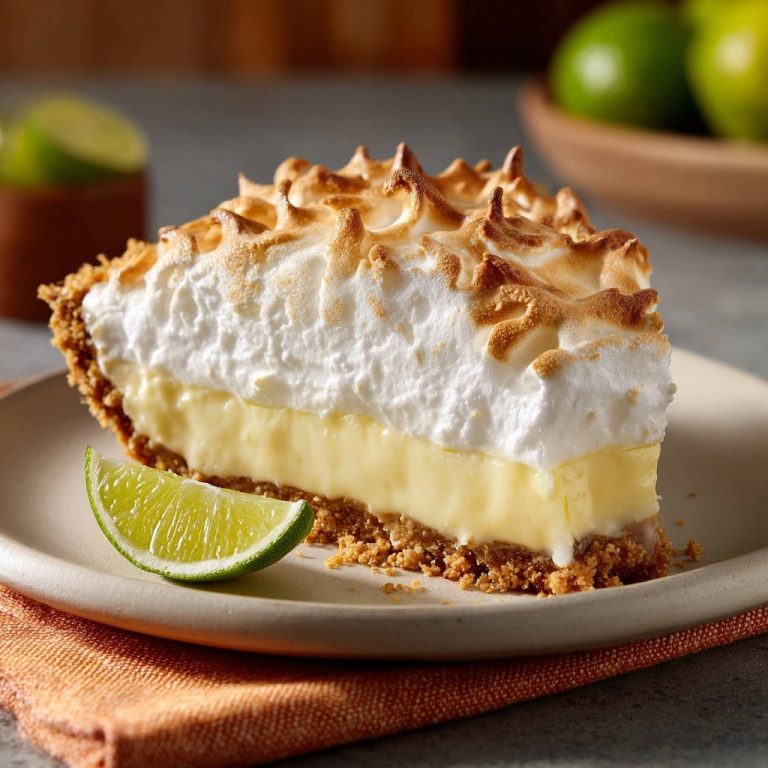
The final touch of light, toasted meringue adds an elegant contrast, creating a truly memorable autumnal treat. It’s a dessert that perfectly captures the essence of fall.
Gather Your Essentials: Ingredients for Dreamy No-Bake Pumpkin Caramel Bars
Building the Indestructible Graham Cracker Base
The foundation of these layered bars is simple yet critical for success. Using high-quality graham cracker crumbs provides a consistent texture and flavor.
Precisely measured granulated sugar adds subtle sweetness, while melted unsalted butter acts as the binding agent. The butter solidifies when chilled, forming the robust, moisture-resistant crust we crave.
Crafting the Silky, Spiced Pumpkin Dream Filling
For the luxurious pumpkin layer, start with softened cream cheese, which ensures a lump-free, silky smooth base. Powdered sugar sweetens and helps to stabilize the filling, while vanilla extract enhances the overall flavor profile.
The star, pumpkin puree (be sure it’s not pie filling, which contains extra liquids and spices), brings that authentic fall taste. Pumpkin pie spice amplifies this flavor, and thawed whipped topping is gently folded in to create an incredibly light, airy texture.
The Decadent Drizzle: Choosing Your Caramel Layer
A good quality prepared caramel sauce is essential here. You can opt for your favorite store-bought brand for convenience, or if you’re feeling ambitious, a homemade caramel sauce will elevate the flavor even further.
This layer provides a rich, sweet counterpoint to the spiced pumpkin, adding both depth and a delightful gooey texture to our no-bake pumpkin caramel bars.
The Cloud-Like Crown: Ingredients for the Meringue Topping
For the light and airy meringue, large egg whites at room temperature are crucial for achieving maximum volume and stable peaks. Cream of tartar acts as a stabilizer, helping the egg whites whip up fluffy and hold their shape.
Gradually added granulated sugar creates a glossy, sturdy meringue, while a touch of vanilla extract adds a delicate aroma, making this topping truly irresistible.
Tools for No-Bake Pumpkin Caramel Bars Success
Must-Have Kitchen Gadgets for Assembly
To successfully assemble these delicious bars, you’ll need a sturdy 8×8 inch baking pan, ideally ungreased for the crust. A set of mixing bowls, varying in size, will be invaluable for preparing each component separately.
If you enjoy working with firm, chilled crusts, you might also like the crisp base in these layered turtle cheesecake bars.
An electric mixer (handheld or stand mixer) is essential for whipping the cream cheese and meringue to their perfect consistencies. Lastly, a flat-bottomed glass or measuring cup is your secret weapon for pressing the crust firmly and evenly, ensuring that critical no-soggy base.
Adding the Golden Touch: Optional Meringue Toasting Tools
For that beautiful, slightly charred meringue topping, a kitchen torch is the preferred tool, offering precise control over the browning. It allows you to create elegant, caramelized peaks in minutes.
If a kitchen torch isn’t available, your oven’s broiler can serve as an effective alternative. Remember to monitor it very closely, as meringue browns extremely fast under high heat.
Your Path to No-Bake Pumpkin Caramel Bars Perfection: A Detailed Guide
Foundation First: Preparing the Robust Crust
Combine Ingredients: In a medium bowl, thoroughly mix graham cracker crumbs, granulated sugar, and melted butter until evenly moistened. The mixture should resemble wet sand, with no dry spots remaining.
Press Firmly: Pour the mixture into an ungreased 8×8 inch baking pan. Using the bottom of a flat glass or measuring cup, press the crust down very firmly and evenly across the bottom. This compaction is absolutely crucial; it creates a dense, solid base that prevents the crust from absorbing moisture and becoming soggy.
Chill to Set: Place the pan in the refrigerator for at least 30 minutes. This chilling period allows the butter to solidify completely, creating a robust, non-porous foundation that is essential for the structure and integrity of your no-bake pumpkin caramel bars.
Whipping Up the Velvety Pumpkin Layer
Cream the Cheese: In a large bowl, use an electric mixer to beat softened cream cheese until it is completely smooth and creamy. Ensuring the cream cheese is at room temperature prevents lumps and ensures a consistent texture.
Sweeten and Flavor: Add powdered sugar and vanilla extract to the cream cheese, beating until well combined and perfectly smooth. Scrape down the sides of the bowl to ensure everything is incorporated.
Incorporate Pumpkin: Stir in the pumpkin puree and pumpkin pie spice until the mixture is uniform and thoroughly blended, achieving a beautiful, inviting orange hue. Make sure no streaks of plain cream cheese remain.
Fold Gently: Finally, gently fold in the thawed whipped topping until no streaks remain. This step is crucial for maintaining a light and airy texture in the pumpkin filling, contributing to the overall delicate mouthfeel of the bars.
Building Your Dessert Masterpiece: Layering It Up
Layer the Pumpkin: Retrieve the chilled crust from the refrigerator. Evenly spread the prepared cream cheese pumpkin filling over the firmly set graham cracker crust. Take care to spread it smoothly to the edges.
Add Caramel: Carefully pour the prepared caramel sauce over the pumpkin layer, gently spreading it to the edges of the pan. Work slowly to avoid disturbing the pumpkin layer underneath, creating a distinct, beautiful middle layer.
The Fluffy Finish: Crafting the Meringue
Beat Egg Whites: In a very clean, dry bowl, use an electric mixer to beat the room temperature egg whites and cream of tartar on medium-high speed until soft peaks begin to form. The bowl must be spotless and free of any grease for success.
Add Sugar Gradually: Gradually add the granulated sugar, one tablespoon at a time, continuing to beat. Increase the speed to high as needed until stiff, glossy peaks form and the meringue holds its shape beautifully when the beaters are lifted.
Add Vanilla: Beat in the vanilla extract just until combined, ensuring the meringue remains light and stable. Avoid overmixing once the vanilla is added.
The Golden Touch: Toasted Meringue Magic
Spread Meringue: Carefully spread the meringue evenly over the caramel layer. You can create attractive swirls or peaks with the back of a spoon, giving your no-bake pumpkin caramel bars an elegant, homemade look.
Toast Meringue (Torch Method): Use a kitchen torch to carefully toast the meringue until lightly browned in spots. Keep the torch moving continuously over the surface to achieve even browning and prevent burning.
Toast Meringue (Broiler Method): If you do not have a kitchen torch, place the pan under a preheated broiler for 1 to 2 minutes. Watch very closely to prevent burning, as broilers can toast meringues incredibly quickly. Remove immediately once lightly golden brown.
The Art of Patience: Chilling for Flawless Slices
Chill Thoroughly: Refrigerate the bars for at least 4 hours, or preferably overnight. This extended chilling time is absolutely essential for all the layers to set completely and firm up, ensuring they hold their shape perfectly.
Slice and Serve: Once thoroughly chilled and firm, use a sharp knife (wiping it clean between slices if necessary) to cut the bars into clean squares and serve. This allows for picture-perfect portions of your stunning layered dessert.
Expert Tips & Tricks for Your Best No-Bake Pumpkin Caramel Bars
Achieving the “No-Soggy” Crust Guarantee
Press with Purpose: The key to a truly firm crust is vigorous and even pressing. Don’t be shy; compact those graham cracker crumbs tightly into the pan to form a solid, dense barrier against moisture from the filling above.
Chill It Right: The 30-minute chilling time for the crust isn’t optional; it’s a mandatory step. This allows the melted butter to fully solidify, creating a robust, non-porous foundation that simply won’t absorb liquids later, ensuring a crisp base for your no-bake pumpkin caramel bars.
Keeping Your Pumpkin Filling Light & Airy
Softened Cream Cheese is Key: Ensure your cream cheese is truly at room temperature before you begin mixing. This allows it to beat smoothly without any lumps, creating a uniform, creamy base for your pumpkin filling.
Fold, Don’t Stir: When incorporating the whipped topping into the pumpkin mixture, use a gentle folding motion. This technique preserves the delicate airiness of the whipped topping, resulting in a wonderfully light and fluffy pumpkin layer that melts in your mouth.
Meringue Secrets: Perfect Peaks Every Time
Spotless Equipment: Any trace of grease or egg yolk in your mixing bowl or on your beaters will prevent egg whites from whipping properly. Ensure all your equipment is immaculately clean and completely dry for meringue success.
Room Temperature Eggs: Egg whites at room temperature whip up with significantly more volume and stability compared to cold ones. Plan ahead by taking them out of the fridge a bit before you start, allowing them to warm up.
Gradual Sugar Addition: Add the granulated sugar slowly, one tablespoon at a time, allowing each addition to fully dissolve into the egg whites. This creates a stable, glossy meringue that holds its stiff peaks beautifully and resists weeping.
The Chill Factor: Why Time is Your Friend
Patience for Perfection: Do not rush the final chilling period for your no-bake pumpkin caramel bars. The recommended 4 hours, or preferably overnight, is crucial for all the layers to set firmly and for their flavors to meld beautifully. This patience ensures clean, beautiful slices and optimal enjoyment.
Troubleshooting Common No-Bake Bar Hurdles
My Crust Isn’t Firm Enough!
Ensure you pressed the graham cracker mixture down very firmly into the pan, compacting it thoroughly. Also, do not skip the crucial chilling step; the butter needs ample time to solidify and create a robust, non-soggy base.
My Pumpkin Filling is Too Runny!
Make sure your cream cheese was fully softened before beating it smooth. Always use actual pumpkin puree, not pumpkin pie filling, which contains extra liquid and sweeteners. Lastly, ensure your whipped topping is thawed but still firm, and remember to fold it in gently to maintain its body and lightness.
My Meringue Won’t Form Stiff Peaks!
The most common culprit is a trace of grease or egg yolk in your bowl or on your beaters. Ensure your equipment is impeccably clean and dry. Additionally, egg whites at room temperature whip more effectively, and always add the sugar gradually as instructed.
How Do I Get Clean Slices?
Thorough chilling is absolutely essential for clean cuts. Ensure the bars have refrigerated for at least 4 hours, or preferably overnight, allowing all layers to firm up completely. For the cleanest slices, use a sharp knife and, ideally, wipe the blade clean between each cut.
Storing, Serving, and Making Ahead These Delights
Ideal Storage for Freshness
Store your No-Bake Pumpkin Caramel Bars in an airtight container in the refrigerator for up to 3-4 days. While the meringue topping is best enjoyed fresh, the bars themselves will remain deliciously flavorful for several days.
Elegant Serving Suggestions
Serve these bars chilled for the best texture and flavor experience. They are perfect on their own, but for an elevated presentation, consider a light dusting of powdered sugar, a sprinkle of cinnamon, or a small dollop of extra whipped cream on top of each slice. For other delightful no-bake options, consider trying a refreshing no-bake strawberry cheesecake or rich no-bake peanut butter fudge pie.
What’s Next?
Try these delicious pairings:
- Mastering Sugared Cinnamon Morning Buns with a Crisp Base
- S’mores French Toast Stack: Crispy Edges, Melty Core
Can I Make These Ahead of Time?
Absolutely! These no-bake pumpkin caramel bars are an ideal make-ahead dessert, perfect for holiday gatherings or entertaining. Preparing them the day before serving allows ample time for chilling, ensuring they set perfectly and are incredibly easy to slice and serve. Simply keep them covered in the refrigerator until ready.
Frequently Asked Questions About No-Bake Pumpkin Caramel Bars
Can I Use Homemade Whipped Cream Instead of Thawed Whipped Topping?
Yes, you can use freshly whipped cream. For better stability, especially if you plan to store the bars for more than a day, you might consider adding a tablespoon of powdered sugar and a teaspoon of cream cheese or unflavored gelatin to your whipped cream before folding it into the pumpkin filling.
What if I Don’t Have a Kitchen Torch for the Meringue?
As mentioned in the directions, you can effectively use your oven’s broiler! Place the bars under a preheated broiler for 1 to 2 minutes, but it’s crucial to keep a very close eye on them, as meringues can burn extremely quickly. Remove them as soon as they achieve a light golden-brown color.
Can I Make These Gluten-Free?
Yes, you can easily adapt these no-bake pumpkin caramel bars to be gluten-free. Simply substitute gluten-free graham cracker crumbs for the regular ones in the crust. The rest of the ingredients are naturally gluten-free.
Is it Possible to Reduce the Sugar Content?
You can slightly reduce the sugar in the graham cracker crust and the pumpkin filling, but be mindful that sugar contributes to both sweetness and the overall texture of the bars. Reducing sugar in the meringue is not recommended, as it is crucial for its stability and structure. For the best results, stick to the recipe, or make only minor adjustments to suit your personal taste preferences.
Can I Substitute the Caramel Sauce?
While caramel sauce is fundamental to the intended flavor profile of these no-bake pumpkin caramel bars, you could experiment with other thick, spoonable sauces. Dulce de leche would offer a similar, rich profile. Other options like a thick chocolate ganache or a fruit curd would significantly change the flavor, but could be an option if you’re looking for a different bar entirely. Just ensure the sauce is thick enough to hold its layer and not seep into the crust.
Your Perfect Autumn Dessert Awaits!
Armed with these expert tips and a foolproof method, you’re now ready to create a truly stunning and deeply satisfying dessert that will impress everyone at your next gathering. These No-Bake Pumpkin Caramel Bars aren’t just a treat; they’re a testament to how simple techniques, executed with care, can yield extraordinary, restaurant-quality results right in your own kitchen.
So, gather your ingredients, follow these detailed steps, and prepare to delight in a dessert that’s as easy to make as it is utterly delicious to eat. Don’t forget to share your beautiful creations and tell us your favorite part of these delightful pumpkin caramel bars!
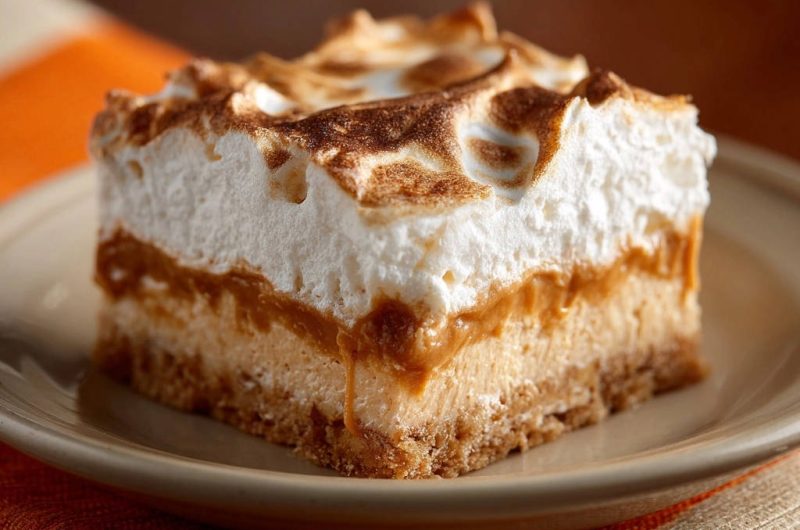
Pumpkin Caramel Bars
Course: DessertCuisine: AmericanDifficulty: medium9
bars45
minutes2
minutes350
kcal240
minutesSay goodbye to soggy crusts with these dreamy No-Bake Pumpkin Caramel Bars! Featuring a secret technique for a perfectly firm graham cracker base, creamy pumpkin filling, rich caramel, and toasted meringue. This easy, fail-safe dessert is sure to impress.
Ingredients
For the Crust:
1 1/2 cups graham cracker crumbs
1/4 cup granulated sugar
6 tablespoons unsalted butter, melted
For the Pumpkin Filling:
8 ounces cream cheese, softened
1/2 cup powdered sugar
1 teaspoon vanilla extract
1 (15 ounce) can pumpkin puree (not pie filling)
1 teaspoon pumpkin pie spice
8 ounces whipped topping, thawed
For the Caramel Layer:
1 cup prepared caramel sauce
For the Meringue Topping:
3 large egg whites, at room temperature
1/2 teaspoon cream of tartar
6 tablespoons granulated sugar
1/2 teaspoon vanilla extract
Directions
- Prepare the Crust (Your Secret to No More Soggy Crust!): In a medium bowl, combine graham cracker crumbs, 1/4 cup granulated sugar, and melted butter. Mix until all crumbs are moistened and resemble wet sand. Pour the mixture into an ungreased 8×8 inch baking pan. Using the bottom of a flat glass or measuring cup, press the crust mixture down very firmly and evenly into the bottom of the pan. This step is crucial for creating a dense, non-soggy base that won’t absorb moisture from the filling. Place the pan in the refrigerator for at least 30 minutes to thoroughly chill and set. This solidifies the butter and forms a robust barrier.
- Make the Pumpkin Filling: In a large bowl, using an electric mixer, beat the softened cream cheese until smooth and creamy. Add the powdered sugar and 1 teaspoon vanilla extract and beat until well combined. Stir in the pumpkin puree and pumpkin pie spice until the mixture is uniform and well blended. Gently fold in the thawed whipped topping until no streaks remain and the filling is light and airy.
- Assemble the Layers: Retrieve the chilled crust from the refrigerator. Evenly spread the cream cheese pumpkin filling over the set graham cracker crust. Pour the prepared caramel sauce over the pumpkin layer, gently spreading it to the edges of the pan.
- Prepare the Meringue: In a very clean, dry bowl, using an electric mixer, beat the egg whites and cream of tartar on medium-high speed until soft peaks form. Gradually add the 6 tablespoons of granulated sugar, one tablespoon at a time, continuing to beat until stiff, glossy peaks form. Beat in 1/2 teaspoon vanilla extract until just combined.
- Top and Toast: Carefully spread the meringue evenly over the caramel layer, creating attractive swirls or peaks with the back of a spoon. Use a kitchen torch to carefully toast the meringue until lightly browned in spots. If you do not have a kitchen torch, you can place the pan under a preheated broiler for 1 to 2 minutes, watching very closely to prevent burning.
- Chill and Serve: Refrigerate the bars for at least 4 hours, or preferably overnight, to allow all the layers to set completely. This thorough chilling is essential for clean slicing and ensures the layers hold their shape beautifully. Once thoroughly chilled, cut into squares and serve.
Notes
- Key to success: firmly press and thoroughly chill the graham cracker crust to prevent sogginess. Chill bars completely (at least 4 hours, preferably overnight) for best slicing.