Mastering the Ultra Creamy Stovetop Mac and Cheese
We have all been there. You spend twenty minutes carefully whisking a sauce only for it to turn into a gritty, oily mess the second the cheese hits the pan. It is heartbreaking to see expensive cheddar separate into clumps of protein and puddles of grease. Most recipes fail because they treat cheese like a heat-tolerant ingredient, but in reality, cheese is a delicate emulsion that requires a gentle touch.
This Ultra Creamy Stovetop Mac and Cheese solves the “broken sauce” problem by using a specific stability method. By combining a pale roux with heavy cream and utilizing residual heat, we create a sauce that stays glossy and thick. This isn’t just a quick dinner; it is a technical fix for the most common frustration in home cooking. You get that restaurant-quality cheese pull every single time without the grainy texture.
The secret to this success is the “off-heat” technique. Most people keep the burner roaring while they add the cheese, which shocks the proteins and causes them to tighten up. By moving the pot to a cool burner before the cheese goes in, you allow the residual heat of the thickened cream to melt everything gently. This keeps the fats and solids bonded together for a velvety finish that coats every ridge of the pasta.
The Science of a Smooth Cheese Sauce
To understand why this recipe works, you have to look at the molecular level of cheese. Cheese is primarily made of water, fat, and protein clusters called casein. When you subject these proteins to high, direct heat, they act like tiny sponges being wrung out. They contract tightly, squeezing out the fat and moisture, which results in that dreaded oily pool at the bottom of your bowl.
Heavy cream acts as our primary stabilizer in this equation. Unlike whole milk alone, heavy cream has a high fat-to-protein ratio. This extra fat acts as a buffer, physically getting in the way of the casein proteins so they cannot bond too tightly. It creates a more forgiving environment where the cheese can melt into a liquid state without “breaking” its emulsion.
The roux—the mixture of butter and flour—serves as the structural foundation. While the cream provides the silkiness, the flour particles swell and create a network that holds the liquid in place. This prevents the sauce from being runny. However, the roux alone isn’t enough to stop graininess; that is where your temperature control becomes the most important tool in your kitchen.
Why Temperature Control Prevents Grittiness
Cheddar cheese has a relatively low melting point, usually around 150°F. If your sauce is bubbling or boiling when you add the cheese, you are likely hitting temperatures closer to 212°F. This massive temperature gap is what causes the cheese to “shock.” The proteins seize up instantly, creating those tiny, sand-like grains that ruin the mouthfeel of the dish.
By switching to the residual heat method, you ensure the sauce stays within that “sweet spot” for melting. The thickened milk and cream mixture holds onto enough thermal energy to melt the shredded cheese completely, but it isn’t hot enough to damage the proteins. It is the difference between a sauce that looks like liquid gold and one that looks like curdled milk.
Essential Components for Ultra Creamy Stovetop Mac and Cheese
When you are making a dish with so few ingredients, the quality and state of those ingredients matter immensely. You want to use room temperature milk and cream. Cold dairy hitting a hot roux can cause the butter to seize, creating tiny lumps that are nearly impossible to whisk out later. Taking your dairy out of the fridge 15 minutes early makes a world of difference.
The choice of fat is also non-negotiable. Use unsalted butter so you can control the sodium levels yourself. Since we are adding three different types of cheese, the salt content can climb quickly. Starting with a neutral, high-quality butter base allows the flavors of the sharp white cheddar and nutty Parmesan to really shine through without being masked by excess salt.
Selecting the Right Pasta Shape for Maximum Surface Area
While elbow macaroni is the traditional choice, Cavatappi or Cellentani are the true heroes of stovetop mac. These corkscrew-shaped noodles have a much larger surface area and a hollow center. This design is intentional; the ridges on the outside “grab” the thick cheese sauce, while the hollow middle acts like a straw, trapping the emulsion inside every bite.
When you boil these shapes, you want to stop about two minutes before the package says “al dente.” The pasta will continue to cook slightly when it hits the warm cheese sauce. If you overcook it in the water, the noodles will lose their structural integrity and turn mushy. You want a firm bite that stands up to the weight of the heavy cream sauce.
The Case for Freshly Grated Block Cheese
If there is one rule you must follow, it is this: grate your own cheese. Pre-shredded cheese in bags is coated in potato starch or cellulose to keep the strands from sticking together in the package. These anti-caking agents are the enemy of a smooth sauce. They don’t dissolve; they just sit in your sauce, contributing to a chalky, gritty texture.
A block of sharp white cheddar has a higher moisture content than the pre-shredded stuff. When you grate it fresh, the cheese melts into a cohesive, gooey pool almost instantly. It also tastes significantly better. The mozzarella provides that classic “cheese pull” stretch, while the Parmesan adds a salty, savory “grip” that helps the sauce adhere to the pasta.
Building Depth with Dry Mustard and Aromatics
Dry mustard powder is the “secret weapon” of professional chefs. You won’t actually taste mustard in the final dish. Instead, the acidity in the mustard powder acts as a flavor enhancer, cutting through the richness of the dairy and making the cheddar taste “sharper.” It provides a back-of-the-palate warmth that balances the heavy fats.
Garlic and onion powder are used here instead of fresh aromatics to maintain a perfectly smooth texture. Fresh garlic can sometimes turn bitter when sautéed in a roux, but the powdered versions distribute evenly throughout the sauce. They provide a savory baseline that prevents the mac and cheese from tasting one-dimensional or overly “milky.”
Step-by-Step: Executing the Perfect Emulsion
Success in this recipe comes down to the visual cues. You aren’t just following a timer; you are watching for specific changes in the pot. The way the liquid moves and the way the whisk leaves trails in the sauce will tell you exactly when to move to the next step. It is a tactile process that requires your full attention for about fifteen minutes.
Phase 1: The Pale Roux and Dairy Integration
When you melt the butter and whisk in the flour, you are looking for a texture like wet sand. You want to cook this for about two minutes. This is just long enough to toast the raw flour taste away, but not long enough to let it turn brown. In a gravy, you might want a dark roux, but for mac and cheese, we want a pale, clean base that doesn’t compete with the color of the white cheddar.
As you pour in the milk and cream, do it slowly. Start with just a splash and whisk until it forms a thick paste. Then add a bit more. This gradual integration prevents lumps from forming. By the time all the liquid is in, the sauce should look like a thin soup. Keep whisking over medium heat until it thickens enough to coat the back of a spoon. If you run your finger across the spoon, the line should stay clean.
Phase 2: Tempering the Sauce and Adding Cheese
Once the sauce is thickened, move the pot off the heat. This is the moment of truth. Add your shredded cheese one handful at a time. If you dump it all in at once, the temperature of the sauce will drop too fast, and the cheese won’t melt evenly. Stir gently in a circular motion until the first handful is completely invisible before adding the next.
You will see the sauce transform from a white liquid into a glossy, thick, pale-yellow coating. It should reach what chefs call the “ribbon stage.” When you lift your spoon, the sauce should fall back into the pot in a thick, continuous ribbon that holds its shape on the surface for a second before disappearing. This indicates the emulsion is perfectly balanced.
Phase 3: The Final Fold and Texture Adjustment
Fold the cooked pasta into the sauce using a large spatula rather than a whisk. You want to be gentle so you don’t break the noodles. The Parmesan goes in last. Because Parmesan is a hard, aged cheese, it doesn’t melt quite as “wet” as cheddar. Adding it at the end provides a bit of texture and helps the sauce “grip” the slippery surface of the pasta.
If the sauce looks too thick or “tight,” don’t panic. Simply add a tablespoon or two of warm milk. The sauce will naturally thicken as it cools, so you want it to look slightly looser in the pot than you want it to look on the plate. This ensures that by the time you sit down to eat, it is the perfect, creamy consistency.
Troubleshooting Common Macaroni and Cheese Failures
If your sauce looks oily, it has likely broken. This usually happens if the heat was too high. You can often save it by adding a splash of cold heavy cream and whisking vigorously off the heat. The cold fat can sometimes help re-emulsify the broken proteins. It is an “emergency whisk” method that has saved many dinners.
If the sauce is too thin, you may not have cooked the roux long enough or let the milk reach a simmer. You can fix this by simmering the sauce for another minute before adding the cheese. However, never try to thicken the sauce after the cheese has been added by turning the heat back up, as this will almost certainly cause the sauce to become grainy.
Flavor Variations and Gourmet Add-ins
Once you master the base sauce, you can get creative. For a sophisticated twist, stir in a teaspoon of white truffle oil and some roasted garlic paste at the very end. The earthy aroma of the truffle pairs beautifully with the sharp white cheddar. It turns a humble comfort food into something that feels like it belongs in a high-end bistro.
Another great option is a “Sun-dried Tomato and Basil” version. Chop up oil-packed sun-dried tomatoes and fold them in with the pasta, then top the whole dish with fresh chiffonade basil. The acidity of the tomatoes cuts through the richness of the heavy cream. For a bit of heat, you can also add roasted red peppers and a pinch of red pepper flakes for a “smoky” profile without using meat.
Optimal Pairings for a Rich Pasta Entrée
Because this mac and cheese is incredibly rich and decadent, you want side dishes that provide a sharp contrast. A simple arugula salad with a lemon-vinaigrette is the perfect partner. The peppery bite of the greens and the acid from the lemon juice cleanse your palate between bites of cheesy pasta, making the meal feel more balanced.
Roasted vegetables are another excellent choice. Try charred Brussels sprouts or broccolini tossed with lemon zest and chili flakes. The slight bitterness of these green vegetables cuts through the dairy. Avoid serving this with other heavy, starchy sides like potatoes; instead, focus on bright, vibrant flavors that bring some “light” to the table.
Storage and Reheating Without Losing Creaminess
Mac and cheese is notorious for turning into a solid, dry brick in the refrigerator. This happens because the pasta continues to absorb moisture from the sauce as it sits. To store it properly, place it in an airtight container for up to three days. I do not recommend freezing this dish, as the dairy emulsion will almost certainly break upon thawing, leaving you with a grainy texture.
When reheating, avoid the microwave if possible. The uneven heat of a microwave is the fastest way to break a cheese sauce. Instead, place the leftovers in a small saucepan over low heat. Add a splash of milk or cream and stir constantly as it warms up. The extra liquid will loosen the sauce back to its original creamy state, and the low heat will keep the cheese from becoming oily.
Expert Tips for Professional Presentation
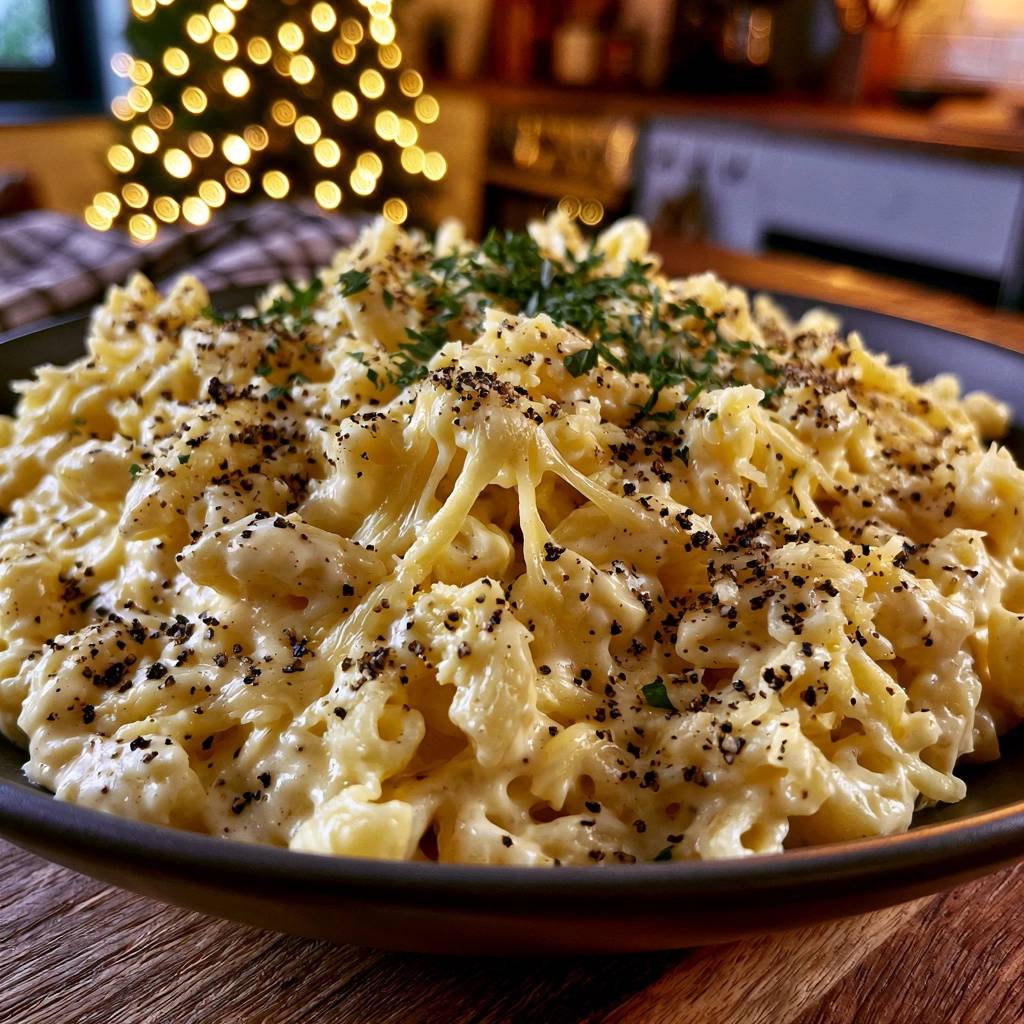
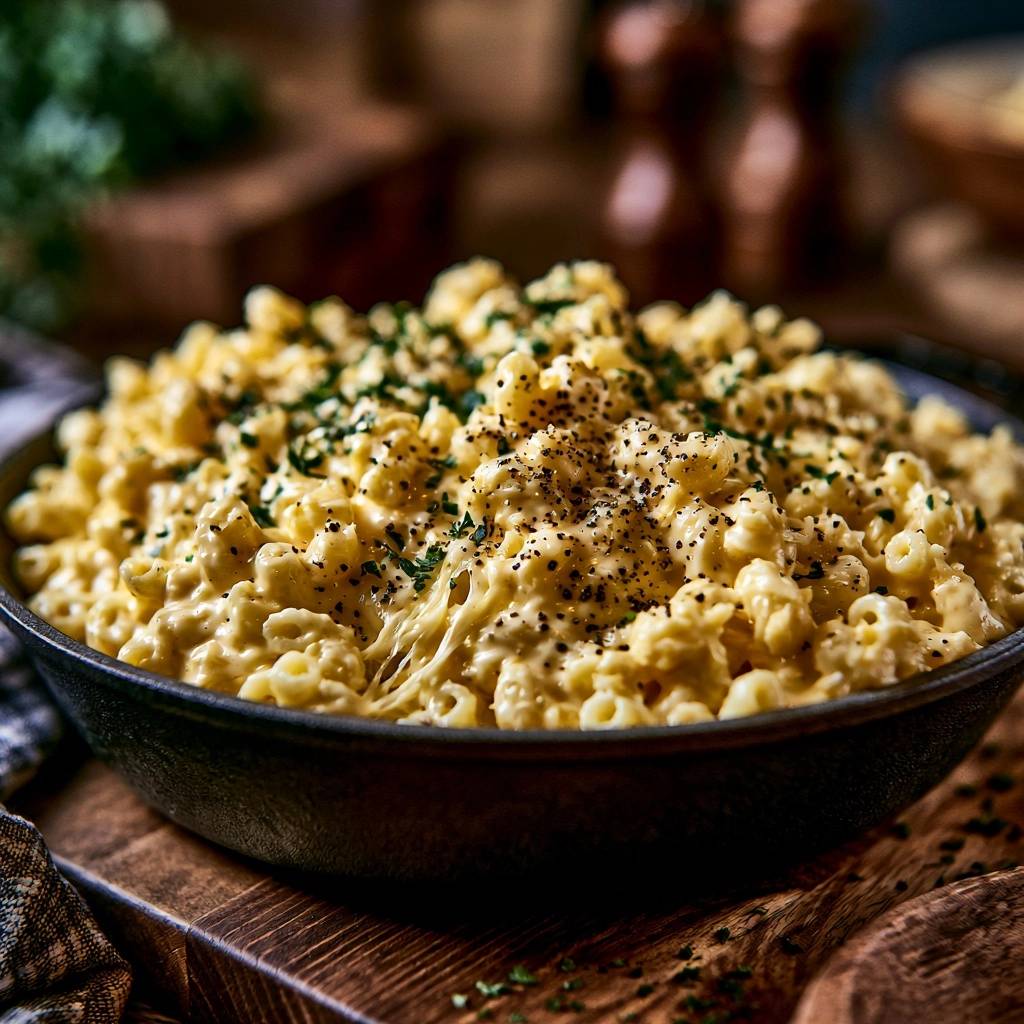
The visual finish of this dish is what makes it look truly appetizing. A heavy hand with coarse cracked black pepper is essential. The dark specks provide a beautiful visual contrast against the pale sauce, and the floral heat of the pepper balances the saltiness of the Parmesan. It makes the dish look “textured” and intentional rather than just a bowl of yellow noodles.
Fresh parsley is the final touch. It adds a necessary “green” note that brightens the entire presentation. Finely chop it just before serving so it stays vibrant. If you want an even more professional look, serve the mac and cheese in individual cast-iron crocks or shallow bowls rather than one big heap. It keeps the pasta hotter for longer and makes the experience feel more special.
The Importance of Immediate Service
Cheese sauce has a “half-life.” It is at its absolute peak the moment it is finished. As it sits, the starches in the pasta and the proteins in the cheese begin to set. This is why you should have your table set and your side dishes ready before you even start the sauce. You want to serve this while the cheese pull is at its most dramatic.
If you are hosting a dinner, time the pasta so it is the very last thing you do. The five minutes after the cheese is folded in are the “golden window” for flavor and texture. Once you plate it and top it with that fresh parsley and pepper, get it to the table immediately. Your guests will thank you for the silkiest, creamiest mac and cheese they have ever tasted.
How do I keep my mac and cheese from being grainy?
Graininess is caused by high heat or pre-shredded cheese. To avoid it, always grate your cheese from a block and turn the heat completely off before stirring the cheese into your cream base. The residual heat is enough to melt the cheese without causing the proteins to clump together and create a sandy texture.
Can I use 2% milk instead of whole milk and heavy cream?
You can, but the sauce will be much thinner and less stable. The fat in the heavy cream acts as an emulsifier that prevents the sauce from breaking. If you use lower-fat milk, you run a much higher risk of the sauce turning oily or separating. For the creamiest results, stick to the whole milk and cream combination.
Why is my cheese sauce oily?
An oily sauce means the emulsion has broken. This usually happens if the sauce got too hot after the cheese was added. If this happens, try removing it from the heat immediately and whisking in a tablespoon of cold heavy cream. This can sometimes “rescue” the sauce by cooling it down and reintroducing a stabilizing fat.
What is the best way to reheat leftovers?
The best way to reheat stovetop mac and cheese is on the stove over low heat. Add a splash of milk (about 1 tablespoon per cup of pasta) to help loosen the sauce. Stir constantly until it is warmed through. Avoid the microwave, as it often heats the cheese too quickly, causing it to separate and become greasy.
Can I substitute the cavatappi for another pasta?
Yes, you can use elbow macaroni, shells, or penne. However, shapes with ridges or hollow centers are best because they hold onto the thick sauce. If you use a smooth pasta like spaghetti, the sauce may slide off the noodles rather than coating them evenly.
Is dry mustard powder necessary?
While you can leave it out, dry mustard powder is highly recommended. It doesn’t make the dish taste like mustard; instead, it acts as a flavor developer that enhances the sharpness of the cheddar and cuts through the heavy fat of the cream. It provides a professional depth of flavor that is often missing from home-cooked versions.
Ultra Creamy Stovetop Mac and Cheese
Course: Main CourseCuisine: AmericanDifficulty: easy4
servings10
minutes15
minutes25
Minutes680
kcalAmerican
Ingredients
1 pound cavatappi or cellentani pasta
4 tablespoons unsalted butter
1/4 cup all-purpose flour
2 cups whole milk, room temperature
1 cup heavy cream, room temperature
1 teaspoon garlic powder
1/2 teaspoon onion powder
1/2 teaspoon dry mustard powder (optional, for depth)
1 teaspoon kosher salt (plus more for pasta water)
2 cups sharp white cheddar cheese, freshly shredded from a block
1 cup mozzarella cheese, freshly shredded from a block
1/2 cup freshly grated Parmesan cheese
2 tablespoons coarse cracked black pepper (for topping)
2 tablespoons fresh parsley, finely chopped
Directions
- Boil the pasta in a large pot of heavily salted water until just al dente (usually 1-2 minutes less than the package directions). Drain and set aside, but do not rinse.
- In the same pot over medium heat, melt the butter. Whisk in the flour and cook for 2 minutes, whisking constantly, to remove the raw flour taste. Do not let the roux brown; it should remain pale.
- Slowly pour in the milk and heavy cream while whisking vigorously to prevent lumps. Continue to cook and whisk until the mixture reaches a gentle simmer and thickens enough to coat the back of a spoon. Stir in the garlic powder, onion powder, dry mustard, and salt.
- CRITICAL STEP FOR TEXTURE: Turn the heat off completely and move the pot to a cool burner. High heat is what causes cheese to break and become gritty.
- Add the shredded white cheddar and mozzarella one handful at a time, stirring gently until completely melted and smooth before adding the next batch. The residual heat from the thickened cream sauce is sufficient to melt the cheese without shocking the proteins.
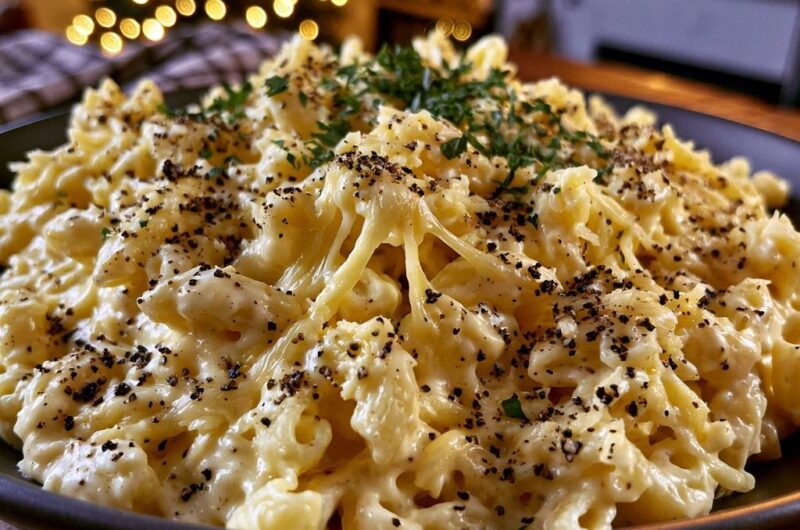
- Fold the cooked pasta back into the cheese sauce. Stir in the Parmesan cheese last; this adds the final “grip” and stringy texture seen in the photo. If the sauce is too thick, add a splash of warm milk.
- Transfer to a serving bowl. Immediately top with a very generous layer of coarse cracked black pepper and fresh parsley to match the bold, textured finish of the dish. Serve immediately while the cheese pull is at its peak.
Notes
- The secret to the smooth texture is using residual heat to melt the cheese. Avoid pre-shredded bagged cheeses as they contain anti-caking agents that can cause grittiness.