Mastering Crispy Honey Pistachio Goat Cheese Balls
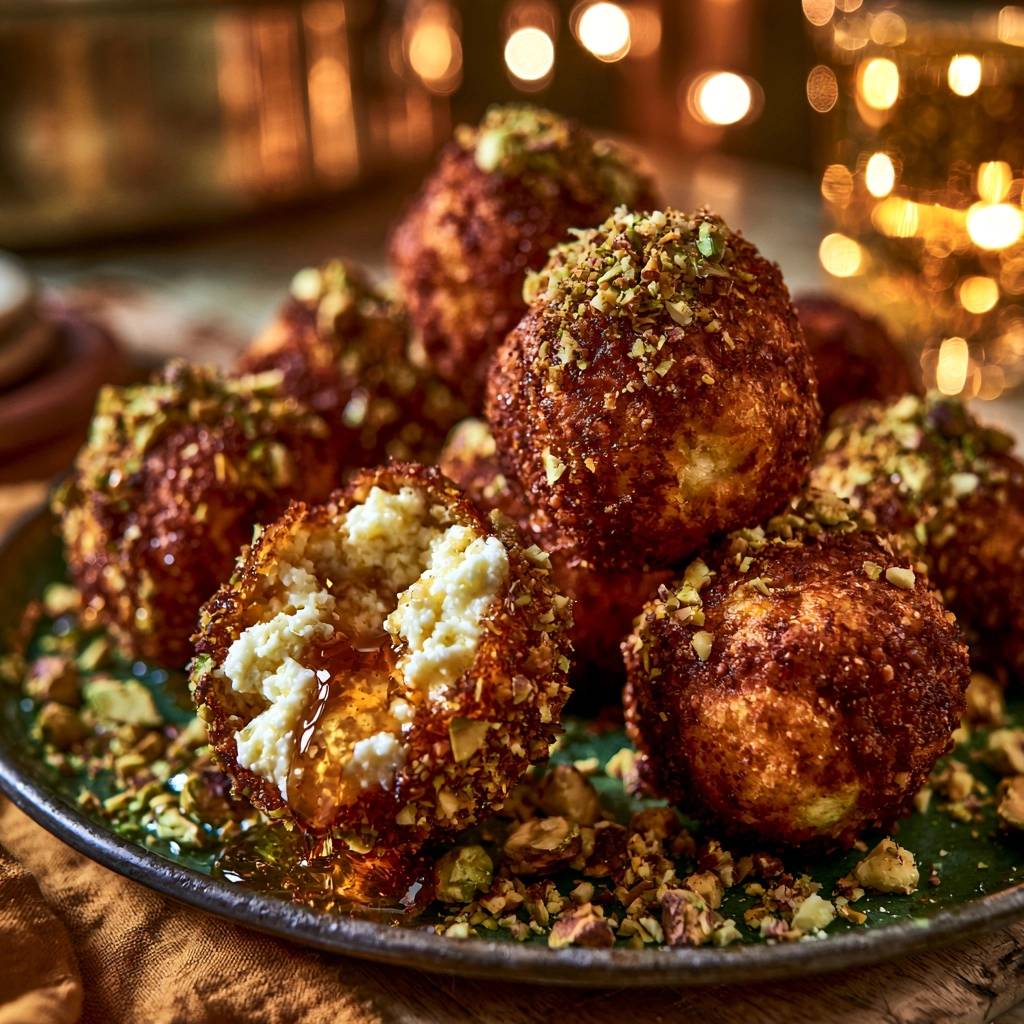
Imagine biting into a shell so crisp it shatters, only to find a center of warm, tangy goat cheese that flows like velvet. The contrast between the salty, earthy crunch of chopped pistachios and the floral sweetness of a honey drizzle creates a flavor profile that feels sophisticated yet deeply comforting. It is the kind of appetizer that stops the room, but for many home cooks, it is also a source of major kitchen anxiety.
The biggest frustration with fried cheese is the dreaded “blowout,” where the cheese melts and leaks into the oil before the crust even turns golden. You end up with a greasy pan and empty shells of breading. This recipe solves that problem by treating the process like a technical project rather than a quick snack. We are going to build a structural fortress around that cheese so it stays exactly where it belongs.
The secret to success lies in a specific double-chill and double-breading method that creates a thermal barrier. By the time the heat of the oil penetrates the thick, crunchy crust, the cheese has just reached its perfect melting point without losing its shape. I’ve found that this extra bit of patience makes the difference between a messy failure and a professional-grade appetizer that looks like it came from a high-end bistro.
The Science of the No-Burst Frying Method
Frying soft cheese is a race against thermodynamics. Goat cheese has a relatively low melting point compared to harder cheeses like cheddar or parmesan. When it hits hot oil, the moisture inside the cheese turns to steam almost instantly. If your breading is thin or weak, that steam pressure will find the smallest crack and cause the cheese to explode outward.
The “Double-Chill” technique is your primary defense. By freezing the cheese balls twice, you are essentially creating a frozen core. This ensures that the exterior breading has enough time to brown and harden into a structural shell before the interior cheese can even think about liquefying. It creates a delay in heat transfer that is absolutely vital for success.
Furthermore, the “Double-Breading” method acts as the physical reinforcement for that shell. A single layer of breading is often porous. By dipping the cheese in egg and panko twice, you create a dense, interlocking web of crumbs. This shell is strong enough to withstand the internal steam pressure, keeping the molten cheese trapped safely inside until you break it open with a fork.
Essential Components for the Perfect Goat Cheese Base
Quality ingredients are the foundation of this dish, starting with the goat cheese itself. You want to use a standard 10-ounce log of plain, unflavored goat cheese. Keep it in the refrigerator until the very second you are ready to roll it. Cold cheese is much easier to handle and won’t stick to your palms as much as room-temperature cheese would.
The choice of frying oil is equally important for a clean flavor and a safe kitchen. You need a neutral oil with a high smoke point, such as canola or grapeseed oil. These oils can handle the 360°F heat without breaking down or smoking, which would impart a bitter taste to your delicate cheese. Avoid olive oil here, as its flavor is too dominant and its smoke point is too low for deep frying.
Your egg wash serves as the protein “glue” that binds everything together. By whisking two large eggs with a tablespoon of water, you thin the proteins just enough to create an even, thin coating. This ensures the flour and panko adhere in a smooth layer rather than clumping up into thick, doughy patches that won’t crisp up properly.
Selecting and Prepping Your Pistachios
For the best flavor and color, look for shelled, unsalted pistachios. The salt level in goat cheese is already quite high, so using salted nuts can make the final dish overwhelming. You want to aim for a “fine chop” rather than a powder. If the pieces are too large, they won’t stick to the hot oil on the crust; if they are a dust, you lose that satisfying crunch.
A crucial tip is to apply the pistachios *after* the frying process. Many people try to mix the nuts into the breading, but the high heat of the oil will scorch the delicate pistachio oils and turn the vibrant green color into a dull, burnt brown. Rolling the finished balls in the nuts while they are still tacky from the fryer preserves their fresh, earthy taste and beautiful appearance.
The Role of Panko vs. Traditional Breadcrumbs
Panko is non-negotiable for this recipe. Unlike traditional breadcrumbs, which are fine and sandy, panko flakes are larger and more jagged. These irregular shapes create significantly more surface area, which translates to more “crunch sites” on every single cheese ball. This texture is what gives the dish its signature shatter-crisp mouthfeel.
The airy structure of panko also serves a functional purpose. Those little nooks and crannies are perfect for catching and holding the honey drizzle. While a smooth breadcrumb would let the honey slide right off onto the plate, the panko acts like a sponge, ensuring every bite has the perfect balance of sweet honey and savory cheese.
Phase One: Shaping and the Initial Flash-Freeze
Start by rolling your chilled goat cheese into uniform 1-inch balls. If your hands are naturally warm, try rinsing them in cold water first to keep the cheese from softening too quickly. You can also use a small cookie scoop to keep the sizes consistent, which ensures they all cook at the same rate in the fryer.
Once shaped, place the balls on a tray lined with parchment paper. They need to go into the freezer for exactly 20 minutes. This initial flash-freeze firms up the exterior of the cheese, making it much easier to handle during the breading process. It prevents the balls from deforming or squishing when you press them into the flour and panko.
Phase Two: The Double-Breading Station Workflow
Efficiency is key when breading, so set up your three bowls in a clear row: flour (seasoned with salt and pepper), egg wash, and panko. Use the “wet hand/dry hand” technique to keep your fingers from becoming breaded themselves. Use one hand for the dry flour and panko, and the other hand exclusively for the liquid egg wash.
The “Double-Dip” is the most important part of the process. First, coat the cheese ball in flour and shake off the excess. Dip it into the egg, then roll it in panko. Now, go back into the egg for a second dip and finish with a final roll in the panko. This second layer creates a thick, impenetrable crust that guarantees a “no-burst” result every single time.
Phase Three: The Critical Second Chill
It is tempting to head straight to the stove once the balls are breaded, but skipping the second 20-minute freeze is the most common cause of failure. This step allows the breading to hydrate. The moisture from the egg soaks into the panko and flour, bonding them together into a solid shell that won’t flake off in the oil.
This second chill also ensures the cheese is cold enough to survive the heat. You want the crust to reach a deep golden brown at the exact same moment the cheese inside reaches a soft, gooey consistency. Without this step, the cheese will likely melt and burst through the crust before the exterior has had a chance to get properly crispy.
Precision Frying: Temperature and Timing
Success in frying comes down to temperature control. Use a kitchen thermometer to bring your oil to exactly 360°F. If the oil is too cold, the breading will soak up grease and become soggy. If it is too hot, the outside will burn before the cheese inside has a chance to warm up. Maintain this temperature throughout the process.
Fry the balls in small batches of three or four at a time. Overcrowding the pan causes the oil temperature to drop rapidly, which ruins the crispness. You are looking for a deep, dark golden brown color, which usually takes between 60 and 90 seconds. This narrow window is the “sweet spot” where the texture is perfect and the cheese is molten but contained.
The Finishing Touch: Pistachios and Honey Integration
As soon as the cheese balls come out of the oil, let them drain on paper towels for no more than 30 seconds. You need to work quickly during the “tacky window.” This is the brief moment when the residual oil on the crust is still hot and sticky enough to act as a natural adhesive for your chopped pistachios.
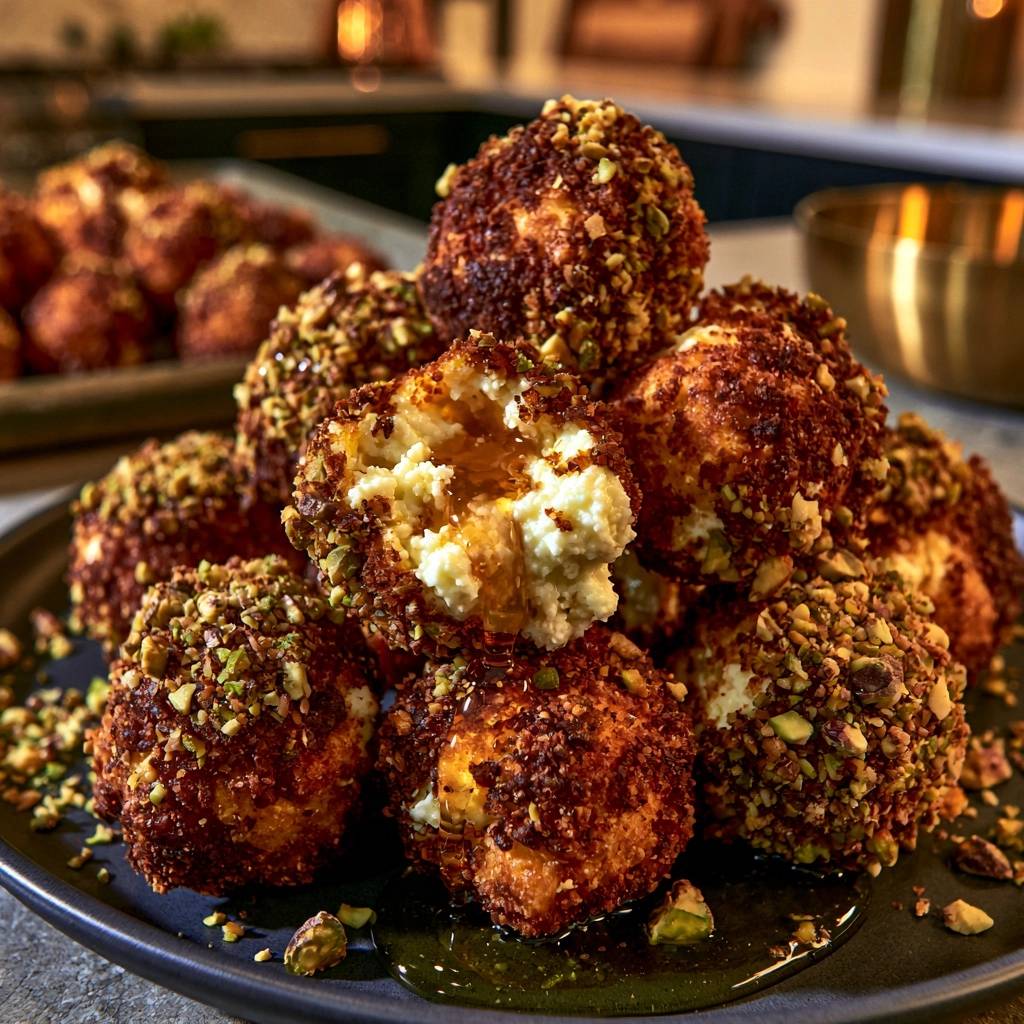
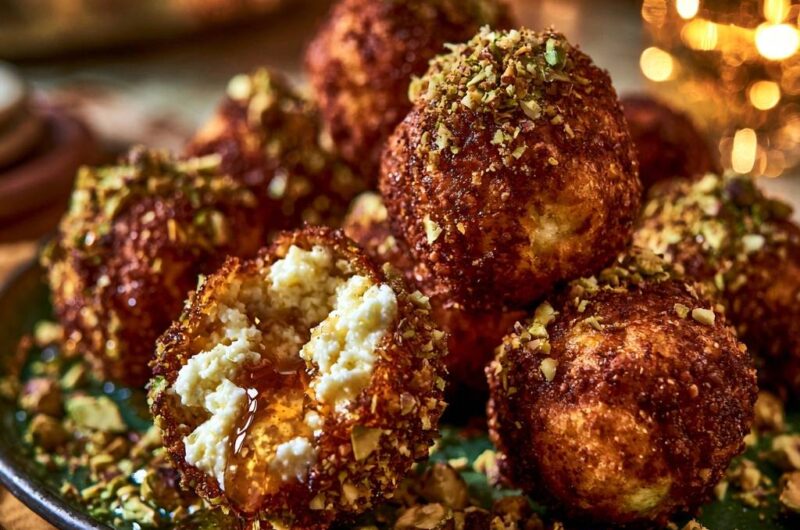
Roll the warm balls in the pistachio bits until they are well-coated, then move them to your serving platter. Drizzle the honey generously over the top while they are still hot. For a truly professional look, break one ball open slightly and pour a teaspoon of honey directly into the warm, creamy center. The visual of the honey mingling with the white cheese is irresistible.
Troubleshooting Common Fried Cheese Obstacles
If your cheese balls turned into flat pancakes, your oil was likely too cold or you skipped the double-chill steps. Cold oil allows the cheese to sit and melt before the crust can set. Always use a thermometer to verify your oil is at 360°F before dropping the first batch. The double-chill is your insurance policy against this specific failure.
If the breading is falling off in the oil, you probably skipped the initial flour dredging step. Flour acts as a primer, giving the egg wash something to grip onto. Without that first layer, the egg and panko will simply slide off the smooth surface of the goat cheese as soon as the heat hits it, leaving you with bare cheese in the fryer.
Greasy cheese balls are almost always the result of overcrowding the pan. When you add too many cold items at once, the oil temperature plummets. Instead of searing the exterior, the oil soaks into the breading. If the pistachios aren’t sticking, you likely waited too long to roll them. They must hit the nuts immediately after the 30-second drain while the surface is still “active.”
Flavor Variations and Ingredient Swaps
While honey and pistachio is a classic combination, you can easily adapt this recipe to suit different palates. If you like a bit of heat, swap the regular honey for a spicy “hot honey.” The kick of chili flakes against the cool, tangy goat cheese is incredible. You could also use a thick balsamic glaze for a more savory, acidic finish.
If pistachios aren’t your favorite or you have an allergy, finely chopped pecans or walnuts work beautifully as well. To brighten the flavor profile, try zesting a fresh lemon directly into the goat cheese before you roll it into balls. The citrus notes cut through the richness of the fried crust and make the whole dish feel lighter and more vibrant.
Optimal Serving Pairings
These cheese balls are quite rich, so they pair best with something that offers a sharp contrast. A bed of fresh arugula or other bitter greens is a perfect choice. The peppery bite of the greens balances the fat of the cheese and the sweetness of the honey. A few slices of toasted sourdough baguette can also help soak up any extra honey on the plate.
For drinks, look for something with high acidity or carbonation to cleanse the palate. A sparkling apple cider or a sharp, spicy ginger beer works wonders. These drinks cut through the creaminess of the goat cheese and the weight of the fried crust, making every bite feel as fresh as the first one.
Expert Tips for Make-Ahead Entertaining
You can easily prep these for a party in advance. Complete the double-breading process and store the balls in a single layer in an airtight container in the freezer for up to 24 hours. This actually makes them even more stable during frying. Just be sure to add about 30 seconds to the frying time if they are frozen solid.
If you have leftovers, though they are best fresh, you can reheat them in an air fryer or oven at 350°F for a few minutes to regain some of that crunch. Avoid the microwave at all costs, as it will turn the beautiful panko crust into a soft, rubbery mess. Always store any leftovers in the refrigerator in a sealed container for no more than two days.
How do I store leftover goat cheese balls?
Store any leftovers in an airtight container in the refrigerator for up to 3 days. To maintain the crispy texture, reheat them in an oven or air fryer at 350°F until warmed through. Do not use a microwave, as it will make the breading soggy and the cheese may leak out. These do not freeze well after they have been fried, so only fry what you plan to eat immediately.
Why did my goat cheese balls explode in the fryer?
Explosions usually happen because the cheese got too hot before the crust was strong enough to hold it. This is caused by skipping the double-breading step or the second 20-minute freeze. The double-breading creates a thick wall, and the second freeze ensures the cheese starts at a very low temperature, giving the crust time to brown before the center melts and creates steam pressure.
Can I use a different type of cheese for this recipe?
You can use other soft cheeses like feta or even small balls of fresh mozzarella, but the timing will change. Goat cheese is ideal because of its distinct tang and creamy melting point. If you use mozzarella, you may need to fry them for a shorter time as it melts much faster than goat cheese. Always ensure whatever cheese you use is very cold before starting the breading process.
What is the best way to chop the pistachios?
The best method is to use a sharp chef’s knife to manually chop the shelled pistachios until they are the size of coarse sand. Avoid using a food processor if possible, as it often turns the bottom layer into a greasy paste while leaving the top layer in large chunks. A manual chop gives you the most control over the texture, ensuring the nuts stick evenly to the cheese balls.
Can I bake these instead of frying them?
While you can bake them at 400°F for about 10-12 minutes, they will not have the same shatter-crisp texture as the fried version. Frying provides an even, intense heat that sets the crust instantly. If you choose to bake them, spray the breaded balls generously with cooking oil before putting them in the oven to help the panko brown. Be aware that the risk of the cheese leaking is much higher with the longer cooking time of baking.
What if I don’t have panko breadcrumbs?
If you can’t find panko, you can pulse plain crackers in a blender until they are coarse crumbs. However, standard fine breadcrumbs are not a great substitute because they lack the surface area needed for a truly crispy crust. Panko is unique because it is made from crustless bread that is processed into airy flakes, which is what creates that signature crunch and holds the honey so well.
Crispy Honey Pistachio Goat Cheese Balls
Course: AppetizerCuisine: AmericanDifficulty: easy6
servings25
minutes5
minutes70
Minutes260
kcalAmerican
Ingredients
10 ounces goat cheese, chilled
1/2 cup all-purpose flour
2 large eggs, beaten with 1 tablespoon water
1.5 cups panko breadcrumbs
1/2 cup shelled pistachios, finely chopped
1/2 cup honey for drizzling and dipping
Vegetable oil for frying (neutral oil like canola or grapeseed)
1/2 teaspoon sea salt
1/4 teaspoon black pepper
Directions
- Roll the cold goat cheese into 1-inch balls. Place them on a parchment-lined tray and freeze for 20 minutes. This initial flash-freeze is the first step to preventing the cheese from bursting during frying.
- Set up a breading station with three bowls: flour mixed with salt and pepper in the first, the egg wash in the second, and panko breadcrumbs in the third.
- Remove cheese balls from the freezer. Coat each ball in flour, dip in egg, and then roll in panko. For the “No-Burst” guarantee shown in the image, dip the ball back into the egg and then into the panko a second time. This creates the thick, sturdy crust required to hold the molten cheese.
- Place the double-breaded balls back in the freezer for another 20 minutes. This second chill is the absolute key; it ensures the crust sets and browns before the cheese reaches its melting point.
- Heat 2 inches of oil in a heavy skillet or pot to 360°F (182°C). Fry the balls in small batches for 60-90 seconds until they reach a deep, dark golden brown. Do not overcrowd the pan.
- Drain on paper towels for 30 seconds. While the exterior is still hot and slightly tacky from the oil, immediately roll the balls in the finely chopped pistachios so they adhere to the crust.
- Arrange on a platter. Using a spoon, drizzle honey generously over the top, allowing it to pool slightly. For the visual effect in the image, break one ball open and pour a teaspoon of honey directly into the warm cheese center before serving.
Notes
- The double-chill and double-breading methods are essential to prevent the cheese from melting or bursting during the frying process. Ensure the oil is exactly 360 degrees Fahrenheit for the best results.