No-Bake Caramel Fruit Crumble Delight: The Anti-Soggy Secret!
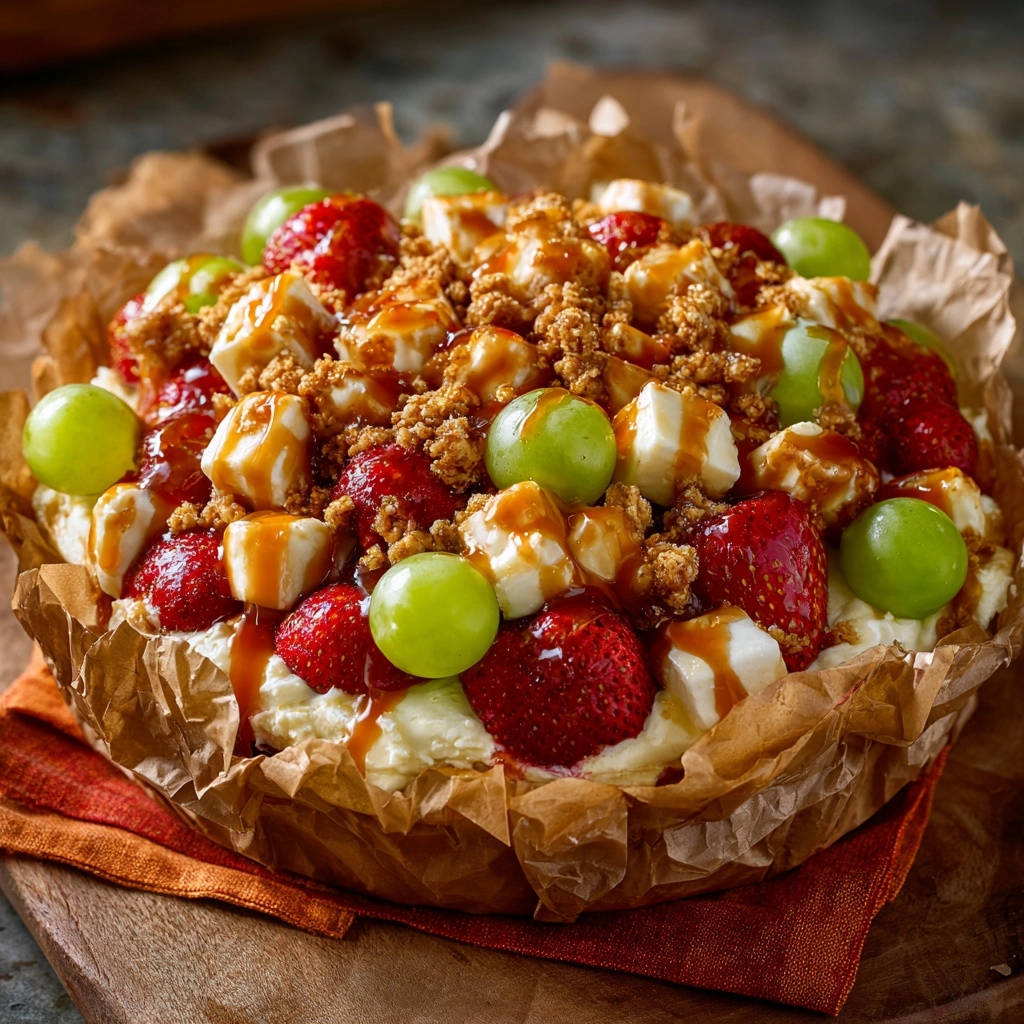
There’s nothing more frustrating than a no-bake dessert with a soggy topping. I’ve been there, crafting what I thought would be a perfect treat, only to find the crumble lose its delightful crunch too soon.
That’s precisely why I perfected this No-Bake Caramel Fruit Crumble Delight recipe, featuring a game-changing secret to ensure every bite delivers that irresistible crispness, paired with a luscious, creamy base and fresh fruit.
The No-Bake Caramel Fruit Crumble Delight That Stays Crisp (Seriously!)
Why You’ll Crave This Chilled Dessert
This dessert is pure joy-effortlessly elegant and incredibly refreshing. It’s the perfect sweet escape for warm evenings or any time you need a stunning treat without turning on the oven for long.
The harmonious blend of creamy, fruity, and crunchy textures makes it an instant favorite, offering a delightful experience that truly satisfies.
The Game-Changing Crumble Trick: Our Anti-Soggy Promise
The core of this recipe’s success lies in our unique crumble preparation. By pre-baking the topping until deeply golden and allowing it to cool completely, we create an impenetrable barrier against moisture.
This ensures your fruit crumble remains perfectly crisp, never soggy, providing that much-desired textural contrast with every single spoonful.
Gather Your Gear: Essential Tools for Crumble Success
Must-Have Kitchen Gadgets
Having the right tools makes all the difference for a seamless dessert-making experience.
9-inch Springform Pan: This is ideal for easy release and beautifully presented slices.
Large Mixing Bowls: You’ll need at least two-one for the creamy base and another for the crumble ingredients.
Electric Mixer (Handheld or Stand): Essential for achieving that perfectly smooth, airy cream cheese base.
Pastry Blender or Fork: Crucial for cutting cold butter into the crumble mixture, creating fine, even crumbs.
Parchment Paper: A non-negotiable for lining your pan, preventing sticking, and ensuring effortless removal.
Choosing the Right Baking Dish
While a 9-inch springform pan is recommended for its professional presentation and easy slicing, a regular 9-inch round baking dish works beautifully too.
Always line your chosen dish with parchment paper, extending it up the sides. This simple step prevents sticking and makes lifting the finished dessert out incredibly easy.
Crafting the Delight: Key Ingredients Explored
For the Velvety Creamy Base
The foundation of this no-bake treat is its rich, smooth, and utterly dreamy base.
Cream Cheese, Softened: Room temperature cream cheese is paramount for a lump-free, silky smooth base. It blends effortlessly, creating that luscious texture.
Powdered Sugar: This fine sugar dissolves seamlessly, sweetening the base without any grainy texture. It also helps stabilize the mixture.
Vanilla Extract: A touch of vanilla enhances all the other flavors, adding a warm, aromatic depth to the creamy layer.
Heavy Cream or Whipped Topping: Whipped heavy cream yields a richer, denser base, while thawed whipped topping offers a lighter, airier consistency. Both are excellent choices, depending on your preference.
Fresh Fruit & Cream Cheese Cubes: The Colorful Topping
This vibrant layer adds fresh flavor, delightful texture, and a beautiful visual appeal to your dessert.
Fresh Strawberries: Hulled and halved, these provide a burst of sweet-tart flavor and juicy freshness. Choose firm, bright red berries.
Green Grapes: Rinsed and stemmed, grapes add a contrasting crispness and a subtle sweetness that complements the strawberries perfectly.
Cream Cheese Cubes: Small cubes of cream cheese are a genius addition, melting ever so slightly into the base as it chills, adding pockets of creamy tang and surprise.
The Secret to Our Crispy Crumble Topping
This unique topping is what sets our no-bake caramel fruit crumble apart, ensuring consistent crunch.
All-Purpose Flour: Provides structure and absorbs moisture, helping the crumble become truly dry and crisp during baking.
Rolled Oats: Adds a delightful chewiness and nutty flavor, contributing to the rustic crumble texture.
Packed Light Brown Sugar: Delivers a deep, caramel-like sweetness and helps the crumble brown beautifully. Packing it ensures proper measurement.
Ground Cinnamon: A hint of cinnamon elevates the classic crumble flavor, adding warmth and spice.
Cold, Cubed Unsalted Butter: Keeping the butter cold is essential. It creates distinct pockets within the flour mixture, leading to that coveted crumbly, crisp texture once baked.
The Irresistible Caramel Drizzle
The final touch of caramel sauce brings a buttery, sweet richness that ties all the layers together.
You can use a good quality store-bought caramel sauce for convenience or, if you’re feeling ambitious, a homemade caramel sauce will add an extra layer of decadence.
If you enjoy working with caramel sauce, you might also love this spiced caramel crumble cheesecake.
Your Path to No-Bake Caramel Fruit Crumble Delight Perfection
Step-by-Step Assembly Guide
- Crispy Crumble Creation (The Anti-Soggy Foundation!)
In a medium bowl, combine your flour, oats, brown sugar, and cinnamon, whisking briefly to mix.
Add the cold, cubed butter and cut it in using a pastry blender or your fingertips until the mixture resembles coarse crumbs. The cold butter is key to preventing a pasty dough.
Spread this mixture evenly on a parchment-lined baking sheet. Bake at 350°F (175°C) for 10-15 minutes, or until it’s deeply golden brown and feels very dry to the touch.
This extra baking time ensures maximum crispness. Now, the most crucial step: let it cool completely on the baking sheet. This ensures it retains its crunch and won’t make your dessert soggy later.
- Whip Up the Smooth Creamy Base
In a large bowl, use an electric mixer to beat the softened cream cheese, powdered sugar, and vanilla extract until the mixture is completely smooth and creamy.
There should be no lumps. Gently fold in your whipped heavy cream or thawed whipped topping until just combined, being careful not to deflate the mixture. Overmixing can make the base dense.
- Line and Lay the Foundation
Prepare your 9-inch springform pan or round baking dish by lining it with parchment paper, allowing it to extend up the sides for easy removal.
Spread the prepared creamy base evenly into the bottom of the pan, smoothing the top with a spatula.
- Arrange Your Vibrant Fruit & Cream Cheese Cubes
Gently arrange the halved strawberries, green grapes, and those little cream cheese cubes over the creamy base. Feel free to create a pretty pattern or simply scatter them aesthetically.
Ensure an even distribution so every slice gets a burst of fruit and creamy tang.
- The Critical Anti-Soggy Crumble Layer
Once your baked crumble topping is completely cool and very crisp, sprinkle it generously and evenly over the assembled dessert.
This step is critical; adding warm or partially cooled crumble will compromise its texture and potentially lead to sogginess. It acts as a final dry barrier over the moist base and fruit.
- Drizzle, Chill, and Delight
Drizzle the top of your No-Bake Caramel Fruit Crumble Delight generously with caramel sauce. More caramel equals more happiness!
For best results, and to allow the creamy base to firm up and the flavors to meld beautifully, chill the dessert in the refrigerator for at least 2 hours before serving. This chilling sets the cream cheese layer and prevents moisture migration to the crumble.
Unlock Pro Secrets: Elevating Your Crumble Delight
Achieving Max Crumble Crispness
The secret to an ultra-crispy crumble is all about moisture control.
Bake Until Truly Dry: Don’t underbake the crumble. It should be deeply golden and feel very dry, almost sandy, when it comes out of the oven. If it’s even slightly soft, bake a bit longer.
Cool Completely: This cannot be stressed enough. Warm crumble will create steam and make your dessert soggy. Ensure it’s room temperature or even slightly chilled before sprinkling.
Store Separately (If Making Ahead): For peak crispness, if preparing components in advance, store the baked crumble in an airtight container at room temperature until just before assembly.
Perfecting Your Creamy Base Texture
A silky-smooth, airy base is key to this dessert’s appeal.
Softened Cream Cheese is a Must: Always bring your cream cheese to room temperature before beating. Cold cream cheese will result in lumps and a less smooth base.
Don’t Overmix the Whipped Cream: When folding in the whipped heavy cream or topping, do so gently until just combined. Overmixing can deflate the cream and make your base dense.
Use Quality Ingredients: High-quality cream cheese and heavy cream will contribute significantly to the overall texture and flavor.
Fruit Selection & Preparation Tips
Fresh, perfectly prepared fruit makes all the difference in this no-bake treat.
Choose Ripe, Firm Fruit: Select strawberries and grapes that are ripe and flavorful but still firm enough to hold their shape. Avoid overly soft or bruised fruit.
Wash and Dry Thoroughly: Any excess moisture on the fruit can contribute to sogginess over time. Gently pat washed fruit completely dry with paper towels before arranging.
Consider Cutting Techniques: For larger fruits like peaches or nectarines (if substituting), slice them thinly to ensure even distribution and easier serving.
Presentation Pointers
Elevate your dessert from delicious to dazzling with these simple presentation tips.
Extra Caramel Drizzle: Just before serving, warm a little extra caramel sauce and drizzle it over individual slices for an impressive finish.
Fresh Mint Sprigs: A few fresh mint leaves add a pop of color and a refreshing aroma.
Dust with Powdered Sugar: A light dusting of powdered sugar over the fruit and crumble adds a professional, elegant touch.
Common Challenges Solved: Your Crumble Troubleshooting Guide
Help! My Crumble is Soggy!
This is the most common issue, but easily prevented with our anti-soggy secret.
The main culprits are usually not baking the crumble long enough until truly dry, not allowing it to cool completely before adding it to the dessert, or adding it too far in advance of chilling. Ensure your crumble is bone-dry and cold.
My Creamy Base Isn’t Setting
A runny base can be disappointing, but solvable.
This often happens if the cream cheese wasn’t softened enough before beating, if the heavy cream wasn’t whipped to stiff peaks, or if the dessert wasn’t chilled for the recommended minimum of 2 hours. Ensure all components are properly prepared and give it ample chilling time.
Fruit Bleeding into the Cream
While some natural bleeding can occur, especially with very juicy fruits, it can be minimized.
Ensure your fruit is very well-drained and patted dry after washing. You can also lightly brush the cut surfaces of very juicy fruits with a thin layer of melted white chocolate or a clear glaze to create a barrier before placing them on the creamy base.
Beyond the Classic: Creative Variations & Smart Substitutions
Seasonal Fruit Swaps
This versatile recipe adapts beautifully to various seasonal fruits.
Try fresh berries in summer (blueberries, raspberries, blackberries), thinly sliced peaches or nectarines, or even a mix of diced apples and pears in the fall. Just ensure any fruit you use is ripe and well-drained.
Dairy-Free & Gluten-Free Options
Adapting this recipe for dietary needs is surprisingly simple.
For a dairy-free base, use a plant-based cream cheese alternative and coconut cream (chilled overnight, scoop out thick cream) or a non-dairy whipped topping. For a gluten-free crumble, substitute the all-purpose flour with a 1:1 gluten-free baking blend that contains xanthan gum, or use gluten-free oats.
Alternative Crumble Ideas
Get creative with your crumble for different flavor profiles.
Consider using crushed graham crackers or vanilla wafers mixed with melted butter for a quick, no-bake crumble. Or, add chopped nuts like pecans or walnuts to the baked crumble for extra crunch and richness.
Flavor Boosters & Add-ins
Elevate the base or drizzle with extra notes.
A hint of orange or lemon zest in the creamy base adds brightness. Swirl in a tablespoon of peanut butter into the caramel sauce for a nutty twist. You could also sprinkle mini chocolate chips over the fruit layer for a delightful surprise.
Enjoying & Preserving Your No-Bake Caramel Fruit Crumble Delight
Best Ways to Serve
This chilled dessert is best served cold, straight from the refrigerator.
Slice with a sharp knife for clean cuts. While delicious on its own, a dollop of extra whipped cream, a scoop of vanilla bean ice cream, or an additional drizzle of warm caramel sauce elevates the experience.
Storage Guidelines for Freshness
To maintain its freshness and delightful textures, proper storage is key.
Store any leftover No-Bake Caramel Fruit Crumble Delight in an airtight container in the refrigerator. This prevents the crumble from absorbing moisture from the air and keeps the creamy base firm.
Can You Make It Ahead?
Absolutely! The creamy base can be made a day in advance and kept covered in the fridge.
The baked crumble topping can also be prepared up to 2-3 days ahead and stored in an airtight container at room temperature. Assemble the entire dessert 2-4 hours before serving for optimal setting and crunch.
Your Questions Answered: No-Bake Caramel Fruit Crumble Delight FAQs
Is the crumble really “no-bake” if the topping is baked?
That’s a great question! The term “no-bake” in this context refers to the main assembly of the dessert, which requires no oven time. The crumble topping is baked separately to achieve that signature crispness and prevent it from becoming soggy when combined with the moist fruit and creamy base. Think of it as a crucial component that happens to be baked, rather than the entire dessert.
Can I use frozen fruit for this recipe?
While fresh fruit is highly recommended for its texture and minimal moisture, you can use frozen fruit with some considerations. Ensure it is fully thawed and, critically, drained very well to remove all excess liquid. Pat it thoroughly dry with paper towels before arranging on the creamy base to prevent the dessert from becoming watery.
How long does No-Bake Caramel Fruit Crumble Delight last in the fridge?
When stored properly in an airtight container in the refrigerator, your No-Bake Caramel Fruit Crumble Delight will remain delicious for up to 3-4 days. The crumble may soften slightly after the first day, but it will still retain a pleasant chewiness and flavor.
Can I make individual servings instead of a whole pan?
Yes, absolutely! This recipe adapts beautifully to individual servings. You can layer the ingredients in small ramekins, mason jars, or even clear dessert cups. Adjust chilling time slightly if using smaller containers, as they may set faster. This is perfect for portion control or for elegant dinner party presentations.
Ready to Impress? Share Your No-Bake Caramel Fruit Crumble Delight Masterpiece!
You’re now armed with the ultimate guide to creating a truly exceptional No-Bake Caramel Fruit Crumble Delight. With our anti-soggy secret and these expert tips, you’re set to impress friends and family with a dessert that’s both stunning and utterly delicious.
Don’t just take my word for it-whip up this masterpiece and let its creamy, crunchy, caramel-laced goodness speak for itself. I can’t wait to see your creations!
Caramel Fruit Crumble
Course: DessertCuisine: AmericanDifficulty: medium8
servings30
minutes15
minutes350
kcal45
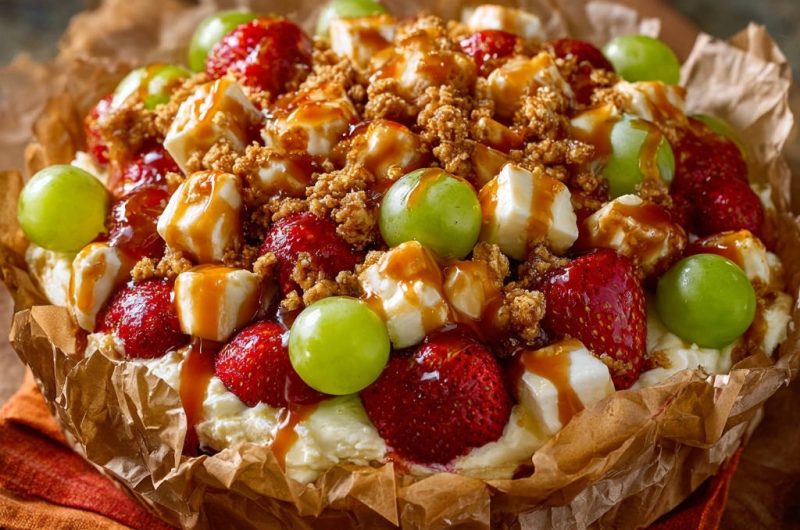
minutesA game-changing dessert featuring a creamy base, fresh fruit, and a trick to keep the crumble topping perfectly crisp. This delightful treat is chilled for optimal texture and finished with a sweet caramel drizzle.
Ingredients
For the Creamy Base:
8 ounces cream cheese, softened
1/2 cup powdered sugar
1 teaspoon vanilla extract
1 cup heavy cream, whipped to stiff peaks OR 1 (8 ounce) container whipped topping, thawed
For the Fruit and Cream Cheese Cubes:
1 pound fresh strawberries, hulled and halved
1 cup green grapes, rinsed and stems removed
4 ounces cream cheese, cut into 1/2 inch cubes
For the Crunchy Crumble Topping:
1/2 cup all purpose flour
1/4 cup rolled oats
1/4 cup packed light brown sugar
1/4 teaspoon ground cinnamon
1/4 cup unsalted butter, cold and cubed
For the Drizzle:
1/4 cup caramel sauce
Directions
- Prepare the Crunchy Crumble Topping: In a medium bowl, combine the flour, oats, brown sugar, and cinnamon. Cut in the cold, cubed butter using a pastry blender or your fingertips until the mixture resembles coarse crumbs. Spread the mixture evenly on a baking sheet lined with parchment paper. Bake at 350°F (175°C) for 10-15 minutes, or until deeply golden brown and very dry. Let cool completely on the baking sheet. This extra baking time and cooling ensures maximum crispness, which is key to preventing sogginess later.
- Make the Creamy Base: In a large bowl, beat the softened cream cheese, powdered sugar, and vanilla extract until smooth and creamy. Gently fold in the whipped heavy cream or thawed whipped topping until just combined.
- Assemble the Dessert: Line a 9 inch springform pan or a round baking dish with parchment paper, allowing it to extend up the sides. Spread the creamy base evenly into the prepared pan.
- Arrange Toppings: Gently arrange the halved strawberries, green grapes, and cream cheese cubes over the creamy base.
- The Anti-Soggy Crumble Step: Once the baked crumble topping is completely cool and very crisp, sprinkle it generously over the assembled dessert. This ensures it retains its crunch, acting as a final dry layer over the moist base and fruit.
- Chill and Serve: Drizzle generously with caramel sauce. For best results and to maintain the creamy base’s firmness and the crumble’s crunch, chill the dessert in the refrigerator for at least 2 hours before serving. This chilling step is crucial to set the cream cheese layer and prevent moisture from migrating to the crumble.
Notes
- Crucial chilling time ensures crisp crumble and firm creamy base.