Savory Olive & Herb Rolled Bread: The Secret to Perfectly Sealed Bites
There’s nothing quite like a warm, savory bread roll fresh from the oven, bursting with delicious fillings. If you’ve ever battled with fillings escaping or dough tearing, you know the frustration. This recipe for Savory Olive & Herb Rolled Bread solves that common dilemma with an ingenious sealing trick, ensuring every bite is perfectly contained and flavorful.
Prepare to create a stunning, fuss-free bread that looks as impressive as it tastes, perfect for any gathering or a simple family treat.
Why This Savory Olive & Herb Rolled Bread Recipe Stands Out
The Ingenious Sealing Technique Explained
The core innovation in this recipe is the strategic use of a 1-inch border around the dough and a layer of cheese as an adhesive. This simple yet powerful trick acts as a natural “glue,” securely holding your flavorful fillings in place as the dough bakes and expands.
It completely eliminates the frustration of ingredients bursting out, ensuring your Savory Olive & Herb Rolled Bread maintains its beautiful shape and delivers a consistent, satisfying bite every time.
If you enjoy working with sealed fillings, this same principle applies to these leak-proof stained glass cookies.
A Symphony of Savory Flavors in Every Bite
Beyond its clever technique, this recipe masterfully blends the briny notes of green and black olives with the piquant burst of capers. Finely diced red bell pepper adds a touch of sweetness and crunch, beautifully complemented by the fresh, aromatic thyme.
The result is a harmonious flavor profile where each ingredient shines, creating a truly memorable savory experience in every slice of this exquisite rolled bread.
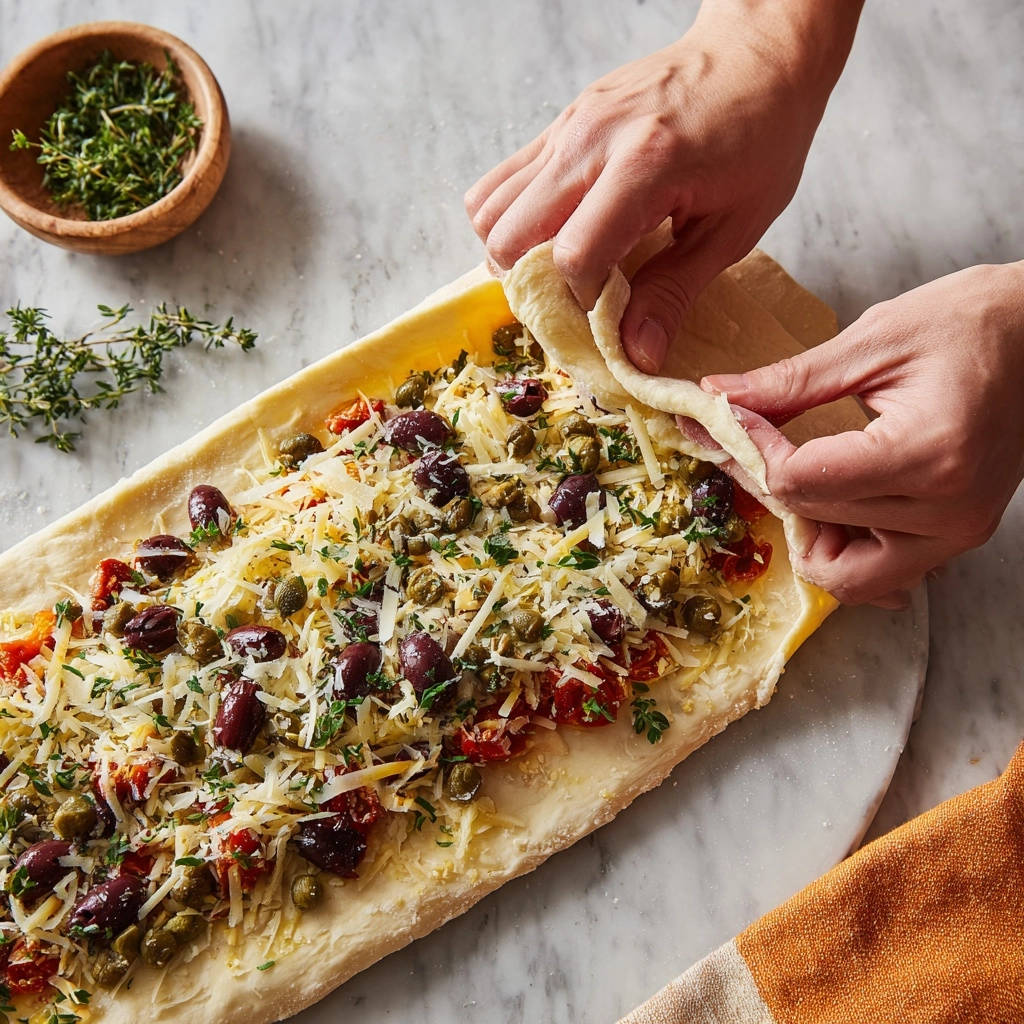
Effortless Elegance for Any Occasion
One of the true beauties of this Savory Olive & Herb Rolled Bread is its balance of impressive appearance and straightforward preparation. By utilizing store-bought pizza dough, you significantly cut down on prep time without sacrificing quality.
This makes it an ideal choice for a quick yet elegant appetizer, a delightful addition to a brunch spread, or a simple, satisfying side dish for any meal.
Crafting the Flavor Profile: Key Ingredients & Their Role
The Foundation: Dough Choices & Preparation
Your dough serves as the canvas for this savory masterpiece. While homemade bread dough offers a unique depth, a good quality store-bought pizza dough provides incredible convenience without compromising on results.
Ensure your chosen dough is at room temperature before rolling. This makes it significantly more pliable and easier to work with, preventing tearing and ensuring an even thickness.
The Star Fillings: Olives, Capers, and Red Bell Pepper
These ingredients are the heart of the bread’s savory character. Pitted green and black olives bring a delightful briny punch, while capers amplify that tangy, salty profile.
The red bell pepper introduces a subtle sweetness and a pleasant textural contrast. Always choose good quality, firm olives and ensure capers are well-drained to avoid excess moisture.
Aromatic Accents: Fresh Herbs & Savory Cheese
Fresh thyme leaves are indispensable here, infusing the bread with an earthy, aromatic warmth that complements the olives beautifully. Avoid dried herbs; the fresh aroma is key.
Shredded Parmesan or an Italian cheese blend not only adds a rich, nutty flavor but, crucially, acts as the binding agent for the fillings. Its meltable quality helps create that perfect, sealed interior.
Seasoning for Perfection
A simple addition of salt and black pepper is vital. These basic seasonings enhance and balance the complex flavors of the olives, capers, and herbs, making them truly pop.
Always taste your filling mixture lightly before incorporating it, adjusting seasoning as needed to suit your preference.
Your Essential Kitchen Toolkit for Rolled Bread Success
Baking Sheet & Parchment Paper: For a non-stick surface and easy cleanup. Parchment paper ensures your beautiful rolled bread doesn’t stick and slides right off the sheet.
Rolling Pin: Key for achieving an even dough thickness. An evenly rolled dough is crucial for uniform baking and easy, tear-free rolling of the fillings.
Large Bowl: For mixing the fillings effectively. A spacious bowl allows you to toss the olives, capers, and vegetables together thoroughly before sprinkling onto the dough.
Pastry Brush: For applying the olive oil wash for a golden crust. A light brush of olive oil before baking gives your bread a gorgeous, rich golden color and a slightly crispy exterior.
Step-by-Step Mastery: Creating Your Perfect Savory Olive & Herb Rolled Bread
- Prepare Your Workspace & Oven:
Preheat your oven to 375°F (190°C). This ensures the oven is at the correct temperature for an even, consistent bake from the start. Simultaneously, line a baking sheet with parchment paper to prevent sticking and simplify cleanup.
- Roll Out the Dough:
On a lightly floured surface, unroll your pizza dough and carefully roll it into a large rectangle, approximately 12×16 inches. The goal is to achieve an even thickness throughout, which is vital for uniform baking and makes the rolling process much smoother without tearing.
- Apply the Cheese Barrier:
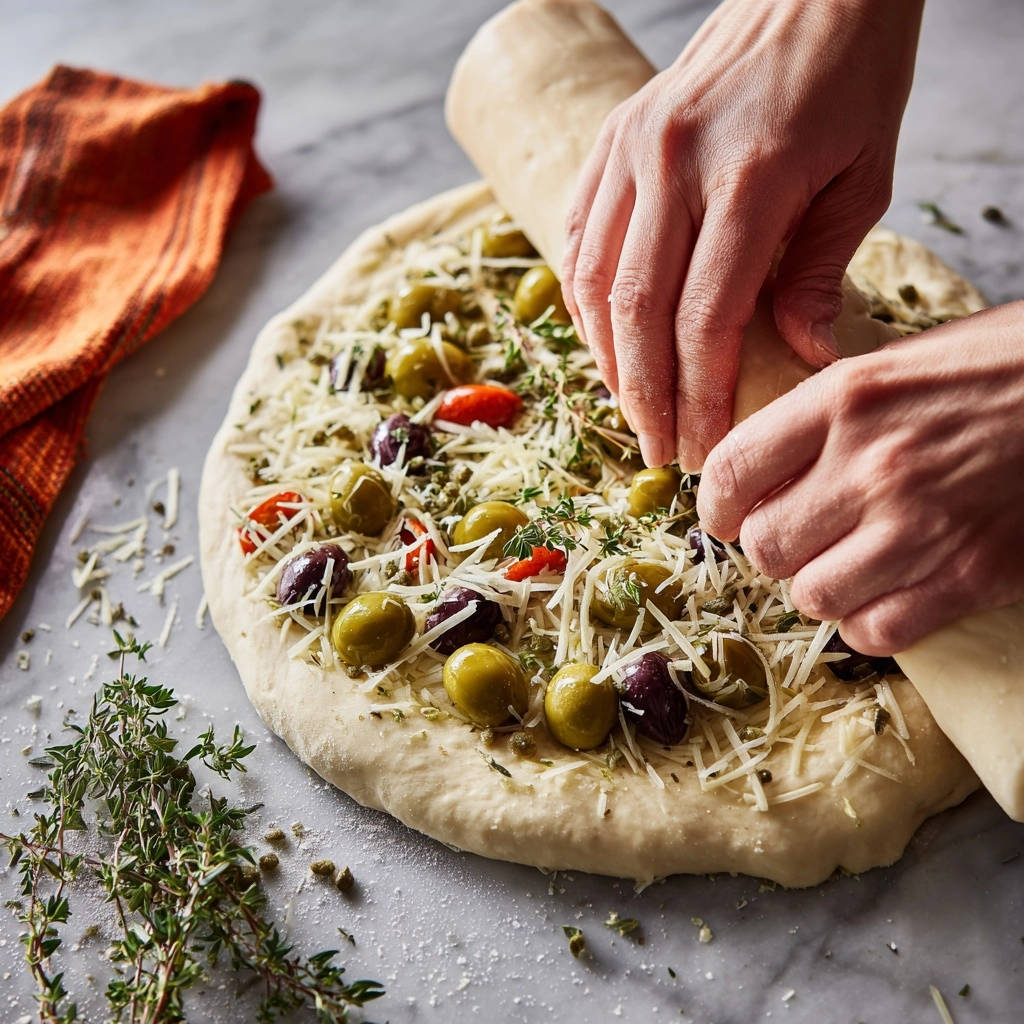
This is where the magic begins! Sprinkle the shredded cheese evenly over the rolled dough, making sure to leave a crucial 1-inch border clear on all four sides. This cheese layer will melt during baking, creating a natural adhesive that perfectly seals in your fillings.
- Distribute the Savory Fillings:
Carefully scatter the green olives, black olives, capers, finely diced red bell pepper, and fresh thyme evenly over the cheese layer. Again, ensure all these delicious fillings stay within that strategic 1-inch border. Avoid piling them too high in any one spot, as this can make rolling difficult and increase the risk of tears.
- Master the Roll:
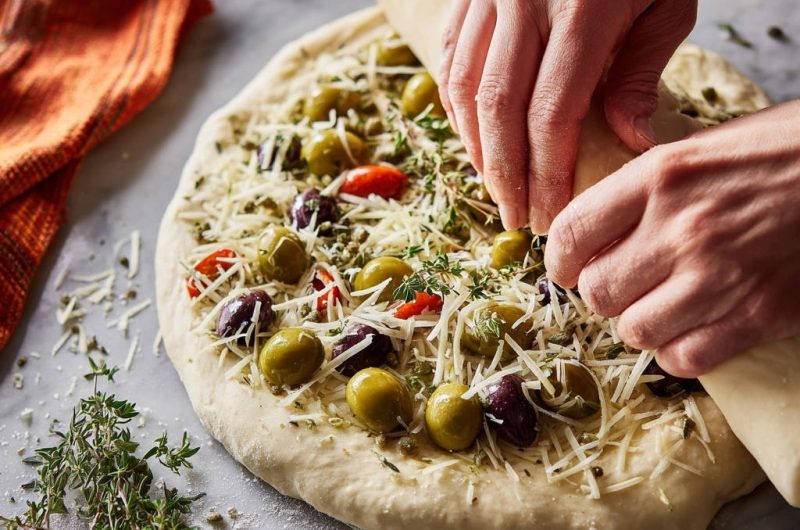
Starting from one of the long ends, carefully and tightly roll the dough towards the opposite long end. As you roll, use your fingers to gently tuck in any fillings that attempt to escape from the sides, maintaining a compact shape. Apply steady, even pressure throughout the rolling process to create a firm log, preventing air pockets and keeping all ingredients perfectly encased. This technique is similar to forming other delightful rolled treats, like these cinnamon sugar pull apart rolls.
- Seal the Deal:
Once you’ve finished rolling, firmly pinch the seam along the entire length of the log to seal it completely. Then, gently tuck in the ends of the roll, pinching them securely as well to fully enclose all the savory fillings. A tight seal is paramount to prevent any leakage during the baking process.
- Prepare for Baking:
Carefully transfer your beautifully rolled bread to the prepared baking sheet, ensuring the seam side is placed down. This positioning helps the seam stay closed during baking. Lightly brush the entire top surface with a little olive oil; this step will contribute to a gorgeous, golden-brown, and slightly crisp crust.
- Bake to Golden Perfection:
Place the baking sheet into your preheated oven and bake for 25-30 minutes, or until the Savory Olive & Herb Rolled Bread is beautifully golden brown and cooked through. Allow it to cool slightly on the baking sheet before slicing and serving. This resting period helps the flavors meld and makes for cleaner, more appealing cuts.
Beyond the Recipe: Expert Tips for Impeccable Results
Achieving the Perfect Dough Thickness
Consistency is paramount when rolling your dough. Aim for an even thickness across the entire rectangle; thin spots can overcook quickly, while thick areas might remain undercooked. Using a lightweight ruler or even a tape measure can help you achieve that ideal 12×16-inch dimension uniformly.
The Art of Even Filling Distribution
Spread your savory fillings truly evenly across the cheese layer. Concentrated pockets of dense filling can make the dough difficult to roll, creating weak points that are prone to tearing. A light, careful hand ensures every slice offers a balanced taste and texture.
Mastering the Tight Roll & Secure Seal
Rolling your dough tightly from one end to the other is crucial to prevent internal air pockets, which can result in a less satisfying, uneven texture. The final seam, where the dough meets, must be pinched firmly and continuously along its entire length to create an impenetrable barrier against escaping fillings.
Visual Cues for Golden Brown Perfection
While the baking time provides a guideline, always prioritize visual cues. Look for a rich, deep golden-brown color across the entire surface of your Savory Olive & Herb Rolled Bread. If the top seems to be browning too rapidly, loosely tenting it with aluminum foil for the remaining bake time can prevent over-browning while the interior finishes cooking.
Solving Common Challenges: Troubleshooting Your Rolled Bread
Dough Tearing or Fillings Escaping During Rolling
If your dough tears, it might be too cold, making it less elastic. Allow it to rest at room temperature for another 15-20 minutes. For escaping fillings, double-check that they are spread evenly and not piled too high; the 1-inch border is designed specifically to prevent this issue. Gently tucking as you roll helps immensely.
Rolled Bread is Dry or Too Dense
Overbaking is the primary culprit for dry bread, so trust your eyes for that golden-brown color. If using homemade dough, density often results from insufficient proofing (rising) time or overworking the dough, which develops tough gluten. Ensure proper kneading and adequate rest for a tender crumb.
Not Golden Brown or Cooked Through
First, verify your oven temperature with an independent thermometer, as oven calibration can vary. Ensure the bread has sufficient time to reach internal doneness. If the top isn’t browning enough, a quick blast under the broiler for 1-2 minutes (watched very carefully!) can achieve that perfect crust, or consider an egg wash (beaten egg with a splash of water) before baking for deeper color.
From Oven to Table: Serving & Storing Your Savory Creation
Delightful Serving Suggestions
This Savory Olive & Herb Rolled Bread is incredibly versatile and shines in many settings! Serve it as an elegant appetizer with a side of warm marinara or pesto for dipping. It’s also a fantastic accompaniment to a hearty bowl of soup, such as this comforting creamy sausage potato soup, or a fresh, crisp salad for a satisfying light lunch.
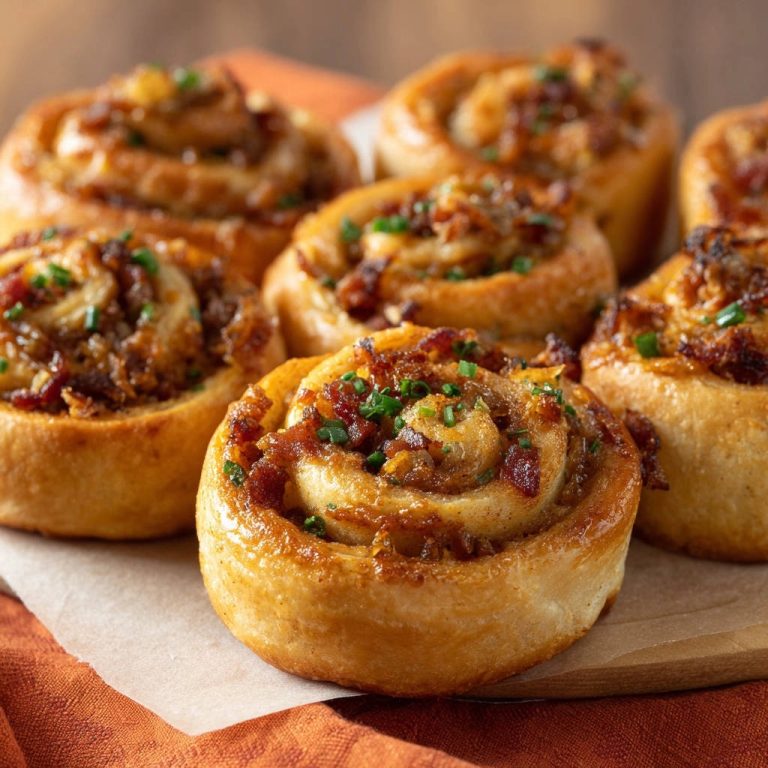
Consider it a flavorful side dish with your favorite dinner, or incorporate it into a vibrant brunch spread. Its beautiful spiral presentation makes it a standout on any table.
Storing Your Savory Rolls Fresh
To maintain peak freshness, allow your Savory Olive & Herb Rolled Bread to cool completely before storing. Once cooled, transfer any leftovers to an airtight container and keep at room temperature for up to 2-3 days. For optimal freshness, you can also wrap individual slices tightly in plastic wrap before placing them in the container.
Make-Ahead & Freezing Options
For convenience, you can prepare the roll up to the baking step. Cover it tightly with plastic wrap and refrigerate for up to 24 hours before baking. For longer storage, the baked and cooled bread freezes beautifully. Wrap it tightly in plastic wrap, then in aluminum foil, and freeze for up to 1 month.
To reheat from frozen, thaw at room temperature for a few hours, then warm in a preheated oven at 350°F (175°C) until heated through and crisp again.
FAQs: Mastering Your Savory Olive & Herb Rolled Bread
Can I use different cheeses or fillings?
Absolutely, this recipe is wonderfully adaptable to your preferences! Feel free to experiment with other meltable cheeses like shredded mozzarella, provolone, or even crumbled feta for a tangier profile. For additional fillings, sun-dried tomatoes (oil-packed and well-drained), roasted red peppers, or sautéed spinach (squeezed dry) are excellent choices. Exploring new combinations is part of the fun, much like discovering new flavors in cheesy ham and spinach breakfast bites.
Just remember to ensure any wet ingredients are thoroughly drained to prevent making the dough soggy and difficult to roll.
Is homemade pizza dough recommended over store-bought?
While high-quality store-bought pizza dough offers unparalleled convenience, a well-made homemade bread or pizza dough can indeed provide a superior flavor and texture. Homemade versions often yield a more tender crumb and a richer yeast flavor. If you have the time and enjoy the process, using homemade dough will undoubtedly elevate this Savory Olive & Herb Rolled Bread even further.
Can this recipe be made dairy-free or gluten-free?
To make this recipe dairy-free, simply substitute the Parmesan or Italian cheese blend with your favorite plant-based shredded cheese alternative. Ensure your chosen dough is also certified dairy-free. For a gluten-free version, you would need to use a commercially available gluten-free pizza dough; be aware that results may vary slightly in texture and handling characteristics compared to traditional wheat-based doughs.
How do I prevent the rolls from unraveling while baking?
The primary defense against unraveling is the combination of a tight roll and, crucially, a very firm, continuous pinch along the entire seam. Ensure the seam side of the rolled bread is placed directly down onto the baking sheet. The natural weight of the bread helps keep it sealed. Additionally, avoid overfilling, as excessive moisture from fillings can weaken the dough and cause it to unroll.
Ready to Impress? Share Your Culinary Journey!
Now that you’re armed with the secrets to perfectly sealed, flavor-packed Savory Olive & Herb Rolled Bread, it’s time to get rolling! This recipe isn’t just about baking; it’s about transforming simple ingredients into a stunning, satisfying creation that will gather compliments and requests for the recipe. Dive into your kitchen with confidence, and prepare to delight your taste buds and those of your loved ones.
We’d love to see your beautiful bread creations! Share your photos and experiences in the comments below, or tag us on social media. Happy baking!
Rolled Bread
Course: BreadCuisine: MediterraneanDifficulty: easy4
1 large roll (serves 6-8)20
minutes25
minutes240
kcal45
minutesDiscover the secret to perfectly sealed, flavorful bread rolls every time. This recipe for Savory Olive & Herb Rolled Bread ensures no messy spills, just delicious, beautiful results. You’ll wonder how you ever made them any other way!
Ingredients
1 pound store-bought pizza dough or homemade bread dough
1/2 cup pitted green olives, halved
1/2 cup pitted black olives, halved
1 cup shredded Parmesan or Italian cheese blend
2 tablespoons capers, drained
1/4 cup finely diced red bell pepper
2 tablespoons fresh thyme leaves, stripped from stems
1 tablespoon olive oil, plus more for brushing
1/4 teaspoon salt
1/4 teaspoon black pepper
Directions
- Preheat your oven to 375°F (190°C). Line a baking sheet with parchment paper.
- On a lightly floured surface, roll the pizza dough into a large rectangle, approximately 12×16 inches, or as thin as you can without tearing. The key here is to get an even thickness.
- This is where the magic happens to keep those fillings in! Sprinkle the shredded cheese evenly over the dough, leaving a 1-inch border clear on all four sides. This border is crucial for sealing.
- Scatter the green olives, black olives, capers, red bell pepper, and fresh thyme evenly over the cheese layer. Again, keep these fillings within that 1-inch border. Avoid piling them too high in any one spot to ensure a smooth, even roll.
- Starting from one of the long ends, carefully and tightly roll the dough towards the opposite long end. As you roll, use your fingers to gently tuck in any fillings that try to escape from the sides. Apply steady, even pressure to create a firm log, preventing air pockets and keeping everything compact.
- Once rolled, pinch the seam firmly along the entire length to seal it completely. Gently tuck in the ends of the roll to enclose all the delicious fillings.
- Carefully transfer the rolled bread to your prepared baking sheet, seam-side down. Lightly brush the top with a little olive oil.
- Bake for 25-30 minutes, or until golden brown and cooked through. Let cool slightly before slicing and serving.
Notes
- The 1-inch border and tight rolling are key for perfectly sealed, flavorful rolls.