Warm Chocolate Chip Cookie Sundae: Secret to Thick Cookies!
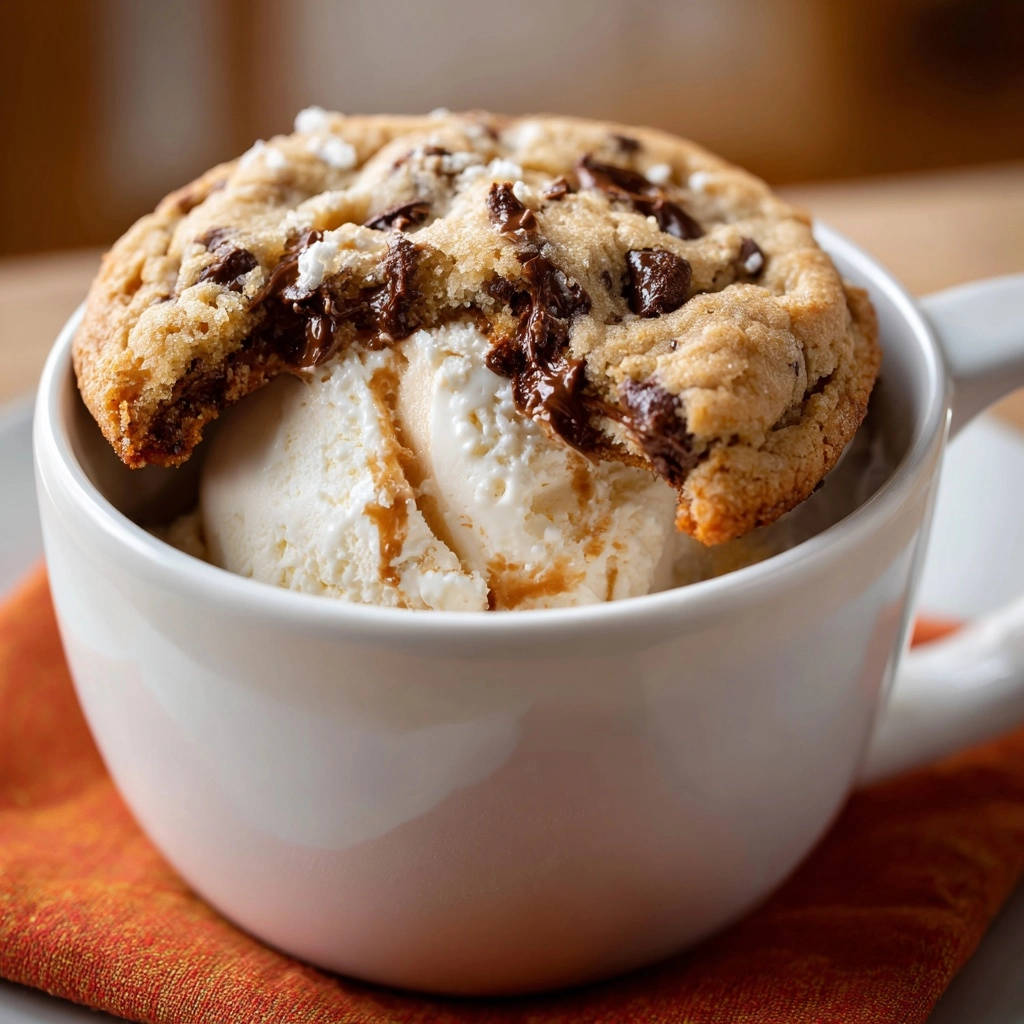
I remember the frustration of seeing my chocolate chip cookies spread into flat discs, a far cry from the bakery-style treats I craved. It took some experimentation, but I finally unlocked the secret to consistently thick, chewy, and perfectly golden-edged cookies. This specific recipe for a Warm Chocolate Chip Cookie Sundae not only guarantees those enviable results but also elevates your classic dessert into an unforgettable experience.
Why This Warm Chocolate Chip Cookie Sundae Will Change Your Dessert Game
This recipe isn’t just about making a delicious treat; it’s about mastering the art of the perfect cookie, setting the stage for an ultimate dessert experience. You’ll gain confidence in your baking and a go-to recipe for any craving.
Say Goodbye to Flat Cookies: Our No-Spread Secret
The cornerstone of this recipe is its “secret weapon”: a strategic dough chilling process. This crucial step solidifies the butter within the dough, preventing rapid spreading in the oven.
You’ll achieve those coveted bakery-style beauties that hold their shape, giving you thick, satisfying cookies every single time.
The Perfect Chewy-Soft Texture, Every Single Time
We’ve meticulously balanced ingredients and baking times to deliver an unparalleled texture. Expect a cookie with a perfectly chewy center that yields to a tender bite, contrasted by slightly crisp, golden edges.
It’s the ideal foundation for any warm cookie sundae, ensuring every spoonful is pure bliss.

Effortless Indulgence: Quick Prep for Instant Cravings
While the chilling step is key, the actual hands-on preparation for these cookies is remarkably quick and straightforward. This makes it an ideal recipe for satisfying sudden dessert desires without extensive effort.
You’ll be able to whip up a batch of these delectable treats whenever a craving strikes, making indulgence truly effortless.
Gathering Your Flavor Arsenal: Key Ingredients Unpacked
Quality ingredients are the foundation of an exceptional Warm Chocolate Chip Cookie Sundae. Understanding their roles ensures perfect results.
Building the Base: Butter, Sugars, and Eggs
Unsalted Butter (Softened): Softened butter creams beautifully with sugar, incorporating air for a lighter cookie texture. Unsalted butter gives you control over the overall saltiness.
Granulated Sugar: Provides sweetness and contributes to the cookie’s crisp edges. It also helps with browning.
Packed Light Brown Sugar: This is essential for chewiness and moisture, thanks to its molasses content. It also adds a deeper, caramel-like flavor.
Large Egg: Acts as a binder, providing structure and richness. Ensure it’s at room temperature for better emulsion.
The Dry Essentials: Flour, Leavening, and Salt
All-Purpose Flour: Provides the cookie’s primary structure. Measure it correctly to avoid a dry or dense cookie.
Baking Soda: Our leavening agent, which helps the cookies rise slightly and contributes to their tender crumb. It reacts with the acidic brown sugar.
Salt: A crucial flavor enhancer, salt balances the sweetness and brings out the full depth of the chocolate. Don’t skip it!
The Star of the Show: Semi-Sweet Chocolate Chips
Semi-Sweet Chocolate Chips: The classic choice for a reason, offering a balanced sweetness that melts beautifully without being overly rich. Opt for a good quality brand for superior flavor.
For variety, you could experiment with milk chocolate, dark chocolate, or even a mix of different chip types to customize your flavor profile.
If you enjoy the thick, chewy texture of these cookies, you might also like this recipe for sea salt dark chocolate chunk cookies.
The Sundae Finish: Vanilla Ice Cream and Topping Options
Vanilla Ice Cream: The essential cool counterpoint to a warm cookie. Choose a high-quality vanilla for the best contrast in flavors and textures.
Optional Toppings: Caramel drizzle adds a luscious, sweet finish. White sprinkles or coarse sugar can be used as a garnish for visual appeal and a slight textural crunch.
Consider hot fudge, chopped nuts, or whipped cream for even more decadent options.
Essential Tools for Your Warm Chocolate Chip Cookie Sundae Adventure
Having the right equipment makes the baking process smoother and ensures consistent, professional-quality results for your Warm Chocolate Chip Cookie Sundae.
Your Baking Toolkit for Perfect Cookies
Electric Mixer (Handheld or Stand): Essential for creaming butter and sugars until light and fluffy, ensuring proper aeration and texture.
Large and Medium Mixing Bowls: Necessary for separating wet and dry ingredients before combining, preventing overmixing.
Measuring Cups and Spoons: Accurate measurements are critical for baking success, ensuring precise ingredient ratios.
Rubber Spatula: Ideal for scraping down the sides of bowls and gently folding in chocolate chips without overworking the dough.
Parchment Paper: Prevents sticking, promotes even baking, and makes cleanup a breeze. Always line your baking sheets.
Baking Sheets: Sturdy sheets that conduct heat evenly are key to perfectly baked, golden-brown cookies.
Cookie Scoop: Ensures uniform cookie size for even baking, making your sundae presentation consistent and appealing.
Crafting Your Warm Chocolate Chip Cookie Sundae: A Detailed Guide
Follow these steps closely to create the ultimate thick, chewy cookies for your irresistible sundae.
Phase 1: Creaming and Combining Wet Ingredients for Flavor
- Cream the Butter and Sugars:
In a large bowl, combine the softened unsalted butter, granulated sugar, and packed light brown sugar. Beat with an electric mixer until the mixture is light, fluffy, and pale in color, typically taking 2-3 minutes.
This crucial step incorporates air, which contributes significantly to the cookie’s final tender and chewy texture.
- Incorporate Egg and Vanilla:
Beat in the large egg and the vanilla extract until they are fully combined into the butter mixture. Ensure you scrape down the sides of the bowl as needed to guarantee all ingredients are evenly incorporated.
Phase 2: Gently Integrating Dry Ingredients and Chocolate Chips
- Prepare Dry Ingredients:
In a separate medium bowl, thoroughly whisk together the all-purpose flour, baking soda, and salt. Whisking ensures these dry ingredients are evenly distributed, leading to consistent leavening and flavor throughout the cookies.
- Combine Dry and Wet:
Gradually add the whisked dry ingredients to the wet mixture, mixing on low speed until just combined. It is CRITICAL not to overmix the dough at this stage, as overmixing develops gluten and can lead to tough, dry cookies.
If you enjoy thick cookies, try these loaded almond chocolate chunk cookies for a crunchy twist.
- Fold in Chocolate Chips:
By hand, gently stir in the semi-sweet chocolate chips using a rubber spatula until they are evenly distributed throughout the dough. Avoid excessive mixing or crushing the chips to maintain their integrity.
Phase 3: The Game-Changing Dough Chill (Your Secret Weapon!)
- Chill Your Cookie Dough:
Cover the cookie dough tightly with plastic wrap and refrigerate for at least 30 minutes, or up to 24 hours. This essential step is the secret to preventing flat, sad cookies and achieving that desired thick, chewy texture.
Chilling allows the butter to solidify, preventing the cookies from spreading too rapidly in the oven. It ensures they hold their shape beautifully, resulting in a perfectly baked cookie that resists spreading.
Phase 4: Baking to Golden Perfection
- Preheat Oven and Prep Baking Sheet:
When you’re ready to bake, preheat your oven to 375 degrees F (190 degrees C). Line a baking sheet with parchment paper to prevent sticking, promote even baking, and simplify cleanup.
- Scoop and Garnish:
Using a cookie scoop, place rounded tablespoons of the chilled dough onto the prepared baking sheet, leaving about 2 inches between each cookie for proper airflow and even baking. If desired, sprinkle with coarse sugar or white sprinkles for an attractive finish.
- Bake Just Right:
Bake for 9-11 minutes, or until the edges are golden brown and the centers still appear slightly soft. This careful baking time is crucial for achieving a chewy interior, as the cookies will continue to set up and cook slightly as they cool.
- Cool and Rest:
Let the baked cookies cool on the baking sheet for 5 minutes. This allows them to firm up before carefully transferring them to a wire rack to cool slightly more, or serve them warm immediately for the ultimate sundae experience.
Phase 5: Assembling Your Ultimate Warm Cookie Sundae
- Construct Your Sundae:
For the ultimate treat, place a warm cookie (or even two!) in a mug or a dessert bowl. Top generously with a scoop or two of your favorite vanilla ice cream.
Drizzle with caramel if desired, and enjoy your perfectly thick, chewy cookie creation immediately. It’s a truly decadent dessert!
Mastering Your Cookie Sundae: Expert Tips & Tricks for Perfection
Elevate your Warm Chocolate Chip Cookie Sundae with these valuable insights and techniques.
Don’t Skip the Chill! The refrigeration step is truly non-negotiable for achieving thick, chewy cookies that hold their shape. Even 30 minutes makes a significant difference, but longer chilling (up to 24 hours) can deepen the flavor and texture even further.
Measure Your Flour Correctly: Too much flour can make your cookies dry and crumbly, while too little can lead to excessive spreading. Spoon flour into your measuring cup and level it off with a straight edge, rather than scooping directly from the bag, for accuracy.
Room Temperature Ingredients Matter: Ensure your butter and egg are at true room temperature. This allows them to emulsify properly during mixing, creating a smooth, homogenous dough that holds more air and bakes more evenly.
Achieve That Golden Edge: Watch your cookies closely in the last few minutes of baking. The key is to remove them from the oven when the edges are golden but the centers still look slightly underdone; they will set up beautifully as they continue to cool on the hot baking sheet.
Salt is Your Flavor Friend: A pinch of flaky sea salt sprinkled on top of the cookie dough before baking can dramatically enhance the chocolate flavor and perfectly balance the sweetness. Don’t underestimate its simple yet profound impact!
Experiment with Chocolate: While semi-sweet is a classic, don’t hesitate to get creative. Try milk chocolate, dark chocolate, white chocolate, or even a mix of different types of chocolate chips or chopped chocolate bars for varied and exciting flavor profiles.
Topping Creativity: Beyond the traditional caramel, consider a rich hot fudge, freshly whipped cream, crunchy chopped nuts, sweet toasted coconut, or even a sprinkle of cinnamon or espresso powder to elevate your sundae to new heights.
More Sweet Treats to Try
If you’re in the mood for another breakfast-for-dessert combo, these pancake recipes share the same fluffy texture that makes the cookie sundae so satisfying.
- For bright fruit and a soft crumb, try these Fluffy Blueberry Pancakes — the berries add a tart contrast to the warm chocolate.
- These Fluffy Oatmeal Pancakes bring a hearty, nutty base that pairs nicely with a drizzle of maple syrup or a scoop of ice cream.
Troubleshooting Common Cookie Conundrums
Even seasoned bakers encounter issues. Here’s how to fix common cookie problems for your next batch of warm cookies.
Why Did My Cookies Spread Too Thin?
Thin, flat cookies are usually caused by butter that’s too soft, dough that wasn’t sufficiently chilled, an oven that’s not hot enough, or too much leavening agent. Ensure your butter is just softened, always chill your dough, and verify your oven temperature with an oven thermometer.
My Cookies Are Too Cakey or Dry!
This often stems from overmixing the dough, which develops too much gluten, or using too much flour. It can also be a sign of overbaking. Mix until just combined, measure flour accurately, and remove cookies when the edges are golden but centers are still soft.
How to Fix a Dough That’s Too Sticky or Crumbly
A dough that’s too sticky might need a bit more flour, added gradually, or more chilling time to firm up the butter. If your dough is too crumbly, it might lack enough moisture (e.g., butter or egg), or too much flour was added. Ensure all ingredients are at room temperature for optimal consistency.
Make-Ahead, Storage, and Serving Suggestions
Planning ahead makes enjoying your Warm Chocolate Chip Cookie Sundae even easier.
Can I Prepare the Cookie Dough in Advance?
Absolutely! The cookie dough can be refrigerated, tightly covered, for up to 24 hours, enhancing the flavor even further. You can also scoop the dough into balls, freeze them on a baking sheet until solid, then transfer to a freezer-safe bag for up to 2 months. Bake from frozen, adding 2-4 minutes to the baking time.
Optimal Storage for Baked Cookies
Store baked cookies in an airtight container at room temperature for up to 3-4 days to maintain their chewiness. For longer storage, freeze cooled baked cookies in a single layer in an airtight container for up to 3 months. Thaw at room temperature or warm briefly in the oven for that fresh-baked feel.
Creative Ways to Serve Your Warm Chocolate Chip Cookie Sundaes
Beyond the classic bowl, consider serving mini warm cookie sundaes in ramekins for individual portions. Offer a “build-your-own” sundae bar with various ice cream flavors, syrups, and toppings. These treats are also fantastic with other dessert elements, such as our decadent pumpkin pie truffles for a festive spread.
Frequently Asked Questions About This Recipe
Here are answers to common questions about creating your perfect warm cookie sundae.
Can I Use Different Types of Chocolate Chips?
Yes, you absolutely can! While semi-sweet is classic, feel free to substitute with milk chocolate, dark chocolate, white chocolate, or even a combination for a unique flavor profile. Just note that very dark chocolate might require slightly less sugar in the recipe, and white chocolate can be quite sweet.
What if I Don’t Have an Electric Mixer?
You can still make these cookies by hand! It will require more effort and arm strength, especially for creaming the butter and sugars until light and fluffy. Use a sturdy whisk or a wooden spoon and ensure your butter is very soft for easier mixing. The texture might be slightly denser but still delicious.
Can I Make This Recipe Gluten-Free?
Yes, you can. Substitute the all-purpose flour with a 1:1 gluten-free baking flour blend that contains xanthan gum. The texture may vary slightly, but many blends work very well for cookies. For another delightful gluten-free friendly dessert, consider our chewy pumpkin chocolate chip blondies.
Is There a Dairy-Free Option for the Cookies?
To make these cookies dairy-free, substitute the unsalted butter with a high-quality plant-based butter alternative. Ensure it is softened to room temperature just like regular butter. The texture should remain quite similar, allowing for a delicious dairy-free warm cookie sundae.
Can I Bake These Cookies Without Chilling the Dough?
While you can, it’s strongly advised against if you desire thick, chewy cookies. Skipping the chilling step will result in cookies that spread significantly more, becoming thinner and potentially crispier rather than chewy. The chilling is truly the “secret weapon” for the texture described.
Ready to Indulge? Your New Favorite Dessert Awaits!
There’s something truly magical about a warm, freshly baked cookie, especially when crowned with a scoop of melting vanilla ice cream and a drizzle of caramel. This Warm Chocolate Chip Cookie Sundae recipe offers not just a dessert, but a foolproof method to achieve cookie perfection every single time.
It’s an invitation to treat yourself, delight your loved ones, and create those cherished dessert memories. Go ahead, gather your ingredients, and transform your kitchen into a haven of sweet indulgence. We can’t wait to hear how much you love it!
Chocolate Chip Cookie Sundae
Course: DessertCuisine: AmericanDifficulty: easy12
cookies45
minutes10
minutes80
kcal55
minutesUnlock the secret to baking thick, chewy chocolate chip cookies with golden edges that won’t spread flat. Perfect for a delicious Warm Chocolate Chip Cookie Sundae.
Ingredients
1/2 cup (1 stick) unsalted butter, softened
1/4 cup granulated sugar
1/2 cup packed light brown sugar
1 large egg
1 teaspoon vanilla extract
1 1/4 cups all purpose flour
1/2 teaspoon baking soda
1/4 teaspoon salt
1 cup semi-sweet chocolate chips
Vanilla ice cream, for serving
Optional: White sprinkles or coarse sugar, for garnish
Optional: Caramel drizzle, for serving
Directions
- In a large bowl, cream together the softened butter, granulated sugar, and brown sugar until light and fluffy. This should take about 2-3 minutes with an electric mixer.
- Beat in the egg and vanilla extract until well combined, scraping down the sides of the bowl as needed.
- In a separate medium bowl, whisk together the flour, baking soda, and salt.
- Gradually add the dry ingredients to the wet ingredients, mixing on low speed until just combined. Do not overmix.
- Stir in the chocolate chips by hand until evenly distributed throughout the dough.
- This next step is the secret weapon for preventing flat cookies: Cover the dough tightly with plastic wrap and refrigerate for at least 30 minutes, or up to 24 hours. Chilling the dough solidifies the butter, which helps the cookies hold their shape better when baking and prevents them from spreading too much.
- When ready to bake, preheat your oven to 375 degrees F (190 degrees C). Line a baking sheet with parchment paper.
- Scoop rounded tablespoons of chilled dough onto the prepared baking sheet, leaving about 2 inches between each cookie. If desired, sprinkle with coarse sugar or white sprinkles.
- Bake for 9-11 minutes, or until the edges are golden brown and the centers are still slightly soft. This careful baking time contributes to a chewy, not flat, cookie.
- Let the cookies cool on the baking sheet for 5 minutes before transferring them to a wire rack to cool slightly more, or serve them warm immediately.
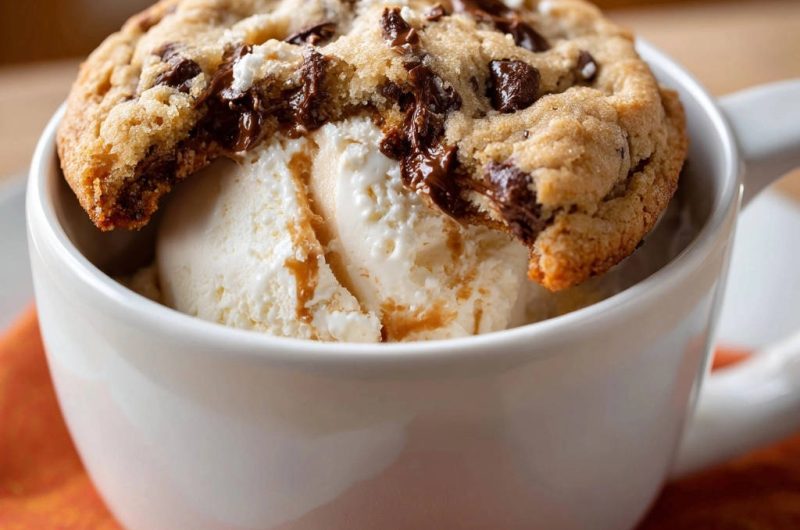
- To serve as a sundae, place a warm cookie in a mug or bowl, top with a scoop or two of vanilla ice cream, and drizzle with caramel if desired. Enjoy your perfectly thick, chewy cookie creation!
Notes
- Chilling the dough for at least 30 minutes is the key to preventing flat cookies and ensuring a thick, chewy texture.