No-Bake Peachy Dream Bars: Perfectly Crisp, Never Soggy
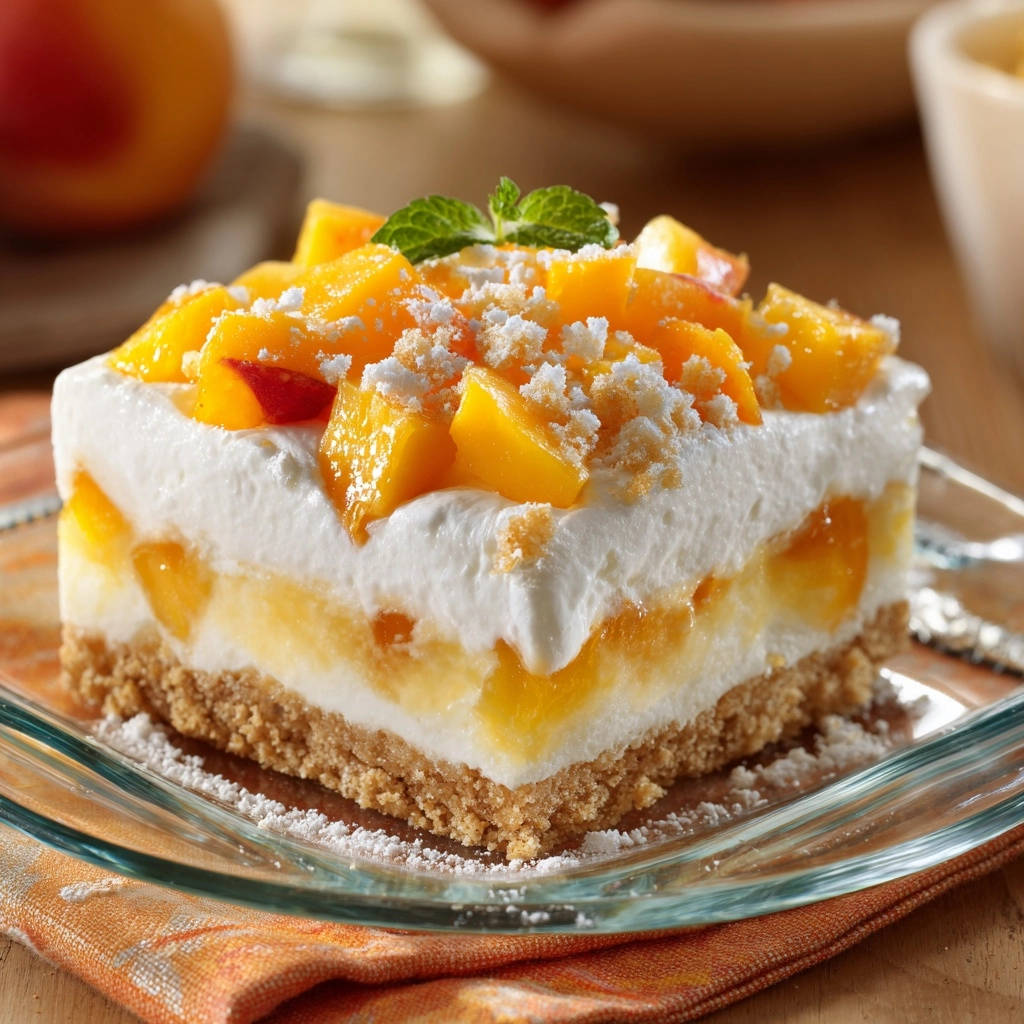
There’s nothing quite like the vibrant taste of fresh peaches in a dessert, but making a no-bake bar that stays perfectly crisp can be a real challenge. I’ve perfected these No-Bake Peachy Dream Bars, ensuring every layer is divine and, most importantly, the crust remains satisfyingly crunchy.
This recipe isn’t just easy; it introduces a clever trick that guarantees a no-soggy bottom, delivering a refreshing, creamy, and wonderfully textured treat that will become your new go-to for effortless elegance.
Beyond Basic: Why Our No-Bake Peachy Dream Bars Stand Out
The “Anti-Soggy” Secret Revealed
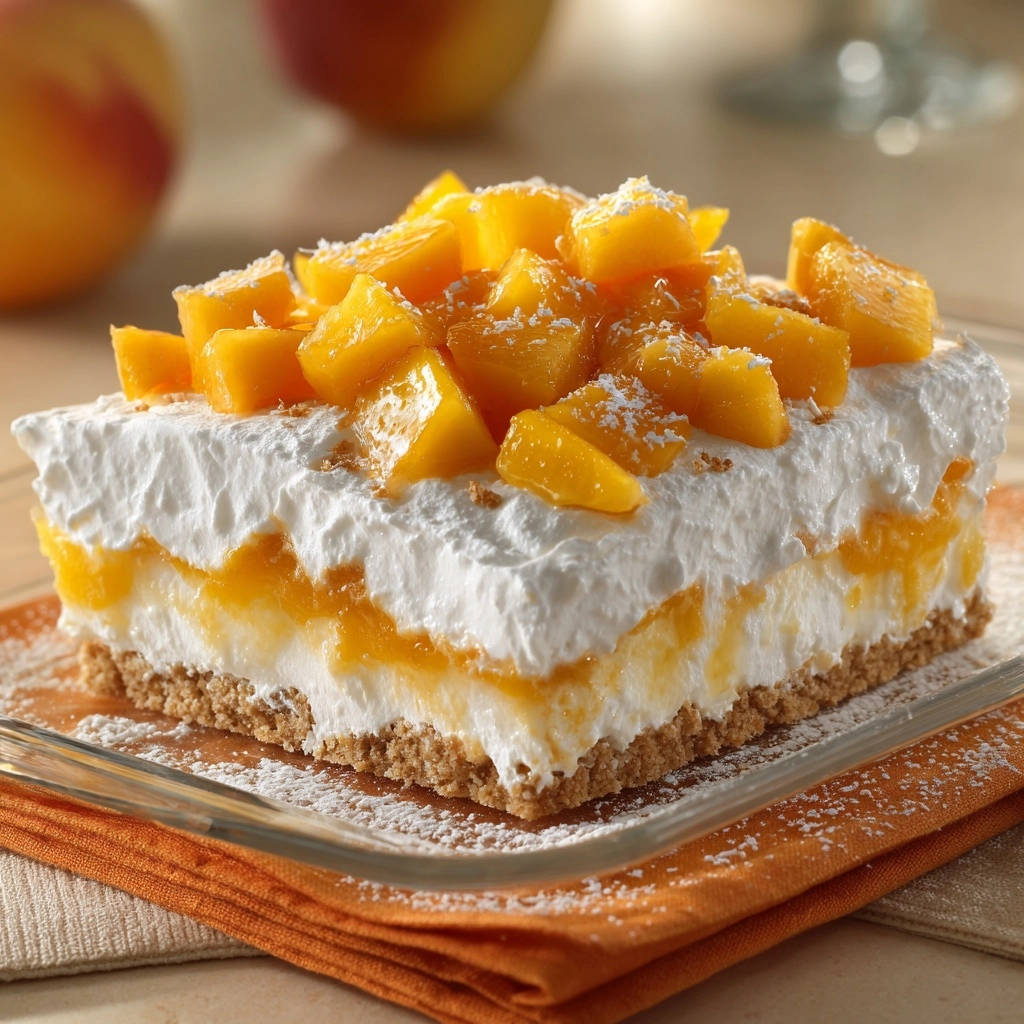
Many no-bake fruit desserts fall victim to a soft, mushy crust after just a few hours. Our recipe incorporates a thin, ingenious barrier layer between the crust and the juicy peaches. This simple addition completely prevents moisture from seeping into the graham cracker base, ensuring a delightful crispness with every bite.
Effortless Elegance for Any Occasion
The beauty of these bars lies in their no-bake simplicity. You achieve a multi-layered, impressive dessert without ever turning on your oven. They are ideal for summer gatherings, potlucks, or when you need a stunning treat with minimal fuss and maximum flavor.
Fresh Flavors, Familiar Comfort
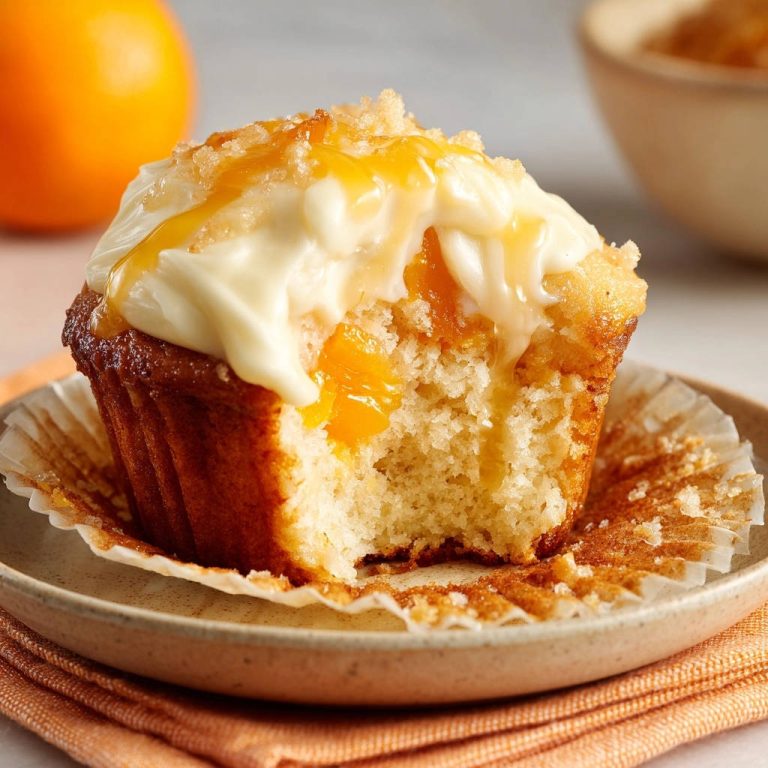
Each bite of these No-Bake Peachy Dream Bars offers a symphony of textures and tastes. The bright, sweet tang of peaches perfectly complements the rich, creamy cheesecake-like filling and the satisfying crunch of the graham cracker crust. It’s a comforting classic reimagined for modern ease.
Crafting Perfection: The Essential Ingredients for Your No-Bake Peachy Dream Bars
Success starts with understanding your ingredients. Choosing the right quality and preparing them correctly is paramount for these delightful bars.
Crust Foundation: Graham Crackers and Butter
Finely crushed graham cracker crumbs form the sturdy base. Their delicate sweetness pairs beautifully with the other layers.
Unsalted butter binds the crumbs, creating a rich, firm crust when chilled. Ensure it’s fully melted to evenly moisten the crumbs.
The Star of the Show: Peaches, Fresh or Canned
Well-drained canned sliced peaches offer convenience and consistent sweetness. Alternatively, ripe, fresh peaches, peeled and diced, provide unparalleled flavor when in season.
Their natural sweetness is enhanced with a touch of granulated sugar during cooking, bringing out their juicy essence.
Silky Smoothness: Cream Cheese and Whipped Topping
Softened cream cheese is essential for a lump-free, velvety smooth filling. It provides the signature tangy richness that balances the sweet fruit.
Thawed whipped topping, such as Cool Whip, introduces airiness and lightens the texture of the creamy layer. This ensures a delicate, melt-in-your-mouth experience.
The Thickening Agent: Cornstarch’s Role
Cornstarch, mixed with cold water to form a slurry, is critical for thickening the peach layer. It prevents the fruit from being too watery and ensures a pleasant, spoonable consistency that holds its shape.
Your Kitchen Arsenal: Essential Tools for No-Bake Peachy Dream Bars
Having the right tools ready makes the process seamless and enjoyable.
Baking Dish Deep Dive
A standard 9×13 inch baking dish is perfect for these bars, providing ample surface area for layering and easy slicing. Opt for one with straight sides for neat presentation.
Mixing Bowls & Whisking Wonders
You’ll need several medium and large mixing bowls for preparing the crust, peach layer, and creamy filling. A whisk is essential for creating the cornstarch slurry.
Electric Mixer Magic
An electric mixer, either hand-held or stand, is invaluable for achieving a smooth, creamy, and lump-free cream cheese mixture. It effortlessly incorporates the powdered sugar and vanilla for a truly luscious filling.
Step-by-Step Success: Assembling Your No-Bake Peachy Dream Bars
1. The Foundation: Mastering the Graham Cracker Crust
Combine finely crushed graham cracker crumbs, 1/4 cup granulated sugar, and melted butter in a medium bowl. Mix thoroughly until all crumbs are evenly moistened.
Press this mixture very firmly and evenly into the bottom of your 9×13 inch baking dish. Using the bottom of a flat glass or a measuring cup helps achieve a dense, compact base, which is crucial for a stable and non-soggy crust.
2. The Chill Factor: Why Refrigeration is Crucial
Place the baking dish with the pressed crust into the refrigerator for at least 30 minutes. This chilling period allows the butter to solidify, setting the crust. This firm base acts as an initial barrier, making it less permeable to moisture from the subsequent layers.
3. Peachy Perfection: Creating the Fruit Layer
If using canned peaches, ensure they are exceptionally well drained to eliminate excess liquid; patting them dry can also help. For fresh peaches, dice them evenly.
In a medium saucepan, combine the diced peaches, 1/4 cup granulated sugar, and 1/4 cup water. Bring this mixture to a gentle simmer over medium heat, stirring occasionally to dissolve the sugar.
Whisk 2 tablespoons of cornstarch with 2 tablespoons of cold water in a small bowl until smooth to create your slurry. Stir this cornstarch slurry into the simmering peaches. Continue to cook, stirring constantly, for 1-2 minutes until the mixture visibly thickens to a glossy, jam-like consistency.
Remove the peach mixture from the heat and allow it to cool completely before assembly. Warm fruit will melt the creamy layers and compromise the integrity of the bars.
4. Creamy Dream: Preparing the Luscious Filling
In a large bowl, beat the softened cream cheese, 1 cup powdered sugar, and 1 teaspoon vanilla extract with an electric mixer. Continue beating until the mixture is completely smooth and creamy, without any lumps.
Gently fold in the thawed whipped topping using a spatula. Mix until no streaks of whipped topping remain, being careful not to overmix, which can deflate the airiness.
5. The Barrier Method: Our Signature Anti-Soggy Trick!
Remove your chilled crust from the refrigerator. Crucially, spread about 1/4 cup of the prepared cream cheese mixture in a thin, even layer over the entire graham cracker crust.
This thin cream cheese layer acts as a protective barrier, preventing the moisture from the peach layer from seeping into the delicate crust and keeping it perfectly crisp.
6. Elegant Layering: Building Your Bars
Carefully spoon the completely cooled peach mixture evenly over the thin cream cheese barrier layer. Spread it gently to avoid disturbing the underlying layer.
Next, evenly spread the remaining cream cheese mixture over the peach layer. Take your time to ensure a smooth, beautiful top layer.
7. The Waiting Game: Thorough Chilling for Optimal Set
Loosely cover the dish with plastic wrap and refrigerate for at least 4 hours, or ideally overnight. This extended chilling time is vital for all layers to set firmly and for the flavors to meld beautifully, creating a cohesive and delightful texture.
8. Presentation Pointers: Garnish and Serve
Before serving, enhance the visual appeal and texture. You can dice a few fresh peach slices for the top, sprinkle with a few extra graham cracker crumbs for added crunch, or adorn with fresh mint leaves for a pop of color and freshness.
Slice into desired bar sizes using a sharp knife dipped in hot water and wiped clean between cuts for neat edges. Enjoy your perfectly non-soggy, incredibly delicious No-Bake Peachy Dream Bars!
Chef’s Notes: Elevating Your No-Bake Peachy Dream Bars
Choosing the Best Peaches
If using fresh peaches, select ripe, fragrant ones for the best flavor. Peel them easily by blanching for 30 seconds in boiling water, then immediately transferring to an ice bath.
Perfecting Your Cream Cheese Layer
Ensure your cream cheese is truly at room temperature. This is key for a silky-smooth, lump-free mixture that incorporates well with the whipped topping.
Customizing Your Crust
For an extra layer of flavor, consider adding a pinch of cinnamon or nutmeg to your graham cracker crust mixture. This complements the peaches beautifully.
Garnishing for Impact
Beyond mint and crumbs, a light dusting of powdered sugar just before serving adds a touch of elegance. To really impress, drizzle with a homemade raspberry sauce for a beautiful color contrast and tangy counterpoint.
Oops! Troubleshooting Common No-Bake Peachy Dream Bar Hiccups
My Crust is Still Soggy!
Ensure your graham cracker crumbs were pressed very firmly into the dish. More importantly, confirm you applied the thin, initial layer of cream cheese mixture over the chilled crust; this is your primary moisture barrier.
Also, make absolutely sure your peach layer was completely cool before layering. Warm fruit will melt and soften everything.
My Peach Layer Isn’t Thickening
The cornstarch slurry needs to be mixed well with cold water to avoid lumps, then stirred consistently into the simmering peaches. Ensure the mixture reaches a gentle simmer and continues cooking for at least 1-2 minutes after adding the slurry for the cornstarch to activate and thicken.
My Cream Cheese Layer is Lumpy
Lumps usually indicate that your cream cheese was not sufficiently softened. Take it out of the refrigerator at least an hour before you plan to use it, or gently warm it in the microwave for 10-15 seconds bursts until pliable.
Also, ensure you beat the cream cheese, powdered sugar, and vanilla together until completely smooth before gently folding in the whipped topping.
Bars Aren’t Setting Firmly
Thorough chilling is non-negotiable for No-Bake Peachy Dream Bars. Make sure you refrigerate them for the full recommended 4 hours, or preferably overnight. If your kitchen is very warm, extend the chilling time.
Overmixing the cream cheese and whipped topping can also make the filling too soft, so fold gently.
Creative Twists: Flavor Variations for Your Dream Bars
These bars are wonderfully versatile! Once you’ve mastered the classic, feel free to experiment.
Berry Bliss Dream Bars
Substitute peaches with an equal amount of mixed berries (strawberries, raspberries, blueberries). Cook them down with sugar and cornstarch just as you would the peaches for a vibrant, tangy twist. For more berry-inspired treats, try these delicious raspberry crumb bars.
Tropical Getaway Dream Bars
Use well-drained crushed pineapple or diced mango in place of peaches. A hint of coconut extract in the cream cheese layer or toasted coconut flakes on top would enhance this tropical theme.
Chocolate Lover’s Dream Bars
Replace the peach layer with a rich chocolate ganache or pudding layer. For another fantastic chocolate bar option, check out these indulgent chocolate crumb cheesecake bars.
Beyond the Bake: Serving, Storing, and Enjoying Your Bars
Best Ways to Serve
Serve these bars chilled for the best texture and flavor. A sharp, warm knife will give you clean slices. They make a fantastic dessert for picnics, barbecues, or any gathering where you want a refreshing and impressive treat.
Storing Your Leftovers
Store any leftover No-Bake Peachy Dream Bars tightly covered with plastic wrap in the refrigerator for up to 3-4 days. The barrier layer helps maintain crust crispness.
Make-Ahead Magic
These bars are perfect for making ahead! Prepare them the day before your event, allowing them to chill overnight. This not only ensures they are perfectly set but also allows the flavors to deepen and meld beautifully.
Your No-Bake Peachy Dream Bars Questions Answered
Can I use frozen peaches?
Yes, you can use frozen peaches. Thaw them completely and drain them exceptionally well, pressing out any excess liquid, before cooking them with sugar and cornstarch.
Is there a dairy-free option for the creamy layer?
While the texture may vary slightly, you can experiment with dairy-free cream cheese alternatives and coconut whipped topping (ensure it’s very cold for stiff peaks) to create a dairy-free version.
How long do these bars last in the refrigerator?
When properly stored, these No-Bake Peachy Dream Bars will last 3-4 days in the refrigerator, maintaining their crisp crust and fresh flavors.
Can I freeze these bars?
Freezing is not recommended for these bars, as the textures of the creamy layer and especially the whipped topping may change upon thawing, becoming somewhat watery or grainy.
What if I don’t have a 9×13 inch pan?
You can use a similarly sized pan, like a 10×10 inch square pan, though the bars will be thicker, and chilling time might need to be slightly extended. Avoid significantly smaller pans, as the layers will be too thick and may not set properly.
Ready to Create Your Own Dream? Share Your No-Bake Peachy Dream Bars!
Now that you have all the secrets to a perfectly crisp crust and luscious layers, it’s time to whip up your own batch of No-Bake Peachy Dream Bars. This recipe truly delivers on flavor and ease, proving that the most impressive desserts don’t always require an oven.
I can’t wait to see your delightful creations! Share your experience, any fun variations, or tips in the comments below, or explore other fantastic no-bake delights like our refreshing no-bake strawberry cheesecake. Happy no-baking!
Peachy Dream Bars
Course: DessertCuisine: AmericanDifficulty: medium12
bars40
minutes2
minutes350
kcal42
minutesThis recipe reveals a brilliant trick to keep your no-bake peach dessert crust perfectly crisp. Enjoy layers of crunchy graham cracker, sweet peaches, and creamy filling without any soggy bottom woes. It’s surprisingly easy and utterly delicious!
Ingredients
1 1/2 cups finely crushed graham cracker crumbs (about 10-12 full sheets)
1/4 cup granulated sugar
1/2 cup unsalted butter, melted
2 (15-ounce) cans sliced peaches in light syrup, very well drained, or 4 cups fresh peaches, peeled and diced
1/4 cup granulated sugar (for peaches)
2 tablespoons cornstarch
1/4 cup cold water (for cornstarch slurry)
8 ounces cream cheese, softened
1 cup powdered sugar
1 teaspoon vanilla extract
1 (8-ounce) container whipped topping, thawed (like Cool Whip)
Optional garnish: Fresh mint leaves, extra graham cracker crumbs
Directions
- Prepare the Crust: In a medium bowl, combine the finely crushed graham cracker crumbs, 1/4 cup granulated sugar, and melted butter. Mix until all crumbs are moistened. Press the mixture firmly and evenly into the bottom of a 9×13 inch baking dish. This is key: Press it down as tightly as possible to create a dense base.
- Chill the Crust: Place the baking dish with the pressed crust into the refrigerator for at least 30 minutes. This step is vital for setting the crust and creating a less permeable barrier.
- Make the Peach Layer: If using canned peaches, ensure they are very well drained to minimize excess liquid. If using fresh, dice them. In a medium saucepan, combine the diced peaches, 1/4 cup granulated sugar, and 1/4 cup water. Bring to a gentle simmer over medium heat. In a small bowl, whisk the cornstarch with 2 tablespoons of cold water to create a slurry. Stir the cornstarch slurry into the simmering peaches. Cook, stirring constantly, until the mixture thickens significantly, about 1-2 minutes. Remove from heat and let cool completely. Cooling the peach layer completely before assembling is important to prevent it from warming the other layers and making the crust soft.
- Prepare the Creamy Layer: In a large bowl, beat the softened cream cheese, powdered sugar, and vanilla extract with an electric mixer until smooth and creamy. Gently fold in the thawed whipped topping until no streaks remain.
- Assemble the Bars (The Anti-Soggy Bottom Secret!): Remove the chilled crust from the refrigerator. To ensure a non-soggy crust, spread about 1/4 cup of the cream cheese mixture thinly and evenly over the chilled graham cracker crust. This thin layer acts as a barrier, preventing moisture from seeping into the crumbs.
- Layer It Up: Carefully spoon the cooled peach mixture evenly over the cream cheese barrier layer. Then, spread the remaining cream cheese mixture evenly over the peach layer.
- Chill Thoroughly: Cover the dish loosely with plastic wrap and refrigerate for at least 4 hours, or preferably overnight, to allow all layers to set completely and for the flavors to meld.
- Garnish and Serve: Before serving, dice a few fresh peaches for the top if desired, sprinkle with extra graham cracker crumbs for texture, and garnish with a fresh mint leaf. Slice into bars and enjoy your perfectly non-soggy treat!
Notes
- The secret to a non-soggy crust lies in the initial chilling and the thin cream cheese barrier layer.