Red Velvet Walnut Macarons: Full, Flawless, & Fantastic!
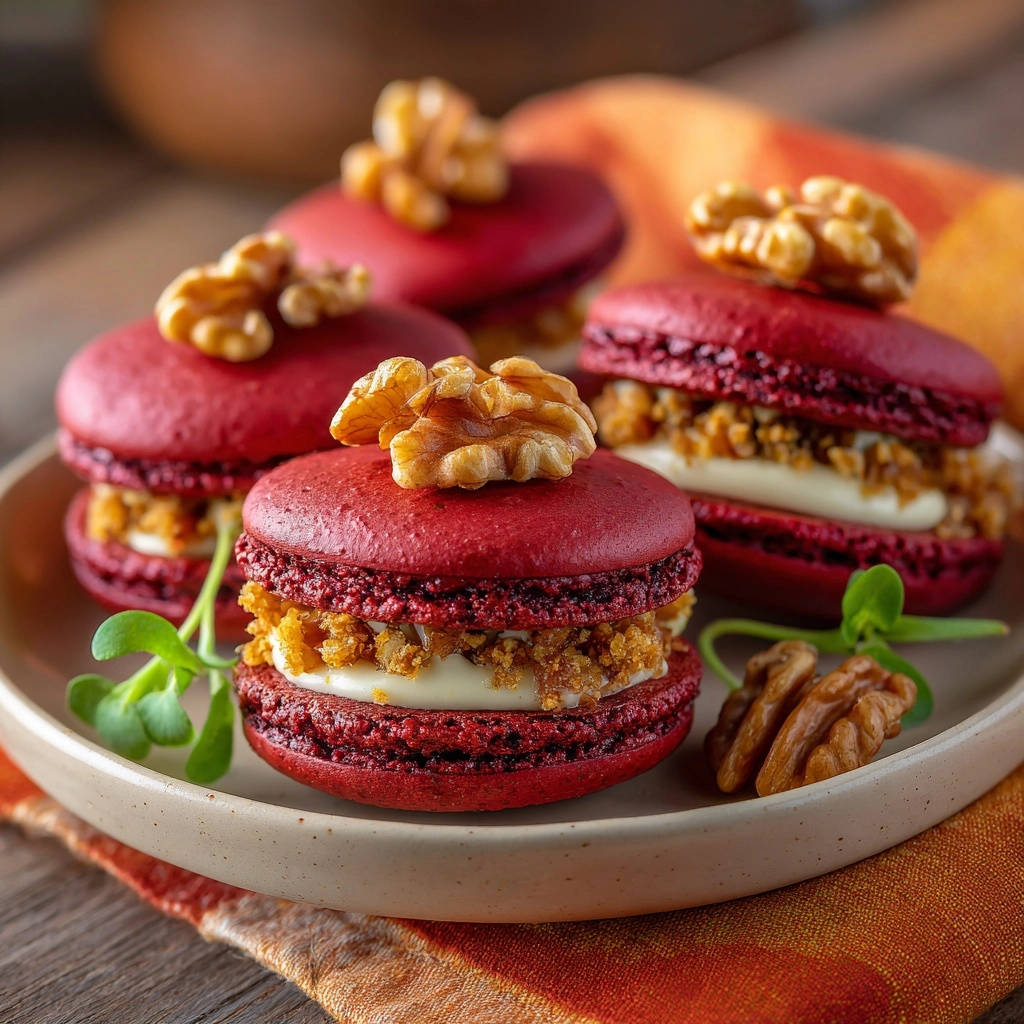
For years, the mere mention of macarons brought a mix of excitement and trepidation to my kitchen. I, like many bakers, faced the frustrating reality of hollow shells, but through countless batches, I’ve finally perfected the art of creating the most exquisite, perfectly full, and incredibly delicious Red Velvet Walnut Macarons.
This recipe isn’t just about baking; it’s about mastering a technique that guarantees those coveted “feet” and a satisfyingly chewy interior, ensuring every single macaron is a bakery-worthy treat you’ll be proud to share.
Why This Red Velvet Walnut Macarons Recipe is Your Macaron Masterpiece
This recipe for Red Velvet Walnut Macarons stands apart because it tackles the most common macaron frustrations head-on, providing clear, actionable steps that lead to consistent success.
The “No Hollow Shells” Guarantee: Our Signature Technique
The secret to perfectly full macarons lies in precise macaronage and a crucial drying step, both meticulously detailed in this guide. We focus on achieving that ideal batter consistency that prevents frustrating air pockets within your shells.
A Symphony of Flavors: Red Velvet, Cream Cheese & Walnut
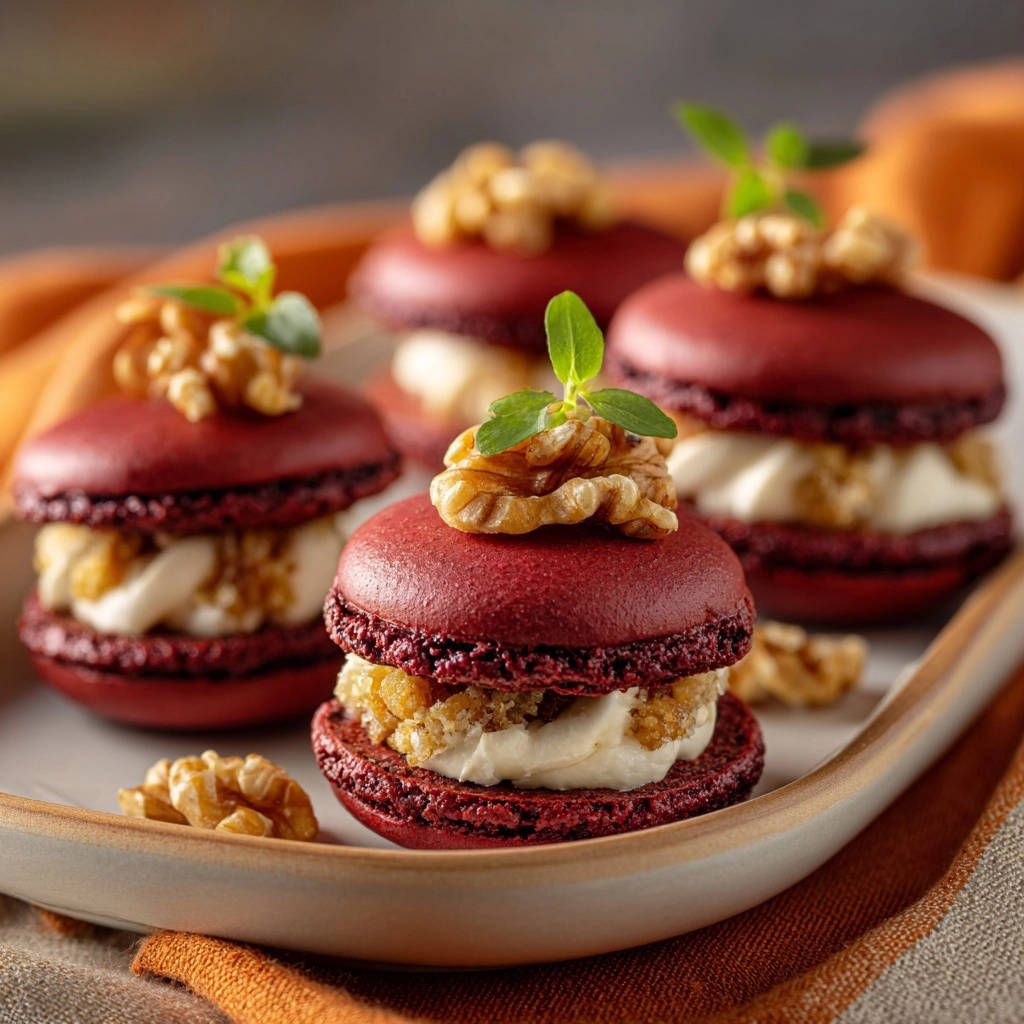
Beyond the flawless texture, these Red Velvet Walnut Macarons deliver an irresistible flavor profile. The classic tangy cream cheese filling perfectly complements the rich red velvet shells, while toasted walnuts add a delightful textural contrast and nutty depth.
Achieving Bakery-Quality Macarons at Home
With careful attention to the techniques outlined here, you’ll be able to create macarons that look and taste like they came from a high-end patisserie, all from the comfort of your own kitchen.
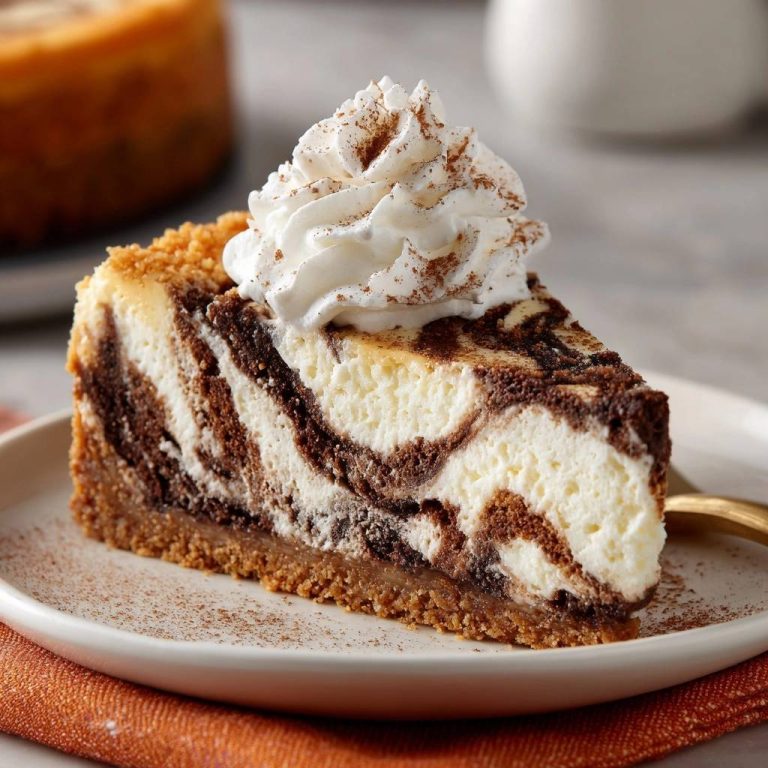
If you love the rich cocoa notes in these macarons, you will also enjoy this recipe for red velvet Oreo cheesecake brownies.
Gathering Your Essentials: Tools for Macaron Success
Having the right equipment is just as important as the ingredients when embarking on your macaron journey. Precision tools simplify the process and significantly increase your chances of success.
Precision Equipment for Perfect Shells
Kitchen Scale: Measuring ingredients by weight, especially almond flour and powdered sugar, is critical for macaron consistency. Volume measurements can vary significantly, leading to unpredictable results.
Stand Mixer (or Hand Mixer): A powerful mixer is essential for achieving a stable and glossy meringue, which forms the backbone of your macaron shells. It ensures consistent aeration and proper peak formation.
Fine-Mesh Sieve: Sifting your dry ingredients twice ensures a super-fine, lump-free mixture, which is vital for smooth macaron shells without unsightly bumps.
Silicone Mats or Parchment Paper: These provide a non-stick surface that helps your macaron shells release cleanly after baking. Silicone mats with pre-printed circles are especially helpful for uniform sizing.
Piping Perfection: Choosing the Right Tip and Bag
Piping Bag: A sturdy, reusable, or disposable piping bag is necessary for neatly portioning the macaron batter onto your baking sheets. Look for one that’s comfortable to grip.
Round Piping Tip (Wilton 1A or Ateco 805): A plain round tip helps create perfectly circular macaron shells. The size of the tip will influence the size of your macarons, so choose one appropriate for your desired 1.5-inch diameter.
The Core Ingredients for Divine Red Velvet Walnut Macarons
Each ingredient plays a crucial role in the texture, flavor, and success of your Red Velvet Walnut Macarons. Quality and proper preparation are key.
For the Macaron Shells: Quality Matters
Superfine Almond Flour: This is non-negotiable for smooth shells. Coarse almond flour will result in bumpy, uneven textures. Look for flour specifically labeled “superfine” or “blanched.”
Aged Egg Whites: Allowing egg whites to sit at room temperature for several hours or overnight, ideally separated, helps to dry them out slightly. This reduces their water content, which improves meringue stability and results in stronger, less fragile shells.
Red Gel Food Coloring: Gel coloring is preferred over liquid as it adds vibrant color without introducing too much moisture to the delicate meringue. A little goes a long way to achieve that signature red velvet hue.
Crafting the Velvety Cream Cheese Filling
Softened Unsalted Butter & Cream Cheese: Ensuring both are at true room temperature is vital for a smooth, lump-free, and airy filling. Cold ingredients will lead to a curdled or chunky texture.
Sifted Powdered Sugar: Sifting prevents lumps in the frosting, ensuring a silky, smooth consistency that pipes beautifully and melts in your mouth.
The Nutty Finish: Walnuts for Texture & Flavor
Finely Crushed Walnuts: These add a wonderful textural contrast and a rich, earthy flavor that complements the sweet and tangy notes of the red velvet and cream cheese. Ensure they are finely crushed for seamless integration into the macaron.
Step-by-Step Macaron Magic: Your Path to Full Shells
Preparation & Precision: Getting Started Right
Prepare the Dry Ingredients: In a medium bowl, whisk together the powdered sugar and superfine almond flour. This initial whisking helps to combine them thoroughly before sifting.
Sift the mixture twice using a fine-mesh sieve to eliminate any remaining lumps or larger almond pieces. This step is non-negotiable for achieving perfectly smooth, unblemished macaron shells. Set this sifted mixture aside.
Building the Meringue: The Foundation of Fluffy Macarons
Make the Meringue: Begin with a meticulously clean, dry bowl – metal or glass is ideal as plastic can retain grease. Beat the aged, room temperature egg whites on medium speed until they become visibly foamy and cloudy.
If using, add the cream of tartar at this foamy stage. It acts as a stabilizer, helping the egg whites whip faster and maintain their structure against overbeating, leading to a more resilient meringue.
Gradually add the granulated sugar, a tablespoon at a time, while continuing to beat on high speed. This slow addition allows the sugar to fully dissolve into the egg whites, creating a smooth and glossy meringue.
Continue beating until stiff, glossy peaks form. When you lift the whisk, the meringue should hold its shape firmly without drooping. The surface should be shiny, not dull. Incorporate the red gel food coloring and beat briefly, just until the color is uniformly distributed, avoiding overmixing at this stage.
The Macaronage Mastery: Your Key to Preventing Hollows
The Macaronage (Crucial Step for Full Shells!): This is the most critical stage for preventing hollow shells and achieving the perfect texture. Add about one-third of your sifted almond flour mixture to the prepared meringue.
Fold gently with a rubber spatula using a cutting and folding motion until just combined. Overmixing at this stage can deflate the meringue too much. Add the second third and repeat the gentle folding process.
Finally, add the last third of the dry ingredients and continue folding using a specific “J” motion: scrape down the side of the bowl, then bring the spatula through the center of the mixture, lifting and folding it over itself. The goal is to deflate the meringue just enough so the batter flows like lava off your spatula in a continuous, unbroken ribbon.
Test the consistency by lifting your spatula and letting the batter fall back into the bowl; it should be able to form a figure “8” without breaking. Alternatively, draw a line through the batter with your spatula; it should slowly disappear back into itself within about 15-20 seconds. This perfect “lava” or “ribbon” consistency is paramount for developing full, not hollow, shells with beautiful feet.
Piping & Drying: Creating the Perfect Canvas
Pipe the Shells: Transfer the perfectly mixed macaron batter into a piping bag fitted with a round tip. Prepare your baking sheets by lining them with parchment paper or silicone mats (preferably with macaron templates).
Hold the piping bag vertically, about half an inch above the mat, and pipe 1.5-inch circles, applying even pressure. Stop piping and gently swirl the tip to create a neat circle. Leave ample space between each macaron to allow for spreading and the formation of “feet.”
Tap and Dry (Another Key for Full Shells!): This step is crucial for releasing trapped air bubbles and allowing a skin to form on the macaron shells, which helps prevent cracks and encourages the development of the characteristic “feet.”
Firmly tap each baking sheet against your counter 5-10 times. This helps any internal air bubbles rise to the surface. Immediately after tapping, use a toothpick to pop any visible air bubbles on the surface of the piped shells for a smooth finish.
Let the piped macarons sit at room temperature for 30-60 minutes, or even longer depending on humidity, until a skin forms. You should be able to gently touch a shell without any batter sticking to your finger. This drying process is absolutely vital for proper rise and to achieve those desired full shells.
Baking for ‘Feet’: The Hallmark of a Great Macaron
Bake the Shells: Preheat your oven to 300°F (150°C). Baking one sheet at a time is often recommended to ensure even heat distribution and consistent results, especially if your oven has hot spots.
Bake each sheet for 12-15 minutes. The shells are done when the “feet” are well-formed and clearly visible, and the shells do not wiggle or shift on the baking sheet when gently touched. They should feel stable and firm. Let the shells cool completely on the baking sheet before attempting to remove them; trying to move them too soon can cause them to break.
Assembling Your Red Velvet Walnut Macaron Delights
Make the Filling: While your macaron shells are cooling, prepare the cream cheese filling. In a medium bowl, beat the softened unsalted butter and softened cream cheese together until the mixture is completely smooth, light, and creamy.
Gradually add the sifted powdered sugar, beating on low speed initially to prevent a sugar cloud, then increasing to medium-high until the frosting is light, fluffy, and well combined. Finally, stir in the vanilla extract until just incorporated, enhancing the overall flavor.
Assemble the Macarons: Once the macaron shells are completely cool, gently lift them off the parchment paper or silicone mat. Carefully pair up similarly sized shells to create uniform macarons.
Pipe a generous dollop of cream cheese filling onto the flat side of one shell. Sprinkle a good amount of the finely crushed walnuts over the cream cheese filling, ensuring every bite gets that delightful crunch.
Place the second matching shell on top and gently press down to create a perfect sandwich, being careful not to crack the delicate shells. For an extra touch of elegance and flavor, top each assembled Red Velvet Walnut Macaron with a whole walnut half.
For the absolute best flavor and texture, refrigerate the finished macarons for at least 24 hours before serving. This “maturing” period allows the flavors to meld beautifully and the shells to soften slightly, achieving that perfect chewy consistency. Your patience will be richly rewarded!
Mastering Macaron Artistry: Expert Tips for Flawless Results
Beyond the basic steps, these tips will elevate your macaron game and help you avoid common pitfalls, leading to truly flawless results every time you bake Red Velvet Walnut Macarons.
For a perfect pairing, try our Chocolate Chunk Walnut Cookies: Foolproof Food Processor Method.
Temperature and Humidity: Macaron’s Best Friends
Macarons are sensitive to environmental conditions. Bake on a day with low humidity if possible, as high moisture in the air can prevent the shells from drying properly, leading to cracking or sticky feet. Ensure your kitchen is not excessively warm, as this can also affect meringue stability.
Aging Egg Whites: Why It’s Worth the Wait
Aging egg whites, as suggested, helps reduce their water content, creating a more stable meringue that is less prone to cracking during baking. Separate your egg whites a day or two in advance and let them sit uncovered in a bowl in the fridge, or at room temperature for several hours if you’re in a hurry.
Sifting Success: A Crucial Step Often Overlooked
Sifting your powdered sugar and almond flour twice is essential for truly smooth macaron shells. Don’t skip this. Any lumps will show up as imperfections on your delicate shells, detracting from their perfect appearance.
Troubleshooting Meringue: What to Look For
Your meringue is the backbone of the macaron. It should be stiff, glossy, and hold distinct peaks that don’t flop over. If it’s not stiff enough, continue beating. If it looks curdled or watery, your bowl might not have been clean enough, or you might have overbeaten it past the stiff peak stage.
Perfecting the “Figure 8” Consistency
The “macaronage” is arguably the most challenging part. The batter needs to flow off your spatula like a thick ribbon, forming a continuous “figure 8” without breaking. If it’s too runny, you’ve overmixed. If it’s too stiff, you haven’t mixed enough. This comes with practice, so pay close attention to the visual cues.
Understanding Your Oven: The Unsung Hero
Oven calibration is crucial for macarons. Hot spots can cause uneven baking, leading to cracked or lopsided shells. Consider purchasing an oven thermometer to ensure your oven is truly at the temperature you set. Rotating your baking sheet halfway through baking can also promote more even results.
Troubleshooting Common Macaron Mishaps
Macarons can be finicky, but most issues have straightforward solutions. Don’t be discouraged by initial failures; each batch teaches you something new.
Hollow Macaron Shells: The Ultimate Challenge Solved
Solution: The primary culprit is often under-macaronage (not mixing the batter enough) or improper tapping to release air. Ensure your batter reaches the “lava” consistency, and firmly tap your baking sheets against the counter several times after piping. Popping visible air bubbles with a toothpick is also crucial. Aging egg whites contributes significantly to denser, fuller shells.
Cracked Shells: What Went Wrong?
Solution: Cracked shells typically indicate trapped air or insufficient drying time. Tap your baking sheets vigorously after piping to release air bubbles. Ensure the piped macarons sit at room temperature until a distinct, non-sticky skin forms before baking. Also, check your oven temperature; too high heat can cause rapid expansion and cracking.
No “Feet”: Diagnosing the Issue
Solution: The iconic “feet” appear when a skin forms on the shell, forcing the batter to rise outwards from the base. Lack of feet usually points to insufficient drying time or an oven that’s not hot enough. Ensure the shells are dry to the touch before baking, and double-check your oven temperature with a thermometer. Over-macaronage can also lead to a batter that’s too thin to form proper feet.
Flat or Spreading Macarons: Preventing a Melted Mess
Solution: This is a classic sign of over-macaronage. The batter has been mixed too much, leading to excessive deflation of the meringue. It will be too thin and runny. Ensure you stop folding the batter as soon as it reaches the “lava” or “ribbon” consistency. There’s no recovery once the batter is overmixed; you’ll need to start fresh.
Sticky Macarons: Why They Won’t Release
Solution: Sticky macarons after baking indicate they are underbaked. They might look done on the outside, but the interior is still soft. Extend the baking time by a minute or two, checking for firmness. Ensure they cool completely on the baking sheet before attempting to remove them. Warm macarons are much more fragile and prone to sticking.
Serving, Storing, and Enjoying Your Red Velvet Walnut Macarons
Proper handling ensures your beautiful Red Velvet Walnut Macarons maintain their exquisite taste and texture for as long as possible.
Optimal Enjoyment: When to Serve
While irresistible right away, Red Velvet Walnut Macarons are best enjoyed after they’ve “matured” in the refrigerator for at least 24 hours. This allows the moisture from the filling to slightly soften the shell, creating that signature chewy, melt-in-your-mouth texture.
Bring them to room temperature for about 15-20 minutes before serving to appreciate their full flavor and creamy filling.
Storing Your Macaron Masterpieces
Store assembled Red Velvet Walnut Macarons in an airtight container in the refrigerator for up to 5-7 days. The airtight seal prevents them from drying out or absorbing unwanted odors.
Make-Ahead Marvels: Preparing in Advance
Macarons are fantastic for making ahead! You can bake the shells and store them unfilled in an airtight container at room temperature for up to 2-3 days, or freeze them for up to a month. The cream cheese filling can also be made a day or two in advance and stored in the refrigerator.
Assemble them the day before you plan to serve them to allow for the crucial maturation period. This makes entertaining a breeze!
Frequently Asked Questions About Red Velvet Walnut Macarons
Can I use fresh egg whites instead of aged?
While aged egg whites are highly recommended for optimal results, you can use fresh egg whites. However, for best stability, consider gently warming them (for example, in a bowl over a pot of simmering water) for a few minutes before whipping, which can help replicate some of the benefits of aging.
Is the cream of tartar really optional?
Cream of tartar is indeed optional, but it acts as an acid that helps stabilize the egg whites, making the meringue stronger and more resilient to overbeating. If you’re new to macarons or in a humid environment, using it provides an extra layer of insurance for your meringue.
How do I know if my macaronage is correct?
The batter should flow like a thick, slow-moving lava or ribbon off your spatula, allowing you to draw a continuous “figure 8” without it breaking. If you draw a line through the batter in the bowl, it should slowly disappear back into itself within 15-20 seconds. This is the “lava lamp” or “ribbon” stage. Too thin, and it’s overmixed; too thick, and it’s undermixed.
What if I don’t have a piping bag?
While a piping bag offers the most control, you can improvise! A large, sturdy zip-top bag with one corner snipped off (creating a small opening) can work in a pinch. However, the consistent pressure and precise round opening of a piping tip will yield the best circular shapes.
How long do these Red Velvet Walnut Macarons last?
When stored in an airtight container in the refrigerator, your assembled Red Velvet Walnut Macarons will maintain their best quality for 5-7 days. The shells will gradually soften over time, enhancing their delightful chewiness.
Can I freeze Red Velvet Walnut Macarons?
Yes, macarons freeze beautifully! Place assembled macarons in a single layer in an airtight container, separating layers with parchment paper. Freeze for up to 1 month. Thaw them in the refrigerator overnight, then bring them to room temperature for about 15-20 minutes before serving for optimal enjoyment. If you’re looking for another delightful frozen treat, you might also enjoy these decadent pumpkin pie truffles.
Ready to Impress? Share Your Red Velvet Walnut Macaron Masterpiece!
You’ve navigated the nuanced world of macarons and emerged victorious with these stunning Red Velvet Walnut Macarons. Each bite is a testament to your patience and newfound expertise, delivering a perfect balance of crisp shell, chewy interior, and rich, tangy filling.
Don’t stop here! This mastery opens the door to countless other exquisite baking adventures. If you’re craving more impressive dessert creations, explore other delightful options like these fantastic chocolate crumb cheesecake bars, which are always a hit.
Sweet Pairings for Macaron Day
If these red velvet walnut macarons have you in the mood for more baked treats with a similar rich color or cozy spice, try one of these rolls.
- For that same warm, spiced sweetness in a soft, pillowy format, these Pumpkin Cinnamon Rolls with Guaranteed Fluffy Texture bring autumn flavor to the table.
- Stick with the red velvet theme and a tangzhong method for extra tenderness with these Red Velvet Cinnamon Rolls with Tangzhong Fluff, a perfect match for the macarons.
We’d love to see your creations! Share your beautiful Red Velvet Walnut Macarons on social media and tag us. Happy baking!
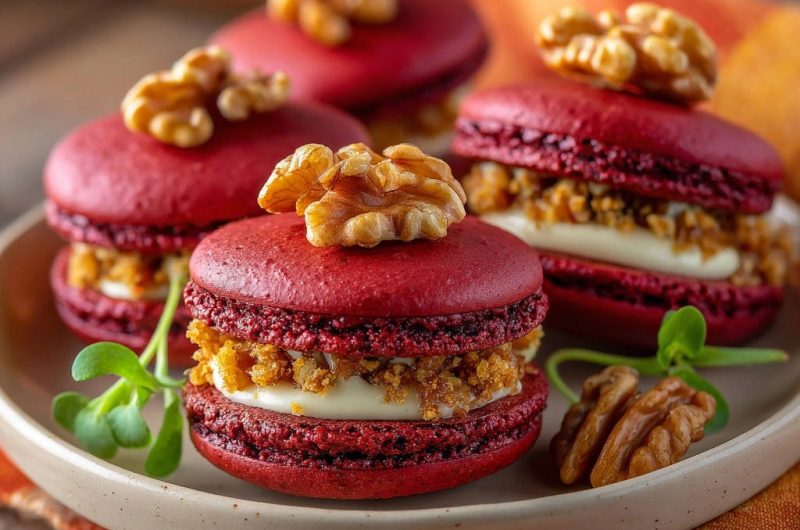
Red Velvet Macarons
Course: DessertCuisine: FrenchDifficulty: medium15
macarons1
hour30
minutes90
kcal90
minutesFinally master bakery-worthy macarons with this detailed recipe for Red Velvet Walnut Macarons. Learn the crucial steps to achieve perfectly full, chewy-on-the-inside, crisp-on-the-outside shells, eliminating common baking frustrations. Enjoy these beautiful, delicious treats filled with creamy cheese and walnuts.
Ingredients
For the Macaron Shells:
1 cup powdered sugar
3/4 cup almond flour, superfine
2 large egg whites, aged (room temperature)
1/4 teaspoon cream of tartar (optional, helps stabilize meringue)
1/4 cup granulated sugar
1 teaspoon red gel food coloring
For the Cream Cheese Filling:
1/2 cup unsalted butter, softened
4 ounces cream cheese, softened
2 cups powdered sugar, sifted
1 teaspoon vanilla extract
For the Walnut Crumble:
1/2 cup walnuts, finely crushed (plus extra for topping)
Directions
- Prepare the Dry Ingredients: In a medium bowl, whisk together the powdered sugar and almond flour. Sift the mixture twice to ensure there are no lumps. Set aside. This step is important for smooth shells.
- Make the Meringue: In a clean, dry bowl (metal or glass is best), beat the aged egg whites on medium speed until foamy. Add the cream of tartar (if using). Gradually add the granulated sugar, a spoonful at a time, while continuing to beat on high speed. Beat until stiff, glossy peaks form. The meringue should be thick enough that when you lift the whisk, the peak holds its shape. Add the red gel food coloring and beat briefly until fully incorporated.
- The Macaronage (Crucial Step for Full Shells!): This is where you prevent hollow shells! Add about one-third of the almond flour mixture to the meringue. Fold gently with a rubber spatula until just combined. Add another third and repeat. Add the final third and continue folding using a “J” motion: scrape down the side of the bowl, then bring the spatula through the center of the mixture, lifting and folding it over itself. The goal is to deflate the meringue just enough so the batter flows like lava off your spatula in a continuous ribbon. It should be able to form a figure “8” without breaking. Do not overmix! Test by drawing a line through the batter; it should slowly disappear in about 15-20 seconds. This perfect consistency ensures your shells are full, not hollow.
- Pipe the Shells: Transfer the macaron batter to a piping bag fitted with a round tip. Line baking sheets with parchment paper or silicone mats. Pipe 1.5-inch circles, leaving space between each.
- Tap and Dry (Another Key for Full Shells!): This step helps release trapped air and forms a skin, preventing cracks and encouraging “feet.” Firmly tap each baking sheet against the counter 5-10 times. This helps any air bubbles rise to the surface. Use a toothpick to pop any visible bubbles. Let the piped macarons sit at room temperature for 30-60 minutes, or until a skin forms. You should be able to gently touch a shell without any batter sticking to your finger. This drying process is vital for proper rise and full shells.
- Bake the Shells: Preheat your oven to 300°F (150°C). Bake one sheet at a time for 12-15 minutes. The shells are done when the “feet” are well-formed and they don’t wiggle on the baking sheet when gently touched. Let cool completely on the baking sheet before removing.
- Make the Filling: While shells cool, beat the softened butter and cream cheese together until smooth and creamy. Gradually add the sifted powdered sugar, beating until light and fluffy. Stir in the vanilla extract.
- Assemble the Macarons: Once shells are completely cool, gently lift them off the parchment. Pair up similarly sized shells. Pipe a dollop of cream cheese filling onto the flat side of one shell. Sprinkle a generous amount of the finely crushed walnuts over the filling. Place the second shell on top and gently press to create a sandwich.
- Garnish: Top each assembled macaron with a whole walnut half. For best flavor and texture, refrigerate the finished macarons for at least 24 hours before serving, allowing the flavors to meld and the shells to soften slightly. Enjoy your perfectly full and delicious Red Velvet Walnut Macarons!
Notes
- For optimal flavor and texture, refrigerate assembled macarons for at least 24 hours before serving.