Skillet Chocolate Chip Cookie Sundae: Irresistibly Gooey!
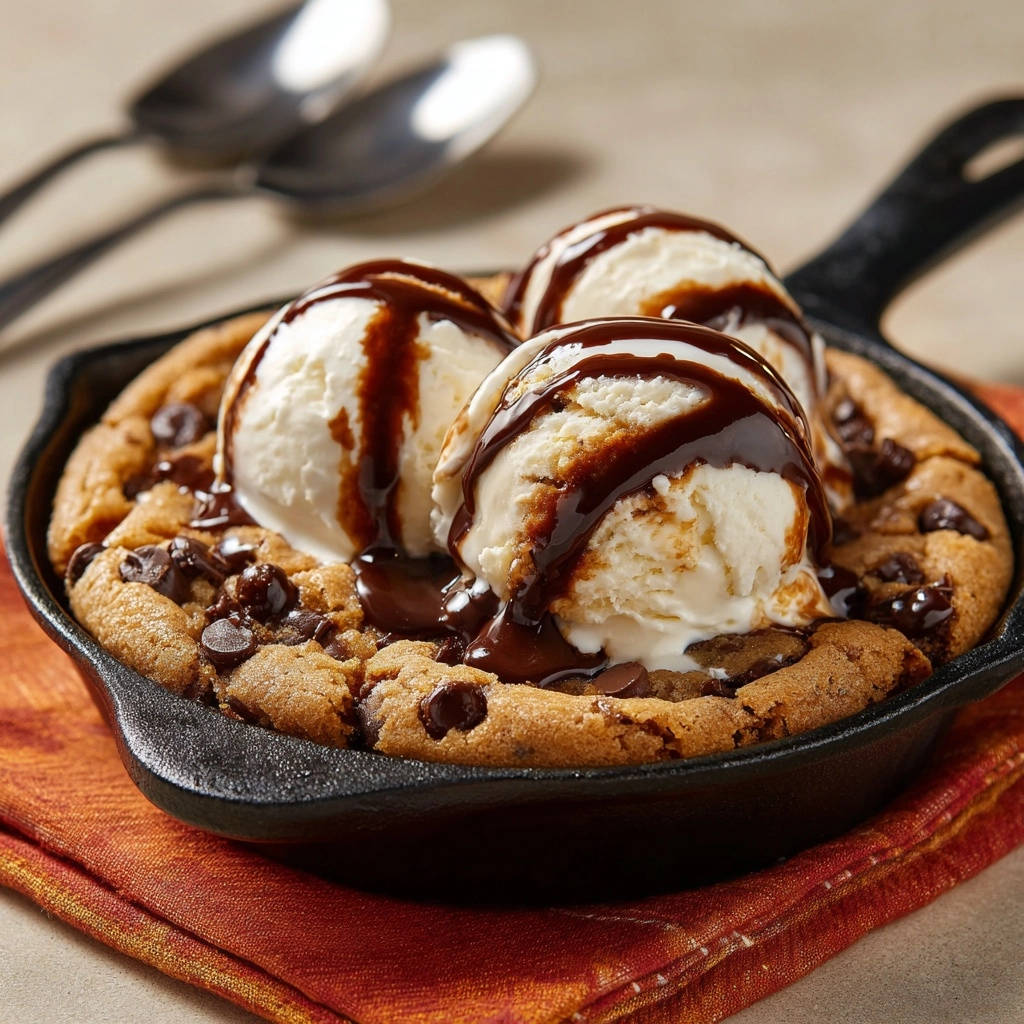
There’s nothing quite like the indulgence of a warm, gooey cookie, but getting that perfect, irresistible center without burning the edges can be a real kitchen challenge. After countless batches, I’ve finally mastered the art of the perfect Skillet Chocolate Chip Cookie Sundae, achieving that soft, chewy texture every single time. This recipe delivers pure dessert magic, guaranteed to become a family favorite.
Beyond Basic: The Secret to Our Irresistibly Gooey Skillet Cookie
What Makes This Skillet Chocolate Chip Cookie Sundae So Special?
This recipe consistently produces a wonderfully soft and chewy cookie, with edges that are perfectly golden and a center that remains incredibly gooey. The secret lies in precise baking times and understanding how carry-over heat transforms the texture.
It’s designed to give you that dream-like, slightly underbaked middle that sets just right as it cools in the hot skillet, ensuring every bite is a delightful contrast of textures.
Quick & Crowd-Pleasing: Your Go-To Dessert Solution
Beyond its incredible taste, this Skillet Chocolate Chip Cookie Sundae is remarkably easy to prepare, making it an ideal last-minute dessert or an impressive treat for guests. Its universal appeal makes it a guaranteed crowd-pleaser for any occasion.
From cozy family nights to celebratory gatherings, this dessert is sure to bring smiles and satisfied sighs with minimal effort.
If you love the contrast of rich chocolate in this sundae, try these sea salt dark chocolate chunk cookies.
Essential Equipment for Skillet Cookie Success
The Star of the Show: Choosing Your Cast Iron Skillet
A 6-inch cast iron skillet is truly ideal for this recipe due to its superior heat retention and even heat distribution. This property is crucial for achieving a perfectly baked cookie with a gooey center and uniformly golden edges.
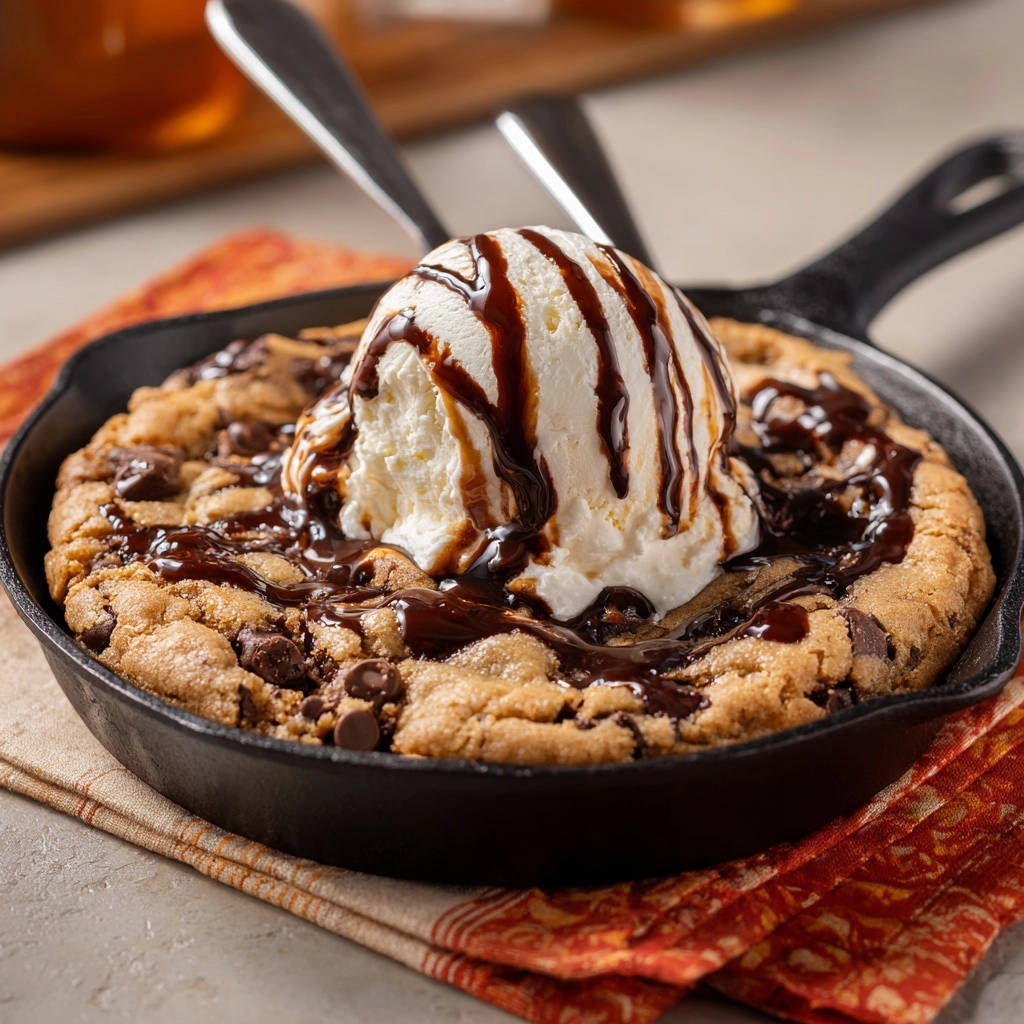
If you don’t have a cast iron skillet, any similar oven-safe dish, like a ceramic baking dish or a small gratin dish, can be used. Just ensure it can withstand high oven temperatures.
Baking Essentials: Beyond the Skillet
Beyond your skillet, you’ll need standard kitchen tools like two medium mixing bowls for wet and dry ingredients. A sturdy whisk is essential for combining dry ingredients and an electric mixer (handheld or stand) greatly simplifies creaming the butter and sugars.
Don’t forget accurate measuring cups and spoons to ensure precise ingredient ratios, which are vital for consistent baking results.
Gather Your Ingredients: The Building Blocks of Bliss
Butter & Sugars: The Foundation of Flavor
Softened unsalted butter provides richness and tenderness, while granulated sugar adds crispness to the edges. Light brown sugar is key for moisture and chewiness, contributing to the cookie’s signature soft texture.
Together, they create a balanced sweetness and the perfect foundational texture for our gooey skillet cookie.
The Wet Binders: Egg & Vanilla
A large egg acts as a binder, bringing all the ingredients together while adding richness and structure. It contributes significantly to the cookie’s final texture and color.
Pure vanilla extract elevates the overall flavor profile, complementing the chocolate and adding a warm, aromatic depth that makes the cookie truly irresistible.
Dry Ingredients for Structure: Flour, Baking Soda, Salt
All-purpose flour provides the necessary structure and body for the cookie dough. It holds everything together, preventing excessive spread.
Baking soda is a leavening agent that helps the cookie rise slightly and contributes to its soft, tender crumb. Salt is crucial for balancing the sweetness and enhancing all the other flavors, making the chocolate pop.
The Melty Heart: Quality Chocolate Chips
One cup of chocolate chips ensures a generous distribution of melty goodness throughout the cookie. Semi-sweet chocolate chips are a classic choice, offering a balanced sweetness.
For a different twist, consider milk chocolate for a sweeter profile or dark chocolate for a richer, more intense flavor in your Skillet Chocolate Chip Cookie Sundae.
Perfect Pairings: Ice Cream & Syrup
Vanilla ice cream is the quintessential accompaniment, its cool creaminess providing a delightful contrast to the warm, gooey cookie. It slowly melts into the cookie, creating spoonfuls of bliss.
If you enjoy the contrast of cold ice cream with warm chocolate, you’ll love the crunchy texture in these loaded almond chocolate chunk cookies.
A drizzle of chocolate syrup adds an extra layer of decadence, intensifying the chocolate flavor and completing the classic sundae experience.
Crafting Your Skillet Chocolate Chip Cookie Sundae: A Step-by-Step Guide
Getting Started: Preheat Your Oven & Prep Your Skillet
Step 1: Preheat your oven to 350°F (175°C) and lightly grease a 6-inch cast iron skillet or similar oven-safe dish.
Proper preheating ensures an even bake from the start, contributing to that perfect texture. Greasing prevents sticking and ensures easy serving.
Creaming the Goodness: Butter & Sugars
Step 2: In a medium bowl, cream together the softened butter, granulated sugar, and brown sugar until light and fluffy, about 2-3 minutes.
This crucial step incorporates air into the mixture, which is essential for a tender, non-dense cookie. Creaming until light and fluffy ensures the sugars dissolve somewhat and creates a smooth base.
Enriching the Mix: Egg & Vanilla
Step 3: Beat in the large egg and vanilla extract until well combined.
Ensure the egg is fully incorporated before moving on; this helps bind the ingredients and contributes to the cookie’s overall structure and flavor. The vanilla extract disperses evenly, enhancing the aromatic quality.
The Dry Duo: Whisking & Gently Combining
Step 4: In a separate small bowl, whisk together the flour, baking soda, and salt.
Whisking these dry ingredients separately ensures they are evenly distributed before being added to the wet mixture, preventing pockets of unmixed leavening or salt.
Step 5: Gradually add the dry ingredients to the wet ingredients, mixing until just combined.
Be careful not to overmix, as this can lead to a tougher cookie texture by developing too much gluten. Stop mixing as soon as no dry streaks of flour remain visible in the dough.
The Chocolatey Finish: Folding in Chips
Step 6: Stir in the chocolate chips until evenly distributed throughout the dough.
A gentle fold prevents overmixing and ensures every single bite of your Skillet Chocolate Chip Cookie Sundae is packed with delightful melty chocolate.
Into the Skillet: Spreading the Dough
Step 7: Press the cookie dough evenly into the prepared skillet.
An even layer promotes uniform baking, which is vital for achieving the signature gooey center without certain parts being raw or overcooked.
The Golden Moment: Baking to Gooey Perfection
Step 8: Bake for 18-22 minutes. The edges should be golden brown and set, but the very center of the cookie should still look slightly soft and even a little underbaked when you pull it out of the oven.
This is the crucial step for that guaranteed gooey center! It will continue to cook and set as it cools in the hot skillet, ensuring a wonderfully soft, gooey middle without being raw. Trust the process and that slightly underbaked look!
Cooling & Topping: The Grand Finale
Step 9: Remove from oven and let the skillet cookie cool for 5-10 minutes.
Allowing it to cool slightly helps the cookie set just enough to hold its shape while retaining maximum warmth for serving. This brief cooling period is essential.
Step 10: Top generously with scoops of vanilla ice cream and a drizzle of chocolate syrup. Serve warm directly from the skillet and enjoy that irresistible gooey goodness!
The contrast between the warm cookie and cold ice cream, paired with sweet chocolate, creates an ultimate dessert experience.
What to serve with your cookie sundae
This gooey skillet cookie sundae is sweet on its own, but a stack of warm pancakes on the side turns it into a brunch spread worth waking up for.
- Start with Fluffy Blueberry Pancakes — the tart berries cut through the cookie’s sweetness, and both share that soft, tender texture.
- Go for Fluffy Oatmeal Pancakes for a heartier base that soaks up extra ice cream and chocolate, making each bite different.
The Secret to That Unforgettable Gooey Center (And Never Burnt Edges!)
Why Undercooking is Key for Perfect Texture
Pulling the cookie out when the center still looks slightly underbaked is fundamental for achieving that coveted gooey texture. If baked until completely set in the oven, it will become dry and tough as it cools.
This intentional “undercooking” prevents overbaking, locking in moisture and ensuring a melt-in-your-mouth experience.
The Magic of Carry-Over Baking in Cast Iron
Cast iron skillets retain heat exceptionally well. After removal from the oven, this residual heat continues to gently cook the cookie, a process known as “carry-over baking.”
This ensures the center finishes cooking to a perfect gooey consistency without getting crispy or burnt, creating an ideal Skillet Chocolate Chip Cookie Sundae.
Visual Cues for Spotting Skillet Cookie Perfection
Look for edges that are golden brown and appear set and firm. The key indicator is the very center: it should still look noticeably soft, perhaps even a bit shiny or wet, but not raw or liquid.
If you gently jiggle the skillet, the center might have a slight wobble. This is precisely when it’s ready to come out of the oven.
Elevate Your Experience: Serving & Topping Ideas
Classic Pairings: Beyond Vanilla Bean
While vanilla ice cream is a timeless choice, consider elevating your Skillet Chocolate Chip Cookie Sundae with other flavors. Salted caramel ice cream offers a sophisticated sweet and salty balance.
Coffee or espresso chip ice cream provides a delightful mocha twist, while mint chip ice cream adds a refreshing zing that pairs beautifully with warm chocolate.
Creative Toppings: A Sundae Sensation
Transform your skillet cookie into a true sundae sensation with a variety of toppings. A dollop of fresh whipped cream and a sprinkle of chopped nuts (like pecans or walnuts) add texture.
Hot fudge sauce, caramel drizzle, or even fresh berries (strawberries, raspberries) can introduce new flavor dimensions. A tiny dash of flaky sea salt can also beautifully enhance the chocolate flavor.
Presentation Pointers: Serving Skillet-Style
The beauty of a Skillet Chocolate Chip Cookie Sundae is serving it directly from the hot skillet. Place the skillet on a heat-safe trivet in the center of the table.
Present individual dessert plates, allowing everyone to scoop out their desired portion of cookie, ice cream, and toppings. This communal style adds to the enjoyment and visual appeal.
Pro Tips & Troubleshooting for Cookie Sundae Mastery
Achieving the Perfect Texture: Don’t Overmix!
The most common mistake leading to tough cookies is overmixing the dough once the flour is added. Overmixing develops the gluten, resulting in a dense, chewy, and less tender texture.
Mix only until the dry ingredients are just incorporated and no streaks of flour remain. A few lumps are perfectly fine!
Temperature Matters: Softened Butter is Key
Ensure your butter is properly softened, not melted or hard from the fridge. Softened butter creams beautifully with sugar, incorporating air for a light texture.
Melted butter changes the dough’s consistency, potentially leading to a greasy, flat cookie, while cold butter won’t cream properly, resulting in a dense cookie.
Customizing Your Chips: Beyond Semi-Sweet
Don’t be afraid to experiment with your chocolate chips! A mix of semi-sweet, milk, and dark chocolate chips creates a complex flavor profile.
Chopping a high-quality chocolate bar into chunks can also introduce a luxurious, uneven melt that’s incredibly satisfying.
Common Cookie Challenges Solved
Problem: My Cookie is Too Dry/Tough
This usually indicates overbaking or overmixing the dough. Ensure you pull the cookie from the oven when the center still looks slightly underbaked, and mix the flour in just until combined.
Problem: My Cookie Spread Too Much
This can happen if your butter was too warm (partially melted) or if your oven temperature is too low. Ensure your butter is softened, not melted, and check your oven with a thermometer for accuracy.
Problem: Edges Burnt, Center Raw
This often points to an oven that’s too hot. Reduce the temperature slightly (perhaps by 25°F or 15°C) and ensure the skillet is placed in the center of the oven. The carry-over baking in the cast iron should then handle the center.
Make-Ahead, Storage, and Reheating Solutions
Preparing Dough in Advance
You can easily prepare the cookie dough ahead of time. Once mixed, press it into your prepared skillet, cover tightly with plastic wrap, and refrigerate for up to 2-3 days.
When ready to bake, let it sit at room temperature for about 15-20 minutes while your oven preheats, then bake as directed. You might need an extra minute or two of baking time if it’s straight from the fridge.
Storing Leftover Skillet Cookie
If you have any leftover Skillet Chocolate Chip Cookie Sundae (a rare occurrence!), cover the skillet tightly with plastic wrap or transfer the cookie to an airtight container. Store at room temperature for up to 2 days.
For longer storage, refrigerate for up to 5 days, though the texture will firm up. Separate ice cream and toppings before storing.
Reviving That Warm, Gooey Goodness
To bring back that fresh-baked warmth and gooey texture, reheat individual slices or the entire cookie in the skillet. For slices, microwave for 15-30 seconds, or bake in a preheated 300°F (150°C) oven for 5-10 minutes.
Reheating in the oven ensures the edges crisp up slightly while the center softens beautifully, making it almost as good as fresh.
Your Skillet Chocolate Chip Cookie Sundae FAQs Answered
Can I use a larger or smaller skillet?
Yes, but you’ll need to adjust quantities and baking time. For a larger skillet (e.g., 8-inch), increase ingredients by about 50% and bake slightly longer. For a smaller skillet (e.g., 4-inch), reduce ingredients by 25-30% and check for doneness sooner.
Can I make this recipe gluten-free?
Absolutely! You can substitute the all-purpose flour with a 1:1 gluten-free baking flour blend. Ensure your blend contains xanthan gum, or add 1/4 teaspoon if it doesn’t. No other major adjustments should be needed.
What’s the best way to clean my cast iron skillet after baking?
After enjoying your Skillet Chocolate Chip Cookie Sundae, let the skillet cool completely. Scrape out any remaining bits, then wash with hot water and a stiff brush or non-abrasive scrubber. Avoid soap if possible, as it can strip the seasoning. Dry thoroughly immediately after washing to prevent rust, and apply a thin layer of cooking oil before storing.
Can I add nuts or other mix-ins to the dough?
Yes, you can! Feel free to add 1/2 cup of chopped nuts (walnuts, pecans), pretzels, toffee bits, or even mini marshmallows along with the chocolate chips. These additions can add wonderful texture and flavor dimensions to your gooey skillet cookie.
Ready to Indulge? Share Your Skillet Chocolate Chip Cookie Sundae Masterpiece!
Now that you have all the insider tips and tricks, you’re ready to create your own irresistible Skillet Chocolate Chip Cookie Sundae. This recipe is designed for maximum indulgence with minimal fuss, ensuring a perfectly gooey center every time.
Gather your ingredients, preheat your oven, and prepare for a truly unforgettable dessert experience. Don’t forget to snap a picture and share your delicious creation!
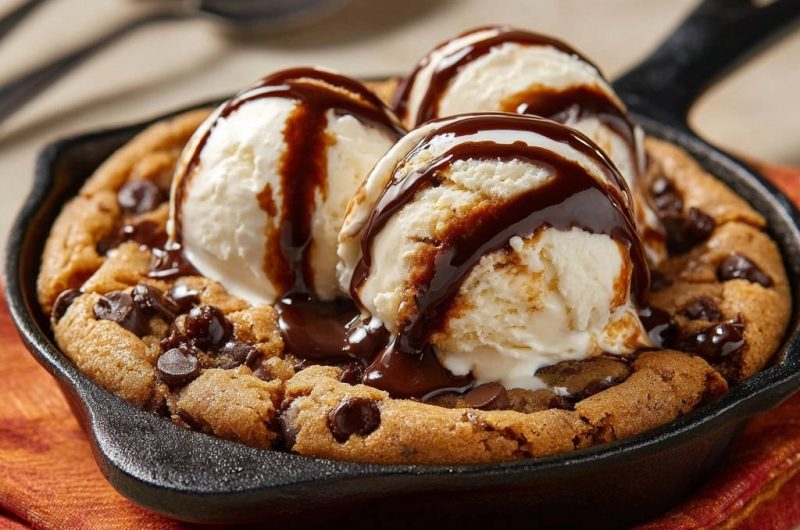
Skillet Chocolate Chip Cookie
Course: DessertCuisine: AmericanDifficulty: easy2
servings15
minutes20
minutes650
kcal45
minutesDiscover the secret to making an irresistibly gooey skillet chocolate chip cookie with perfectly soft and chewy centers. This dessert magic is baked right in a skillet, ensuring a warm, comforting treat. Top it with melting vanilla ice cream and chocolate syrup for the ultimate Skillet Chocolate Chip Cookie Sundae.
Ingredients
1/2 cup (1 stick) unsalted butter, softened
1/2 cup granulated sugar
1/4 cup packed light brown sugar
1 large egg
1 teaspoon vanilla extract
1 1/4 cups all-purpose flour
1/2 teaspoon baking soda
1/4 teaspoon salt
1 cup chocolate chips
Vanilla ice cream, for serving
Chocolate syrup, for drizzling
Directions
- Preheat your oven to 350°F (175°C). Lightly grease a 6-inch cast iron skillet or a similar oven-safe dish.
- In a medium bowl, cream together the softened butter, granulated sugar, and brown sugar until light and fluffy, about 2-3 minutes.
- Beat in the egg and vanilla extract until well combined.
- In a separate small bowl, whisk together the flour, baking soda, and salt.
- Gradually add the dry ingredients to the wet ingredients, mixing until just combined. Be careful not to overmix, as this can lead to a tougher cookie texture.
- Stir in the chocolate chips until evenly distributed throughout the dough.
- Press the cookie dough evenly into the prepared skillet.
- Bake for 18-22 minutes. This is the crucial step for that guaranteed gooey center! You want the edges to be golden brown and set, but the very center of the cookie should still look slightly soft and even a little underbaked when you pull it out of the oven. It will continue to cook and set as it cools in the hot skillet, ensuring a wonderfully soft, gooey middle without being raw.
- Remove from oven and let the skillet cookie cool for 5-10 minutes.
- Top generously with scoops of vanilla ice cream and a drizzle of chocolate syrup. Serve warm directly from the skillet and enjoy that irresistible gooey goodness!
Notes
- The key to a gooey center is to slightly underbake; it will set as it cools in the hot skillet. Serve warm directly from the skillet for the best experience!