Mastering Cheesy Broccoli and Rice Squares: The Structural Secret to Non-Mushy Casseroles
Most of us have a love-hate relationship with rice casseroles. While the flavor is usually a nostalgic win, the texture often leaves much to be desired. You know the drill: you scoop a serving onto your plate, and it immediately slumps into a sad, watery puddle of mush. It’s frustrating when a dish tastes great but feels like baby food.
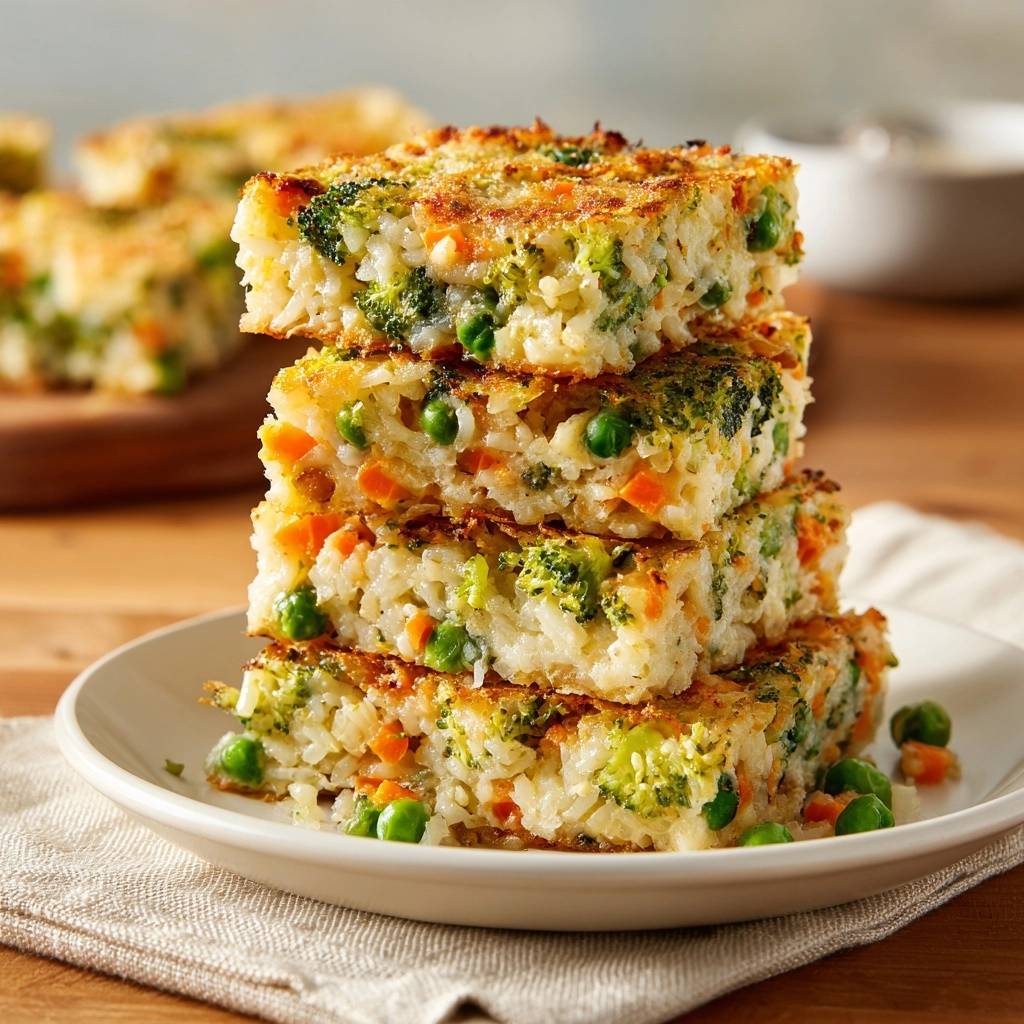
These Cheesy Broccoli and Rice Squares are the solution to that “mush factor.” Instead of a loose bake, we’re creating a structurally sound, portable square that you can actually pick up with your hands if you wanted to. We’ve traded the traditional “scoop” for a firm, savory slice that boasts crispy edges and a dense, satisfying center.
The secret to this “Anti-Soggy Bottom” philosophy lies in moisture management. By treating our vegetables and rice as dry components rather than wet ones, we ensure the binder can do its job. You’re looking for a texture that’s more like a savory blondie than a wet pilaf, and it all starts with how you prep your ingredients.
For anyone who loves a hearty rice casserole, this same structural trick works beautifully in a cheesy ground beef skillet.
The Science of Structural Integrity in Rice Bakes
To get a square that holds its shape, you have to understand the chemistry of the binder. In this recipe, the three eggs and heavy cream aren’t just for richness; they create a protein matrix. As the eggs cook, they coagulate, wrapping around each grain of rice and piece of broccoli to lock them in place.
However, that matrix only works if you use physical force. Compression is a mandatory step here. When you press the mixture into the pan with a heavy spatula, you’re removing air pockets that would otherwise cause the square to crumble. This creates a high-density bake that can support its own weight once sliced.
During the 35-minute bake time, evaporation plays a huge role. The heat draws out any remaining moisture, allowing the fats from the cheddar and the proteins from the egg to fuse. This transformation is what gives you that “skyscraper” depth and a firm, clean bite every single time.
Essential Components for Cheesy Broccoli and Rice Squares
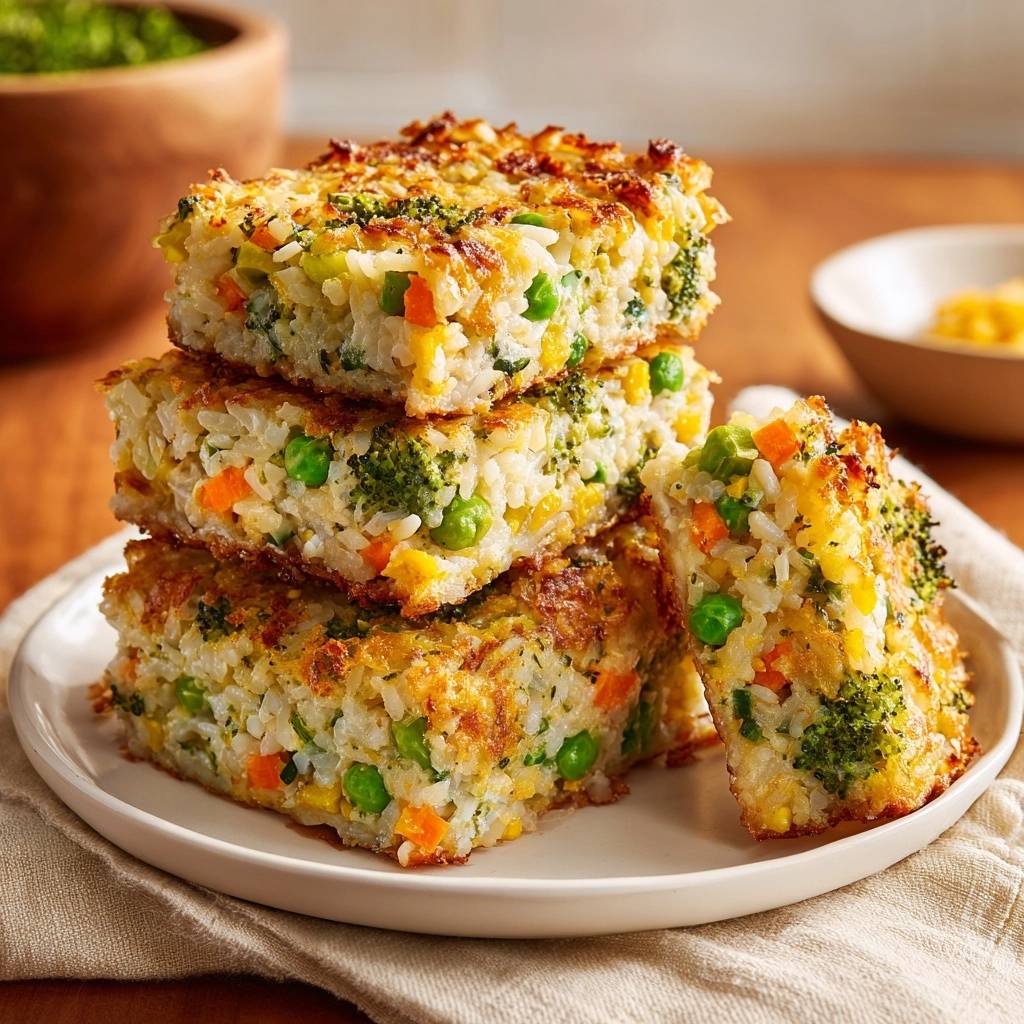
The backbone of this dish is long-grain white rice. It’s sturdier than short-grain varieties, which tend to get gummy when baked. You want those distinct grains to provide a bit of “tooth” against the creamy cheese and soft vegetables.
Sharp cheddar is non-negotiable for the flavor profile, but the Parmesan is the real hero for texture. Parmesan has a lower moisture content and a higher salt-to-fat ratio, which helps create that toasted, salty crust on top. It acts like a savory “seal” for the square.
For another take on the same creamy, cheese-based side dish, check out this roasted cauliflower gratin.
For the aromatics, I always stick to garlic and onion powder. While fresh onions are delicious, they release a significant amount of water as they sweat in the oven. Using powders allows us to inject deep, savory flavor without compromising the structural integrity of the rice matrix.
Why Day-Old Rice Outperforms Fresh Grains
If you use freshly cooked, steaming hot rice, your squares will likely turn into a gummy mass. This is because of a process called retrogradation. When rice is chilled, the starches recrystallize, making the grains firmer and less likely to burst or release excess starch during the second round of cooking in the oven.
Chilled rice also has a much drier surface. If you didn’t plan ahead and cook your rice yesterday, don’t panic. You can mimic this effect by spreading freshly cooked rice onto a large baking sheet and letting it air-dry for 30 minutes, or popping it in the fridge for a quick chill.
Moisture Control: Prepping the Broccoli and Vegetables
Water is the absolute enemy of a stackable square. When you steam your broccoli, it absorbs liquid like a sponge. If you toss it straight into the bowl, that water will leak out during baking, creating a soggy bottom that no amount of cheese can save.
The “Par-steam and Pat-dry” method is your best friend here. After steaming the broccoli for three minutes, chop it finely and then press it firmly between several layers of paper towels. You’ll be shocked at how much green liquid comes out. Do the same for your thawed peas and carrots to ensure they are bone-dry before mixing.
Step-by-Step: Engineering the Perfect Rice Square
Phase one starts with the pan. Use melted butter instead of a standard oil spray. Butter contains milk solids that brown beautifully, essentially frying the bottom layer of rice against the metal pan to create a golden, savory crust that acts as a foundation.
When you move to the folding phase, be gentle. You want to thoroughly coat every single grain of rice with the egg and cream mixture, but you don’t want to smash the grains. Use a folding motion with a silicone spatula until the mixture looks uniform and glossy.
The “Press” is where the magic happens. Once the mixture is in the pan, use a heavy spatula or the bottom of a flat measuring cup to pack it down. You want a completely flat, even surface. This eliminates the internal gaps that lead to “structural failure” when you try to lift a square out.
Finally, the topping is all about the Maillard reaction. Drizzling that last bit of melted butter over the Parmesan creates a toasted, lace-like topping. This provides a crunch that contrasts perfectly with the dense, cheesy interior of the square.
Thermal Timing: Baking for Color and Cohesion
We bake these at 375°F because it’s the “sweet spot” for browning. A lower temperature would eventually cook the eggs, but it wouldn’t give you those crispy, caramelized edges. A higher temperature would burn the cheese on top before the center has a chance to set firmly.
Keep an eye out for the visual cues. You’ll know it’s done when the perimeter of the rice is a deep golden brown and actually starts pulling away from the sides of the pan. The center should feel firm to the touch, not bouncy or soft, when you give it a light press.
The 15-Minute Rule: Why Resting is Mandatory
I know it’s tempting to dive in the second the timer goes off, but you must wait. As the pan sits, carry-over cooking finishes the job. More importantly, the melted cheese and egg proteins need time to re-solidify and “grip” the rice grains.
If you cut into the pan immediately, the squares will likely crumble and lose their sharp edges. After 15 minutes of resting, you’ll be able to make clean, surgical cuts with a sharp knife. The result is a beautiful, geometric square that looks as good as it tastes.
Flavor Variations and Dairy-Safe Swaps
If you want to kick things up, try the Spicy Square. Swap the cheddar for pepper jack and add a tablespoon of diced canned chilies. Just make sure to drain the chilies thoroughly so you don’t introduce unwanted moisture into the mix.
For a Protein Boost, you can fold in a cup of finely shredded rotisserie chicken. Since the chicken is already cooked and relatively dry, it won’t mess with the structural integrity. It turns these squares from a side dish into a full, hand-held meal.
If you need to avoid dairy, you can use a thick cashew-based cream in place of the heavy cream. For the cheese, nutritional yeast provides that savory “umami” hit, though you’ll lose some of the binding power that melted cheese provides, so add an extra egg to compensate.
Troubleshooting Common Rice Square Failures
If your squares are falling apart, the culprit is usually under-compression or wet vegetables. Next time, press the mixture down even harder and spend an extra minute squeezing the water out of your broccoli. It makes a world of difference.
A greasy bottom usually happens if you use a very low-quality “processed” cheese product that has a high oil separation rate. Stick to a block of sharp cheddar that you grate yourself. Pre-shredded cheese is coated in potato starch, which can sometimes interfere with the “melt” but actually helps with binding in this specific recipe.
If the rice feels crunchy or hard, it means the grains weren’t fully cooked before they went into the oven. This recipe doesn’t “cook” the rice; it just bakes the mixture together. Always ensure your rice is tender and fully hydrated before you start the assembly process.
Make-Ahead Strategies and Freezing Protocols
These are a meal prepper’s dream. You can bake a batch on Sunday and have lunch for the whole week. To reheat, I highly recommend using an air fryer or a toaster oven. This helps the edges regain their crispiness, whereas a microwave tends to make the whole square soft.
For freezing, let the squares cool completely first. Place them on a parchment-lined sheet pan in the freezer for an hour until they are hard. Then, you can toss them into a freezer bag. This “flash-freeze” method prevents them from sticking together, so you can grab just one at a time.
In a lunchbox, these stay structural for hours at room temperature. They don’t require a fork, making them a great alternative to sandwiches for kids or busy office days. They are surprisingly filling and won’t leave a mess behind.
Optimal Pairings for a Balanced Plate
Since these squares are quite rich and dense, they pair beautifully with something acidic. A bright arugula salad with a heavy squeeze of lemon juice and a splash of olive oil cuts right through the cheddar. The peppery greens balance the savory rice perfectly.
If you’re serving these as a side, they go great with grilled lemon-herb chicken or even a simple roasted salmon. The textures complement each other without competing. For a vegetarian feast, serve them alongside a hearty bean soup or a bowl of roasted radishes for a bit of crunch.
What’s Next?
Try these delicious pairings:
- Mastering Cajun Shrimp and Sausage Creole: The Secret to Tender Seafood
- Mastering Creamy Steak and Mushroom Stroganoff
Expert Tips for High-Volume Batch Cooking
If you’re feeding a crowd, you can easily double this recipe and use a 9×13 inch pan. However, you’ll need to increase the bake time by about 10 to 15 minutes. Because the surface area is larger, the center takes longer to reach the necessary temperature to set the eggs.
For the most consistent results, I recommend using a kitchen scale to weigh your cooked rice. Three cups of cooked rice usually weigh about 585 grams. Using a scale ensures that your rice-to-egg ratio is perfect every time, which is the key to that repeatable, perfect texture.
Frequently Asked Questions
Can I use brown rice instead of white?
Yes, you can use brown rice, but keep in mind that it has a much chewier texture and a nuttier flavor. Brown rice also tends to hold onto more moisture, so you may need to bake the squares for an extra 5 minutes to ensure they set properly. Make sure the brown rice is fully cooked and chilled before starting.
Can I use raw broccoli instead of steamed?
I don’t recommend using raw broccoli. Raw broccoli releases a lot of water as it cooks in the oven, which will lead to a watery, loose square. Par-steaming also ensures the broccoli is tender enough to bite through easily, matching the texture of the soft rice and melted cheese.
What is the best way to reheat to keep the bottom crispy?
The absolute best way to reheat these is in an air fryer at 350°F for about 4-5 minutes. This circulates hot air around the square, crisping up the bottom and the cheesy top. If you don’t have an air fryer, a toaster oven or a standard oven works well. Avoid the microwave if you want to maintain that “fried” bottom texture.
Can I substitute the heavy cream with almond milk?
You can, but the squares will be slightly less rich and a bit less sturdy. Heavy cream contains fats that help stabilize the egg binder. If you use almond milk, make sure it is unsweetened and plain. You might want to add an extra tablespoon of melted butter to the mix to make up for the lost fat content.
Why did my cheese separate and get oily?
This usually happens if the oven is too hot or if you use a “sharp” cheddar that has been aged for a very long time. Aged cheeses have less moisture and can break into oil more easily. If you notice this happening, try using a “medium” cheddar next time, or ensure you aren’t over-baking the squares once they’ve reached that golden-brown stage.
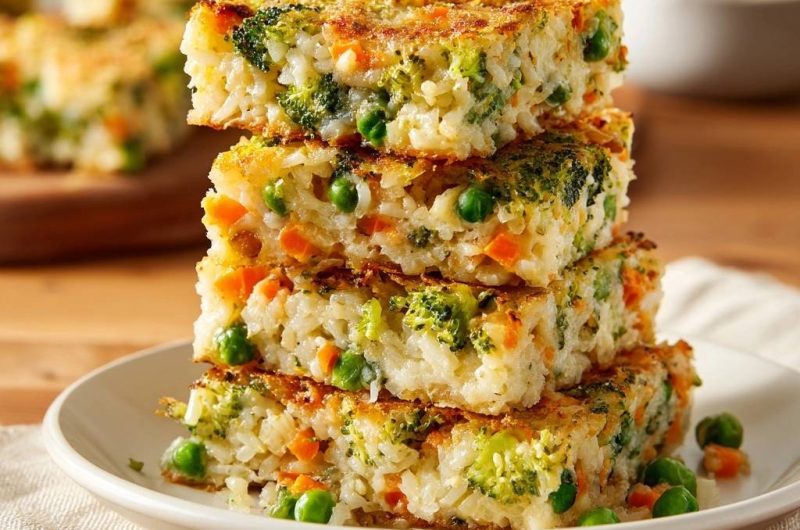
Cheesy Broccoli Rice Squares
Course: Main CourseCuisine: AmericanDifficulty: easy9
squares15
minutes35
minutes210
kcal50
MinutesA sturdy and portable rice casserole alternative that avoids mushiness by using dry-cooked rice and par-steamed vegetables. These squares are firm, savory, and perfect for meal prep or side dishes.
Ingredients
3 cups cooked white rice (preferably day-old or chilled to ensure grains are dry)
2 cups fresh broccoli florets, steamed for 3 minutes and finely chopped
1 cup frozen peas and carrots mix, thawed and patted very dry
1.5 cups sharp cheddar cheese, shredded
1/2 cup grated parmesan cheese
3 large eggs, beaten
1/4 cup heavy cream or whole milk (to bind the rice starch)
1/2 teaspoon garlic powder
1/2 teaspoon onion powder
1/2 teaspoon salt
1/4 teaspoon black pepper
2 tablespoons unsalted butter, melted (for the pan and topping)
Directions
- Preheat your oven to 375°F (190°C). Generously grease an 8×8 inch metal or glass baking pan with 1 tablespoon of melted butter.
- Prepare the vegetables: Ensure the steamed broccoli and thawed peas/carrots are pressed between paper towels to remove all surface moisture. Excess water is the enemy of the “stackable” square.
- In a large mixing bowl, combine the chilled rice, chopped broccoli, peas, and carrots. Toss to distribute the vegetables evenly.
- In a separate bowl, whisk together the eggs, heavy cream, garlic powder, onion powder, salt, and pepper until well combined.
- Pour the egg mixture over the rice and vegetables. Add the shredded cheddar and half of the parmesan cheese. Fold thoroughly until every grain of rice is coated in the egg binder.
- Transfer the mixture to the prepared baking pan. Use the back of a heavy spatula to press the mixture down firmly and evenly. Compression is vital for the structural integrity shown in the image.
- Sprinkle the remaining parmesan cheese over the top and drizzle with the remaining tablespoon of melted butter to create the golden, toasted crust.
- Bake for 30 to 35 minutes. The edges should be deep golden brown and pulling away slightly from the sides of the pan, and the top should be firm and toasted.
- Crucial Step: Remove from the oven and let the pan rest for at least 15 minutes before slicing. This allows the cheese and egg proteins to fully set. Slice into 9 squares and serve warm or at room temperature for maximum sturdiness.
Notes
- The secret to the structural integrity is pressing the mixture firmly into the pan and allowing it to rest for 15 minutes after baking to let the proteins set.