Mastering Loaded Almond Chocolate Chunk Cookies
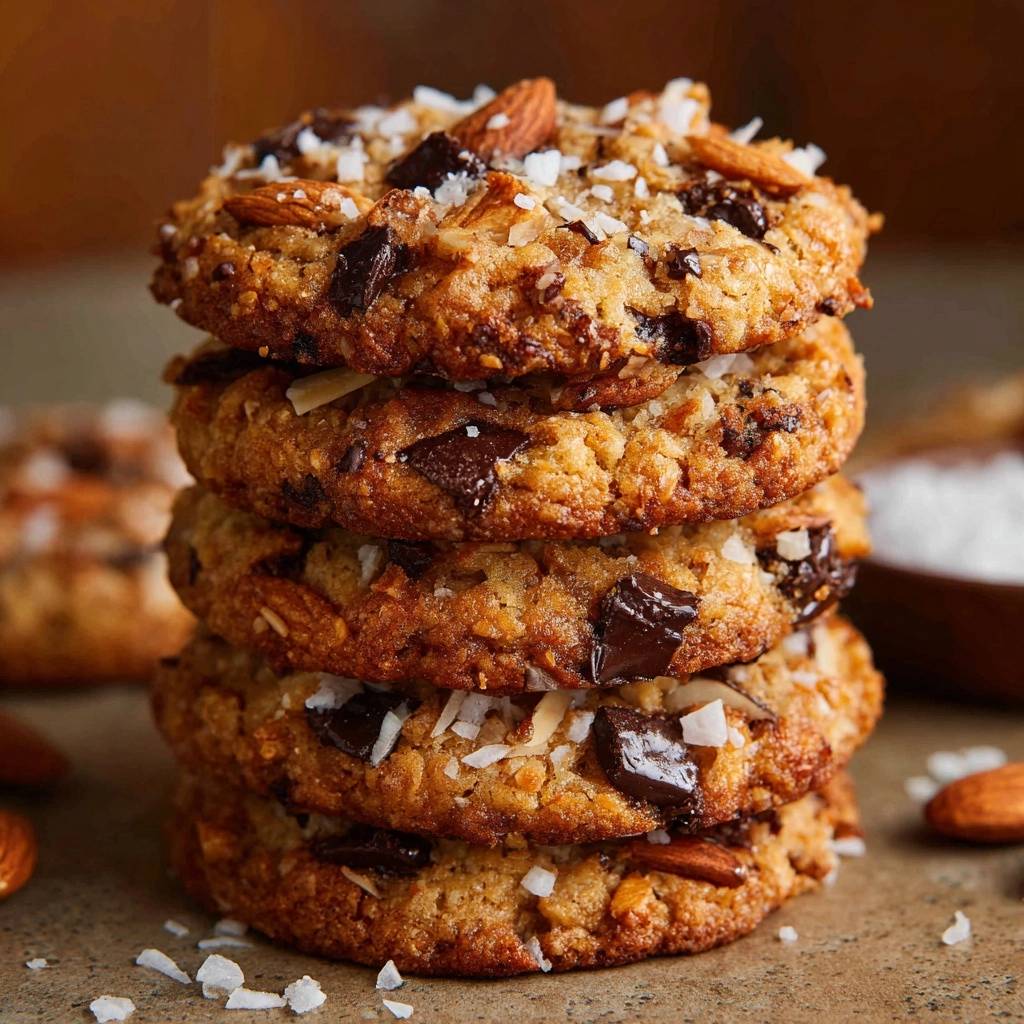
Most cookies crumble under the weight of heavy mix-ins, leaving you with a greasy, flat mess that lacks structural integrity. These Loaded Almond Chocolate Chunk Cookies solve that problem by focusing on a specific moisture-to-fat ratio designed to support whole almonds and massive chocolate chunks. By balancing the hydration of the dough with a higher protein content from the oats, we create a cookie that stands tall and proud.
The “Anti-Soggy Bottom” philosophy relies on controlling the temperature of your fats and the speed of your bake. Unlike standard bakery cookies that often rely on excessive sugar for a soft texture, this recipe prioritizes a sturdy, caramelized base. This ensures that every bite offers a distinct snap rather than a limp, oily mouthfeel that often plagues “loaded” recipes.
For a perfect pairing, try our Thick Chewy Chocolate Chip Cookies Recipe.
I’ve found that the secret to professional-grade results lies in the flash-freeze method. By chilling the dough balls for exactly twenty minutes, you solidify the butter just enough to delay its melting point in the oven. This technical step allows the outer edges to set into a golden crust before the center has a chance to spread, resulting in a thick, chewy masterpiece every single time.
The Anatomy of a Loaded Almond Chocolate Chunk Cookie
When you bite into this cookie, you first experience the dramatic snap of a whole raw almond. This isn’t just a flavor choice; the whole nut provides a massive textural contrast to the soft, yielding dough. As you chew, the dark chocolate chunks begin to melt, creating rich puddles of cocoa that weave through the earthy, toasted notes of the rolled oats.
The oats act as the unsung hero here, providing a rustic chewiness that balances the crunch of the nuts. You’ll notice a subtle sweetness from the coconut flakes, which toast slightly on the surface during the high-heat bake. This creates a complex sensory profile where the saltiness of the dough meets the bitterness of dark chocolate and the floral aroma of coconut.
Texture is just as important as taste in a premium cookie. The edges are intentionally crisp and deeply caramelized, while the center remains dense and fudge-like. This duality ensures that the cookie doesn’t feel one-note, keeping your palate engaged from the first bite to the very last crumb.
Essential Components for the Perfect Cookie Base
Success starts with the butter. You need it softened so it incorporates with the sugar, but it must remain cool to the touch. If your butter is oily or too warm, it won’t hold the air bubbles necessary for a thick cookie. I always look for a matte finish on the butter rather than a shiny one before I start creaming.
The sugar selection is equally technical. We use a high proportion of dark brown sugar because its molasses content adds acidity. This acidity reacts with the baking soda to create a lift that supports the heavy almonds. Meanwhile, the granulated sugar provides the structural “skeleton” that allows the edges to crisp up beautifully under high heat.
When it comes to the flour and oats, precision is key. All-purpose flour provides the gluten structure, while old-fashioned rolled oats add bulk and moisture absorption. If you use room temperature eggs, they will emulsify perfectly into the fat, creating a smooth, stable dough that won’t separate or become “weepy” during the chilling phase.
Selecting Your Chocolate and Almonds
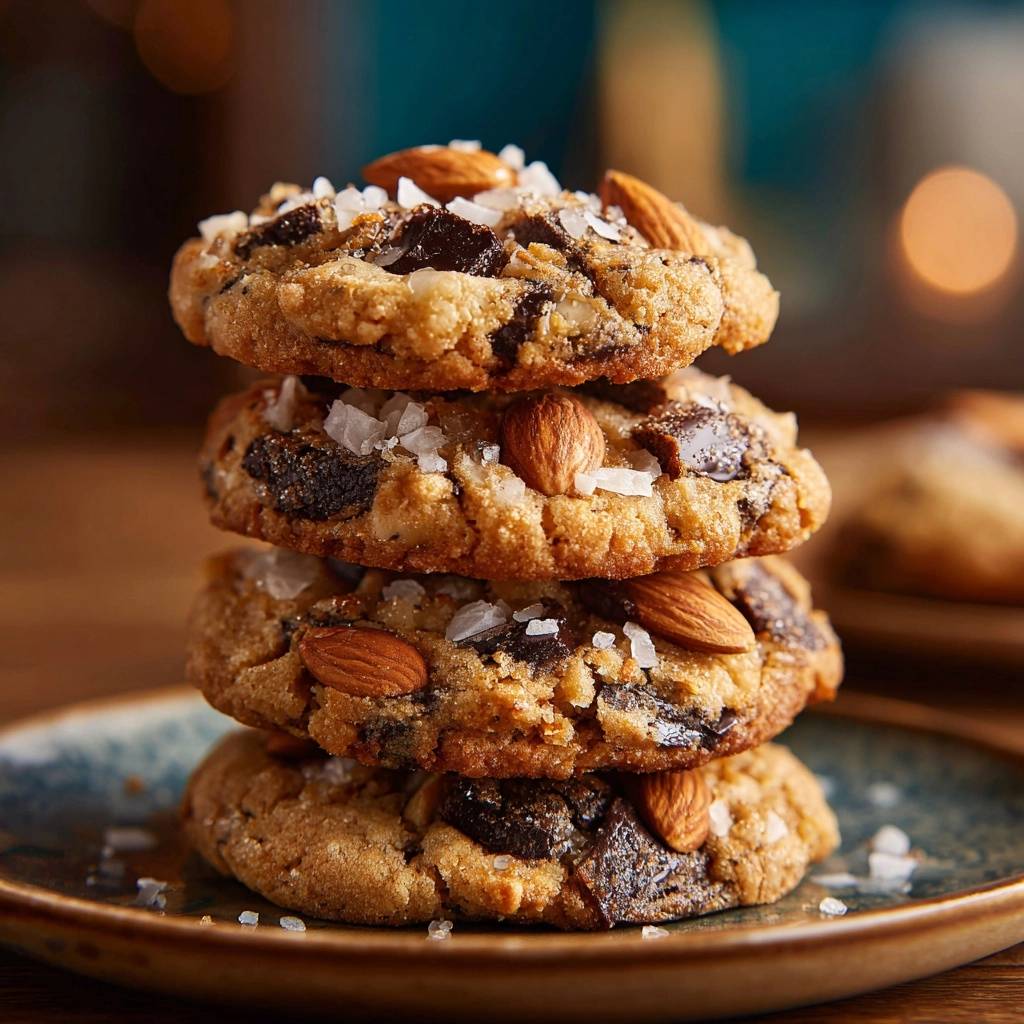
I strongly recommend using chocolate chunks over standard chips. Chunks contain less stabilizers, which means they melt into luxurious pools rather than holding a stiff, waxy shape. This “puddling” effect ensures that the chocolate interacts with the dough and the nuts in every single mouthful.
For the almonds, stick with raw, whole nuts. Since we are baking these at a high temperature of 375°F, pre-roasted almonds would likely over-brown and turn bitter. Raw almonds toast perfectly inside the dough, emerging from the oven with a woody, sweet flavor and a satisfyingly loud crunch.
The Role of Rolled Oats in Structural Support
Oats are the secret weapon for any “loaded” cookie. They act as a secondary binder, soaking up excess moisture from the eggs and butter. This prevents the dough from spreading too thin under the weight of the heavy inclusions, which is the primary cause of the dreaded “soggy bottom.”
Visually, the oats provide a beautiful, craggy surface that looks like it came straight from a high-end pastry shop. They create a dense network within the dough that traps the chocolate chunks in place. Without the oats, the heavy almonds would simply sink to the bottom of the cookie and ruin the bake.
The Science of the Anti-Soggy Fix
The thermodynamics of this recipe are what set it apart from generic versions. When you put a room-temperature cookie in the oven, the butter melts almost instantly, causing the dough to spread before the flour has time to set. By using a 20-minute flash-freeze, we create a temperature gradient within the dough ball.
The outside of the dough warms up first, while the core remains cold. This delay allows the starch in the flour to gelatinize and form a solid structure before the fat can fully liquefy. This is why the cookies stay thick and tall instead of turning into thin, greasy puddles on your baking sheet.
Furthermore, the 375°F oven temperature is non-negotiable. Most recipes call for 350°F, but that lower heat leads to a slower bake that encourages spreading. The higher heat creates an immediate “crust” on the bottom of the cookie. This rapid heat transfer locks the shape in place and develops the deep Maillard reaction responsible for that professional golden color.
Step-by-Step: Mixing and Aerating the Dough
Start by creaming your butter and sugars for a full three minutes. You are looking for a pale, fluffy texture that resembles frosting. This process creates millions of tiny air pockets that will expand in the oven, giving the cookie its lift. Don’t rush this step; it’s the foundation of the entire texture.
Once you add the eggs, slow down. Over-beating eggs at this stage introduces too much air, which can cause the cookies to puff up like a cake and then collapse into a wrinkled mess. Add them one at a time, mixing just until the yellow streaks disappear into the creamed butter.
When you add the dry ingredients, use a low speed or a sturdy spatula. You want to stop the moment you see no more white flour. Over-mixing at this stage develops too much gluten, which will turn your chewy cookie into something tough and bread-like. Keep it gentle to keep it tender.
Folding Techniques for Even Distribution
I always fold in the almonds, chocolate, and coconut by hand. A stand mixer is too powerful and can easily shatter the whole almonds or break down the delicate rolled oats. Using a large rubber spatula allows you to distribute the heavy mix-ins evenly without damaging the integrity of the dough.
To get that “Pro-Look,” don’t mix all your toppings into the dough. Reserve a handful of almonds and chocolate chunks. After you’ve scooped your dough balls, press these reserved pieces into the top. This ensures the star ingredients are visible and creates an irresistible, rustic presentation.
Make sure you reach all the way to the bottom of the bowl while folding. The heavy chocolate chunks often sink during the mixing process. A thorough, bottom-to-top folding motion ensures that the first cookie you scoop has just as many goodies as the very last one in the batch.
Precision Baking for a Golden Foundation
When you pull the cookies out of the oven, they might look slightly underdone in the very center. This is exactly what you want. The edges should be a deep, dark golden brown, but the middle should still look soft. If you wait until the center looks “done,” the cookie will be rock-hard once it cools.
The 5-minute rest on the hot baking sheet is a critical part of the cooking process. This is called “carry-over cooking.” The residual heat from the metal pan continues to bake the bottom of the cookie, ensuring it is fully set and crisp without drying out the top.
After those five minutes, move them to a wire rack. If you leave them on the pan for too long, the steam trapped underneath will soften the bottom, defeating the purpose of our “Anti-Soggy” method. Air circulation is vital for maintaining that perfect, crunchy base we worked so hard to create.
Troubleshooting Common Cookie Texture Issues
If your cookies turned out flat, your butter was likely too warm before you started, or you skipped the freezer step. Even a few degrees can make a difference. Next time, try chilling the butter for 10 minutes before creaming if your kitchen is particularly warm.
If the cookies are crumbly and won’t hold together, you might have over-measured the flour or oats. Always use the “spoon and level” method for flour rather than dipping the cup directly into the bag. Too much dry matter prevents the fats from binding the ingredients into a cohesive dough.
Pale cookies are usually a sign of a cool oven. Many home ovens run 25 degrees lower than the dial suggests. If your cookies aren’t browning by the 10-minute mark, consider using an oven thermometer to verify the temperature. That 375°F “blast” is essential for the caramelized flavor profile.
Flavor Variations and Nut-Free Swaps
While almonds provide a classic crunch, you can easily swap them for toasted pecans or walnuts. Pecans offer a softer, more buttery texture that pairs beautifully with the dark chocolate. Just ensure you keep the volume measurements the same to maintain the dough’s structural balance.
For a different flavor profile, try using white chocolate chunks and dried cranberries. The base recipe is sturdy enough to handle the extra moisture from dried fruit. However, keep the oats in the mix, as they are necessary to support the weight of the white chocolate, which tends to melt faster than dark chocolate.
If you need a nut-free version, you can replace the almonds with pumpkin seeds or extra sunflower seeds. These provide a similar “snap” without the allergen risk. You could also double the amount of coconut flakes, though I recommend toasting half of them beforehand to add more depth to the flavor.
Make-Ahead Strategies and Storage Logistics
This dough is a fantastic candidate for long-term storage. You can scoop the dough into balls and freeze them on a tray until solid, then transfer them to a heavy-duty freezer bag. They will stay fresh for up to three months, allowing you to bake a single fresh cookie whenever the craving hits.
When baking directly from the freezer, do not thaw the dough. Simply place the frozen balls on your baking sheet and add about two minutes to the total baking time. The high heat will still create that beautiful crust while the frozen center stays thick and chewy.
Store your baked cookies in an airtight container at room temperature for up to four days. To maintain the crisp edges, you can place a small piece of parchment paper between layers. If they soften too much, a quick 2-minute zap in a 300°F oven will crisp the bottoms right back up.
Expert Tips for Professional Results
Why use sea salt instead of table salt?
Table salt has very fine grains that dissolve instantly, often making the dough taste uniformly salty. Sea salt, especially the flaky kind used for topping, provides “pops” of saltiness that contrast with the sweet chocolate. This creates a more sophisticated flavor profile that mimics high-end bakery treats.
Can I use quick oats instead of old-fashioned?
I don’t recommend it. Quick oats are chopped much finer and absorb moisture too rapidly, which can make the cookie dough dry and “thirsty.” Old-fashioned rolled oats provide the necessary structural “ribs” that keep the cookie from collapsing and offer a much better chew.
Why did my coconut flakes burn?
Coconut has a high sugar content and burns easily. If your flakes are turning black, they are likely too close to the heating element or were placed too sparsely on the edges. Try tucking most of the coconut into the dough and only using a light sprinkle on top during the final few minutes of baking.
How do I get perfectly round cookies?
Use the “cookie scoot” method. Immediately after taking the pan out of the oven, place a circular glass or a large round cookie cutter over a hot cookie. Gently move the cutter in a circular motion, “scooting” the edges of the cookie inward. This smooths out any stray bits of chocolate or nuts for a perfect circle.
The Final Flourish: Topping and Presentation
The moment those cookies exit the oven, hit them with a final sprinkle of flaky sea salt and a few fresh coconut flakes. The heat from the cookie will slightly soften the salt and help the coconut adhere. These raw garnishes provide a bright, fresh contrast to the deep, caramelized flavors of the baked dough.
Presentation is about more than just looks; it’s about setting expectations. When someone sees a whole almond and a large shard of salt on top, they know they are in for a premium experience. Let them cool just enough so the chocolate isn’t liquid, but the center is still warm and gooey for the best possible tasting experience.
How should I store these to keep the bottom crisp?
To maintain the “Anti-Soggy” texture, avoid storing them while they are even slightly warm. Any residual steam will get trapped in the container and soften the crust. Once completely cool, store them in a glass jar or a tin. If you live in a humid climate, adding a small silica gel packet or a piece of dry cracker to the container can help absorb excess moisture.
Why did my cookies spread too much even after freezing?
This usually happens if the butter was over-creamed or if the eggs were too large. If you use “Jumbo” eggs instead of “Large,” the extra liquid can thin out the dough. Additionally, ensure your baking sheet is completely cool before placing a new batch of dough on it; putting cold dough on a hot pan will cause instant spreading.
Can I substitute the dark chocolate for milk chocolate?
You can, but keep in mind that milk chocolate has a higher sugar and fat content, which makes it melt more aggressively. This might result in a slightly softer cookie. If you make this swap, I suggest increasing the chilling time in the freezer by an extra five minutes to help the cookie maintain its shape during the bake.
What is the best way to reheat a day-old cookie?
Avoid the microwave, as it will make the cookie soft and rubbery. Instead, use a toaster oven or a regular oven at 300°F for about 3 to 5 minutes. This gently warms the chocolate and recrisps the bottom edges, making the cookie taste like it was just pulled from the oven for the first time.
Almond Chocolate Chunk Cookies
Course: DessertCuisine: AmericanDifficulty: easy18
cookies15
minutes12
minutes240
kcal47
MinutesThese Loaded Almond Chocolate Chunk Cookies use a high-heat baking method and a short freeze time to create a perfectly structured treat. Packed with oats, nuts, and thick chocolate, they offer a chewy center and a crunchy exterior.
Ingredients
1 cup unsalted butter, softened but still cool to the touch
3/4 cup granulated sugar
3/4 cup packed dark brown sugar
2 large eggs, room temperature
1 teaspoon vanilla extract
2 1/4 cups all-purpose flour
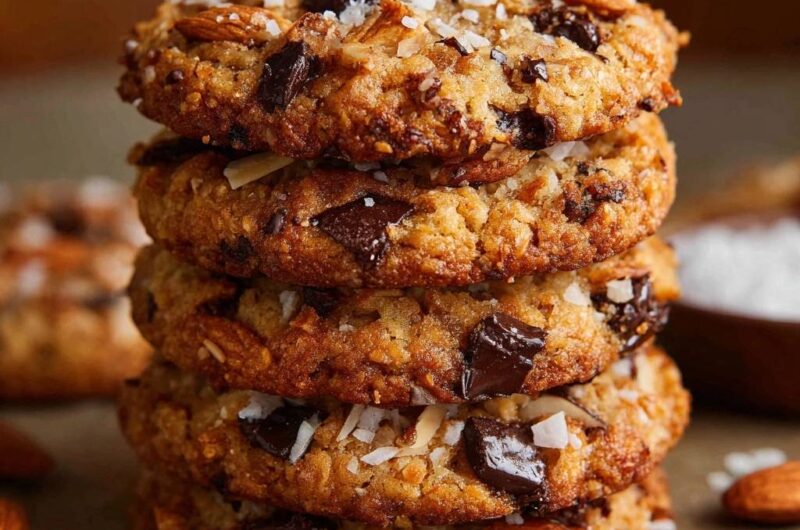
1 cup old-fashioned rolled oats (for the visual texture shown in the image)
1 teaspoon baking soda
1/2 teaspoon sea salt
1 1/2 cups dark chocolate chunks
1 cup whole raw almonds
1/2 cup large coconut flakes (unsweetened)
Flaky sea salt for topping
Directions
- Cream the butter and both sugars in a large bowl until light and fluffy (about 3 minutes). To prevent a soggy bottom, do not over-beat the eggs; add them one at a time along with the vanilla, mixing just until combined.
- In a separate bowl, whisk together the flour, oats, baking soda, and salt. Gradually add the dry ingredients to the wet ingredients, mixing until no streaks of flour remain.
- Fold in the chocolate chunks, whole almonds, and coconut flakes by hand. Reserve a few almonds and chocolate chunks to press into the tops later for a professional look.
- The Anti-Soggy Fix: Scoop the dough into large, 3-tablespoon sized balls and place them on a tray. Freeze the dough balls for exactly 20 minutes before baking. This solidifies the fats so they do not melt instantly, preventing the greasy, flat texture that leads to sogginess.
- Preheat your oven to 375°F (190°C). This higher temperature creates an immediate crust on the bottom and edges of the cookie, locking in the shape and providing the deep golden color seen in the image.
- Place chilled dough balls on a parchment-lined baking sheet, spacing them 3 inches apart. Press the reserved almonds and chocolate chunks into the tops of the balls.
- Bake for 10 to 12 minutes or until the edges are deep golden brown and the centers no longer look wet.
- Remove from the oven and immediately sprinkle with extra coconut flakes and flaky sea salt. Let the cookies rest on the hot baking sheet for 5 minutes to finish setting the base before moving them to a wire rack.
Notes
- The 20-minute freeze and 375-degree oven temperature are critical to preventing the cookies from spreading too thin and becoming greasy or soggy.