S’mores Bark: Perfectly Golden & Gooey Every Time!
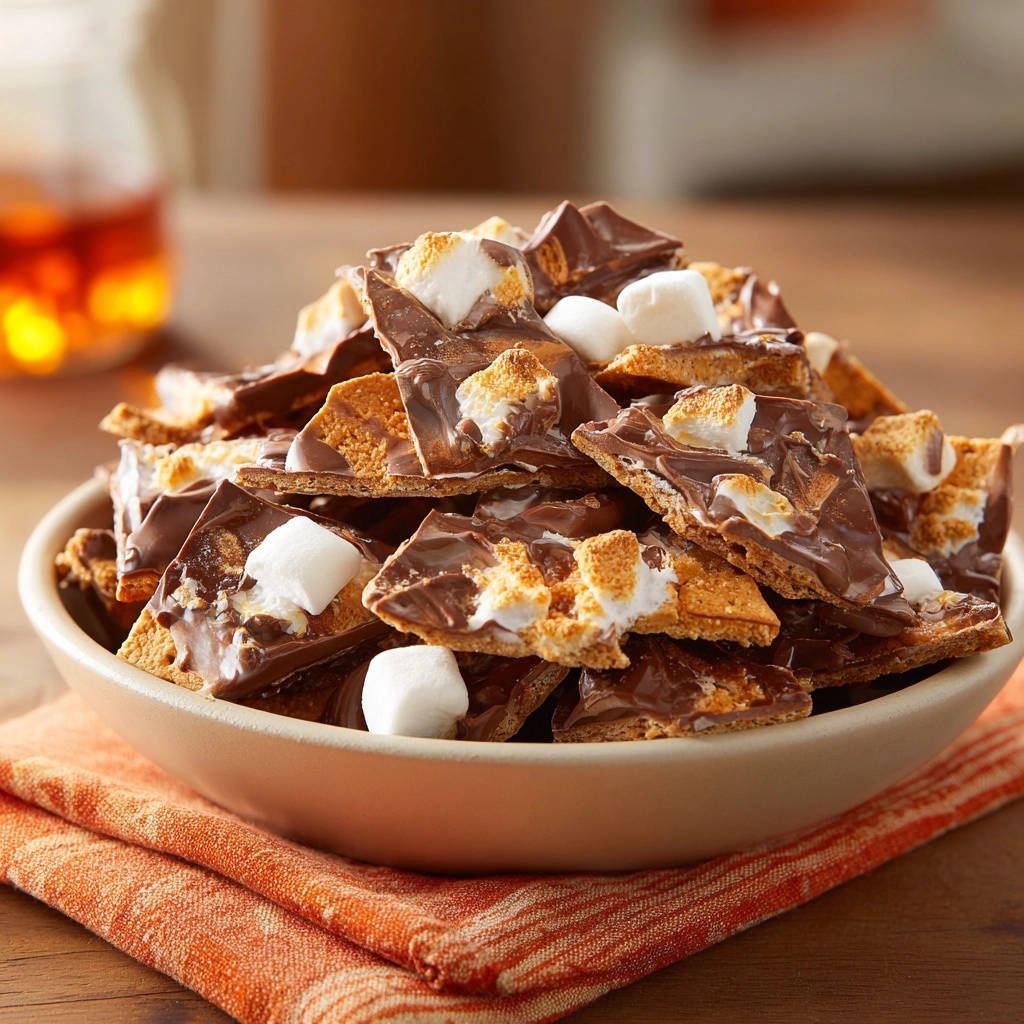
We all love s’mores, but getting those marshmallows just right can be a challenge-either underdone or charred to a crisp! My secret for this incredible S’mores Bark recipe guarantees perfectly golden, soft marshmallows every single time, all without the fuss of a campfire.
This method transforms classic s’mores into an effortlessly elegant bark, making it the ultimate indoor treat for any occasion.
The Magic Behind Our S’mores Bark (And Why It’s a Game-Changer!)
This S’mores Bark recipe isn’t just another dessert; it’s a clever reimagining of a beloved classic, designed for maximum enjoyment with minimal effort.
Effortless Perfection: The Broiler Secret
The true genius of this recipe lies in its strategic use of your oven’s broiler.
This technique provides a quick, intense heat that perfectly toasts marshmallows to a beautiful golden-brown, mimicking a campfire char without the risk of burning them to a crisp.
It’s a foolproof method for achieving that coveted soft, gooey center with a delightful toasted exterior every time.
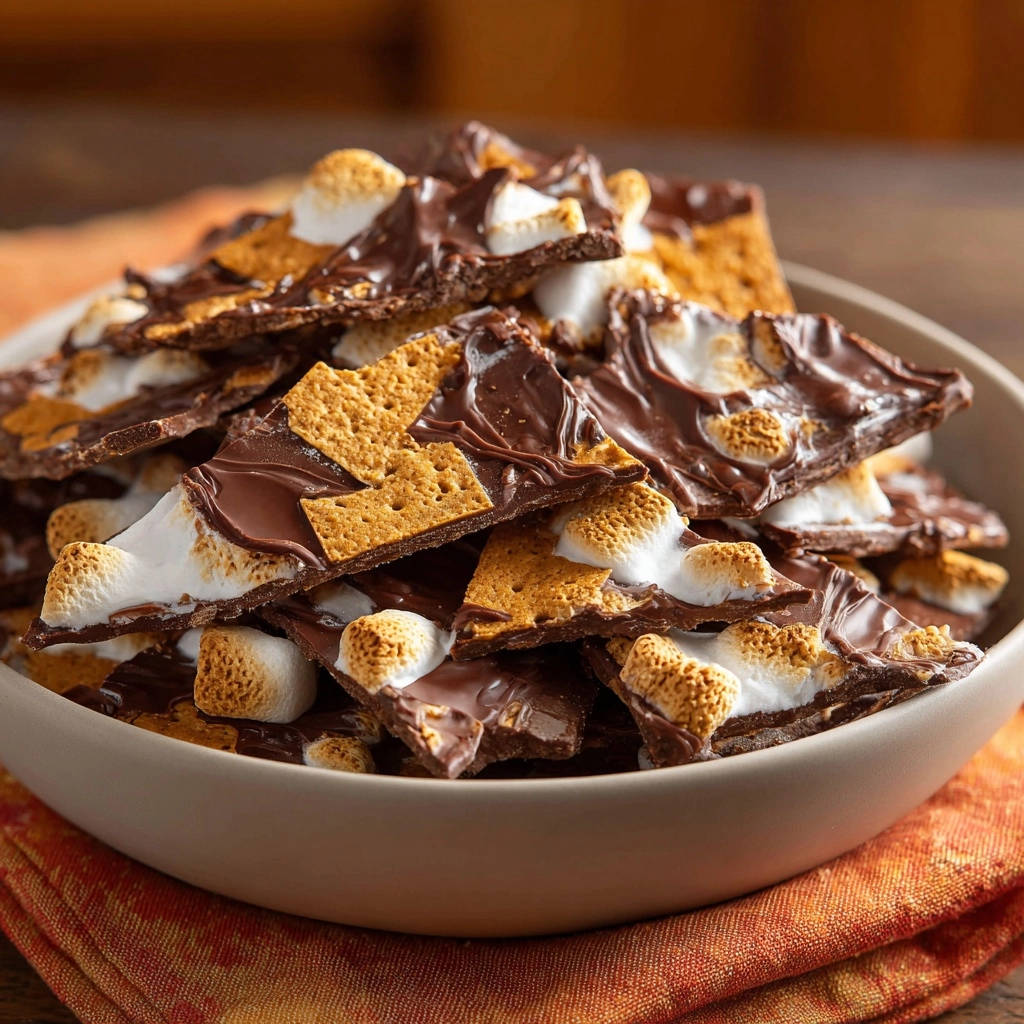
No Campfire, No Problem: Indoor S’mores Joy
Craving the nostalgic flavor of s’mores but lack a fire pit or camping trip? This S’mores Bark brings all that gooey, chocolatey, crunchy goodness right into your kitchen.
It’s the ultimate solution for enjoying s’mores anytime, anywhere, regardless of weather or outdoor space.
Quick Assembly, Epic Flavor: Ideal for Any Occasion
From start to finish, this S’mores Bark comes together remarkably fast, making it ideal for last-minute cravings or spontaneous gatherings.
It’s a show-stopping treat that requires minimal active cooking time, allowing you to spend less time in the kitchen and more time enjoying the moment.
Gather Your Goodies: Simple Ingredients for S’mores Bark Bliss
One of the best aspects of this chocolate bark is its simplicity, relying on just a few classic ingredients to deliver big flavor.
The Crunchy Base: Graham Crackers
We start with full sheets of classic graham crackers, providing that essential crisp, honey-kissed foundation.
Arrange them snugly on your baking sheet, breaking them as needed to create an even, continuous layer for your bark.
Decadent Melt: Choosing Your Chocolate
For this recipe, milk chocolate chips are the star, melting into a creamy, sweet layer that perfectly balances the crackers and marshmallows.
Using a good quality chocolate chip will significantly impact the final flavor and melt consistency of your S’mores Bark.
Pillowy Clouds: Mini Marshmallows
Mini marshmallows are absolutely essential here, as their smaller size allows for even distribution and uniform toasting under the broiler.
They transform into wonderfully gooey, golden clouds that are the hallmark of any great s’mores experience.
Pantry Staples & Optional Enhancements
While this recipe is perfect as is, a tiny pinch of flaky sea salt sprinkled over the melted chocolate can beautifully enhance all the flavors.
For an extra touch of indulgence, consider a drizzle of white chocolate or melted peanut butter after the bark has cooled, or try our decadent pumpkin pie truffles for another easy, delightful treat.
Your S’mores Bark Toolkit: Essential Equipment
You won’t need an arsenal of gadgets for this recipe; just a few basic kitchen tools will set you up for success.
Baking Sheets & Parchment Paper
A large, sturdy baking sheet is crucial for accommodating the graham cracker base in a single layer.
Lining it generously with parchment paper is a non-negotiable step; it ensures your S’mores Bark lifts off effortlessly and makes cleanup a breeze.
Spreading & Smoothing: The Offset Spatula
An offset spatula is your best friend for gently and evenly spreading the melted chocolate over the graham crackers.
If you don’t have one, the back of a large spoon works perfectly well for achieving that smooth, consistent layer.
Everyday Kitchen Utensils
Beyond these key items, you’ll simply need standard measuring cups for your ingredients and perhaps a small bowl for pouring chocolate chips onto the sheet.
Crafting Your Masterpiece: A Step-by-Step Guide to S’mores Bark
Follow these precise steps to create a batch of S’mores Bark that’s sure to disappear in minutes.
Preparation is Key: Oven & Pan Setup
Preheat your oven to 350°F (175°C) and line a large baking sheet with parchment paper, ensuring it extends beyond the edges for easy handling later.
Carefully arrange the graham cracker sheets in a single layer across the prepared baking sheet. It’s okay if you need to break some slightly to fit them snugly, forming a complete base.
Chocolate Meltdown: Spreading the Sweetness
Evenly sprinkle the milk chocolate chips over the graham cracker base. Place the baking sheet into the preheated oven for 5 to 7 minutes, or until the chocolate chips appear glossy and soft.
Immediately remove the sheet from the oven. Using an offset spatula or the back of a spoon, gently and quickly spread the now-melted chocolate across the graham crackers to create a smooth, consistent layer.
The Marshmallow Magic: Broiler Technique Unveiled
Generously sprinkle the mini marshmallows over the warm, melted chocolate, ensuring an even distribution.
Now for the secret to perfectly toasted marshmallows: change your oven setting to BROIL (use a low setting if available). Place the baking sheet back into the oven, on the top rack.
Watch the marshmallows constantly. They will toast very quickly, usually within 1 to 2 minutes. As soon as they achieve a beautiful golden-brown hue, remove the sheet immediately from the oven. This quick, high-heat blast gives you that authentic, toasted flavor and perfect texture without charring.
Cooling & Breaking: The Grand Finale
Allow the S’mores Bark to cool completely on the baking sheet at room temperature. For faster setting, you can place it in the refrigerator for about 30 minutes until firm.
Once fully set, carefully lift the parchment paper from the baking sheet. Break the bark into irregular, bite-sized pieces. Embrace the rustic charm!
Elevate Your Bark: Insider Tips for S’mores Perfection
Take your S’mores Bark from great to absolutely unforgettable with these expert tips and variations.
Achieving the Perfect Golden Marshmallow Hue: Oven calibration varies, so always keep a close eye on your marshmallows under the broiler. The difference between perfectly toasted and burnt can be literally seconds. If your oven has a light, use it!
Chocolate Choices: Beyond Milk Chocolate: While milk chocolate is classic for S’mores Bark, feel free to experiment with semi-sweet, dark, or even a blend of chocolates for different flavor profiles. White chocolate chips can also be drizzled on top after the bark cools for extra visual appeal and sweetness.
Creative Toppings & Flavor Boosts: After spreading the chocolate (before marshmallows), consider adding a sprinkle of sea salt to enhance the flavors. You could also press in crushed pretzels for an extra salty crunch or sprinkle a few mini chocolate chips over the marshmallows for a double chocolate punch.
Clean Cuts and Storage Savvy: For cleaner breaks, ensure the bark is completely chilled. If it starts to soften while you’re breaking it, pop it back into the fridge. Store the finished S’mores Bark in an airtight container at room temperature for up to 3 days, or in the refrigerator for longer freshness.
Oh Snap! Common S’mores Bark Hurdles & How to Fix Them
Even with simple recipes, sometimes little snags occur. Here are quick solutions to common S’mores Bark issues.
Marshmallows Burned Too Quickly?
This is a common issue when using the broiler! Ensure you are using the low broiler setting if your oven has one, and position your baking sheet on the top rack, but perhaps one notch lower than the very highest position.
Most importantly, do not walk away from the oven; marshmallows toast in a flash, sometimes in under a minute. Constant vigilance is key!
Chocolate Not Spreading Smoothly?
If your chocolate isn’t spreading easily, it might not be warm enough. Ensure it’s glossy and soft before you remove it from the oven, indicating it’s fully melted.
Work quickly once it’s out, as chocolate sets as it cools. An offset spatula helps a lot with even spreading due to its angled design.
Bark Not Setting Firmly Enough?
Patience is key! The bark needs to cool completely to achieve its signature snap and break cleanly.
If your kitchen is warm, or you’re in a hurry, definitely use the refrigerator method for at least 30 minutes, or even up to an hour, to ensure it’s fully firm before breaking.
Graham Crackers Getting Soggy?
Soggy graham crackers usually happen if the bark is stored in a humid environment or not in an airtight container.
Make sure your S’mores Bark is completely cool and firm before storing, and always use an airtight container to protect it from moisture absorption.
Enjoying Your S’mores Bark: Serving, Storage, & Make-Ahead Tips
Once your S’mores Bark is made, how can you best enjoy and preserve its deliciousness?
Creative Serving Suggestions
S’mores Bark is fantastic on its own, but it also makes a delightful addition to any dessert platter.
Arrange the irregular pieces artfully, or crumble some over a scoop of vanilla ice cream for an extra special treat. It’s also perfect for party platters alongside other crowd-pleasers, like game day buffalo chicken nachos.
Consider packaging pieces in small decorative bags with ribbons for homemade gifts or charming party favors. It’s a thoughtful, personal touch that everyone will appreciate!
Storing for Freshness: Keeping Your Bark Delicious
To maintain its crunch and chewiness, store your S’mores Bark in an airtight container at room temperature for up to 3 days.
For longer storage, or if you prefer a firmer texture, you can keep it in the refrigerator for up to a week. Always ensure the bark is completely cool and dry before sealing it to prevent condensation.
Make-Ahead Marvel: Prep for Parties
This S’mores Bark recipe is an ideal candidate for making ahead, especially when preparing for parties or gatherings.
You can prepare it a day or two in advance, store it properly, and then simply break it into pieces right before serving. Its robust nature means it travels well too, making it a great option for potlucks or picnics where traditional s’mores might be too messy.
Your S’mores Bark Questions Answered!
Here are quick answers to some common inquiries about making and enjoying S’mores Bark.
Can I use different types of chocolate?
Absolutely! While milk chocolate is a classic choice for S’mores Bark, you can certainly use semi-sweet, dark chocolate, or even a mix to suit your preference. Just be aware that darker chocolates will have a more intense flavor.
You could also drizzle white chocolate over the top once the bark is cool for added flavor and visual appeal.
How long does S’mores Bark last?
When stored in an airtight container at room temperature, S’mores Bark will remain fresh and delicious for up to 3 days. If refrigerated, it can last for up to a week, though the graham crackers might become slightly firmer in texture.
Can I make this recipe gluten-free?
Yes, you can! Simply substitute the standard graham crackers with gluten-free graham crackers, which are widely available in most grocery stores.
The rest of the ingredients are typically gluten-free, but always double-check labels for hidden gluten, especially in chocolate chips, to be absolutely sure.
Is there an alternative to the broiler method?
While the broiler method is key to achieving that perfectly toasted marshmallow look and flavor without a campfire, you can attempt to toast the marshmallows using a kitchen torch if you prefer.
Sprinkle the marshmallows over the melted chocolate as usual, then use a culinary torch to carefully brown them. This method gives you more control over the browning process, but ensure even toasting for the best results.
Ready to Create S’mores Bark Memories?
Armed with this simple yet ingenious recipe, you’re now ready to whip up a batch of S’mores Bark that will impress every palate and satisfy every craving.
It’s the perfect blend of nostalgic flavors and modern convenience, proving that you don’t need a campfire to capture the magic of perfectly toasted marshmallows. If you enjoy quick and easy treats, you might also love our delightful raspberry crumb bars.
So go ahead, gather your ingredients, follow these easy steps, and prepare for a wave of compliments. Don’t forget to share your S’mores Bark creations with us – we can’t wait to see your golden, gooey masterpieces!

S’mores Bark
Course: DessertCuisine: AmericanDifficulty: easy12
pieces10
minutes10
minutes240
kcal50
minutesIndulge in the classic taste of s’mores, no campfire required! This super easy S’mores Bark guarantees perfectly golden, soft marshmallows every time with a clever oven trick. A delightful, crunchy, and chocolatey treat perfect for sharing.
Ingredients
8 full sheets graham crackers
12 ounces milk chocolate chips
2 cups mini marshmallows
Directions
- Preheat your oven to 350 degrees F. Line a large baking sheet with parchment paper. Arrange the graham cracker sheets in a single layer on the prepared baking sheet, breaking them slightly if needed to fit.
- Spread the chocolate chips evenly over the graham crackers. Place the baking sheet in the preheated oven for 5 to 7 minutes, or until the chocolate chips are glossy and soft.
- Remove the baking sheet from the oven. Using an offset spatula or the back of a spoon, gently spread the melted chocolate evenly over the graham crackers.
- Sprinkle the mini marshmallows evenly over the melted chocolate.
- Here’s the trick to perfectly toasted marshmallows, every time! Change your oven setting to BROIL (low setting if available). Place the baking sheet back into the oven on the top rack, but watch it constantly. The marshmallows will toast very quickly, usually within 1 to 2 minutes. As soon as they turn golden brown, remove the sheet immediately from the oven. This quick, high heat blast gives you that beautiful, toasted flavor without turning them to charcoal.
- Let the s’mores bark cool completely on the baking sheet at room temperature, or for faster setting, place it in the refrigerator for about 30 minutes. Once firm, break the bark into irregular pieces. Store in an airtight container at room temperature for up to 3 days.
Notes
- The broiling technique is key for perfectly golden, toasted marshmallows without burning them.