Chocolate Peanut Butter No-Bake Pie: Effortlessly Perfect Slices
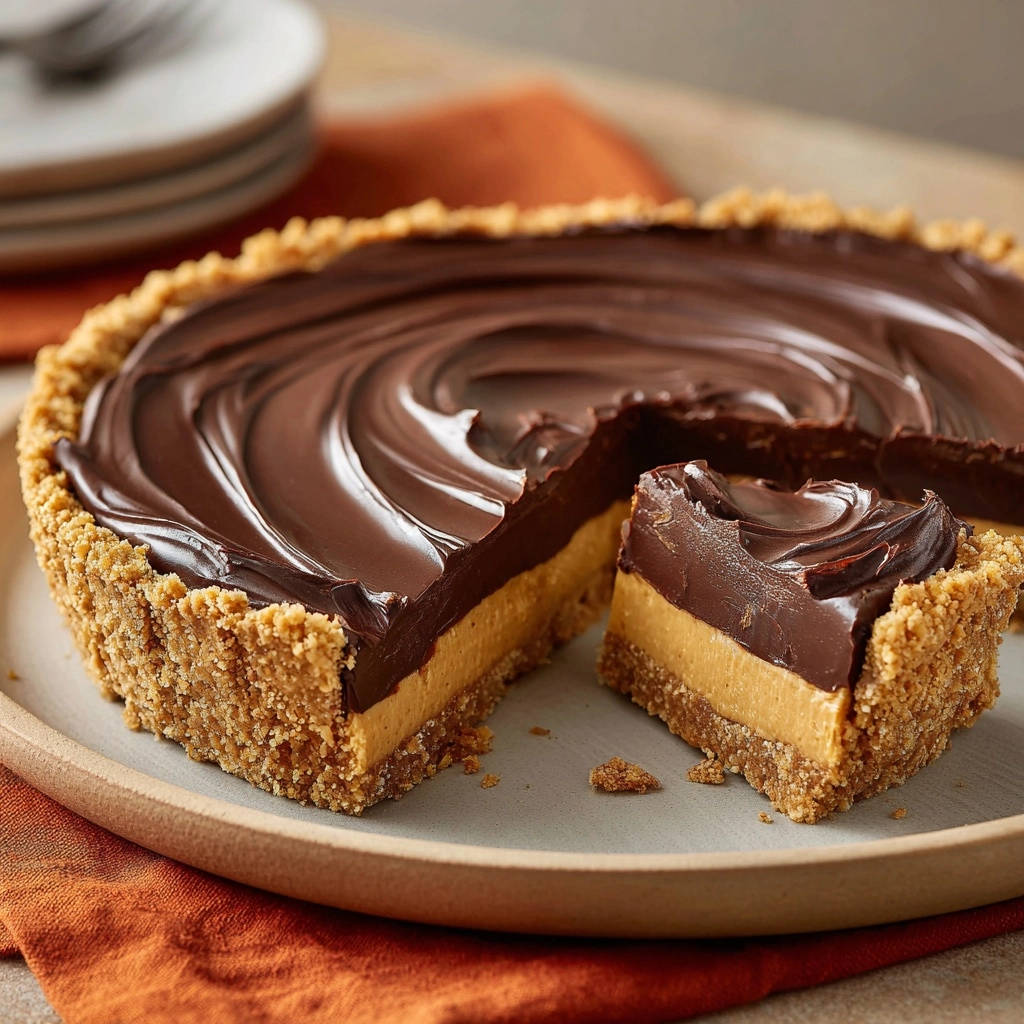
There’s nothing quite like the anticipation of cutting into a beautiful no-bake pie, only to be disappointed by soft, messy slices that refuse to hold their shape. I’ve certainly been there, but after countless experiments, I’ve perfected the ultimate Chocolate Peanut Butter No-Bake Pie recipe that guarantees perfectly firm, clean slices every single time.
This dessert is not only a dream to make with minimal effort, but it delivers on both incredible flavor and stunning presentation. Get ready to impress everyone with a dessert that looks as good as it tastes and becomes a staple in your recipe repertoire.
Tired of Soggy Slices? Why This No-Bake Pie Delivers
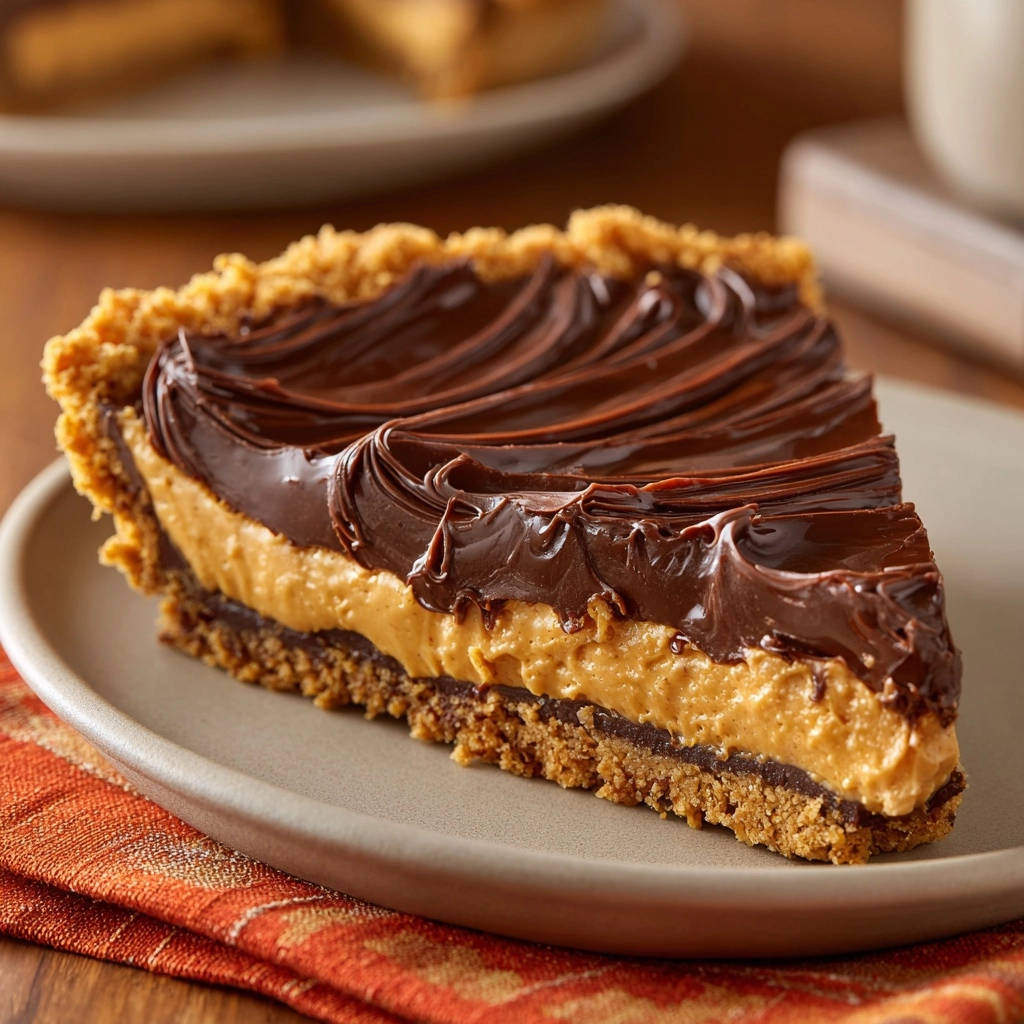
This Chocolate Peanut Butter No-Bake Pie stands out because it tackles the most common frustration: structural integrity. Our specific technique ensures each slice is firm, clean, and ready for its close-up, banishing dessert disasters forever.
The secret lies in the careful balance of ingredients, particularly the cream cheese in the filling, combined with strategic chilling times. This unique approach creates a dessert that’s rich, creamy, and holds its shape beautifully from the first slice to the last.
Beyond its impeccable structure, this pie offers a deeply satisfying fusion of classic chocolate and peanut butter flavors, making it a guaranteed crowd-pleaser for any occasion.
If you enjoy the rich chocolate and creamy layers here, this layered chocolate vanilla pie is another no-bake favorite worth trying.
Building Blocks of Bliss: Decoding Your Ingredients
For the Irresistible Graham Cracker Crust
Graham cracker crumbs form the essential base, offering a delightful crunch and classic flavor that complements the rich filling perfectly.
Granulated sugar adds a touch of sweetness, balancing the richness of the filling and enhancing the overall crust flavor.
Melted unsalted butter binds the crumbs, creating a sturdy foundation that won’t crumble, ensuring a robust and easy-to-slice base.
Crafting the Creamy Peanut Butter Core
Cream cheese, softened: This is the secret weapon! It provides the critical structure that ensures your slices are perfectly firm, preventing any dreaded collapse and giving the pie its incredible stability.
Creamy peanut butter: The star flavor! Choose a smooth, good-quality peanut butter to achieve the best taste and a wonderfully silky texture for your filling.
Powdered sugar: Sweetens and helps thicken the filling, dissolving smoothly for a truly silky and light consistency without grittiness.
Vanilla extract: A touch of vanilla enhances the overall flavor profile, adding warmth and depth that complements both the chocolate and peanut butter.
Heavy cream: Contributes to the light and creamy texture, making the filling wonderfully airy and decadent, rather than overly dense.
Pinch of salt: Balances the sweetness and amplifies the rich chocolate and peanut butter flavors, ensuring every bite is perfectly seasoned.
The Dreamy Chocolate Ganache Topping
Semi-sweet chocolate chips: Provide the rich, decadent chocolate layer. Opt for good-quality chips as they melt more smoothly and offer a superior flavor.
Heavy cream: Creates a luscious, pourable ganache when combined with the chocolate, ensuring a beautiful, glossy finish that sets perfectly atop the peanut butter layer.
Your Culinary Toolkit: Essential Gadgets for Pie Perfection
9-inch Pie Plate
This is the standard vessel for your delicious creation, ensuring proper proportions and an attractive, evenly shaped presentation for your Chocolate Peanut Butter No-Bake Pie.
Electric Mixer (Handheld or Stand)
Crucial for achieving a smooth, creamy, and fluffy peanut butter filling quickly and efficiently. It ensures the cream cheese and peanut butter are perfectly incorporated.
Heatproof Bowls & Small Saucepan
These are essential for preparing the chocolate ganache safely, allowing for gentle warming of the cream and proper melting of the chocolate chips into a glossy topping.
Spatulas and Whisks
Spatulas are vital for combining ingredients, pressing the crust, and spreading layers smoothly. A whisk is perfect for achieving that perfectly smooth ganache.
Mastering the Layers: A Step-by-Step Assembly Guide
- Prepare the Crust:
In a medium bowl, combine the graham cracker crumbs, granulated sugar, and melted butter until the crumbs are uniformly moistened, resembling wet sand.
Press this mixture very firmly into the bottom and up the sides of a 9-inch pie plate. Use the bottom of a flat glass or measuring cup to compact it as much as possible, creating a sturdy, non-crumbly base.
Place the pie plate in the refrigerator to chill for at least 15 minutes. This initial chill helps the butter solidify, setting the crust before the filling is added.
- Make the Peanut Butter Filling:
In a large bowl, using an electric mixer, beat the softened cream cheese until it’s wonderfully smooth and creamy, which typically takes about 2 minutes.
Add the creamy peanut butter and continue beating until it is fully incorporated and the mixture is smooth, ensuring no lumps remain.
Gradually add the powdered sugar on low speed until just combined, then increase the speed to medium and beat until the filling becomes noticeably fluffy and light.
Finally, stir in the vanilla extract, heavy cream, and a pinch of salt until the mixture is light, creamy, and very thick. The cream cheese provides the essential structure that will prevent soft slices.
- Assemble the First Layer:
Spoon the prepared peanut butter filling into your chilled graham cracker crust. Carefully spread it evenly using a spatula, working to create a smooth, level top.
Return the pie to the refrigerator to chill for at least 30 minutes. This crucial step allows the peanut butter layer to begin setting, which is vital to prevent the chocolate ganache from melting into it later.
- Prepare the Chocolate Topping (Ganache):
Gently warm the heavy cream in a small saucepan over medium-low heat until it just begins to simmer around the edges; alternatively, heat it in a microwave-safe bowl until hot but not boiling.
Remove the hot cream from the heat and pour it over the semi-sweet chocolate chips in a heatproof bowl. Let it sit undisturbed for 5 minutes, allowing the chocolate to soften thoroughly.
After 5 minutes, whisk gently from the center outwards until the mixture is completely smooth and glossy, transforming into a luxurious ganache.
Allow the ganache to cool for about 10-15 minutes, stirring occasionally. It should thicken slightly but still be pourable; this prevents it from being too warm and melting into the chilled peanut butter layer.
- Finish the Pie:
Carefully pour the cooled chocolate ganache over the chilled peanut butter filling. Gently spread it to the edges of the crust with a spatula or by tilting the pie plate to ensure an even, beautiful coating.
For an elegant touch, you can use the back of a spoon to create decorative swirls on the surface of the ganache before it sets.
- The Ultimate Firmness Secret: Final Chill:
Place the assembled Chocolate Peanut Butter No-Bake Pie in the refrigerator to chill for a minimum of 4 hours. For the most perfect, cleanest slices that hold their shape impeccably, overnight chilling is highly recommended.
This extended chilling time is absolutely crucial, as it allows all the layers to fully set and firm up, guaranteeing each slice holds its beautiful form when cut.
If you love the peanut butter and chocolate pairing in this pie, try cutting it into bars with these chocolate peanut rice krispie bars for an easy no-bake treat.
Before serving, for an even cleaner cut, you can place the pie in the freezer for about 15-20 minutes. Then, let it sit at room temperature for 5-10 minutes to slightly soften before slicing and serving for optimal enjoyment.
Beyond the Recipe: Expert Tips for No-Bake Success
Perfecting Your Pie Crust Press
Ensure your graham cracker crust is pressed very firmly, especially up the sides of the pie plate. This prevents crumbling when slicing and provides a strong, reliable base. For maximum compaction, use the bottom of a flat-bottomed glass or measuring cup.
The Cream Cheese Temperature Trick
Always use truly softened cream cheese for the filling. If it’s too cold, it will be lumpy and won’t incorporate smoothly, compromising the filling’s texture. For best results, let it sit at room temperature for at least 30-60 minutes before mixing.
Cooling Your Ganache Just Right
Crucially, do not pour hot ganache over your chilled peanut butter layer! Allowing it to cool and thicken slightly is essential to prevent it from melting into the layer below, ensuring you have beautifully distinct strata in your pie.
The Overnight Chill Advantage
While 4 hours is the minimum chilling time, an overnight chill (8+ hours) truly transforms this Chocolate Peanut Butter No-Bake Pie. It allows the cream cheese and peanut butter filling to achieve maximum firmness, guaranteeing those picture-perfect, clean slices you desire.
Clean Slices Every Time (The Hot Knife Method)
For the absolute cleanest cuts, run a sharp knife under hot water, wipe it completely dry, and then make each slice. Repeat this process for every cut. The slightly warmed blade glides through the chocolate and peanut butter layers without sticking, ensuring pristine edges.
Troubleshooting Your Way to a Flawless Dessert
“My Crust is Crumbly and Won’t Hold!”
Solution: This usually means you need either more melted butter or more aggressive compaction. Ensure your graham cracker crumbs are thoroughly moistened, resembling wet sand. Press very firmly into the pie plate using a flat-bottomed glass, paying extra attention to the corners and up the sides for a sturdy base.
“The Peanut Butter Filling is Too Soft or Lumpy!”
Solution: Double-check that your cream cheese was fully softened before you started beating it; cold cream cheese is the primary culprit for a lumpy filling. If the filling feels too soft after mixing, a little extra powdered sugar can help thicken it, but thorough chilling remains critical for structural integrity.
“My Chocolate Ganache Separated or Looks Oily!”
Solution: This often occurs if the heavy cream was too hot or if the ganache was over-whisked. If it separates, try adding a tablespoon of lukewarm water and whisking gently until it comes back together. Ensure the cream is heated just until simmering, not boiling vigorously.
Common Questions About Your Chocolate Peanut Butter No-Bake Pie
Can I make this Chocolate Peanut Butter No-Bake Pie ahead of time?
Absolutely! This pie is an excellent make-ahead dessert, making it perfect for entertaining. In fact, chilling it overnight is highly recommended for achieving the best texture and the cleanest slices.
What if I don’t have graham cracker crumbs?
You can readily substitute other cookie crumbs such as chocolate wafers, Oreo cookies (with or without the cream filling), or even shortbread cookies. If you’re looking for other delightful no-bake dessert ideas that might use different crusts, consider trying our chocolate crumb cheesecake bars for another delicious option.
Can I use crunchy peanut butter for the filling?
While creamy peanut butter is specified for a silky-smooth texture, crunchy peanut butter can be used if you prefer a subtle textural contrast. Be aware that it will alter the filling’s consistency and might make it slightly less “smoothly whipped” but can add a pleasant nuttiness.
How long does this Chocolate Peanut Butter No-Bake Pie last in the refrigerator?
When properly covered, this pie can be stored in the refrigerator for up to 3-4 days, maintaining its delicious flavor and firm texture.
Can I freeze this no-bake pie?
Yes, you can! Wrap the entire chilled pie (or individual slices) tightly in plastic wrap, then in aluminum foil. It can be frozen for up to 1-2 months. Thaw it in the refrigerator for several hours or overnight before serving to enjoy its optimal texture.
Make Ahead, Store, & Serve: Maximizing Your Pie Enjoyment
Optimal Chilling for Best Results
As highlighted in the instructions, an extended chill time is non-negotiable for a no-bake pie that holds its shape and cuts beautifully. Plan your dessert preparation to allow at least 4 hours, and ideally, an overnight rest in the refrigerator for peak perfection.
How to Store Leftovers with Care
To keep your leftover slices of Chocolate Peanut Butter No-Bake Pie fresh and delicious, cover the pie plate tightly with plastic wrap or aluminum foil. You can also transfer individual slices to an airtight container. This prevents the crust from becoming stale and the filling from absorbing unwanted refrigerator odors.
Creative Serving Suggestions & Garnishes
While this pie is spectacular on its own, you can elevate your serving with simple garnishes. Consider a dusting of cocoa powder, a generous swirl of fresh whipped cream, a sprinkle of finely chopped peanuts, or even a drizzle of extra chocolate sauce for added visual appeal and flavor dimensions.
Ready to Share Your Masterpiece?
With this ultimate Chocolate Peanut Butter No-Bake Pie recipe, you are now equipped to create a dessert that is not only incredibly delicious but also impeccably presented. Say goodbye to wobbly, messy slices and hello to perfectly firm, show-stopping pieces that will earn you rave reviews from family and friends.
More Sweet Treats to Try
If you enjoyed the chocolate and peanut butter combo in this no-bake pie, these two recipes share similar flavors or a rich, dessert-worthy vibe.
- For an extra dose of peanut butter goodness, scoop up some Loaded Peanut Butter Toffee Dip — it’s a quick, shareable option that pairs well with fruit or pretzels.
- Switch things up with Red Velvet Cinnamon Rolls with Tangzhong Fluff; the soft, tangy red velvet dough and creamy topping offer a different texture but the same indulgent feel.
We encourage you to try this recipe and experience the satisfaction of a flawless no-bake pie that holds its shape like a dream. For more decadent no-bake inspiration, you might also enjoy exploring our recipe for decadent pumpkin pie truffles. Don’t forget to share your amazing Chocolate Peanut Butter No-Bake Pie creations with us online – we absolutely love seeing your culinary triumphs!
Chocolate Peanut Butter Pie
Course: DessertCuisine: AmericanDifficulty: easy8
servings45
minutes470
kcal240
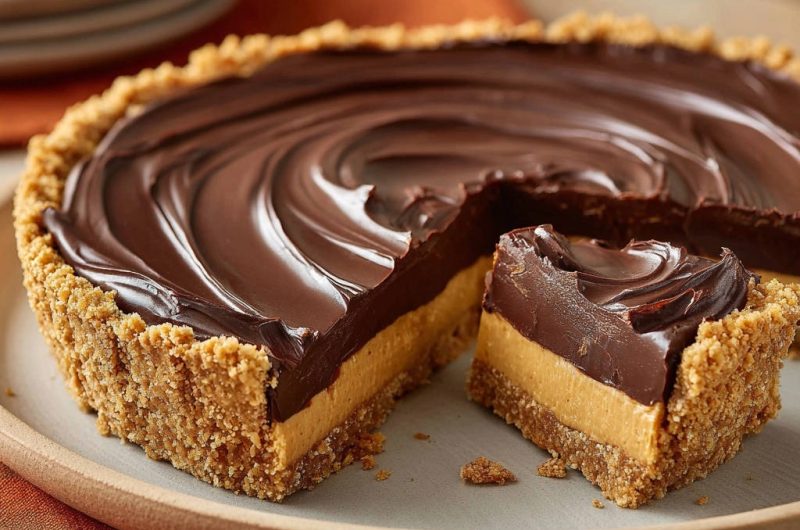
minutesSay goodbye to messy slices with this Chocolate Peanut Butter No-Bake Pie! This recipe reveals the ultimate secret to achieving perfectly firm, clean slices every single time. Combining a crisp graham cracker crust, creamy peanut butter filling, and a rich chocolate ganache, it’s a show-stopping dessert that looks as good as it tastes.
Ingredients
For the Crust:
1 and 1/2 cups graham cracker crumbs (about 10 full sheets)
1/4 cup granulated sugar
6 tablespoons unsalted butter, melted
For the Peanut Butter Filling:
8 ounces cream cheese, softened
1 cup creamy peanut butter
1 and 1/2 cups powdered sugar
1/2 teaspoon vanilla extract
1/4 cup heavy cream
Pinch of salt
For the Chocolate Topping:
1 cup semi-sweet chocolate chips
1/2 cup heavy cream
Directions
- Prepare the Crust: In a medium bowl, combine the graham cracker crumbs and granulated sugar. Pour in the melted butter and stir until well combined and the crumbs are moistened. Press the mixture firmly into the bottom and up the sides of a 9-inch pie plate. For best results, use the bottom of a flat glass or measuring cup to compact the crust as much as possible. Place the pie plate in the refrigerator to chill for at least 15 minutes while you prepare the filling.
- Make the Peanut Butter Filling: In a large bowl, using an electric mixer, beat the softened cream cheese until smooth and creamy, about 2 minutes. Add the peanut butter and beat until fully incorporated and smooth. Gradually add the powdered sugar, mixing on low speed until combined, then increase speed to medium and beat until fluffy. Stir in the vanilla extract, heavy cream, and a pinch of salt until the mixture is light and creamy but still very thick. The cream cheese is key here; it provides the essential structure that keeps your slices from falling apart!
- Assemble the First Layer: Spoon the peanut butter filling into the chilled graham cracker crust. Spread it evenly using a spatula, ensuring the top is smooth. Place the pie back into the refrigerator to chill for at least 30 minutes while you prepare the topping. This initial chilling helps the peanut butter layer set slightly before the chocolate is added.
- Prepare the Chocolate Topping: In a small saucepan over medium-low heat, gently warm the heavy cream until it just begins to simmer around the edges. Alternatively, heat in a microwave-safe bowl until hot but not boiling. Remove from heat and pour the hot cream over the chocolate chips in a heatproof bowl. Let it sit for 5 minutes without stirring. Then, whisk gently from the center outwards until the mixture is completely smooth and glossy. Let the chocolate ganache cool for about 10-15 minutes, stirring occasionally, until it’s slightly thickened but still pourable. This cooling step prevents the ganache from being too warm and melting into the peanut butter layer.
- Finish the Pie: Pour the cooled chocolate ganache over the peanut butter filling, gently spreading it to the edges with a spatula or by tilting the pie plate. For a decorative swirl, use the back of a spoon to create patterns on the surface.
- The Ultimate Firmness Secret : Place the pie in the refrigerator to chill for a minimum of 4 hours, but for the most perfect, clean slices, overnight chilling is highly recommended. This extended chilling time allows all the layers to fully set and firm up, ensuring each slice holds its shape beautifully. Before serving, you can place it in the freezer for about 15-20 minutes for an even cleaner cut, then let it sit at room temperature for 5-10 minutes to slightly soften before slicing and serving.
Notes
- For the ultimate firmness and clean slices, chill the pie overnight.