Cheesy Sweet Potato Beef Bake: No-Sink Layers Recipe
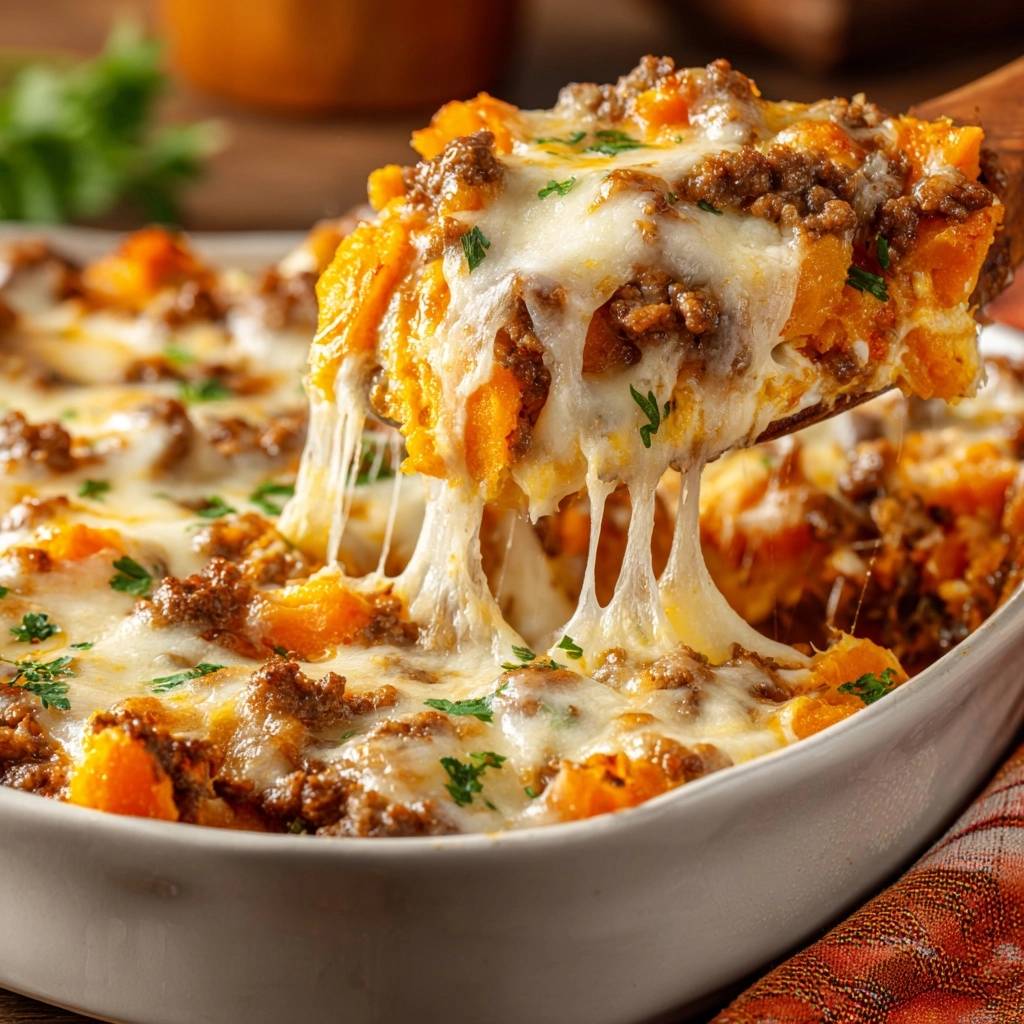
Ever made a shepherd’s pie-style bake where the sweet potato mash sinks right into the beef, leaving you with a mushy mess? This Cheesy Sweet Potato Beef Bake fixes that frustration for good. You’ll get crisp cheese edges, fluffy mash that stays put, and pull-apart layers every time. It’s the comfort food upgrade your family dinners need.
Why does this recipe deliver? Traditional versions fail because hot fillings don’t set, so the mash collapses in. Here, a simple 10-minute cool-down firms everything up. Plus, melty cheddar binds the beef for stability. In addition, the no-milk mash keeps things thick and airy.
The real secret lies in dolloping the mash gently after cooling. This traps air pockets, so it won’t deflate or sink. You’ll slice into perfect layers that taste like home-cooked heaven, with that golden, bubbly top pulling apart just right.
Why Cheesy Sweet Potato Beef Bake Succeeds
This bake nails no-sink layers through smart heat management. Hot beef stays soft, but cooling lets proteins firm up. Therefore, your mash sits high and proud. Prep takes 45 minutes total, serves 6-8, and clocks in at about 550 calories per serving.
For a perfect pairing, try our Mastering Cheesy Beef Stuffed Peppers Without the Soggy Bottom.
Contrast that with mushy failures from skipping steps. The cheese melt seals the beef, creating a sturdy base. You’ll love the reliable results that make weeknights feel special.
Science of Firm Beef Base
When you stir in cheese after browning ground beef, proteins coagulate as it cools. Hot filling stays jiggly, but after 10 minutes, it sets like a firm custard. Parsley adds subtle structure too, locking in that non-sinking texture.
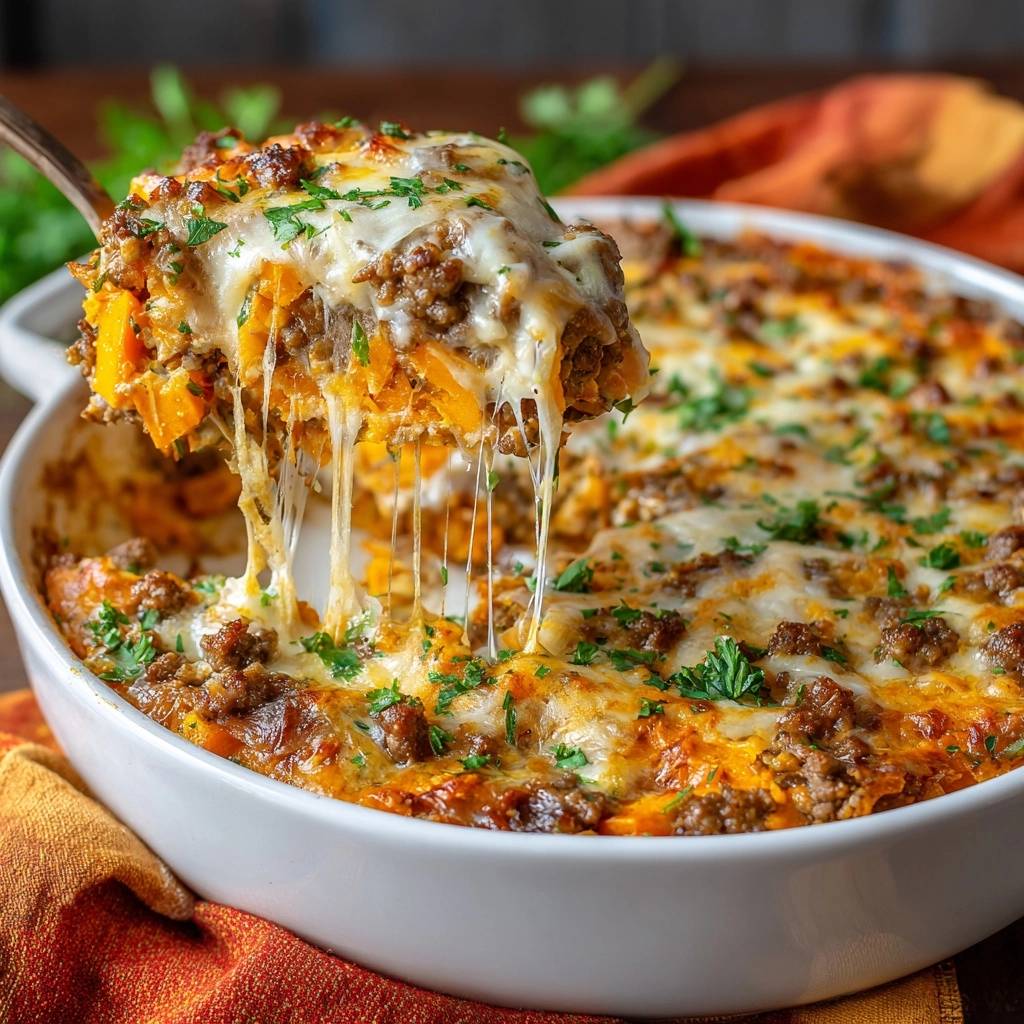
Picture spooning into cooled beef, it holds shape unlike the soupy version. This simple shift prevents disasters every time.
If you’re layering flavors here, you’ll love the same bold approach in this jalapeno popper stuffed meatloaf.
Fluffy Mash Without Dairy Sink
Boiled sweet potatoes undergo starch retrogradation when cooled slightly. That thickens the mash without milk, perfect for spreading. In addition, the brief cool traps air for fluffiness.
No watery collapse here. You’ll get a dollopable texture that spreads evenly over beef.
Key Ingredients for Cheesy Sweet Potato Beef Bake
Sweet potatoes (2 lbs or 900g, peeled and cubed) bring natural sweetness and starch for thick mash. Ground beef (1.5 lbs or 680g, lean preferred) provides protein and firmness. Shredded cheddar cheese (3 cups or 340g, sharp for best melt) seals layers with gooey pull.
Fresh parsley (1/4 cup chopped) binds the filling and adds fresh pop. Olive oil (1 tbsp), salt, and pepper season simply. Go for grass-fed beef if you can, it drains cleaner. Orange-fleshed sweets boost beta-carotene too.
Pro tip: Freshly shred cheese, it melts smoother than pre-shredded. These picks ensure nutrition and no-sink success.
Selecting Sweet Potatoes
Choose orange varieties for vibrant color and smoother mash. Cube them evenly, about 1-inch, for quick boiling. Store in a cool, dark spot up to two weeks.
White ones work but lack that sweet edge. Boiling cubed yields lump-free results fast.
Cheese and Beef Pairing Insights
Shred cheddar fresh, anti-caking agents in pre-shredded block melting. For beef, 80/20 mix browns best, but drain fat well. This combo creates a rich, firm base.
Lean beef cuts grease without drying out. Perfect harmony for cheesy bliss.
Equipment for Perfect Cheesy Sweet Potato Beef Bake
Grab a 3-quart casserole dish, glass conducts heat evenly for bubbly edges. A potato masher keeps mash thick without overworking starches. Use a large skillet for even beef browning.
Skip mixers, they make it gummy. An oven thermometer ensures 375°F precision. Budget glass dishes from any store work great.
Phase 1: Mastering Sweet Potato Mash
Preheat oven to 375°F. Boil 2 lbs cubed sweet potatoes in salted water until fork-tender, about 15 minutes. Drain thoroughly, then mash smooth with a masher. Season with salt and pepper.
Set aside to cool slightly. This makes it spreadable yet thick. Watch for steam rising, that’s your cue it’s ready.
Common error: over-boiling turns it watery. Test with a fork early.
Achieving Fork-Tender Texture
Start timing at boil, 12-15 minutes max. Salted water seasons from inside out. If too firm, simmer 2 more minutes.
Pierce easily, no resistance. Perfect every time.
Phase 2: Browning Beef with Cheese Binder
Warm 1 tbsp olive oil in a skillet over medium heat. Add 1.5 lbs ground beef, season with salt and pepper. Cook until browned and crumbled, about 8 minutes. Drain excess fat.
Stir in 1/4 cup parsley and 1 cup cheddar. Cook 2 more minutes until cheese melts and binds. Smell that herby, cheesy aroma building firmness.
This step creates the non-sinking base. Crumble as you go to avoid clumps.
Preventing Greasy Filling
Tilt skillet, spoon out fat after browning. Lean beef releases less. Pat with paper towels if needed.
Dry filling stacks better under mash.
Phase 3: Layering Cheesy Sweet Potato Beef Bake
Grease a 3-quart casserole. Spread beef evenly, then cool 10 minutes. Dollop cooled mash in mounds, gently spread to cover without pressing.
Sprinkle 2 cups cheese on top. Air pockets keep it fluffy. No hard presses, or it densifies.
10-Minute Cool-Down Mechanics
Cooling reverses gelatinization in beef, firming it like jello sets. Test with a spoon, it shouldn’t jiggle. Set a timer, don’t skip.
This mechanics your layers stay distinct.
Phase 4: Baking to Golden Perfection
Bake uncovered at 375°F for 25-30 minutes until cheese bubbles. Broil 2 minutes for golden edges, watch closely. Rest 5 minutes, garnish with parsley.
Middle rack for even heat. Smell that crispy top forming? Slice to reveal layers.
Avoiding Mistakes in Cheesy Sweet Potato Beef Bake
Top pitfall: skipping cool-down causes sinking. Pressing mash collapses air. Under-draining fat slicks the top. Too little cheese dries it out.
Fix by following timers strictly. Dollop gently always. You’ll avoid soggy disasters.
Troubleshooting Soggy Layers
Over-mashing releases starch, thin it out. Reheat covered at 350°F to revive crisp. Pat beef dry pre-layering.
Fresh assembly prevents most issues.
Make-Ahead Guide for Cheesy Sweet Potato Beef Bake
Assemble fully, cover tightly, fridge up to 2 days. Bake fresh for best texture. Or freeze beef layer separate up to 3 months.
Thaw overnight, layer and bake. Scale for 12 by doubling in two dishes. Reheat covered at 350°F, then uncover.
Freezing and Thawing Steps
Portion beef into freezer bags, flatten for quick thaw. Wrap casserole foil-tight. Thaw in fridge 24 hours, quality holds well.
Avoid refreezing mash, it weeps.
Flavor Twists on Cheesy Sweet Potato Beef Bake
Swap beef for ground turkey or lentils for lighter take. Add minced garlic, onions, bell peppers to filling. Try gouda or smoked cheddar for smoky melt.
Spice with cumin or chipotle. Yams sub sweet potatoes fine. All keep no-sink magic intact.
What to Serve Alongside This Cheesy Beef Bake
If you’re planning a full meal around this sweet potato and beef bake, these two potato-based sides fit right in with the cheesy, hearty theme.
- For another layer of crispy, cheesy comfort, the Cheesy Hash Brown Casserole shares the same casserole-style warmth and pairs nicely with the beef’s savory richness.
- To add a cool, creamy contrast, the Creamy Southern Style Potato Salad brings tang and texture that cuts through the cheese and sweet potato sweetness.
Pairing Sides with Cheesy Sweet Potato Beef Bake
Crisp green salad cuts the richness. Roasted broccoli adds char. Garlic breadsticks sop up juices.
Sparkling cider refreshes. Fresh fruit dessert balances hearty vibes. Light contrasts make it shine.
Cheesy Sweet Potato Beef Bake FAQ
How do I store leftovers and can it freeze?
Store in an airtight container in the fridge up to 4 days. Reheat portions in microwave or 350°F oven until hot, about 10-15 minutes. It freezes well if you prep beef layer separate, up to 3 months; thaw fully in fridge before layering and baking. Mash doesn’t refreeze great, gets watery, so assemble post-thaw for best layers.
Why did my sweet potato mash sink into the beef?
Most likely you skipped the 10-minute cool-down or layered hot components. Cooling firms beef proteins via coagulation, creating a stable base. Also, pressing mash down releases air pockets, causing collapse. Always dollop gently and wait, it’ll hold perfectly.
Can I make this dairy-free or use substitutions for cheese?
Yes, try vegan cheddar shreds designed for melting; they bind similarly without sinking issues. Skip real cheese for nutritional yeast in beef for cheesiness. However, dairy-free mash needs a splash of olive oil for creaminess, but keep it minimal to maintain thickness.
Can I use instant sweet potato mash?
No, instant mash is too watery and pre-gelatinized, it sinks instantly into beef. Fresh boiled gives starch retrogradation for fluffy, stable layers. Stick to whole potatoes, it’s worth the 15-minute boil for foolproof results.
Why broil at the end and how long?
Broiling 1-2 minutes crisps cheese edges to golden perfection without overcooking filling. Watch closely to avoid burning, as oven strength varies. It adds that irresistible pull-apart texture everyone craves.
How do I scale this for 4 servings?
Halve everything: 1 lb sweet potatoes, 0.75 lb beef, 1.5 cups cheese. Use a 2-quart dish. Times stay same, just less volume. Perfect for smaller families, layers still hold with the cool-down trick.
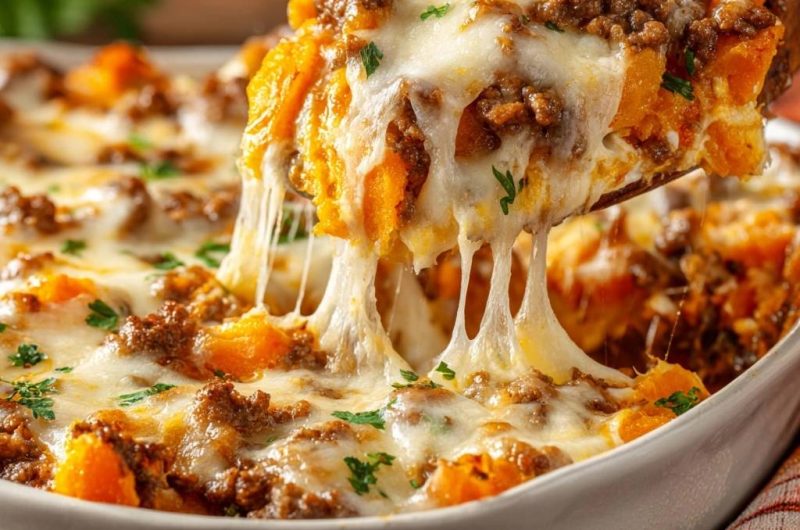
Sweet Potato Beef Bake
Course: Main CourseCuisine: AmericanDifficulty: medium6
servings20
minutes45
minutes650
kcal65
MinutesTired of shepherd’s pie-style bakes where the sweet potato topping sinks into the beef? This recipe uses a 10-minute cool-down to set the beef filling firm, keeping creamy mash on top with melty cheese for pull-apart perfection.
Ingredients
2 lbs sweet potatoes, peeled and cubed
1.5 lbs ground beef
3 cups shredded cheddar cheese, divided
1/4 cup chopped fresh parsley, plus more for garnish
Salt and pepper to taste
1 tbsp olive oil
Directions
- Preheat oven to 375°F. Boil sweet potatoes in salted water until fork-tender, about 15 minutes. Drain well, mash smooth with a potato masher (no milk needed for thick texture), season with salt and pepper. Set aside to cool slightly for spreadable consistency.
- In a large skillet over medium heat, warm olive oil. Add ground beef, season with salt and pepper, and cook until browned and crumbled, about 8 minutes. Drain excess fat. Stir in 1/4 cup chopped parsley and 1 cup shredded cheddar cheese. Continue cooking 2 more minutes until cheese melts and binds the mixture for a firmer texture. Cook until no pink remains and it reaches 160°F (71°C).
- Transfer beef to a greased 3-quart casserole dish. Spread evenly and let cool 10 minutes. This crucial cool-down step firms up the filling, creating a stable base that prevents sinking.
- Dollop cooled sweet potato mash over beef in even mounds, then gently spread to cover completely without pressing down hard. This air-trapped layer stays fluffy and intact. Sprinkle remaining 2 cups cheese on top.
- Bake uncovered 25-30 minutes until cheese melts and bubbles. Broil 2 minutes for golden edges. Rest 5 minutes, garnish with parsley. Slice to reveal perfect layers no sink ever!
Notes
- The 10-minute cool-down after spreading the beef is crucial to firm up the filling and prevent the sweet potato mash from sinking. No milk in the mash keeps it thick and spreadable.