Snickerdoodles: Guaranteed Chewy & Crinkled Perfection
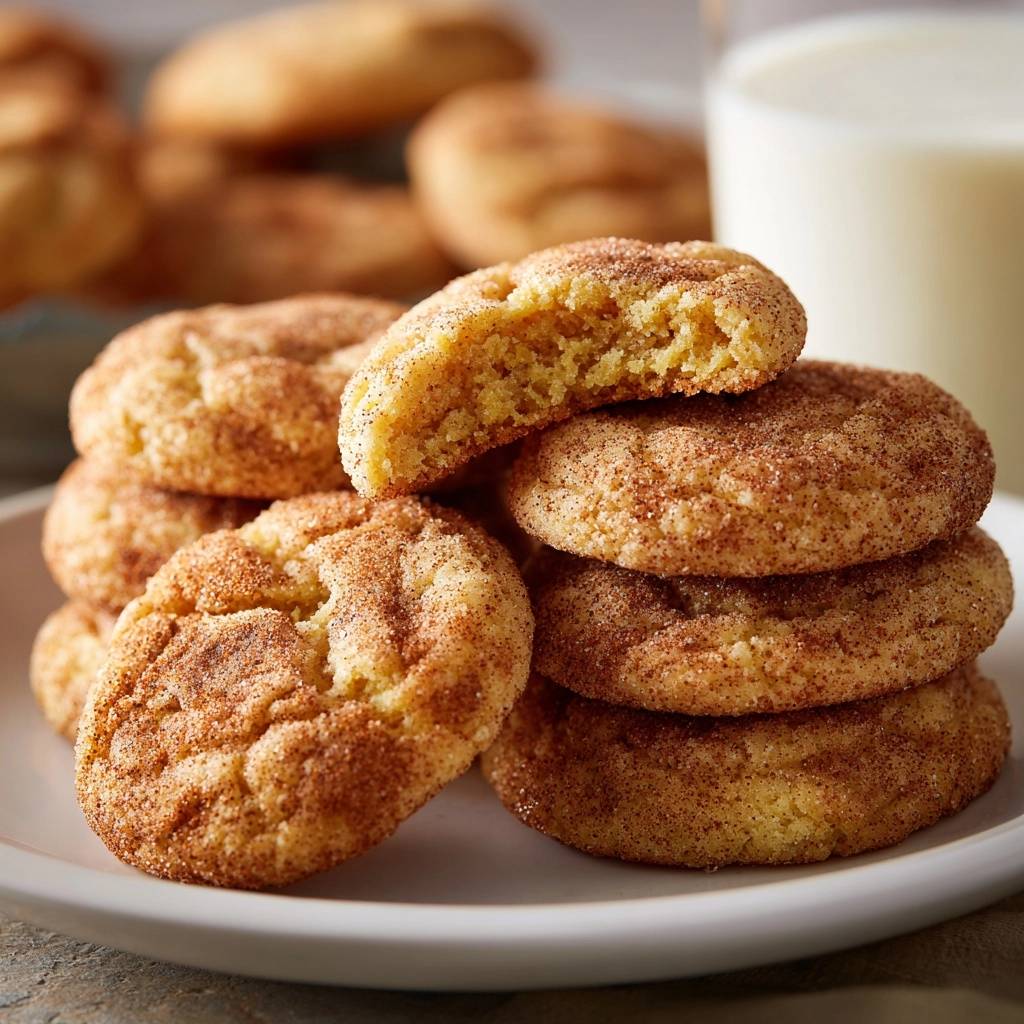
For years, crafting the perfect Snickerdoodle felt like chasing a baking myth – that elusive balance of a deeply chewy center with the signature crinkled, cinnamon-sugar crust. Many recipes fall flat, yielding cookies that are either too dry, too cakey, or simply lack that irresistible melt-in-your-mouth tenderness. This recipe, born from countless tests and tweaks, finally cracks the code, ensuring every batch of your homemade Snickerdoodles is a triumphant success.
The Snickerdoodle Secret: Why This Recipe Delivers
Achieving Snickerdoodle perfection isn’t just about following steps; it’s about understanding the “why” behind each ingredient and technique. This recipe focuses on precise methods that guarantee an exceptional result every time.
Mastering the Melt-in-Your-Mouth Center
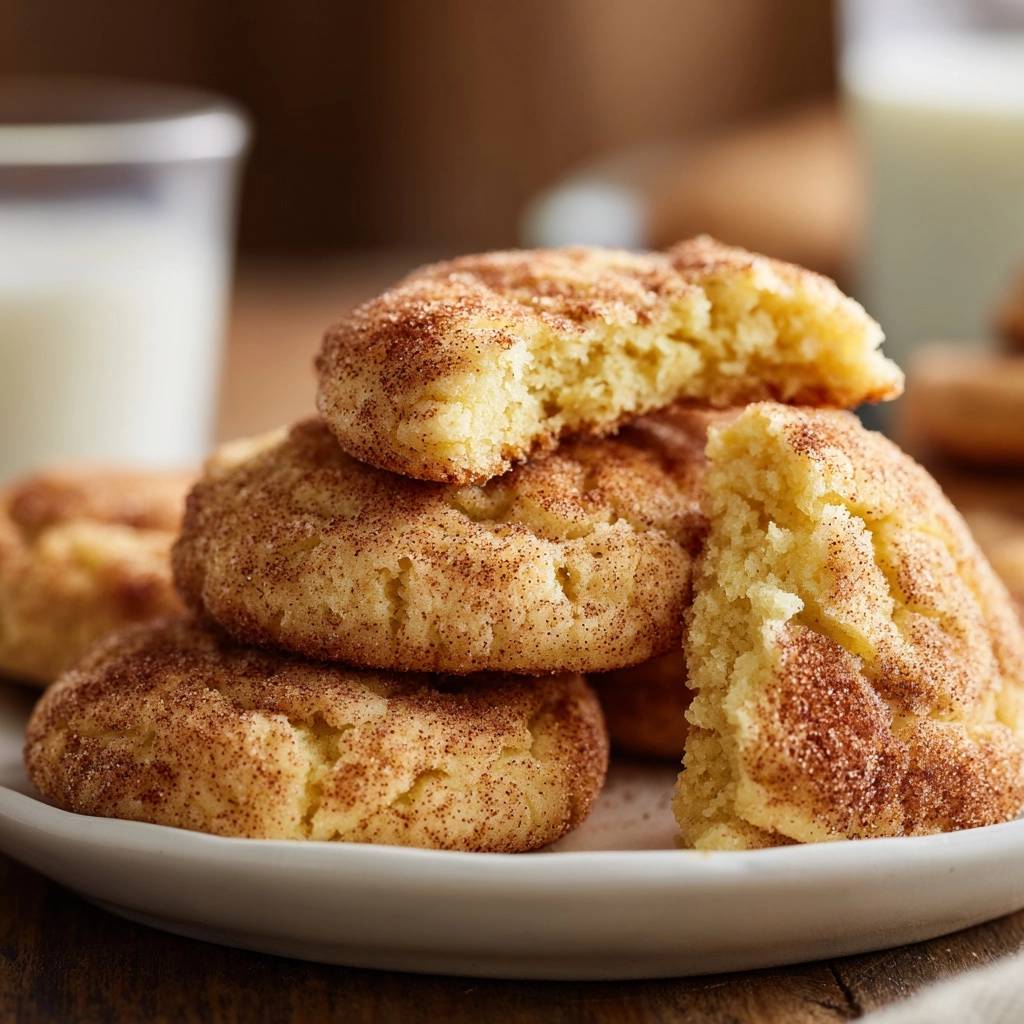
The secret to a truly chewy Snickerdoodle lies in strategic ingredient ratios and careful baking. We prevent dryness by ensuring optimal moisture, coupled with a specific baking cue that preserves that soft, delightful interior.
Underbaking just slightly is key. This allows residual heat to gently finish the cooking process as the cookies cool, locking in moisture and tenderness.
No More Flat or Crumbly: The Texture Breakthrough
Our recipe achieves that iconic crinkled texture and prevents common issues like excessive spreading or crumbly cookies. This is largely thanks to the precise balance of leavening agents and careful dough handling.
The specific interaction of cream of tartar and baking soda is vital. It creates the perfect pH environment for the cookies to rise, crinkle, and maintain their charming, plush form.
A Go-To Recipe That Solves Common Baking Woes
This Snickerdoodle recipe is designed to be your reliable guide, addressing frequent challenges bakers face. From overmixing to ideal chilling, we cover the essentials for foolproof baking.
It’s crafted to minimize guesswork and maximize enjoyment, ensuring every batch of these classic cookies meets your highest expectations.
Gather Your Snickerdoodle Essentials
Quality ingredients are the foundation of exceptional homemade Snickerdoodles. Here’s what you’ll need, with insights into their crucial roles.
The Foundation: Flours and Leaveners
All-Purpose Flour: Provides the essential structure for your cookies. Measuring it correctly by spooning into the cup, then leveling, prevents a dense dough.
Cream of Tartar: This is the signature ingredient for Snickerdoodles. It provides the characteristic tangy flavor and works with baking soda to create that unique chewy, crinkled texture, ensuring the cookies stay soft and never cakey.
Baking Soda: A leavening agent that reacts with the cream of tartar to produce carbon dioxide, creating lift and contributing to the crinkled surface.
Salt: Balances the sweetness and enhances all the other flavors, making them pop.
Enriching Elements: Butter, Sugar, & Flavorings
Unsalted Butter (Softened): Softened butter is crucial for creaming effectively with sugar. It incorporates air, which leads to a lighter, more tender cookie texture.
Granulated Sugar: Provides sweetness and helps with browning and spread. Its interaction with butter forms the base of a tender dough.
Large Egg: Acts as a binder, adding moisture and richness while contributing to the overall structure of the cookie dough.
Vanilla Extract: Enhances the cookie’s flavor profile, adding warmth and depth to every bite.
The Signature Finish: Cinnamon-Sugar Coating
Granulated Sugar: Forms the sweet base of the coating, providing crunch and sparkle.
If you enjoy the cinnamon-sugar coating and soft texture of these, you’ll also love the crackly tops and spiced warmth of these soft ginger molasses cookies.
Ground Cinnamon: The quintessential spice for Snickerdoodles, offering warm, aromatic notes that define the cookie’s flavor.
Essential Tools for Snickerdoodle Success
Having the right tools simplifies the baking process and contributes to consistent results for your chewy Snickerdoodles.
Mixing and Measuring Must-Haves
Electric Mixer: Essential for creaming butter and sugar until light and fluffy, ensuring proper aeration.
Mixing Bowls (Small, Medium, Large): You’ll need various sizes for dry ingredients, wet ingredients, and the cinnamon-sugar coating.
Measuring Cups and Spoons: Accurate measurements are critical for baking success, so use these diligently.
Spatula: Perfect for scraping down the sides of bowls, ensuring all ingredients are well incorporated.
Baking Sheet and Beyond
Parchment Paper or Silicone Baking Mat: Prevents sticking and promotes even baking, making cleanup a breeze.
Baking Sheet: A sturdy baking sheet provides the surface for your cookies to bake evenly.
Wire Cooling Rack: Allows air to circulate around the cookies, ensuring they cool completely without becoming soggy bottoms.
Tablespoon Scoop: Crucial for portioning dough uniformly, which leads to consistently sized and baked cookies.
Your Guide to Snickerdoodle Perfection: Step-by-Step
Prepare Your Workspace & Coating
Preheat your oven to 375F (190C) and line a baking sheet with parchment paper or a silicone baking mat.
In a small bowl, whisk together the 2 tablespoons granulated sugar and 1 teaspoon ground cinnamon for the coating. Set this aside, as it’s crucial for the classic Snickerdoodle finish.
Crafting the Dry Foundation: Cream of Tartar’s Role
In a medium bowl, whisk together the flour, cream of tartar, baking soda, and salt until well combined.
The cream of tartar is a hero ingredient here, not just for its signature tangy flavor but because it works synergistically with the baking soda to achieve that unique chewy, crinkled texture, ensuring your cookies are never cakey or dry.
Creaming for Air: The Wet Ingredients
In a large bowl, use an electric mixer to cream together the softened unsalted butter and 3/4 cup granulated sugar until the mixture is light and fluffy, typically about 2-3 minutes.
This creaming process incorporates essential air, which is a key contributor to the Snickerdoodles’ soft texture.
Beat in the large egg and vanilla extract until they are fully combined. Remember to scrape down the sides of the bowl as needed to ensure everything is incorporated evenly.
If you’re a fan of that soft, chewy texture, you’ll love how these triple chocolate chunk brownie cookies turn out.
Combining Gently: The Dough Assembly
Gradually add the whisked dry ingredient mixture to the wet ingredients, mixing on low speed until they are just combined.
Be extremely careful not to overmix the dough once the flour is added. Overmixing can develop too much gluten, which will result in tougher, less chewy cookies, detracting from that signature Snickerdoodle texture.
Forming and Coating: The Iconic Roll
Scoop the dough by the tablespoonful and gently roll each portion into a smooth ball between your palms.
Roll each dough ball generously in the prepared cinnamon-sugar mixture, ensuring it is fully coated on all sides. This coating is what gives Snickerdoodles their iconic look and flavor.
Place the coated dough balls about 2 inches apart on your prepared baking sheet to allow for even baking and spreading.
Baking to Chewy Perfection: The Underbake Secret
Bake the Snickerdoodles for 8 to 10 minutes. The most crucial part for achieving that guaranteed chewy center is observing their appearance.
The cookies should look set around the edges but still appear slightly soft and puffy in the middle. They might even look a little underbaked when you pull them out of the oven, but trust the process.
This slight underbaking is the ultimate secret to a perfectly soft and delightfully chewy interior after they’ve cooled.
Cooling for Optimal Texture
Let the Snickerdoodles cool on the baking sheet for 5 minutes before carefully transferring them to a wire rack to cool completely.
This initial resting time on the hot baking sheet allows them to finish cooking gently and firm up without becoming hard, preserving their tender texture.
Expert Tips for Your Best Snickerdoodles Yet
Elevate your Snickerdoodle game with these refined tips, direct from my kitchen to yours.
Don’t Overmix the Dough!
Once flour is added, mix only until no streaks remain. Overmixing develops gluten, which toughens the dough, resulting in cookies that are cakey or tough instead of wonderfully chewy.
Embrace the “Underbake” Philosophy
Pull your Snickerdoodles from the oven when their edges are set but the centers still look slightly soft, puffy, and perhaps a touch underbaked. The residual heat from the baking sheet will continue to cook them through, achieving that ideal gooey-chewy texture as they cool.
The Power of Room Temperature Butter
Ensure your unsalted butter is genuinely softened (but not greasy or melted) before creaming. Properly softened butter whips beautifully with sugar, incorporating maximum air for a light, airy dough structure that yields tender cookies. If your butter is too cold, microwave it in 5-second bursts, flipping each time.
Why Cream of Tartar is Non-Negotiable
Cream of tartar is fundamental to classic Snickerdoodles. It not only imparts the characteristic tangy note but also reacts with baking soda to create the perfect pH balance, preventing sugar crystallization and yielding that signature crinkled, chewy texture. Substitutions will significantly alter the final result.
Consistent Dough Ball Rolling
Use a tablespoon-sized cookie scoop for uniform portions, then roll each piece into a smooth ball. Consistent sizing ensures all your Snickerdoodles bake evenly. Always roll generously and completely coat each ball in the cinnamon-sugar mixture for that iconic taste and appearance.
Chilling for Better Shape and Flavor
For even thicker, chewier Snickerdoodles and to prevent excessive spreading, consider chilling the dough for 30 minutes to an hour after forming the balls and coating them. Chilling also allows the flavors to meld, resulting in a more robust taste.
More Sweet Treats to Try
If these soft, buttery snickerdoodles hit the spot, you can keep the cinnamon-sugar theme going with these other baked goods.
- For a richer, gooier spin on cinnamon, try these Ultra-Gooey Chocolate Cinnamon Rolls with their deep cocoa swirl.
- When you want the same spiced flavor in a sliceable form, bake a batch of Cinnamon Sugar Mini Loaves for a fluffy, tender alternative.
Snickerdoodle Troubleshooting: Solving Common Bakes
Even expert bakers encounter challenges. Here’s how to tackle common Snickerdoodle issues.
My Snickerdoodles Are Spreading Too Much!
This often happens if your butter was too soft or melted, or if the dough was too warm. Chilling the dough for at least 30 minutes before baking can significantly help. Also, ensure you’re measuring your flour accurately and your oven temperature is correct.
Why Are My Cookies Dry or Cakey?
Overmixing the dough once the flour is added is a primary culprit, as it develops too much gluten. Overbaking is another common cause; remember the “underbake” philosophy for optimal chewiness. Check your ingredient ratios, especially flour, to ensure they’re precise.
The Cinnamon-Sugar Coating Isn’t Sticking
Ensure your dough balls are rolled immediately after forming them, before they dry out too much. The dough shouldn’t be too warm, as this can make it greasy and less receptive to the sugar mixture. A quick chill can often remedy this.
My Snickerdoodles Lack that Signature Tang
The tangy flavor comes directly from the cream of tartar. If your cookies lack it, ensure your cream of tartar is fresh (it loses potency over time) and measured correctly. Do not skip this essential ingredient for authentic Snickerdoodles.
Serving, Storing, and Making Ahead
Maximize your enjoyment of these delightful Snickerdoodles with proper care.
Optimal Serving Suggestions
Snickerdoodles are divine on their own, but truly shine alongside a warm mug of coffee or a cold glass of milk. For an extra treat, serve them warm with a scoop of vanilla bean ice cream.
Keeping Your Snickerdoodles Fresh
Store your cooled Snickerdoodles in an airtight container at room temperature for up to 3-4 days to maintain their chewiness. For longer storage, freeze them.
Make-Ahead Dough Options
You can prepare the dough in advance. Roll and coat the dough balls, then refrigerate them in an airtight container for up to 2 days. Alternatively, freeze the raw, coated dough balls on a baking sheet, then transfer them to a freezer bag for up to 3 months. Bake from frozen, adding 1-2 minutes to the baking time.
Your Snickerdoodle FAQs Answered
Let’s address some of the most common questions about baking Snickerdoodles.
Can I substitute cream of tartar in Snickerdoodles?
While you can technically use alternatives like lemon juice, vinegar, or baking powder (in specific ratios with baking soda), none will perfectly replicate the unique tangy flavor and specific chewy, crinkled texture that cream of tartar provides. For authentic Snickerdoodles, cream of tartar is highly recommended.
How do I know when Snickerdoodles are truly done baking?
Look for edges that are set and lightly golden, but the centers should still appear slightly soft, puffy, and perhaps a bit underdone. This slight underbake is crucial. They will firm up and become perfectly chewy as they cool on the hot baking sheet.
Why are my Snickerdoodles flat?
Flat Snickerdoodles are often a result of butter being too soft or melted, dough that’s too warm, an oven that isn’t preheated to the correct temperature, or too little leavening. Chilling the dough can help, as can ensuring accurate measurements of all ingredients.
Can I make Snickerdoodles gluten-free?
Yes, you can adapt this recipe for gluten-free diets. I recommend using a high-quality 1:1 gluten-free all-purpose flour blend that contains xanthan gum. You might need minor adjustments to liquid or baking time, as gluten-free flours can absorb moisture differently.
Can I freeze Snickerdoodle dough or baked cookies?
Absolutely! Both raw dough balls and baked Snickerdoodles freeze beautifully. For dough, flash freeze coated balls, then transfer to a freezer-safe bag. For baked cookies, ensure they are completely cooled before freezing in an airtight container. Thaw at room temperature or rewarm briefly.
Ready to Share Your Snickerdoodle Masterpiece?
You now possess the secrets to baking truly exceptional Snickerdoodles-cookies that boast a guaranteed chewy center and that irresistible crinkled, cinnamon-sugar finish. This recipe ensures every bite delivers on the promise of classic, comforting flavor and perfect texture.
Go forth and create your own Snickerdoodle magic! We’d love to hear about your baking triumphs. Share your Snickerdoodle masterpieces with us or leave a comment below with your favorite tip!
Snickerdoodles
Course: DessertCuisine: AmericanDifficulty: easy24
cookies20
minutes10
minutes40
kcal35
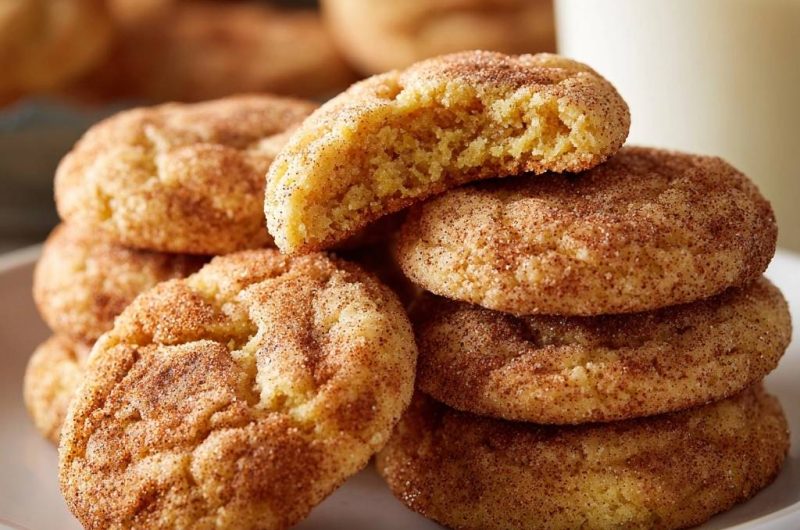
minutesSay goodbye to dry, cakey cookies! This Snickerdoodle recipe guarantees a perfect soft, chewy center every time, solving all your baking challenges. Get ready for melt-in-your-mouth cinnamon-sugar goodness with every bite.
Ingredients
1 and 1/2 cups all-purpose flour
1 teaspoon cream of tartar
1/2 teaspoon baking soda
1/4 teaspoon salt
1/2 cup (1 stick) unsalted butter, softened
3/4 cup granulated sugar
1 large egg
1 teaspoon vanilla extract
For the cinnamon-sugar coating:
2 tablespoons granulated sugar
1 teaspoon ground cinnamon
Directions
- Preheat your oven to 375F (190C). Line a baking sheet with parchment paper or a silicone baking mat.
- In a small bowl, whisk together the 2 tablespoons granulated sugar and 1 teaspoon cinnamon for the coating. Set aside.
- In a medium bowl, whisk together the flour, cream of tartar, baking soda, and salt. The cream of tartar is key here not just for the characteristic tangy flavor, but it also works with the baking soda to create that signature chewy, crinkled texture that keeps the cookies from being cakey or dry.
- In a large bowl, using an electric mixer, cream together the softened butter and 3/4 cup granulated sugar until light and fluffy, about 2-3 minutes. This step incorporates air, which contributes to the soft texture.
- Beat in the egg and vanilla extract until well combined. Scrape down the sides of the bowl as needed.
- Gradually add the dry ingredient mixture to the wet ingredients, mixing on low speed until just combined. Be careful not to overmix the dough once the flour is added; overmixing can develop too much gluten and result in tougher, less chewy cookies.
- Scoop dough by the tablespoonful and roll each portion into a smooth ball. Roll each dough ball generously in the prepared cinnamon-sugar mixture until fully coated. Place the coated dough balls about 2 inches apart on your prepared baking sheet.
- Bake for 8 to 10 minutes. Here’s the most crucial part for that guaranteed chewy center: The cookies should look set around the edges but still appear slightly soft and puffy in the middle. They might even look a little underbaked when you pull them out. This slight underbaking is the secret to a perfectly soft and chewy interior after cooling.
- Let the cookies cool on the baking sheet for 5 minutes before transferring them to a wire rack to cool completely. This resting time helps them finish cooking gently and firm up without becoming hard. Enjoy your perfectly chewy Snickerdoodles!
Notes
- Don’t overmix the dough for tender cookies. Slight underbaking is key for a chewy center. Cream of tartar ensures signature texture and flavor.