Mastering Triple Chocolate Chunk Brownie Cookies
You know that sinking feeling when you pull a baking sheet out of the oven only to find a single, giant, greasy puddle? It’s the ultimate kitchen heartbreak. Most chocolate cookies fail because they lack the structural “bones” to hold up all that heavy cocoa and butter, resulting in a flat mess that sticks to the parchment.
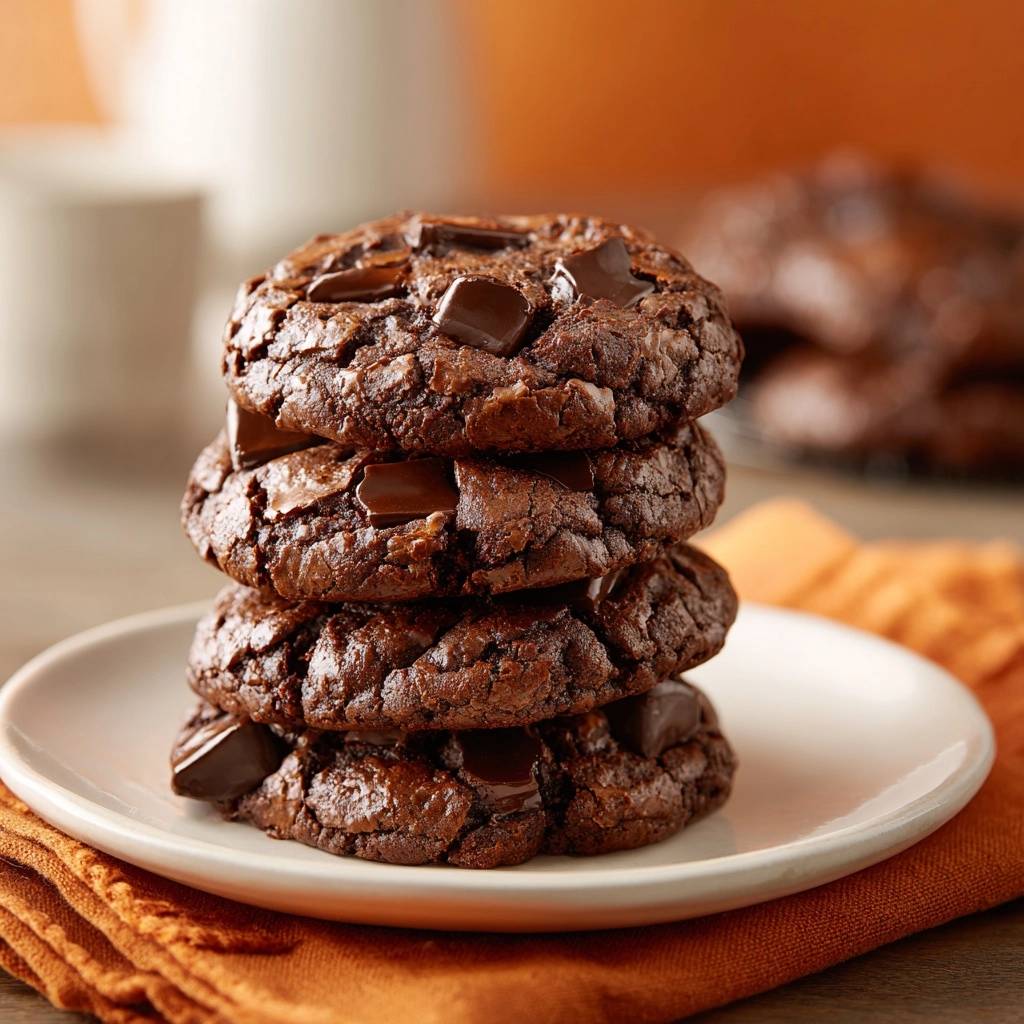
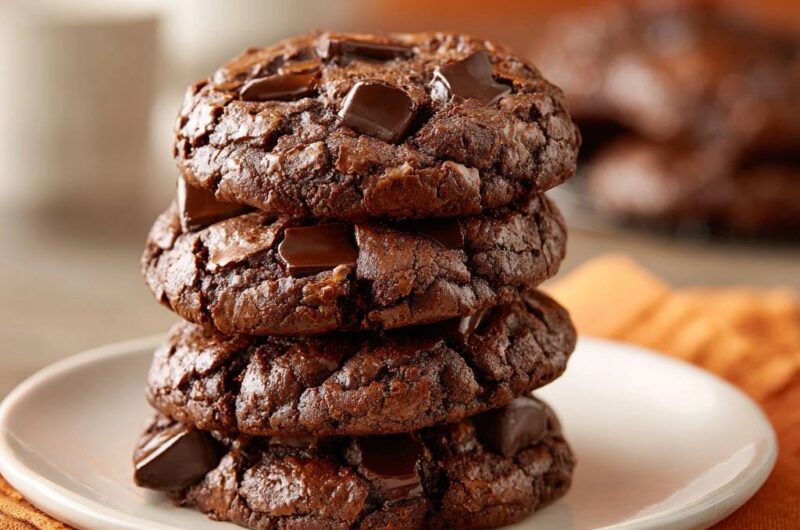
These Triple Chocolate Chunk Brownie Cookies are the definitive fix for the “puddle” problem. We aren’t just making a standard cookie dough here; we’re essentially engineering a portable brownie. You’ll get that iconic, paper-thin crackly crust that shatters when you bite into it, revealing a center so fudgy it’s practically ganache.
The secret to this architectural marvel isn’t more flour—it’s air. By whipping your eggs and sugar into a stable foam, you create a structural network that traps the chocolate in place. This guide breaks down the science of the “ribbon stage” and the hydration rest to ensure your cookies stand tall and stay fudgy every single time.
The Anatomy of a Non-Spreading Brownie Cookie
To stop a cookie from spreading into a thin disc, you have to understand the battle between fats and starches. In a typical chocolate chip cookie, the butter melts quickly, and if the flour isn’t strong enough, the dough collapses. This recipe flips the script by using melted chocolate as a primary building block.
Instead of relying solely on a high volume of flour, which can make a cookie cakey and dry, we use the protein in the eggs to provide lift. When you aerate the batter properly, you’re creating millions of tiny bubbles. These bubbles expand in the heat, holding the cookie’s shape while the edges set, preventing that dreaded “puddle” effect.
Why Dutch-Process Cocoa is Non-Negotiable
Dutch-process cocoa has been treated with an alkalizing agent to neutralize its natural acidity. This process gives the cocoa a darker, richer color and a smoother, mellow flavor that tastes like a premium candy bar. Because it’s neutral, it doesn’t react wildly with baking soda, giving us more control over the rise.
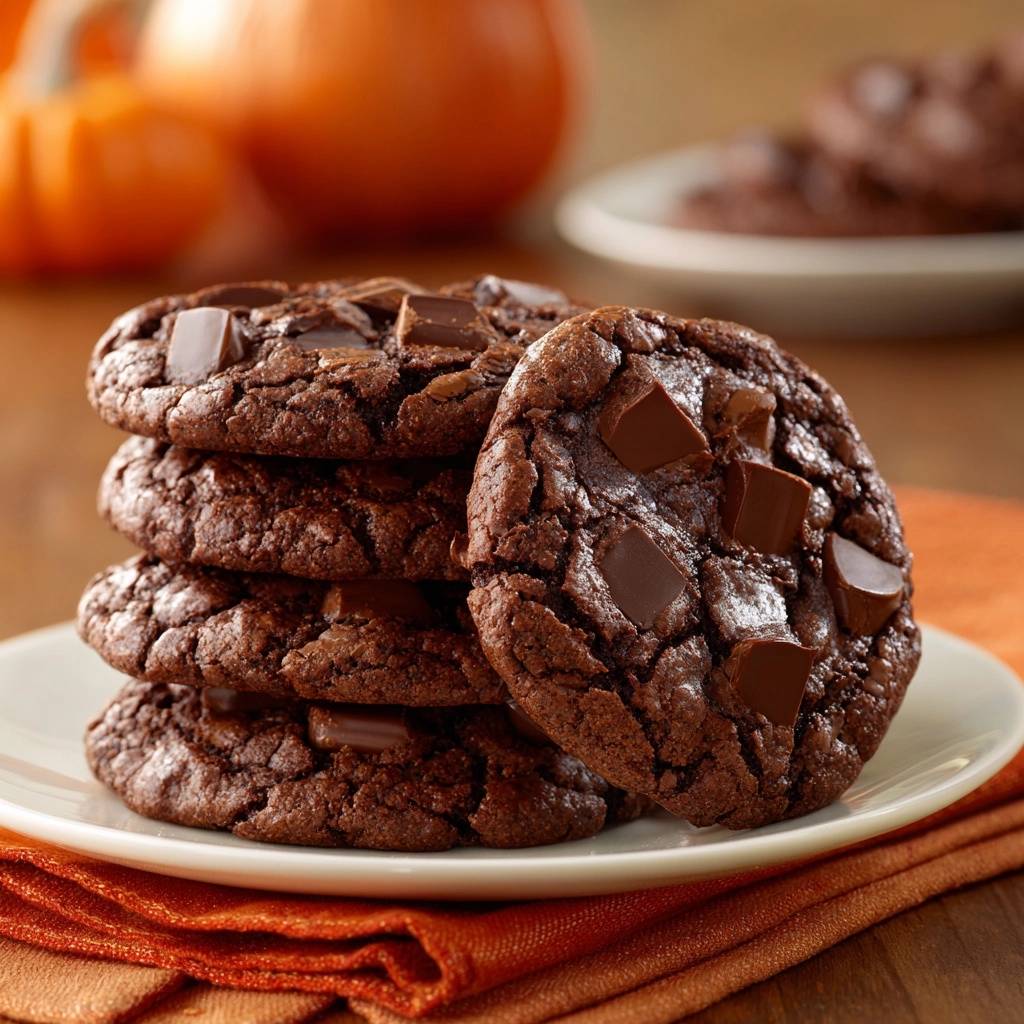
If you use natural cocoa powder, the acidity can interfere with the delicate egg foam we’re building. Dutch-process cocoa also has a higher fat content usually, which contributes to that melt-in-your-mouth texture. It pairs perfectly with the baking powder to provide a gentle, even lift without causing the dough to puff up and then deflate.
The Role of High-Quality Baking Bars
Standard chocolate chips are designed to hold their shape; they contain stabilizers and less cocoa butter so they don’t turn into a liquid mess in the oven. For the base of this dough, however, we want the chocolate to become one with the batter. This is why high-quality baking bars are essential.
When you melt 8 ounces of real chocolate with butter, you’re creating a rich emulsion. This melted chocolate acts as the “glue” for the cookie. As the cookies cool, the chocolate firms back up, creating that dense, fudgy interior that chocolate chips simply can’t replicate. Save the chips or chunks for the very end as a mix-in.
If you enjoy the rich chocolate base of these cookies, try this sea salt dark chocolate chunk version for a savory contrast.
Essential Components for Triple Chocolate Success
Success starts with the temperature of your ingredients. You must use room temperature eggs because cold eggs will cause your melted chocolate and butter to seize up instantly. When the eggs are warm, they emulsify beautifully with the fats, creating a glossy, smooth batter that flows perfectly.
Light brown sugar is another heavy hitter here. It contains just enough molasses to provide moisture and a hint of caramel flavor without being as heavy or acidic as dark brown sugar. This balance is vital for achieving that specific brownie-like chew rather than a gritty, sugary crunch.
Selecting Your Triple Chocolate Varieties
We achieve “Triple Chocolate” status through three distinct layers: the melted baking bar base, the Dutch-process cocoa, and the hand-chopped chunks. For the best results, look for a baking bar with 60% to 70% cacao. This provides a sophisticated bitterness that cuts through the sugar.
For the chunks, I always recommend chopping a bar by hand rather than buying pre-packaged chunks. Hand-chopping creates “chocolate dust” and irregular shards that melt into the dough at different rates. This ensures that every single bite has a different texture of chocolate, from tiny flecks to massive, molten pools.
The Science of the Ribbon Stage
This is the most important technical step in the entire recipe. You need to beat the eggs and sugars on high speed for a full five minutes. During this time, the sugar crystals dissolve into the egg proteins, and the mixture will transform from a dark grainy liquid into a pale, thick, voluminous foam.
You’ll know you’ve reached the “ribbon stage” when you lift the whisk and the batter falls back into the bowl in a thick, ribbon-like trail. This trail should sit on the surface for about three seconds before disappearing. This foam is what creates the shiny, crackled “meringue” top that defines a perfect brownie cookie.
Step-by-Step: Engineering the Perfect Crinkle
Once your egg foam is ready, you have to move with a mix of speed and gentleness. The goal is to incorporate the heavy melted chocolate and the dry ingredients without popping all those precious air bubbles you just spent five minutes creating. It’s a delicate dance of chemistry and technique.
Melting and Tempering the Chocolate Base
Use a double boiler to melt your chocolate and butter slowly. If you apply direct heat or get the chocolate too hot, the fats will separate, and you’ll end up with a greasy cookie that won’t hold its shape. The mixture should be smooth and glossy, not piping hot.
Let the melted mixture sit for about five minutes before adding it to the eggs. If it’s too hot, it will scramble the eggs; if it’s too cold, it will be too thick to fold in. It should feel just slightly warm to the touch, allowing it to blend seamlessly into the aerated egg mixture.
Folding Techniques to Preserve Aeration
Put down the electric mixer when it’s time to add the flour and cocoa. Use a large silicone spatula and the “J-fold” method. Cut through the center of the bowl, scoop under the bottom, and turn the batter over. Rotate the bowl as you go until the last streak of flour disappears.
Over-mixing at this stage is the fastest way to a flat cookie. Every stroke of the spatula breaks a few air bubbles, so be efficient. Stop the moment the dough looks uniform. The batter will feel much thinner than a standard cookie dough—don’t panic, that’s exactly how it should look at this stage.
The Critical 15-Minute Hydration Rest
This is the “secret sauce” step that most people skip. Because the batter is thin, it needs time for the starch in the flour and cocoa powder to fully hydrate. As it sits at room temperature, the starches soak up the moisture from the eggs and melted chocolate.
After 15 minutes, you’ll notice the batter has transformed from a pourable liquid into a thick, scoopable dough. This rest period ensures the cookies have enough “body” to stay thick in the oven. If you scoop immediately, they will spread too fast before the edges have a chance to set.
Precision Baking for a Fudgy Center
Baking is about timing and temperature, especially with a dough this delicate. You want the outside to set into a crisp shell while the inside remains soft and underbaked. This contrast is what makes these cookies so addictive, so keep a close eye on your oven timer.
Oven Calibration and Rack Placement
Always bake these on the middle rack. If they’re too close to the bottom, the chocolate base will scorch; too close to the top, and the crinkle crust will burn before the center is set. I highly recommend using an oven thermometer to verify your temperature is exactly 350°F.
Even a 10-degree difference can change the way the sugar reacts. If the oven is too cool, the cookies will spread too much before the crust forms. If it’s too hot, the outside will brown too quickly, leaving the middle raw and unstable, which causes the cookie to collapse as it cools.
The Visual Cues of Doneness
Forget the toothpick test; it doesn’t work for brownie cookies. Around the 9 or 10-minute mark, look for the “puff.” The cookies should be risen and the surface should be covered in deep cracks. The edges should look firm and matte, but the center should still look slightly soft.
If the center looks “wet,” give it one more minute. However, if it looks set but soft, pull them out! The cookies will continue to cook on the hot baking sheet for several minutes. This “carry-over” cooking is what perfects the fudgy texture without drying out the edges.
Troubleshooting Common Brownie Cookie Failures
Even with the best intentions, things can go wrong in the world of chocolate. If your cookies didn’t turn out like the pictures, it’s usually down to one of three technical errors. Don’t get discouraged; these are easy fixes for your next batch.
Why My Cookies Spread Into One Giant Sheet
If your cookies turned into a single sheet of chocolate, you likely skipped the 15-minute hydration rest or didn’t beat the eggs long enough. Without that 5-minute aeration, there is no “skeleton” to hold the dough up. Also, ensure your butter wasn’t oily or melted to the point of separation before mixing.
Another culprit could be the temperature of your baking sheet. Never scoop dough onto a hot pan from a previous batch. The heat will melt the fats instantly, causing the dough to run before the oven can do its job. Always let your pans cool completely between batches.
Solving the Mystery of the Missing Crinkle Top
That shiny, crackled top is actually a very thin layer of meringue. If your cookies are matte and smooth, the sugar didn’t fully dissolve into the eggs. This usually happens if the eggs were cold or if you didn’t beat the mixture on high speed for the full five minutes.
Using a high-quality chocolate bar for the melted base also helps. The fats and lecithin in real chocolate bars interact with the egg foam to create that glossy finish. If you used only chocolate chips for the melted portion, you might miss out on that signature shine.
Storage and Texture Preservation
These cookies are at their absolute peak about 30 minutes after they come out of the oven, once the center has set but is still slightly warm. However, they keep remarkably well if you store them correctly to protect that delicate crust.
What to Serve With Chocolate Cookies
If you want to keep the chocolate theme going, try these pairings that match the rich, gooey texture of the cookies.
- For a soft, cinnamon-spiced counterpoint, serve them with a batch of Ultra-Gooey Chocolate Cinnamon Rolls — the double chocolate layers make them a natural companion.
- To balance the sweetness with something savory, pair the cookies alongside Southern Biscuits and Mushroom Gravy; the creamy, peppery gravy contrasts nicely with the dense chocolate chunks.
The Best Way to Store Fudgy Cookies
Store these in an airtight container at room temperature for up to three days. Be aware that the moisture from the fudgy centers will eventually soften the crackly top. If you want to regain that crunch, you can pop them in a 300°F oven for just two minutes to re-crisp the exterior.
Avoid storing them in the refrigerator, as the cold will make the chocolate base quite hard and lose its “fudge” factor. If you must keep them longer, they actually taste incredible when eaten slightly chilled, but room temperature is best for the full flavor profile.
Freezing Dough vs. Freezing Baked Cookies
Unlike standard chocolate chip cookies, this specific batter does not freeze well in its raw form. The egg foam structure is too delicate and will deflate as it thaws, leading to flat, tough cookies. It is much better to bake the entire batch at once.
The good news is that the baked cookies freeze beautifully. Wrap them individually in plastic wrap and place them in a freezer bag. They will stay fresh for up to two months. Just let them thaw on the counter for an hour before eating, and they’ll be just as fudgy as day one.
Expert Tips for Customizing the Flavor Profile
Once you’ve mastered the base technique, you can start playing with the flavors. The structure of this cookie is robust enough to handle a few small additions, provided you don’t over-mix the batter while adding them.
Enhancing Chocolate with Espresso and Salt
To make the chocolate taste “more like chocolate,” add a teaspoon of instant espresso powder to your dry ingredients. You won’t taste the coffee, but it deepens the cocoa notes significantly. A generous sprinkle of flaky sea salt on top immediately after baking also provides a sharp contrast to the rich sugar.
The salt crystals react with your taste buds to amplify the perception of the cacao. It turns a simple sweet treat into a sophisticated dessert. Just be sure to use flaky salt like Maldon, as table salt will be too harsh and won’t provide that satisfying crunch.
Texture Add-ins: Nuts and Toffee
If you want some extra crunch, you can fold in half a cup of toasted walnuts or pecans along with your chocolate chunks. Toffee bits are another fantastic addition, as they melt slightly and create little pockets of chewy caramel throughout the cookie.
If you enjoy adding nuts for texture, these rich and fudgy loaded almond chocolate chunk cookies pack a similar crunch.
Just remember not to exceed one cup of total “add-ins.” If you put too much heavy stuff in the dough, it will weigh down the egg foam and cause the cookies to spread more than intended. Keep the ratios balanced to maintain that perfect brownie-cookie hybrid shape.
Frequently Asked Questions
Can I use a microwave instead of a double boiler?
Yes, you can use a microwave, but you must be extremely careful. Heat the chocolate and butter in 20-second bursts, stirring thoroughly between each one. Stop when there are still a few small lumps left and stir until they melt from the residual heat. This prevents the chocolate from scorching or seizing.
Why is my batter so thin compared to chocolate chip dough?
This is completely normal! Because this recipe uses a high ratio of melted chocolate and eggs with very little flour, it starts out looking more like a thick cake batter. The 15-minute rest at room temperature is what allows it to firm up into a scoopable consistency. Don’t be tempted to add more flour, or you’ll lose the fudgy center.
Can I substitute coconut sugar for brown sugar?
I don’t recommend it for this specific recipe. Coconut sugar is much drier than brown sugar and doesn’t dissolve as easily into the egg foam. This will likely result in a grainy texture and will prevent the crackly “meringue” top from forming. Stick to light brown sugar for the best moisture balance and spread control.
What happens if I use extra-large eggs?
Using extra-large eggs adds too much liquid to the batter. This will make the dough too thin to hold its shape, even after the 15-minute rest, leading to excessive spreading. This recipe is calibrated for large eggs (about 50g each without the shell). If your eggs look massive, whisk them in a bowl and measure out exactly 100g for the two eggs.
Why did my chocolate chunks melt into the dough instead of staying whole?
This usually happens if you fold the chunks into the batter while the melted chocolate/butter mixture is still too hot. If the base is too warm, it will melt your chunks instantly. Ensure your melted chocolate has cooled for at least five minutes and your batter doesn’t feel hot to the touch before you fold in those final pieces.
Brownie Cookies
Course: DessertCuisine: AmericanDifficulty: easy18
cookies15
minutes10
minutes210
kcal25
MinutesThese brownie-style cookies use a specific aeration method and a high chocolate-to-flour ratio to guarantee a thick center and a meringue-like crust. By whipping eggs to the ribbon stage and allowing the batter to hydrate, you achieve a stable structure that prevents the cookies from spreading flat.
Ingredients
1/2 cup all-purpose flour
1/4 cup unsweetened Dutch-process cocoa powder
1/2 teaspoon baking powder
1/4 teaspoon salt
8 oz semi-sweet chocolate (baking bars), chopped
1/4 cup unsalted butter, cubed
3/4 cup light brown sugar, packed
1/4 cup granulated sugar
2 large eggs, room temperature
1 teaspoon vanilla extract
1 cup large semi-sweet chocolate chunks (for folding and topping)
Directions
- In a small bowl, whisk together the flour, cocoa powder, baking powder, and salt. Set aside.
- Create a double boiler by placing a heat-proof bowl over a pot of simmering water. Melt the 8 oz of chopped chocolate and the butter together until smooth. Remove from heat and let cool for 5 minutes.
- In a large mixing bowl, combine the eggs, brown sugar, and granulated sugar. Using a hand mixer or stand mixer with a whisk attachment, beat on high speed for exactly 5 minutes. The mixture should be pale, thick, and fall off the whisk in a thick “ribbon” that holds its shape for a few seconds. This aeration is the secret to the crackly brownie top.
- Lower the mixer speed and pour in the melted chocolate/butter mixture and vanilla extract. Mix just until combined.
- Gently fold in the dry ingredients using a spatula until no flour streaks remain. Fold in 3/4 cup of the chocolate chunks. The batter will be thinner than traditional cookie dough-this is normal.
- To solve the spreading problem and ensure the thick height seen in the image, let the batter sit at room temperature for 10-15 minutes. This allows the starch in the flour and cocoa to hydrate, thickening the batter into a scoopable consistency.
- Preheat your oven to 350°F (175°C) and line a baking sheet with parchment paper.
- Scoop rounded tablespoons of dough onto the sheet, spacing them 2 inches apart. Press the remaining large chocolate chunks deeply into the tops of the dough balls.
- Bake for 9 to 11 minutes. The cookies will puff up and develop a crackled surface. The edges should be set, but the centers must remain soft to the touch.
- Let the cookies cool on the baking sheet for at least 15 minutes. This “carry-over” cooking time is essential for the fudgy center to set without the cookie collapsing or becoming dry.
Notes
- Letting the batter sit for 10 to 15 minutes before scooping is essential for the starch to hydrate and prevent spreading. Ensure eggs are at room temperature for the best aeration.