Ultimate Pulled Chicken Mac & Cheese: Stays Gooey & Creamy!
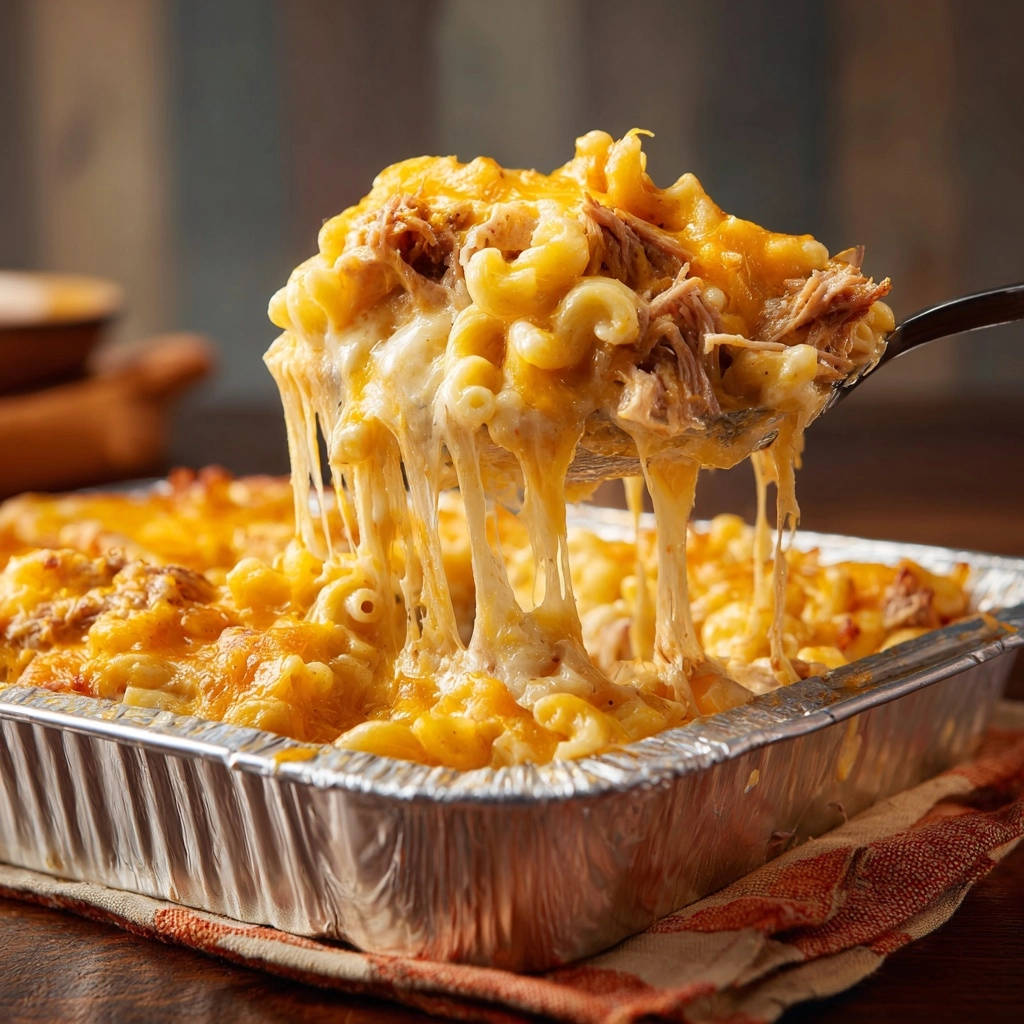
Who hasn’t been disappointed by mac and cheese that starts off perfectly creamy but ends up a sad, stiff block after baking? It’s a common struggle, one I’ve personally faced countless times!
But I’ve cracked the code to keeping this Ultimate Pulled Chicken Mac & Cheese incredibly gooey and satisfying, even when loaded with tender pulled chicken. Get ready for mac and cheese perfection that stays rich and luscious, every single spoonful.
Beyond Basic: The Genius Behind Our Gooey Mac & Cheese Perfection
The Crucial Undercooked Pasta Advantage
A common pitfall in baked macaroni and cheese is mushy, dry pasta. We avoid this by cooking the elbow macaroni just 1-2 minutes shy of al dente before it even hits the oven.
This slight undercooking allows the pasta to finish cooking in the luxurious cheese sauce during baking, absorbing flavor without becoming overcooked or losing its perfect chew.
Melting Cheese Off-Heat for Silky Smoothness
Adding cheese directly to a fiercely bubbling hot sauce can cause it to seize, become stringy, or even grainy. Our method involves removing the béchamel from the heat before incorporating the cheese.
This gentle melting ensures a truly silky, smooth, and cohesive cheese sauce, preventing any undesirable texture issues and maintaining that irresistible gooeyness.
Covered Baking: Locking in Tenderness and Moisture
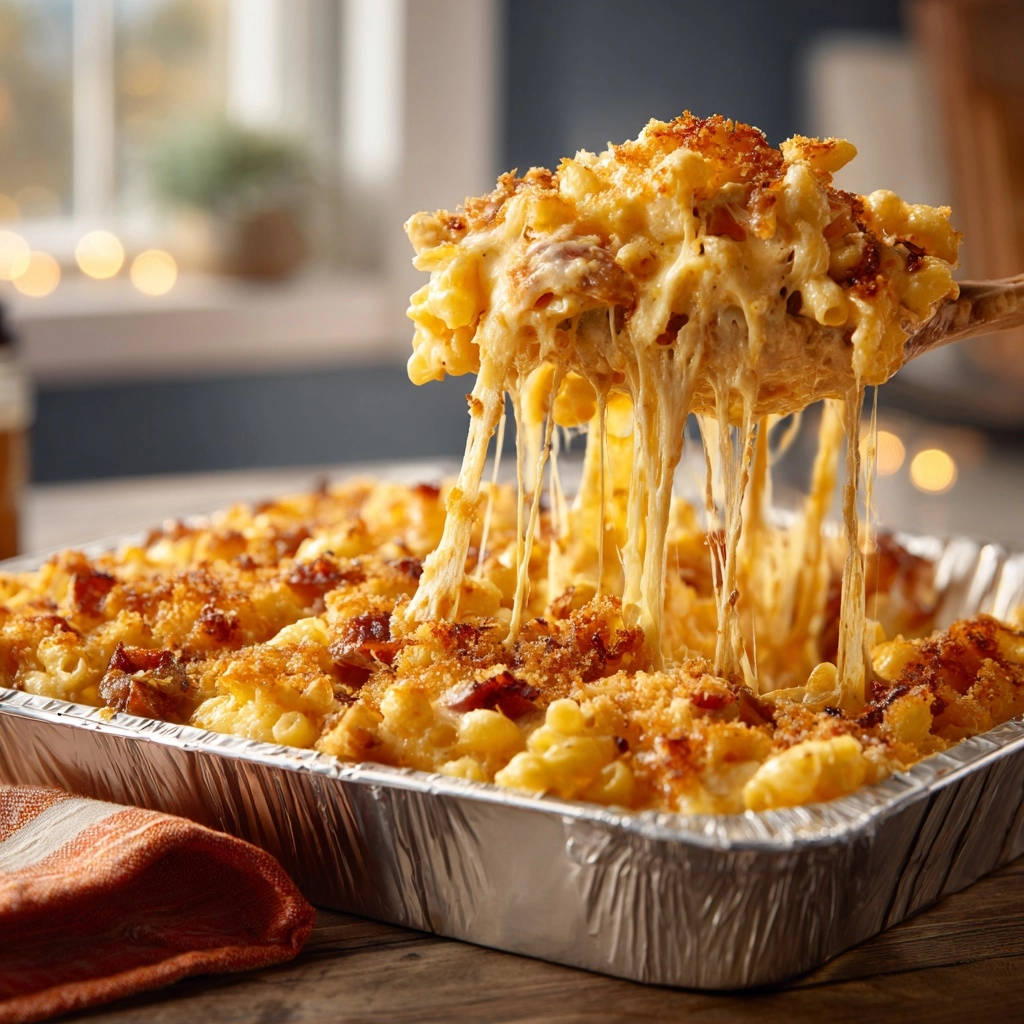
The initial covered baking phase is non-negotiable for this homemade mac and cheese. Tightly covering the dish creates a steamy environment inside your oven.
This steam keeps the macaroni incredibly tender and prevents the delicate cheese sauce from drying out prematurely, guaranteeing a consistently moist and gooey casserole from edge to center.
Warm Chicken Integration: The Secret to Cohesion
Adding cold chicken to a warm sauce can disrupt the temperature and texture of your creamy mac & cheese. We use warm, shredded pulled chicken for a reason.
Ensuring the chicken is warm helps it blend seamlessly into the sauce, maintaining the overall warm temperature of the mixture and preventing any cooling that could impact the final texture.
The Essential Rest for Perfect Creaminess
Patience is a virtue, especially with this comfort food classic. Letting the baked mac and cheese rest for 5-10 minutes post-oven is critical.
If you love that gooey cheese pull, you’ll enjoy the same creamy comfort in this creamy chicken broccoli pasta bake.
This short rest allows the bubbling cheese sauce to settle and thicken slightly. It prevents the dish from being watery upon serving and ensures maximum creaminess, solidifying its status as perfect mac and cheese.
Gathering Your Flavor Arsenal: Key Ingredients for Success
The Pasta Powerhouse: Elbow Macaroni
We use 1 pound of classic elbow macaroni for this recipe. Its small, curved shape is perfect for trapping and holding onto abundant amounts of that rich, gooey cheese sauce.
Crafting the Silky Béchamel Base
The foundation of our gooey cheese sauce begins with 1/4 cup unsalted butter and 1/4 cup all-purpose flour to form a golden roux. This essential thickener creates a stable base.
Three cups of warm whole milk and 1 cup of heavy cream are then whisked in, contributing to an incredibly rich and velvety béchamel, which is the heart of any exceptional mac and cheese.
The Melty Cheese Medley: Sharp Cheddar & Monterey Jack
Our recipe calls for 4 cups of shredded sharp cheddar cheese and 2 cups of shredded Monterey Jack. Sharp cheddar provides a bold, tangy flavor profile.
Monterey Jack, renowned for its superior melt, contributes an unmatched creaminess and stretch, creating a balanced and deeply flavorful cheese blend for this Ultimate Pulled Chicken Mac & Cheese.
Starring the Savory Pulled Chicken
Two cups of cooked, warm, and shredded pulled chicken add a hearty, savory dimension to the dish. Its tender texture ensures every bite is a satisfying blend of pasta, cheese, and protein.
A Hint of Spice: Seasoning Essentials
One teaspoon of salt and 1/2 teaspoon of black pepper are fundamental for seasoning. The optional 1/4 teaspoon dry mustard powder subtly enhances the cheese flavor, making it pop without tasting overtly mustardy.
An optional 1/8 teaspoon of cayenne pepper adds a gentle warmth, balancing the richness of the cheese without making the dish overtly spicy.
Essential Tools for Your Ultimate Pulled Chicken Mac & Cheese Journey
Large Saucepan or Dutch Oven: Ideal for crafting the béchamel sauce and combining ingredients for ample space.
Whisk: Essential for a lump-free roux and a smooth, consistently creamy sauce base.
9×13 Inch Baking Dish: The perfect size for baking this hearty casserole, ensuring even cooking and generous portions.
Measuring Cups and Spoons: For accurate ingredient proportions, crucial for a balanced and delicious outcome.
Colander: For thoroughly draining the macaroni, preventing excess water from diluting the rich cheese sauce.
Aluminum Foil: Crucial for the covered baking phase to lock in moisture and promote tender macaroni.
Crafting Perfection: A Step-by-Step Guide to Ultimate Pulled Chicken Mac & Cheese
Prepare Your Oven & Dish:
Preheat your oven to 350°F (175°C) and lightly grease a 9×13 inch baking dish. This ensures a smooth baking process and prevents your delicious mac and cheese from sticking.
Cook the Macaroni to Perfection:
Cook the elbow macaroni according to package directions, but drain it 1-2 minutes before it reaches al dente. This slight undercooking is crucial to prevent it from becoming mushy and dry in the oven. Rinse briefly with cool water to halt cooking, then drain very thoroughly to avoid watering down your sauce.
Build Your Flavorful Roux:
In a large saucepan or Dutch oven, melt the 1/4 cup unsalted butter over medium heat. Whisk in the 1/4 cup all-purpose flour and cook for 1 minute, stirring constantly, until it forms a light golden paste. This roux forms the essential thickening base for your rich cheese sauce.
Create the Silky Béchamel:
Gradually whisk in the 3 cups warm whole milk and 1 cup heavy cream. Continue whisking constantly until the mixture thickens and comes to a gentle simmer, about 5-7 minutes. Constant whisking is key to a smooth, lump-free sauce, which is vital for a truly creamy mac & cheese.
Melt the Cheeses Off-Heat for Smoothness:
Remove the pan from the heat. Stir in the 1 teaspoon salt, 1/2 teaspoon black pepper, and the optional dry mustard and cayenne pepper. Add 3 cups of the shredded sharp cheddar cheese and 1 cup of the shredded Monterey Jack cheese, a handful at a time, stirring until completely melted and smooth. Adding the cheese off the heat prevents it from becoming grainy or breaking, ensuring a velvety finish.
Combine Macaroni, Chicken, and Sauce:
Add the slightly undercooked macaroni and the 2 cups warm pulled chicken to the cheese sauce. Stir gently until everything is evenly coated and well combined. Ensuring the chicken is warm helps it blend seamlessly and keeps the overall mixture moist, contributing to the gooey cheese sauce consistency.
Layer and Top for Baking:
Pour the mac and cheese mixture into your prepared baking dish. Top evenly with the remaining 1 cup of shredded sharp cheddar cheese and 1 cup of shredded Monterey Jack cheese. This creates a beautiful, bubbly, and slightly crispy crust on your Ultimate Pulled Chicken Mac & Cheese.
Bake Covered for Gooey Texture:
Cover the dish tightly with aluminum foil. Bake for 20 minutes. Baking it covered for this initial period creates steam that keeps the macaroni tender and prevents the sauce from drying out too quickly, locking in that wonderful gooey texture.
Achieve a Golden, Bubbly Finish:
Remove the foil and continue baking for another 10-15 minutes, or until the cheese on top is bubbly and lightly golden brown. This develops a delicious, slightly crispy topping that adds another layer of texture.
The Essential Resting Period:
Let the mac and cheese rest for 5-10 minutes before serving. This short rest allows the sauce to settle and thicken slightly, ensuring it stays incredibly creamy and doesn’t become watery. Don’t skip this step for the best possible texture! Enjoy your Ultimate Pulled Chicken Mac & Cheese!
Chef’s Secrets & Creative Twists for Your Ultimate Pulled Chicken Mac & Cheese
Choose Quality Cheeses: Always freshly grate your own cheese from blocks. Pre-shredded cheeses often contain anti-caking agents that can make your sauce less smooth and sometimes grainy, affecting the gooey cheese sauce.
Don’t Rush the Roux: Cook your roux for the full minute. This ensures the raw flour taste is completely cooked out, leaving behind a pure, nutty flavor for your sauce base, which is crucial for a delicious homemade mac and cheese.
Elevate with Seasoning: While optional, a pinch of dry mustard powder subtly amplifies the cheese flavor without making it taste like mustard. A tiny grating of fresh nutmeg also works wonders in a béchamel sauce, adding depth.
The Best Pulled Chicken: Utilize leftover rotisserie chicken for convenience, or slow-cook chicken breasts with some broth and shred them for maximum tenderness and flavor. Ensure the tender pulled chicken is moist and seasoned.
For a perfect pairing, try our Cheesy Chicken Bacon Potato Casserole: Juicy, Foolproof Recipe.
For an Extra Crispy Topping: Mix 1 cup of panko breadcrumbs with 2 tablespoons of melted butter. Sprinkle this mixture evenly over the cheese layer before the final uncovered baking stage for an irresistible crunch.
Spice It Up: For a kick, increase the cayenne pepper or add a dash of your favorite hot sauce to the cheese sauce. A pinch of smoked paprika can also add a delightful depth and warmth to this comfort food classic.
Planning Ahead: Make-Ahead, Storage, and Reheating Tips
Can I Prepare My Mac and Cheese in Advance?
Absolutely! Assemble the entire Ultimate Pulled Chicken Mac & Cheese dish up to the point of baking. Cover it tightly with plastic wrap or foil and refrigerate for up to 24 hours.
When ready to bake, remove it from the fridge 30 minutes before, then bake as directed, potentially adding an extra 5-10 minutes to the covered baking time if still very cold.
Storing Leftover Ultimate Pulled Chicken Mac & Cheese
Store any leftover creamy mac & cheese in an airtight container in the refrigerator for up to 3-4 days. For longer storage, you can freeze individual portions.
To freeze, wrap well in plastic wrap and then foil, or use freezer-safe containers, for up to 2-3 months. Thaw overnight in the refrigerator before reheating for the best texture.
Reheating for Best Results
For oven reheating, cover the dish with foil and bake at 300°F (150°C) until heated through, about 20-30 minutes. Adding a splash of milk or cream can help restore moisture and prevent dryness.
For smaller portions, microwave on medium power, stirring occasionally, until hot. Always aim for gentle reheating to maintain the creamy texture of your homemade mac and cheese.
Troubleshooting Your Ultimate Pulled Chicken Mac & Cheese
Why Is My Mac and Cheese Sauce Grainy?
A grainy sauce usually results from overcooking the cheese, adding cheese to a sauce that’s too hot, or using pre-shredded cheese with anti-caking agents. Remember to add the cheese off the heat and stir gently until just melted.
My Sauce is Too Thin (or Too Thick)!
If your sauce is too thin, you may need to cook it a little longer to allow the roux to fully thicken, or you can whisk in a cornstarch slurry (1 tbsp cornstarch with 1 tbsp cold water) and simmer briefly. If too thick, simply whisk in a splash of warm milk or cream until it reaches your desired consistency.
Why Did My Macaroni Get Mushy?
Mushy macaroni is almost always due to overcooking the pasta initially. Always remember to drain your elbow macaroni 1-2 minutes before it reaches al dente. It will finish cooking in the oven, maintaining its perfect texture.
It’s Dry After Baking!
A dry Ultimate Pulled Chicken Mac & Cheese typically means it was overbaked, or the initial covered baking step was skipped. Ensure you cover the dish tightly for the first 20 minutes to lock in moisture, and don’t skip the crucial resting period after baking.
Your Top Questions About Ultimate Pulled Chicken Mac & Cheese Answered
What’s the best chicken to use for this recipe?
Rotisserie chicken is excellent for convenience and flavor. Slow-cooked shredded chicken breasts or thighs, or even poached chicken, are also fantastic choices for tender, moist results. Just ensure your tender pulled chicken is warm when adding it to the sauce.
Can I use different types of pasta instead of elbow macaroni?
Yes, you certainly can! Smaller pasta shapes like medium shells, cavatappi, or penne work beautifully. Just be sure to adjust the initial cooking time to be slightly under al dente, just as you would for the elbow macaroni.
Is it possible to make this Ultimate Pulled Chicken Mac & Cheese gluten-free?
Absolutely! Simply substitute the all-purpose flour in the roux with a gluten-free all-purpose flour blend (ensure it’s suitable for sauces). Then, use your favorite gluten-free elbow macaroni, cooking it slightly under al dente as directed. The rest of the recipe remains naturally gluten-free.
Why should the milk and cream be warm before adding them to the roux?
Adding warm liquid to the roux is a chef’s trick that helps prevent lumps from forming in your béchamel sauce. It allows the sauce to thicken more smoothly and reduces the overall cooking time, leading to a silkier gooey cheese sauce.
Can I add vegetables to this recipe?
Yes, absolutely! For added nutrition and flavor, consider folding in finely diced steamed broccoli florets, thawed frozen peas, or sautéed mushrooms along with the macaroni and tender pulled chicken. Ensure vegetables are cooked and drained of excess moisture.
What to Serve Alongside
This creamy pulled chicken mac and cheese is rich and filling, so you want sides that cut through the heaviness or add a fresh contrast.
- For a roasted vegetable side with a similar cheesy finish, try this Cheesy Bacon Brussels Bake that stays crisp instead of turning mushy.
- A sweet, buttery Cheesy Homestyle Creamed Corn brings a soft texture and mild sweetness that balances the smoky, savory notes of the mac and cheese.
Ready to Indulge? Your Ultimate Pulled Chicken Mac & Cheese Awaits!
So there you have it – the ultimate guide to creating a Pulled Chicken Mac & Cheese that truly lives up to its name. No more dry, clumpy disappointments; just a velvety, cheesy, and satisfying dish that will have everyone asking for seconds. With these perfected techniques, you’re now equipped to achieve mac and cheese bliss every single time.
We’d love to hear about your experience! Try this recipe for yourself, and don’t forget to share your culinary creations and feedback in the comments below. Happy cooking, and get ready to enjoy the ultimate comfort food experience!
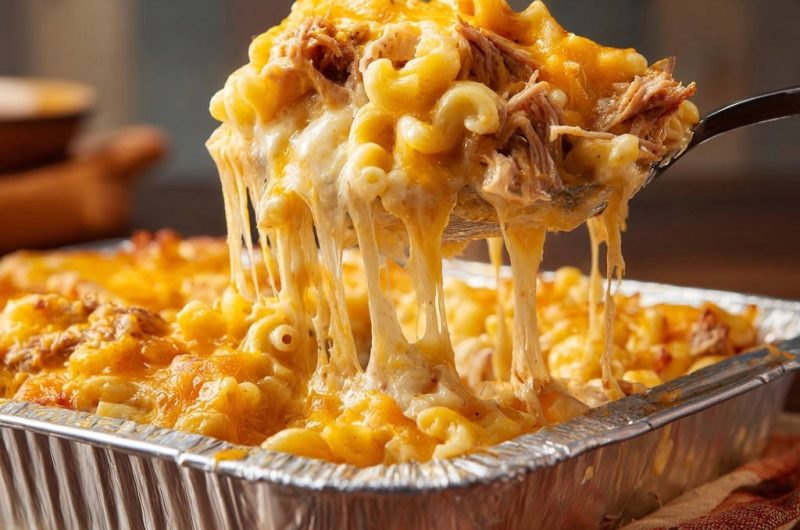
Pulled Chicken Mac & Cheese
Course: Main CourseCuisine: AmericanDifficulty: medium8
servings20
minutes35
minutes650
kcal60
minutesWho hasn’t been disappointed by mac and cheese that starts off perfectly creamy but ends up a sad, stiff block after baking? This recipe cracks the code to keeping it incredibly gooey and satisfying, even when loaded with tender pulled chicken. Get ready for mac and cheese perfection that stays rich and luscious, every single spoonful.
Ingredients
1 pound elbow macaroni
1/4 cup unsalted butter
1/4 cup all-purpose flour
3 cups whole milk, warm
1 cup heavy cream
1 teaspoon salt
1/2 teaspoon black pepper
1/4 teaspoon dry mustard powder (optional)
1/8 teaspoon cayenne pepper (optional)
4 cups shredded sharp cheddar cheese, divided
2 cups shredded Monterey Jack cheese, divided
2 cups cooked pulled chicken, warm and shredded
Directions
- Preheat your oven to 350°F (175°C). Lightly grease a 9×13 inch baking dish or prepare a similar-sized aluminum pan.
- Cook the elbow macaroni according to package directions, but drain it 1-2 minutes before it reaches al dente. This slight undercooking is crucial to prevent it from becoming mushy and dry in the oven. Rinse briefly with cool water to halt cooking and drain very thoroughly.
- In a large saucepan or Dutch oven, melt the unsalted butter over medium heat. Whisk in the all-purpose flour and cook for 1 minute, stirring constantly, until it forms a light golden paste (this is your roux).
- Gradually whisk in the warm whole milk and heavy cream. Continue whisking constantly until the mixture thickens and comes to a gentle simmer, about 5-7 minutes. Remove the pan from the heat.
- Stir in the salt, black pepper, dry mustard powder (if using), and cayenne pepper (if using). Add 3 cups of the shredded sharp cheddar cheese and 1 cup of the shredded Monterey Jack cheese, a handful at a time, stirring until completely melted and smooth. Adding the cheese off the heat helps keep the sauce silky and prevents it from becoming grainy or breaking.
- Add the slightly undercooked macaroni and the warm pulled chicken to the cheese sauce. Stir gently until everything is evenly coated and well combined. Ensuring the chicken is warm helps it blend seamlessly and keeps the overall mixture moist.
- Pour the mac and cheese mixture into your prepared baking dish. Top with the remaining 1 cup of shredded sharp cheddar cheese and 1 cup of shredded Monterey Jack cheese.
- Cover the dish tightly with aluminum foil. Bake for 20 minutes. Baking it covered for this initial period creates steam that keeps the macaroni tender and the sauce from drying out too quickly, locking in that wonderful gooey texture.
- Remove the foil and continue baking for another 10-15 minutes, or until the cheese on top is bubbly and lightly golden brown.
- Let the mac and cheese rest for 5-10 minutes before serving. This short rest allows the sauce to settle and thicken slightly, ensuring it stays incredibly creamy and doesn’t become watery. Enjoy!
Notes
- Crucial steps for gooey results: slightly undercook pasta, add cheese off heat, bake covered, and rest before serving.