Mastering Ultra-Creamy Scalloped Potatoes
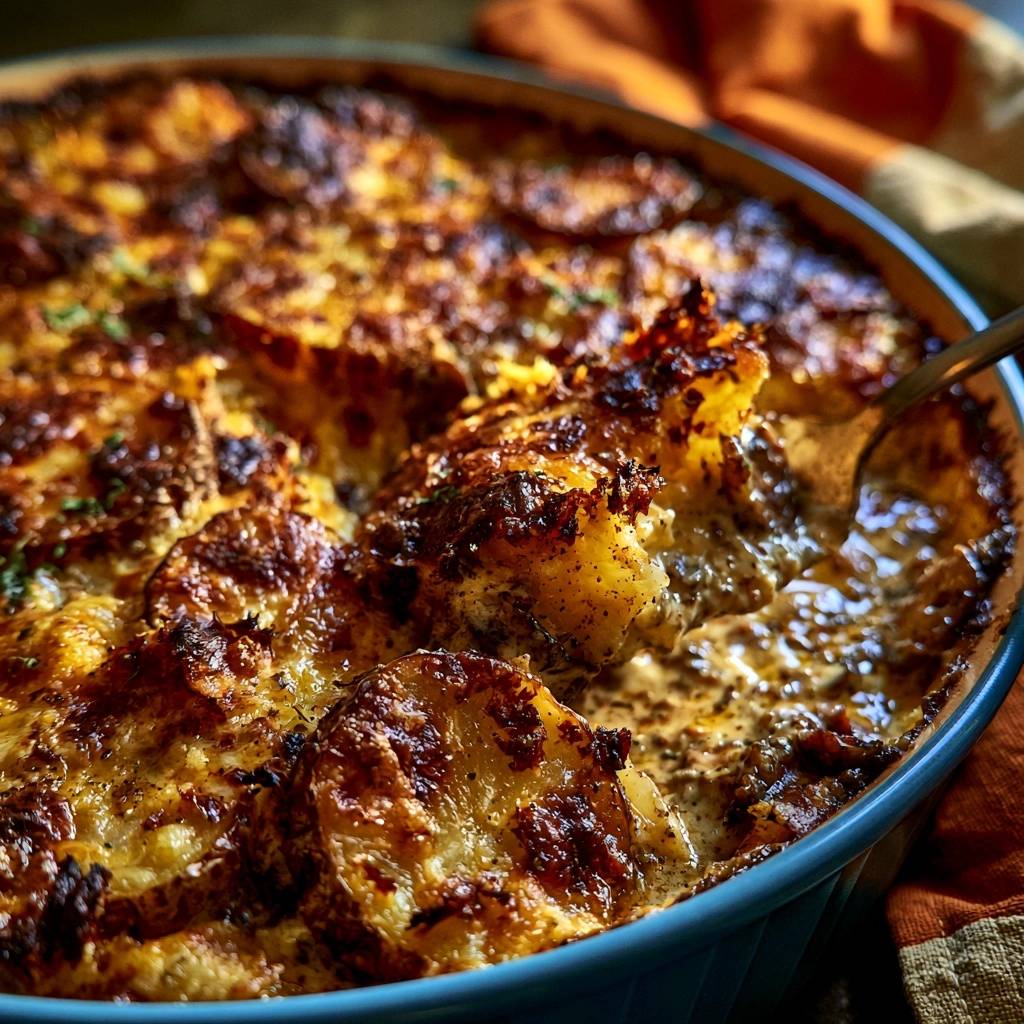
Imagine sliding your fork into a stack of tender, buttery potatoes bathed in a sauce so thick it clings to every curve. You won’t find any watery puddles or grainy, curdled messes here. Instead, you get a rich, custard-like consistency that feels like a warm hug on a plate. It’s the kind of side dish that steals the spotlight from the main course every single time.
Most people struggle with scalloped potatoes because the dairy breaks or the centers stay crunchy while the top burns. We’re fixing that today by ditching the traditional “pour and pray” method. We’re using a specific starch-locking technique that guarantees a velvety finish. It’s all about controlling the science of the potato before it ever touches the baking dish.
The real secret lies in the surface starch of your potatoes. While many recipes tell you to rinse your slices, I’m telling you to keep that starch right where it is. That natural dust acts as a built-in thickener, bonding the heavy cream to the vegetable. By simmering the slices in the dairy first, we create a stable emulsion that won’t break under the high heat of your oven.
The Science of Starch-Locking for Velvety Sauce
When you slice a potato, you release microscopic starch granules called amylose and amylopectin. In a typical gratin, these granules often sink to the bottom or wash away, leaving the cream to fend for itself. Without a binder, the high heat of the oven causes the proteins in the milk to clump together, resulting in that dreaded curdled appearance. It looks broken because, chemically, it is.
Our starch-locking philosophy changes the game by activating those granules early. By simmering the potatoes directly in the cream and milk, the heat causes the starch to swell and gelatinize. This process creates a protective web around the dairy fats. It effectively turns your liquid into a self-thickening sauce that stays smooth and glossy even at high temperatures.
Therefore, you must never soak your sliced potatoes in water. If you wash away that surface starch, you lose your primary thickening agent. You’d be forced to rely on flour or cornstarch, which can lead to a pasty, artificial mouthfeel. Keeping the starch intact ensures the sauce tastes like pure, unadulterated cream and potato essence.
Essential Components for Ultra-Creamy Scalloped Potatoes
Quality ingredients are the foundation of this dish, starting with the potato variety. I always reach for Yukon Golds because they sit perfectly in the middle of the texture spectrum. They have enough starch to thicken the sauce but enough waxiness to hold their shape. Russets tend to fall apart into mush, while red potatoes can stay too firm and waxy.
The dairy choice is equally critical for success. We use a combination of heavy cream and whole milk to achieve maximum richness without it feeling overly heavy. The high fat content in heavy cream is your best defense against curdling. Lower-fat milks or dairy alternatives lack the structural integrity to withstand the long baking time required to soften the potatoes.
For flavor, we aren’t just using salt and pepper. A touch of smoked paprika provides a beautiful sunset hue and a hint of depth that cuts through the fat. Freshly minced garlic and dried thyme infuse the cream with earthy notes. Finally, sharp cheddar provides a punchy tang, while parmesan adds a salty, nutty crust that shatters when you bite into it.
Selecting and Slicing the Ideal Potato
Consistency is your best friend when it comes to cooking times. I highly recommend using a mandoline set to 1/8 inch to ensure every slice is identical. If your slices vary in thickness, you’ll end up with some potatoes that are mushy and others that are still raw in the middle. It’s a frustrating experience that a mandoline easily solves.
I also prefer to keep the skins on for this recipe. The skins provide a rustic look and add a bit of structural integrity to the thin slices. Plus, they carry a lot of the earthy potato flavor that balances the richness of the cream. Just make sure to scrub them well before you start slicing.
The Dairy Base: Why Fat Percentages Matter
Using whole milk alongside the heavy cream keeps the sauce fluid enough to seep into every crevice. However, the heavy cream is the real workhorse here. Its high proportion of fat molecules surrounds the milk proteins, preventing them from bonding together and turning into curds. It’s a physical barrier that ensures a silky result.
As you simmer the garlic and herbs in this dairy base, the fats absorb the aromatics. This creates a much deeper flavor profile than simply sprinkling garlic on top of the layers. You’re essentially creating a savory infused cream that seasons the potato from the inside out as it cooks.
Step-by-Step: The Pre-Simmer Technique
This is the most important part of the process. Instead of layering raw potatoes, you’ll add them to a wide saucepan with your seasoned cream. Bring it to a very gentle simmer, not a rolling boil. You’ll notice the liquid start to transform almost immediately. Within minutes, the thin cream turns into a thick, silky glaze that coats the back of your spoon.
Stir the pot gently every minute or so to make sure nothing sticks to the bottom. You aren’t trying to cook the potatoes all the way through yet. You’re just looking to soften them slightly and release that starch. This 8 to 10-minute head start ensures that the potatoes will be perfectly tender by the time the cheese on top is golden brown.
Watch for the visual cues. The liquid should look glossy and opaque, not watery. If it looks like the potatoes are starting to break apart, remove them from the heat immediately. You want them flexible but still whole. This step also tempers the dairy, meaning it’s already warm and stable before it hits the hot oven.
Infusing the Cream with Aromatics
Before the potatoes go in, let the cream, garlic, and spices hang out over low heat for a minute. This “blooms” the dried thyme and smoked paprika, releasing their oils into the fat. You’ll smell the garlic become fragrant and sweet rather than sharp and pungent. This small step makes a massive difference in the final flavor profile.
Tempering the Dairy to Prevent Breaking
By heating the cream slowly on the stove, you’re gently bringing the proteins up to temperature. Sudden temperature shocks are what usually cause sauces to break. Since the sauce is already hot and thickened by the starch when it enters the oven, it stays unified throughout the entire 75-minute baking process.
Assembling the Layers for Maximum Texture
When you’re ready to assemble, use a slotted spoon to move the potatoes into your greased dish. I like to shingle them, which means overlapping them slightly like roof tiles. This creates little pockets where the cheese can hide. Sprinkle half of your sharp cheddar in the middle layer for a hidden gooey surprise.
Once the potatoes are in, pour that remaining thick cream sauce over the top. It should be thick enough that it doesn’t all just sink to the bottom. It should sit in the nooks and crannies. Finish with the rest of the cheddar and a generous dusting of parmesan. The parmesan is key for that salty, crispy finish.
The Two-Stage Baking Process
We bake this in two distinct phases to get the best of both worlds. First, we cover the dish tightly with foil and bake at 375°F. The foil traps the steam coming off the potatoes, which finishes the softening process. Without the foil, the top would burn long before the middle was edible.
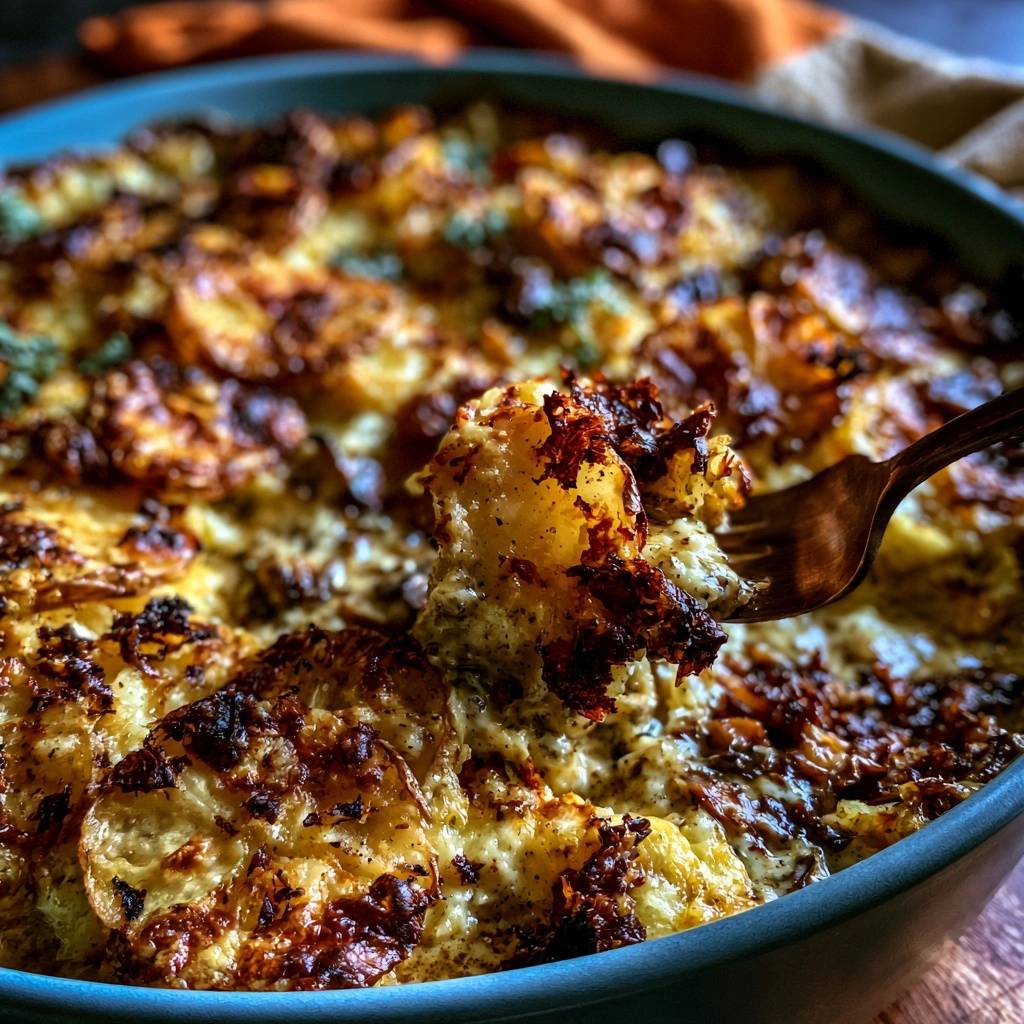
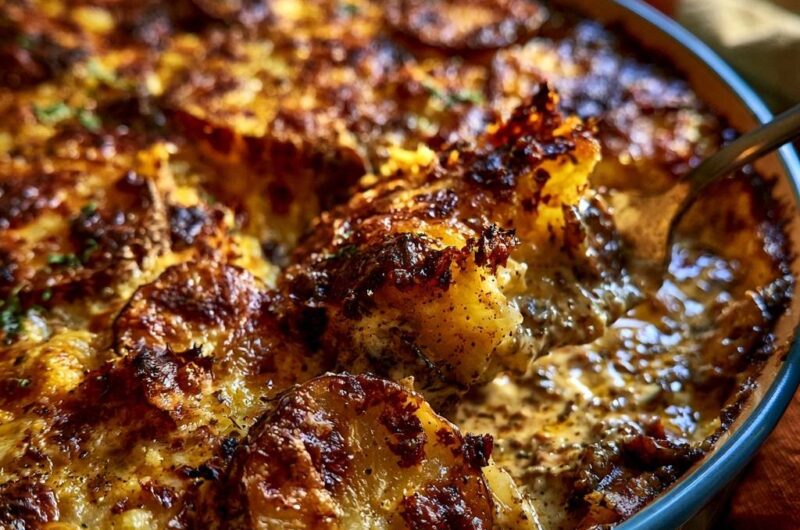
After 30 minutes, we ditch the foil and crank the heat to 400°F. This is where the Maillard reaction happens. The high heat browns the proteins in the cheese and caramelizes the edges of the potatoes. You’re looking for bubbling edges and a deep, golden-brown crust that looks almost like a lace cracker.
Achieving the Golden Frico Crust
That crispy, cheesy top is often called a “frico” in professional kitchens. The combination of the sharp cheddar’s fat and the parmesan’s solids creates a textured topping that stays crunchy. Don’t be afraid of a few dark brown spots; those are the bits that pack the most flavor. If it’s not bubbling vigorously, give it another five minutes.
Why the 15-Minute Rest is Mandatory
I know it’s tempting to scoop into the dish the second it leaves the oven, but you must wait. When the dish is piping hot, the sauce is still in a liquid state. If you cut into it immediately, the sauce will run to the bottom, leaving the top potatoes dry. It needs time to settle.
During the 15-minute rest, carry-over cooking finishes the very center of the potatoes. More importantly, the starch and dairy proteins begin to set into a spoonable, custard-like consistency. The sauce will thicken significantly as it drops a few degrees, ensuring every bite is perfectly coated and rich.
Troubleshooting Common Potato Casserole Issues
If your potatoes are still crunchy after the full bake time, it usually means they were sliced too thick or the foil wasn’t sealed tightly enough. Steam is essential for softening the cellulose in the potato. Next time, ensure your mandoline is set to a true 1/8 inch and crimp that foil around the edges of the dish like your life depends on it.
A curdled or broken sauce is almost always the result of using low-fat dairy or skipping the pre-simmer step. If you see oil pooling at the top, the cheese might have been a lower quality with too many fillers. Always grate your own cheese from a block. Pre-shredded cheese is coated in potato starch or cellulose to prevent clumping in the bag, which can mess with your sauce’s texture.
If the dish feels too oily, you might have over-baked it. Once the dairy reaches a certain temperature for too long, the fat will eventually separate regardless of the starch. Stick to the timer and look for the visual cues of a golden crust and bubbling edges rather than letting it sit in the oven indefinitely.
Optimal Pairings for Rich Potato Dishes
Because these potatoes are incredibly rich and decadent, you want to pair them with something that offers a bit of acidity or brightness. A lemon-herb roasted chicken is a classic choice. The citrus notes cut right through the heavy cream. Similarly, a crisp green salad with a sharp Dijon vinaigrette provides a refreshing contrast to the savory cheese.
If you’re serving this for a holiday or special occasion, it stands up beautifully next to braised beef short ribs or a roast. The deep, umami flavors of the meat complement the smoked paprika and garlic in the potatoes. Just avoid serving it with other heavy, cream-based sides, or the meal might feel a bit one-note.
Make-Ahead Strategy and Storage Tips
You can definitely prepare this a day in advance. Follow the recipe through the simmering and assembly stages, but don’t bake it. Let it cool completely, cover it tightly, and pop it in the fridge. When you’re ready to eat, just add about 10 minutes to the covered baking time to account for the cold dish.
Leftovers stay delicious for about three to four days in the refrigerator. To reheat, I recommend using the oven at 300°F with a splash of milk over the top to loosen the sauce. Avoid the microwave if possible, as it tends to make the potatoes rubbery and can cause the sauce to break. I don’t recommend freezing this dish, as the potatoes become grainy and the sauce loses its silky texture once thawed.
How do I prevent the potatoes from turning brown while I’m slicing?
Since we aren’t soaking these in water to preserve the starch, you should work quickly. Have your cream mixture ready on the stove before you start slicing. As you finish a potato, drop the slices directly into the cream. The dairy will coat the slices and block oxygen, which is what causes the browning in the first place.
Can I use a different type of cheese?
Absolutely, though I recommend sticking to cheeses that melt well. Gruyère is a fantastic, sophisticated substitute for cheddar and adds a lovely nutty flavor. Fontina or Monterey Jack also work well for a gooey texture. Just ensure you keep the parmesan for the top, as its high protein content is what creates that signature golden crust.
Why is my sauce still thin even after resting?
This usually happens if the potatoes didn’t simmer long enough in the pan or if the oven temperature was too low. The starch needs heat to activate its thickening power. If this happens, you can try popping the dish back into a 400°F oven uncovered for another 10 minutes to help some of the moisture evaporate, but the 15-minute rest is usually the magic fix.
Can I add other vegetables to this recipe?
You can, but be careful with watery vegetables like zucchini or mushrooms, as they will release liquid and thin out your sauce. If you want to add something, try thinly sliced onions or leeks. Sauté them in the butter first until they are soft before adding the cream and potatoes to the pan. This ensures they are fully cooked and their flavor is integrated.
What is the best way to reheat leftovers without them getting oily?
The key to reheating is “low and slow.” Place the leftovers in a baking dish, add a tablespoon of milk or cream to help re-emulsify the sauce, and cover with foil. Heat at 300°F until warmed through. This gentle heat prevents the fat from separating from the sauce, keeping it creamy rather than oily.
Ultra-Creamy Scalloped Potatoes
Course: Side DishCuisine: AmericanDifficulty: easy8
servings20
minutes1
hour15
minutes95
Minutes380
kcalAmerican
Ingredients
3 pounds Yukon Gold potatoes, sliced 1/8 inch thick (keep skins on for texture)
2 cups heavy cream
1 cup whole milk
3 cloves garlic, minced
1 teaspoon salt
1/2 teaspoon black pepper
1/2 teaspoon smoked paprika (for the deep golden color shown)
1/2 teaspoon dried thyme
2 cups shredded sharp cheddar cheese
1/2 cup grated parmesan cheese
2 tablespoons butter
Fresh parsley, finely chopped (for garnish)
Directions
- Preheat your oven to 375 degrees F. Grease a deep 9×13 inch baking dish or a large oval ceramic gratin dish with butter.
- The secret to a non-watery sauce is managing the starch. Do not soak your sliced potatoes in water. The surface starch is what thickens the cream.
- In a large, wide saucepan or Dutch oven, combine the heavy cream, milk, minced garlic, salt, pepper, smoked paprika, and thyme. Bring the mixture to a very gentle simmer over medium heat.
- Add the sliced potatoes directly into the simmering cream mixture. Gently stir to coat. Let them simmer for 8 to 10 minutes, stirring occasionally to prevent sticking. The liquid will visibly thicken into a silky glaze. This pre-cooks the starch and ensures the dairy is tempered, preventing the sauce from breaking in the oven.
- Use a slotted spoon to transfer half of the warm potatoes into the prepared baking dish, arranging them slightly upright or overlapping for texture. Sprinkle with half of the cheddar cheese.
- Layer the remaining potatoes on top, then pour the remaining thickened cream sauce from the pan over the entire dish.
- Top with the remaining cheddar and the parmesan cheese.
- Cover the dish tightly with foil. This traps steam to soften the potatoes quickly. Bake for 30 minutes.
- Remove the foil. Increase oven temperature to 400 degrees F. Bake for another 30 to 35 minutes. This final high-heat stretch is crucial for developing the dark, caramelized “frico” crust and bubbling edges seen in the photo.
- Let the dish rest for 15 minutes before serving. This rest period is mandatory; it allows the sauce to fully set into a rich, spoonable consistency. Garnish with fresh parsley before serving.
Notes
- Do not soak sliced potatoes in water as the surface starch is essential for thickening the sauce. A 15-minute rest period after baking is mandatory to allow the sauce to set to a spoonable consistency.