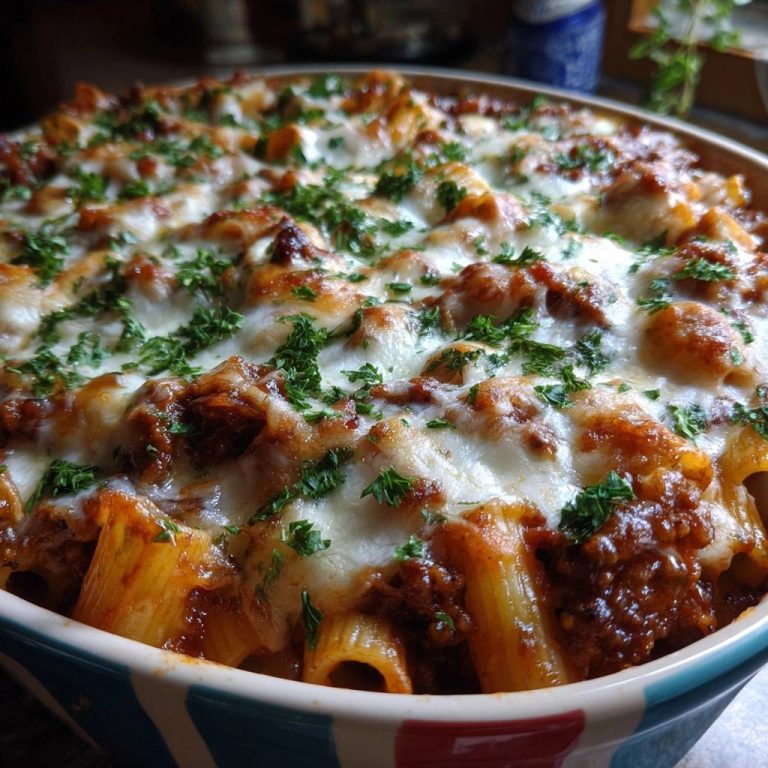
The Ultimate Creamy Chicken Broccoli Pasta Bake
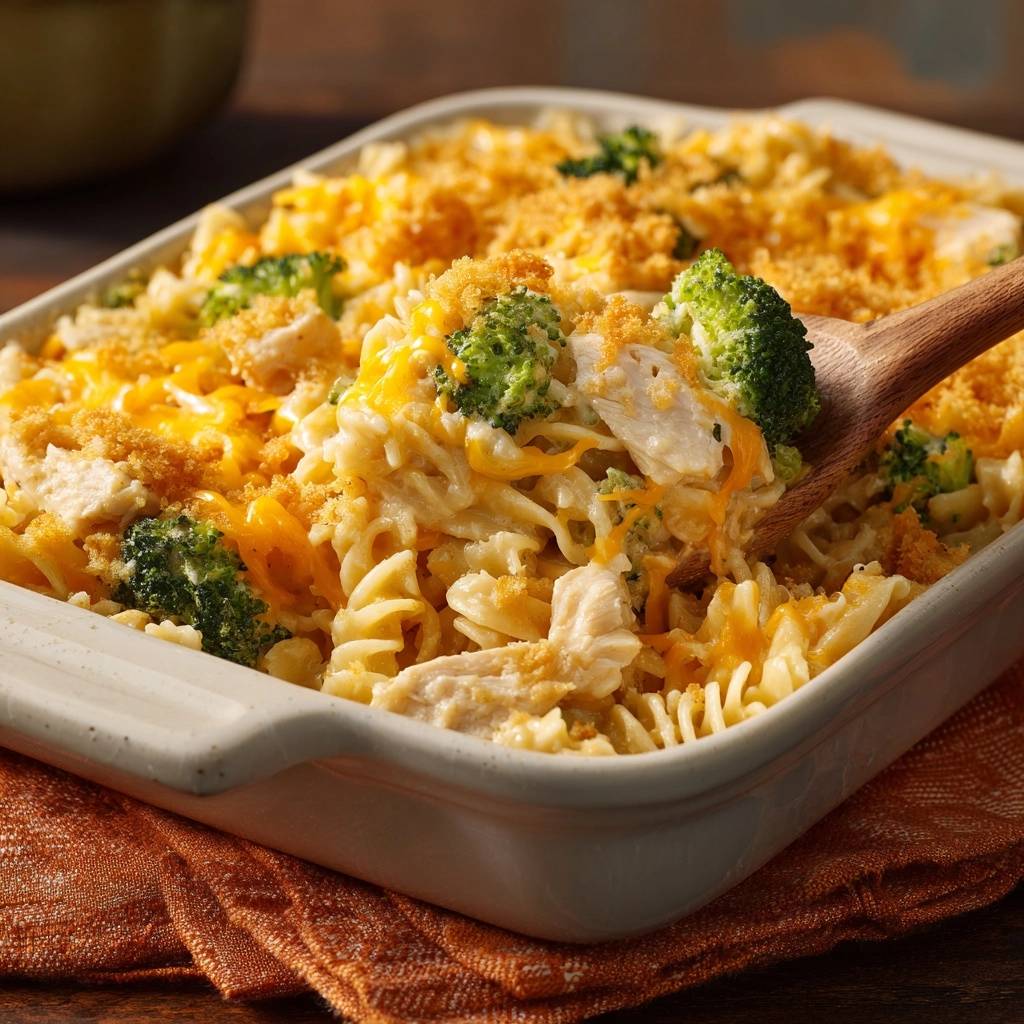
Forget those watery, bland casseroles that leave a puddle of liquid at the bottom of your bowl. We’ve all been there, expecting a decadent bite only to find the sauce has broken and the broccoli is mushy. This Creamy Chicken Broccoli Pasta Bake changes the game by focusing on a thick, velvety Mornay sauce that actually clings to every single noodle.
The secret to this recipe lies in the texture contrast between the tender chicken and the crisp-tender roasted broccoli. By using a specific par-roasting technique, we ensure the vegetables add flavor rather than excess moisture. You’re going to love how the golden, buttery Panko crust shatters with every forkful, revealing a rich, cheesy interior that stays perfectly emulsified.
I’ve found that the real trick to a professional-grade pasta bake is all in the pasta’s “thirst.” If you cook your noodles all the way through in the boiling water, they won’t have any room to soak up that seasoned cream sauce in the oven. Trust me, pulling the pasta three minutes early is the single best thing you can do for the final flavor of this dish.
Why Most Broccoli Pasta Bakes Fail
Most recipes fail because they treat broccoli like an afterthought, tossing raw or steamed florets directly into the pan. Broccoli is a high-moisture vegetable, and as it bakes, those cell walls break down and release water. This “vegetable juice” thins out your beautiful cheese sauce, turning a rich meal into a soupy mess.
Furthermore, many home cooks rely on pre-shredded cheese, which is coated in potato starch or cellulose to prevent clumping in the bag. While convenient, these additives prevent the cheese from melting smoothly into the sauce. When you combine excess vegetable water with grainy, pre-shredded cheese, the sauce integrity collapses entirely.
Essential Components for a Velvety Sauce
To achieve that signature silkiness, you need a high-fat base that can stand up to the heat of the oven. I always recommend using a mix of whole milk and heavy cream. The heavy cream provides the stability needed to prevent curdling, while the whole milk keeps the dish from feeling overly heavy or cloying.
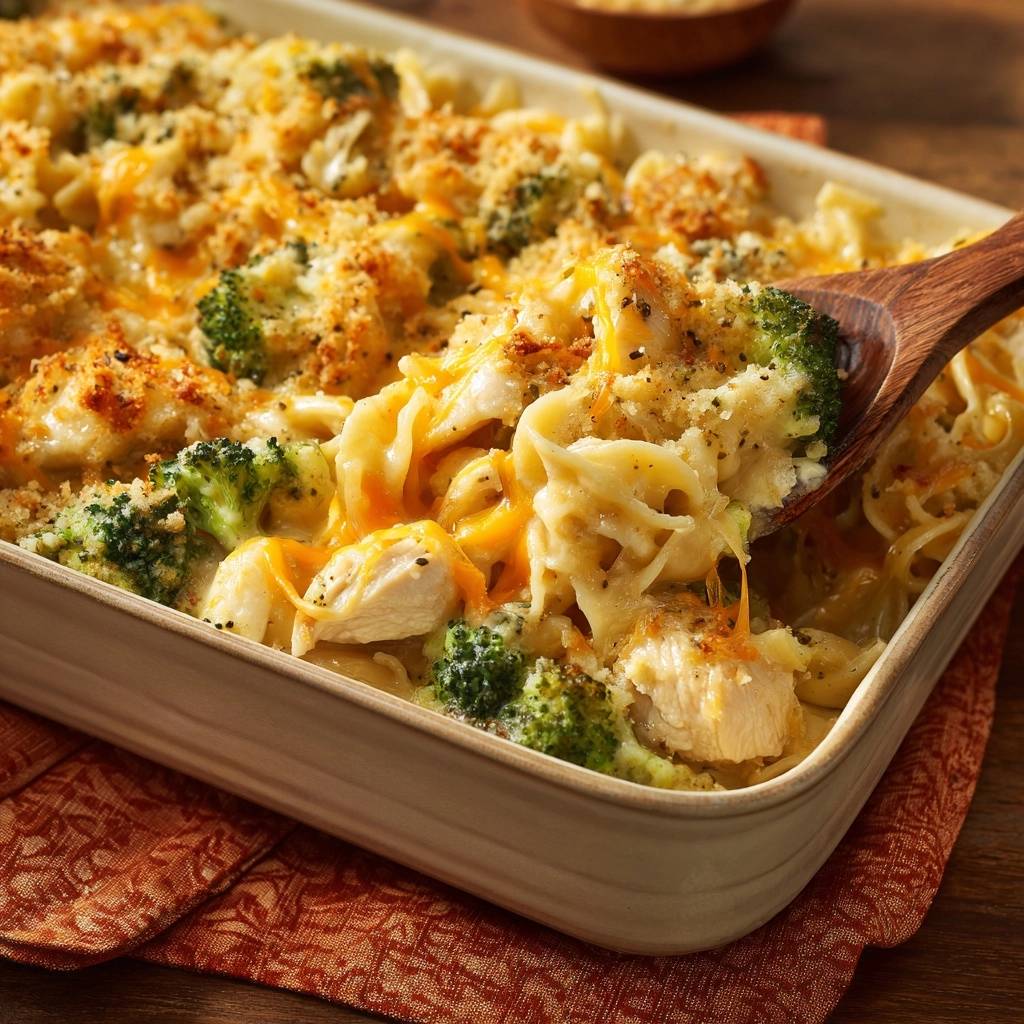
Sharp cheddar is my go-to choice here because it packs a punch that doesn’t get lost among the other ingredients. However, if you want an even smoother melt, you can swap half of the cheddar for Gruyère or Fontina. Don’t skip the smoked paprika; it adds a subtle, earthy depth that makes the cheese taste even more “cheesy” without adding any actual heat.
Selecting the Right Pasta Shape
Rotini is the undisputed king of this pasta bake because its spiral shape acts like a screw, trapping the thick sauce in its ridges. You want a shape with plenty of surface area so the Mornay sauce has something to grab onto. If you can’t find rotini, cavatappi or conchiglie (small shells) are excellent alternatives that offer similar “sauce traps.”
Avoid long, thin noodles like spaghetti or linguine for this specific bake. These shapes tend to clump together in the oven, making it impossible for the sauce to distribute evenly. You want every bite to be a balanced mix of chicken, broccoli, and pasta, which only short, sturdy shapes can provide.
Fresh vs. Frozen Broccoli Florets
Fresh broccoli is always the winner for texture, as it holds its shape beautifully during the roasting process. If you’re using fresh, make sure to cut the florets into small, bite-sized pieces so they cook at the same rate as the pasta. This ensures you don’t end up with giant, crunchy stalks in the middle of a soft bake.
However, if you only have frozen broccoli on hand, you can still make this work. Frozen broccoli carries about 30% more water weight than fresh, so you must thaw it completely and squeeze it dry with a clean kitchen towel. Skip the par-roasting step for frozen florets, as they are already blanched and will turn to mush if roasted twice.
The Secret to Non-Watery Broccoli
The par-roasting technique is the absolute “aha!” moment of this recipe. By roasting the raw broccoli at 400°F for just ten minutes before it ever touches the pasta, you’re doing two things. First, you’re triggering the Maillard reaction, which brings out a nutty, charred sweetness that steaming simply can’t replicate.
Second, and most importantly, that high heat evaporates the internal moisture that usually ruins the sauce. You’ll notice the broccoli looks slightly shrunken and bright green when it comes out of the oven. This is exactly what you want. It’s now a sponge ready to soak up the cheese sauce rather than a water balloon ready to pop and dilute your dinner.
Mastering the Mornay Sauce Base
Creating a Mornay sauce starts with a simple roux of butter and flour. When you melt the butter and whisk in the flour, let it bubble for about 60 to 90 seconds. You’re looking for a fragrant, slightly nutty aroma. This step is vital because it cooks out the “raw flour” taste that can make a sauce feel heavy and pasty on the tongue.
Once the roux is ready, you’ll add your liquids to reach the “nappe” stage. This is a French culinary term meaning the sauce is thick enough to coat the back of a spoon. If you can run your finger through the sauce on the spoon and the line stays clean without the sauce running back together, you’ve achieved the perfect thickness.
Whisking Techniques for Lumps-Free Cream
Temperature shock is the main cause of lumpy sauces. I prefer to add my milk and cream slowly, starting with just a splash at a time. Whisk vigorously after each addition until the paste is smooth again. This gradual method allows the flour particles to hydrate evenly, resulting in a glossy, professional-grade finish every time.
If you do find a few stubborn lumps, don’t panic. Just keep whisking over medium heat as the sauce thickens; the heat and motion will usually break them down. Using a flat whisk can also help you reach the corners of the saucepan where flour likes to hide and clump up.
Step-by-Step: Assembling the Pasta Bake
When boiling your pasta, remember that it will spend another 20 minutes submerged in hot sauce in the oven. If you cook it to “al dente” on the stove, it will be overcooked and mushy by the time you serve it. Aim for “molto al dente,” which means the center of the noodle should still feel quite firm when you bite into it.
This undercooked pasta acts like a vacuum. As it bakes, it pulls the seasoned cream and fats from the sauce into the core of the noodle. This is how you get a pasta bake where the flavor is actually inside the pasta, not just sitting on top of it. It’s a small detail that makes a massive difference in the final result.
Folding and Coating the Ingredients
Instead of layering the ingredients in the baking dish, I always mix everything directly in the pot used to make the sauce. This ensures that every nook and cranny of the rotini and every floret of broccoli is 100% coated. It’s much easier to get an even distribution in a large pot than it is to toss things in a shallow 9×13 dish.
Be gentle during this folding process. You want to use a large spatula to lift the sauce from the bottom and turn it over the pasta. This prevents the roasted broccoli from breaking apart into tiny green crumbs. Once everything looks glossy and well-distributed, then you can transfer it to your prepared baking dish.
Achieving the Golden Panko Crust
A great pasta bake needs a “crunch factor” to offset the creamy interior. While traditional breadcrumbs are fine, Panko is superior because the flakes are larger and airier, leading to a much crispier topping. The key is to toss the Panko with melted butter before sprinkling it over the cheese.
If you like the crunch factor here, this cheesy chicken mac bake uses the same trick for a perfect topping.
The butter helps the breadcrumbs brown evenly and adds a rich flavor that mimics fried bread. The layer of shredded cheese underneath the Panko acts as a moisture seal. It protects the chicken and pasta from drying out in the oven’s heat while providing a sticky base for the crunchy crumbs to adhere to.
Make-Ahead Strategies and Storage
This is a fantastic meal-prep dish because you can assemble the entire thing up to 24 hours in advance. If you’re making it ahead, let the sauce and pasta cool slightly before mixing them so the pasta doesn’t over-absorb the liquid while sitting in the fridge. Cover it tightly with foil to prevent the cheese from drying out.
When you’re ready to bake, take the dish out of the fridge about 30 minutes before putting it in the oven. Cold glass or ceramic dishes can crack if they go straight into a 400°F oven, and the pasta will cook more evenly if it starts closer to room temperature. You may need to add 5 to 10 minutes to the total bake time.
Freezing and Reheating Instructions
You can freeze this bake for up to two months. I recommend freezing it before the final bake for the best texture. Wrap the dish in a double layer of plastic wrap and then a layer of aluminum foil. To reheat, thaw it in the refrigerator overnight and bake as directed, though you might need to add a splash of milk if it looks a bit dry.
For individual leftovers, the microwave works, but the oven is better for maintaining the crust. If the sauce looks like it has separated after being in the fridge, don’t worry. As the fats heat up, they will re-emulsify. Adding a teaspoon of water or milk before reheating helps loosen the starches and restores that creamy mouthfeel.
Troubleshooting Your Pasta Bake
If your sauce feels too thick before you even put it in the oven, whisk in an extra quarter-cup of milk. The sauce should be thick, but it still needs to be pourable. If it looks like a heavy paste, the pasta won’t be able to absorb it properly, and the final dish will feel dry.
On the flip side, if you notice oil pooling on top of the cheese, it’s likely because the oven was too hot or you used pre-shredded cheese with too many additives. You can gently blot the excess oil with a paper towel. Next time, try grating a block of high-quality sharp cheddar by hand; the difference in how it melts is truly night and day.
Vegetarian and Protein Variations
If you want to skip the chicken, roasted cauliflower makes a spectacular substitute. It has a similar hearty texture and pairs perfectly with the cheddar Mornay sauce. You could also stir in a can of rinsed chickpeas or white cannellini beans for a boost of plant-based protein without changing the cooking time.
For those who want even more flavor, try using smoked turkey or even shredded roast beef. Just ensure whatever protein you add is already cooked, as the 20-minute bake time isn’t long enough to cook raw meat safely. No matter what you swap, keep the sauce-to-solid ratio the same to maintain that creamy consistency.
Perfect Side Dish Pairings
Since this pasta bake is incredibly rich and cheesy, you want side dishes that offer a bright, acidic contrast. A simple arugula salad with a sharp lemon vinaigrette is my favorite pairing. The peppery bite of the greens and the hit of citrus cut right through the heavy cream and butter, refreshing your palate between bites.
If you’re looking for something heartier, a piece of toasted sourdough rubbed with a raw garlic clove is excellent for mopping up any extra sauce. Avoid sides that are also heavy in dairy or starch, like mashed potatoes or creamed corn. You want something crisp and fresh to balance out the “comfort food” vibes of the main dish.
Expert Tips for Success
First, always grate your own cheese. I know it’s an extra step, but the lack of anti-caking agents means your sauce will be significantly smoother and more flavorful. A standard box grater takes less than two minutes to process a 10-ounce block of cheddar.
Second, do not skip the 10-minute rest period after the bake comes out of the oven. This isn’t just about cooling it down so you don’t burn your mouth. During this time, the starches in the pasta and the proteins in the cheese sauce “set,” creating a cohesive, thick pull rather than a runny mess.
Third, use a Dutch oven if you have one. You can boil the pasta, drain it, and then make the sauce in the same pot. This saves on cleanup and keeps the pot warm, which helps the cheese melt faster. Finally, look for bubbling edges and a deeply browned crust as your visual cues for doneness; the center should be hot and gooey, not dry.
How do I prevent the sauce from becoming watery?
The most effective way to prevent a watery sauce is to par-roast your broccoli at 400°F for 8-10 minutes before adding it to the pasta. This evaporates the internal moisture that usually leaks out during baking. Additionally, using heavy cream instead of just milk provides a more stable emulsion that won’t break or thin out under high heat.
Can I use a different type of pasta?
Yes, you can use other short pasta shapes like penne, cavatappi, or medium shells. The key is to choose a shape with ridges or holes that can “trap” the creamy sauce. Avoid long noodles like spaghetti, as they tend to clump together in a bake, preventing the sauce from coating every piece evenly.
How should I store and reheat leftovers?
Store leftovers in an airtight container in the refrigerator for up to 3 to 4 days. To reheat, place a portion in an oven-safe dish, add a tiny splash of milk to help loosen the sauce, and cover with foil. Bake at 350°F until heated through. This method preserves the creamy texture much better than a microwave, which can cause the cheese sauce to become oily.
Why is my cheese sauce grainy?
Grainy sauce is usually caused by using pre-shredded cheese or overheating the sauce once the cheese is added. Pre-shredded cheese is coated in cellulose to prevent clumping, which doesn’t melt smoothly. For the best results, buy a block of sharp cheddar and grate it yourself. Also, always remove the sauce from the heat before stirring in the cheese to prevent the proteins from tightening and becoming grainy.
Can I make this recipe gluten-free?
Absolutely. To make this gluten-free, substitute the all-purpose flour with a 1:1 gluten-free flour blend for the roux. Use your favorite gluten-free short pasta, but be extra careful not to overcook it during the boiling stage, as gluten-free pasta can turn mushy very quickly. Finally, ensure your Panko breadcrumbs are a gluten-free variety.
Is it possible to freeze this pasta bake?
Yes, this dish freezes well for up to 2 months. For the best texture, assemble the bake but do not do the final oven bake. Wrap it tightly in plastic wrap and foil. When you’re ready to eat, thaw it in the fridge overnight and then bake as directed. You may need to add an extra 10 minutes to the baking time since the dish will be cold.
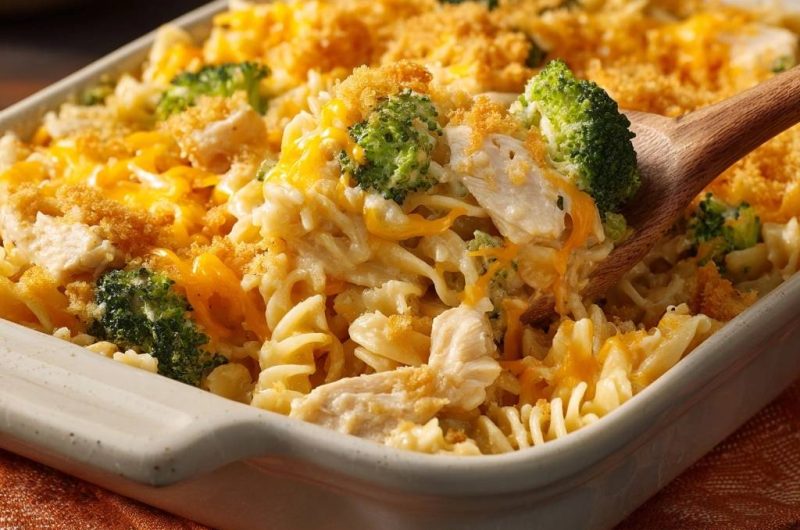
Chicken Broccoli Pasta Bake
Course: Main CourseCuisine: AmericanDifficulty: medium6
servings15
minutes25
minutes510
kcal40
MinutesThis comforting pasta bake combines rotini, tender chicken, and roasted broccoli in a rich cheddar cheese sauce. By roasting the broccoli first and undercooking the pasta, this recipe ensures a perfectly thick and creamy result every time.
Ingredients
1 pound rotini pasta
2 cups cooked chicken breast, cut into bite-sized chunks
4 cups fresh broccoli florets, cut into small pieces
2.5 cups sharp cheddar cheese, shredded (divided)
3/4 cup Panko breadcrumbs
2 tablespoons butter, melted
1 cup whole milk
1 cup heavy cream
4 tablespoons all-purpose flour
4 tablespoons butter
1 teaspoon garlic powder
1/2 teaspoon onion powder
1/2 teaspoon smoked paprika
Salt and black pepper to taste
Directions
- Preheat your oven to 400°F (200°C). Place the raw broccoli florets on a baking sheet, drizzle with a tiny bit of oil, and roast for 8-10 minutes. This step is the secret to success as it evaporates the internal water that usually ruins the sauce consistency.
- While broccoli roasts, boil your pasta in heavily salted water. Cook the pasta for 3 minutes less than the package directions for al dente. The noodles should still have a firm “bite” in the center; they will finish cooking by absorbing the cream from the sauce in the oven.
- In a large saucepan or Dutch oven, melt 4 tablespoons of butter over medium heat. Whisk in the flour and cook for 1-2 minutes until fragrant but not browned.
- Slowly pour in the milk and heavy cream while whisking constantly to prevent lumps. Continue to simmer until the sauce is thick enough to heavily coat the back of a spoon.
- Remove the sauce from heat. Stir in 1.5 cups of the cheddar cheese, garlic powder, onion powder, smoked paprika, salt, and pepper. Whisk until the cheese is completely melted and the sauce is glossy.
- Add the undercooked pasta, roasted broccoli, and chicken directly into the sauce pot. Toss gently until every piece is thoroughly coated.
- Transfer the mixture to a 9×13 inch baking dish. Top with the remaining 1 cup of shredded cheddar cheese.
- In a small bowl, mix the Panko breadcrumbs with 2 tablespoons of melted butter. Sprinkle the breadcrumbs evenly over the cheese layer.
- Bake for 15 to 20 minutes until the sauce is bubbling at the edges and the Panko topping is deeply golden brown.
- Let the dish rest for 5-10 minutes before serving. This resting period is crucial for the starches to set, ensuring a thick, creamy pull rather than a runny sauce.
Notes
- The secret to success is par-roasting the broccoli to evaporate internal water and letting the dish rest for 5 to 10 minutes after baking to allow the sauce to set.