Asparagus and Cheese Stuffed Chicken: Juicy Perfection
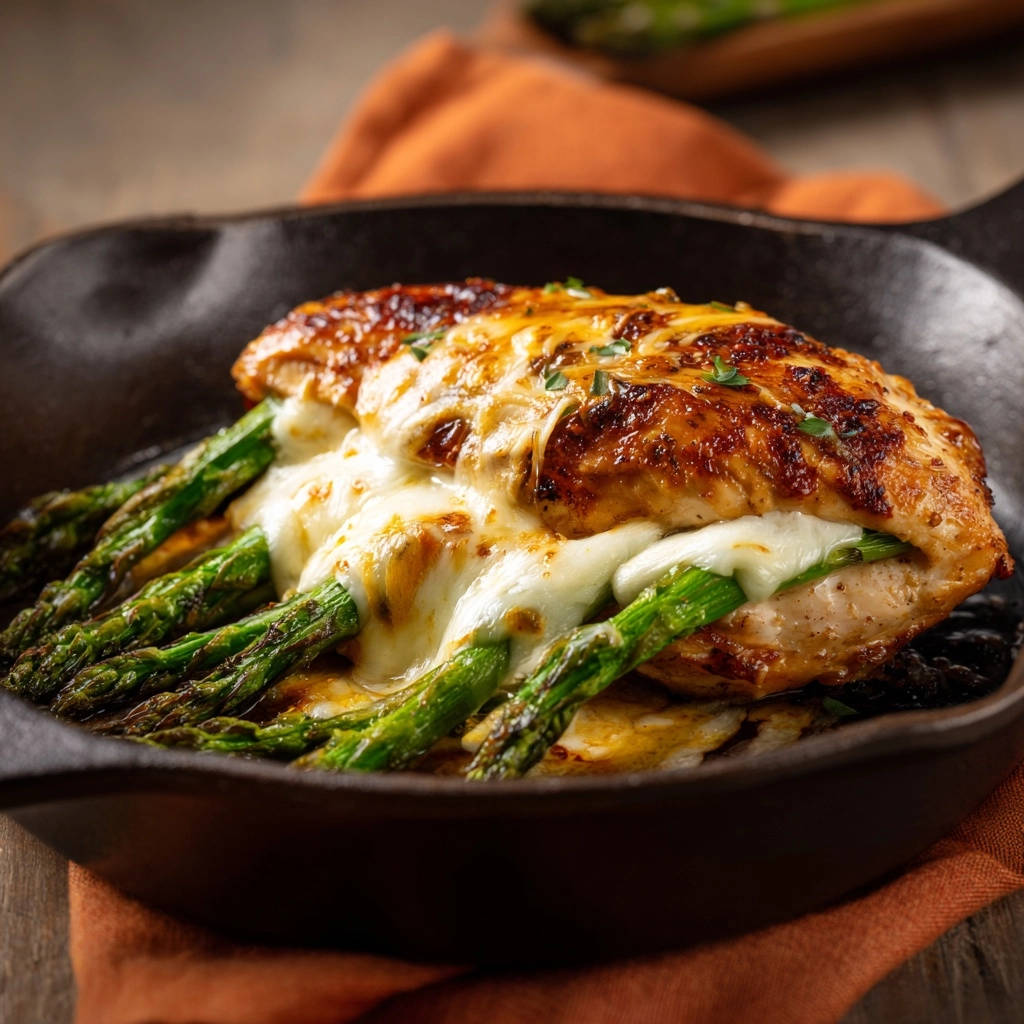
For years, I struggled to achieve perfectly moist chicken breast at home. We’ve all experienced that frustrating moment when a promising chicken dinner turns into a dry, flavorless disappointment. But after countless attempts, I finally unlocked the secret to consistently juicy results, especially with a stunning main like this Asparagus and Cheese Stuffed Chicken.
This particular recipe isn’t just another chicken dish; it’s a testament to simple techniques that guarantee an incredibly tender, flavorful experience every single time. Prepare to elevate your weeknight meals or impress guests with a dish that truly delivers on taste and texture.
Why This Asparagus and Cheese Stuffed Chicken Recipe Is a Game-Changer
Many home cooks face the challenge of dry chicken breasts, often leading to uninspiring meals. My mission was to create a recipe that not only tastes incredible but also consistently delivers on its promise of juicy, tender chicken.
More Ways to Fill Out the Plate
This stuffed chicken is rich and cheesy, so you want sides that bring texture and balance. A rice dish or a firm, baked casserole square both work well here.
- For a sturdy, non-mushy side that holds its shape next to the chicken, try these Cheesy Broccoli and Rice Squares.
- A pot of Fluffy Cheddar Herb Rice soaks up any juices from the chicken without turning into a clumpy mess.
This method solves the universal problem of overcooked, bland poultry, transforming it into a succulent delight. The secret lies in a combination of simple yet strategic cooking techniques that lock in moisture and build layers of flavor.
The Quest for Perfectly Juicy Chicken (and How We Solved It)
The common frustration of ending up with dry, rubbery chicken is truly disheartening. It often stems from uneven cooking or an internal temperature that climbs too high.
This recipe for Asparagus and Cheese Stuffed Chicken directly addresses these issues, ensuring every bite is moist and tender. We utilize specific preparation and cooking steps designed to prevent dryness, guaranteeing a satisfying result every time.
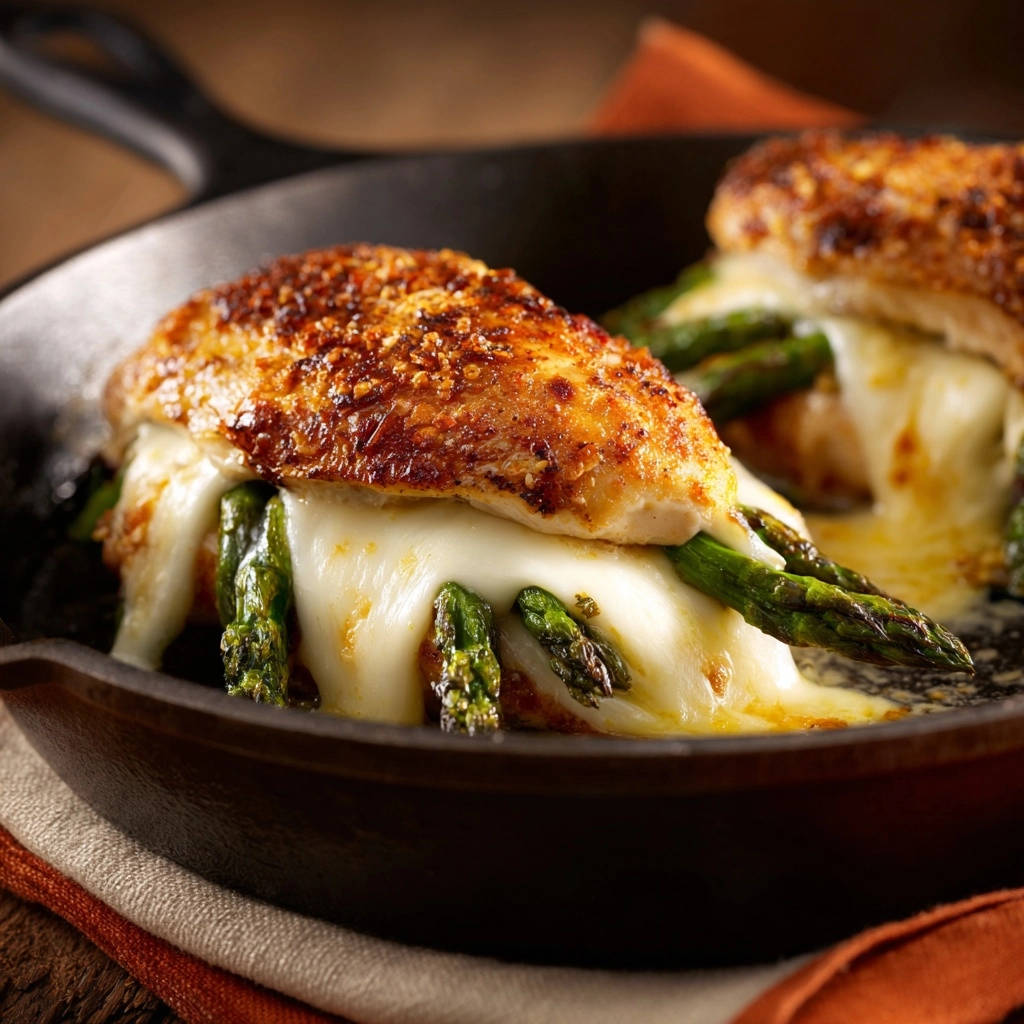
Beyond Basic: What Makes Our Stuffed Chicken Stand Out
Our approach goes beyond basic cooking. We incorporate a gentle pounding technique to ensure even thickness, which is crucial for uniform cooking.
A quick sear creates a beautiful golden crust, locking in flavorful juices before the chicken finishes cooking in the oven. Finally, a crucial resting period allows the chicken’s internal juices to redistribute, culminating in unparalleled tenderness.
Gather Your Flavor Architects: Essential Ingredients for Success
Crafting exceptional Asparagus and Cheese Stuffed Chicken begins with selecting the right components. Each ingredient plays a vital role in the dish’s overall success and flavor profile.
The Heart of the Dish: Boneless, Skinless Chicken Breasts
Opt for fresh, plump boneless, skinless chicken breasts, ideally of similar size for even cooking. The quality of your chicken significantly impacts the final taste and texture.
Aim for breasts that are not overly thick, as they will be butterflied and pounded. This preparation ensures a perfectly even canvas for your delicious stuffing.
The Creamy, Dreamy Filling: Fresh Asparagus & Melty Cheese
Select vibrant, firm asparagus spears; fresh is always best for crisp-tender texture. Remember to snap or trim off the tough, woody ends for the most enjoyable bite.
For the cheese, shredded mozzarella is an excellent choice for its superb meltiness and mild flavor. Its ability to create a gooey, comforting filling is unmatched, but feel free to explore alternatives.
The Aromatic Ensemble: Seasonings & Olive Oil
Garlic powder provides a foundational, savory note that complements the chicken and cheese beautifully. Paprika adds a warm, subtly smoky flavor and contributes to a lovely golden hue on the chicken.
Salt and black pepper are essential for enhancing all the other flavors, bringing balance to the dish. Olive oil is critical for both searing the chicken, developing a crust, and ensuring moisture retention during cooking.
Pre-Flight Checklist: Tools for Your Stuffed Chicken Adventure
Having the right kitchen tools at hand makes the cooking process smoother and more enjoyable. These essentials ensure precision and efficiency in preparing your Asparagus and Cheese Stuffed Chicken.
The Non-Negotiables: Cutting Boards & Mallets (or Rolling Pins)
A sturdy cutting board provides a safe and clean surface for preparing your chicken and vegetables. A meat mallet is indispensable for pounding the chicken breasts to an even thickness, which is crucial for uniform cooking.
If you don’t own a mallet, a heavy rolling pin or even the bottom of a sturdy saucepan can effectively achieve the desired thinness.
For Searing & Roasting: The Essential Oven-Safe Skillet
An oven-safe skillet, such as a cast iron pan or a high-quality stainless steel skillet, is an absolute must for this recipe. It allows you to sear the chicken on the stovetop and then transfer it directly to the oven.
This seamless transition minimizes cleanup and is key to achieving that desirable golden-brown crust and juicy interior.
Precision for Juiciness: A Reliable Meat Thermometer
A good quality meat thermometer is your best friend in the kitchen, especially when cooking chicken. It’s the only truly reliable way to ensure your chicken is cooked to a safe internal temperature without overcooking it.
Targeting 165°F (74°C) in the thickest part guarantees safety and prevents your stuffed chicken from drying out, ensuring maximum juiciness.
Crafting Your Asparagus and Cheese Stuffed Chicken: A Step-by-Step Journey
- Step 1: Preheat and Prepare Your Workspace
Set your oven to 375°F (190°C) to ensure it’s at the ideal temperature when your chicken is ready for roasting. Gather all your ingredients, seasonings, and tools on a clean workspace, setting yourself up for a smooth cooking experience.
- Step 2: Mastering the Butterfly and Pound Technique
Place each boneless, skinless chicken breast on a cutting board. Carefully slice horizontally almost all the way through, leaving about a half-inch intact on one side, then open it like a book.
Cover the butterflied chicken with plastic wrap and gently pound it with a meat mallet or rolling pin until it’s uniformly 1/2 to 3/4 inch thick. This crucial step ensures even cooking and prevents your chicken from drying out, creating a perfect pocket for the filling.
- Step 3: Seasoning for Depth of Flavor
In a small bowl, combine the garlic powder, paprika, salt, and black pepper. This simple yet powerful blend will become the savory foundation of your dish.
Sprinkle this seasoning mixture generously and evenly over both sides of the flattened chicken breasts, ensuring every bite is infused with robust flavor.
- Step 4: The Art of Stuffing Your Chicken
Arrange a small handful of trimmed asparagus spears and approximately 1/4 cup of shredded mozzarella cheese on one half of each seasoned chicken breast. Be mindful not to overfill, as this can make folding difficult.
Carefully fold the other half of the chicken over the filling, creating a neat, stuffed pocket. If necessary, secure the edges with one or two toothpicks to keep the delicious filling securely inside during cooking.
- Step 5: The Golden Sear: Building that Irresistible Crust
Heat the olive oil in a large, oven-safe skillet (like cast iron) over medium-high heat until it shimmers. Carefully place the stuffed chicken breasts into the hot skillet, ensuring not to overcrowd the pan.
Sear for 3-4 minutes per side until each chicken breast develops a beautiful, golden-brown crust. This quick sear is vital for locking in moisture and building a rich, flavorful exterior that enhances the entire dish.
- Step 6: Oven Finish Perfection for Tenderness
Once seared, transfer the entire skillet directly to your preheated oven. Continue cooking for 15-20 minutes, or until the internal temperature of the thickest part of the chicken reaches 165°F (74°C) when measured with a meat thermometer.
This gentle oven finish allows the chicken to cook through evenly and thoroughly without becoming dry, preserving its inherent juiciness.
- Step 7: The Melted Cheese Crown: A Bubbly Finish
During the last 5 minutes of the chicken’s oven cooking time, sprinkle the remaining shredded cheese generously over the tops of the chicken breasts. Return the skillet to the oven.
Continue cooking just until the cheese is beautifully bubbly, melted, and slightly golden brown, forming an irresistible, gooey cap over your stuffed chicken.
- Step 8: The Critical Rest: Locking in the Juices
Once the chicken reaches the proper internal temperature and the cheese is melted, remove the skillet from the oven. Resist the urge to slice immediately; this next step is paramount for truly tender results.
Allow the chicken to rest in the skillet for 5-10 minutes before serving. This critical resting period allows the internal juices to redistribute throughout the meat, preventing them from escaping when sliced and ensuring every bite is incredibly moist.
- Step 9: Garnish and Serve Your Masterpiece
Once rested, remove any toothpicks from the stuffed chicken breasts. Garnish generously with fresh or dried chopped parsley, which adds a lovely pop of color and a fresh, herbaceous aroma.
Serve your hot, perfectly juicy Asparagus and Cheese Stuffed Chicken immediately, ready to be enjoyed as the star of your meal.
If you love creamy, cheese-stuffed chicken, this stuffed chicken with asparagus uses the same method to keep the meat juicy and tender.
Chef’s Corner: Pro Tips for Your Juiciest Stuffed Chicken
Achieving culinary perfection often comes down to understanding the ‘why’ behind each technique. These expert tips will elevate your Asparagus and Cheese Stuffed Chicken from good to extraordinary.
Why Uniform Thickness Matters: The Key to Even Cooking
Pounding your chicken to an even thickness is not merely about creating space for stuffing; it’s fundamental to perfectly cooked chicken. Without it, thinner edges cook faster and dry out while thicker parts remain undercooked.
This simple preparation step ensures your entire stuffed chicken breast cooks evenly, resulting in consistent tenderness throughout the meat and preventing those dreaded dry spots.
The Searing Advantage: Flavor, Texture, and Moisture Retention
Searing isn’t just for looks; it’s a powerhouse technique for flavor. The high heat caramelizes the chicken’s exterior, creating a rich, savory crust through the Maillard reaction.
Beyond flavor, this quick sear helps to “set” the exterior of the chicken, effectively locking in moisture before it transfers to the gentler heat of the oven. This combination results in a beautifully textured and incredibly juicy final product.
Don’t Skip the Rest: Your Secret to Truly Tender Chicken
The resting period after cooking is arguably the most crucial step for juicy chicken, yet it’s often overlooked. When chicken cooks, its muscle fibers contract, pushing moisture to the center.
Allowing the chicken to rest gives these fibers time to relax, reabsorbing those precious juices. This redistribution ensures that when you slice into your Asparagus and Cheese Stuffed Chicken, every morsel is succulent and tender, not dry.
Exploring Cheese Choices: Beyond Mozzarella
While mozzarella is a fantastic choice for its melt and mild flavor, don’t hesitate to experiment with other melty cheeses to personalize your stuffed chicken. Provolone offers a sharper, more piquant note that pairs wonderfully with chicken.
Swiss cheese or a Monterey Jack blend can introduce a nutty or slightly bolder profile. Consider how different cheeses will interact with the asparagus and seasonings to create your perfect savory filling.
Seasonal Swaps: Customizing Your Stuffed Chicken Filling
This Asparagus and Cheese Stuffed Chicken recipe is wonderfully adaptable. Feel free to swap out the asparagus based on season or personal preference. Fresh spinach, sautéed mushrooms, or roasted red peppers make excellent alternatives.
Blanched broccoli florets or even a mixture of finely diced, sautéed bell peppers can add different textures and flavors. Always ensure any vegetable fillings are pre-cooked or finely chopped to ensure they cook through within the chicken’s cooking time.
Common Questions & Quick Fixes for Stuffed Chicken
Even expert cooks encounter challenges. Here are solutions to common queries about Asparagus and Cheese Stuffed Chicken, ensuring your success in the kitchen.
“My chicken turned out dry!” What went wrong?
The most common culprits for dry chicken are overcooking and skipping the resting step. Always use a meat thermometer to ensure the chicken reaches exactly 165°F (74°C) and no higher.
Crucially, allow the chicken to rest for 5-10 minutes after cooking. This crucial period allows the juices to redistribute, guaranteeing a tender and moist result.
How do I keep the filling from falling out while cooking?
Proper folding is key; ensure you’ve created a neat, tight pocket for your filling. If the chicken breast isn’t holding its shape, secure the edges with one or two sturdy toothpicks.
The initial searing step also helps to ‘seal’ the chicken, forming a crust that holds everything together before it goes into the oven. Pressing the seam side down first can aid in this.
Can I prepare this recipe ahead of time?
Yes, you can prep components in advance. Butterfly, pound, season, and even stuff the chicken breasts up to 24 hours ahead of time.
Store the pre-stuffed chicken securely wrapped in plastic wrap or an airtight container in the refrigerator. When ready to cook, proceed with the searing and baking steps as directed, potentially adding a few minutes to the total cooking time if starting from a colder state.
What if I don’t have a meat mallet?
No meat mallet? No problem! A heavy rolling pin works beautifully to pound chicken breasts to an even thickness. You can also use the bottom of a sturdy, heavy skillet or a durable mug.
Just ensure you place plastic wrap over the chicken to prevent tearing and for easier cleanup. The goal is even thickness, not brute force.
Is there a way to make this gluten-free or low-carb?
This Asparagus and Cheese Stuffed Chicken recipe is naturally gluten-free as long as all ingredients are certified as such. There are no flours or breadings involved.
For a low-carb option, the recipe is already very suitable. You can simply enjoy it as is, or pair it with low-carb sides like a large green salad or cauliflower rice instead of traditional starches.
Pairing Perfection: What to Serve with Asparagus and Cheese Stuffed Chicken
A well-chosen side dish can complete your meal, balancing the rich flavors of the Asparagus and Cheese Stuffed Chicken. Consider options that complement without overpowering the star of the plate.
For the same reason we avoid a wet chicken breast, this trick also prevents a soggy bottom on these cheesy baked chicken sliders.
Complementary Side Dishes for a Complete Meal
Roasted potatoes or a light quinoa salad offer satisfying textures and absorb the chicken’s delicious juices. A simple green salad with a vinaigrette dressing provides a refreshing counterpoint to the richness of the cheese.
Alternatively, a delicate rice pilaf or even some steamed green beans with a squeeze of lemon would round out the meal beautifully without feeling too heavy.
Elevate Your Plate: Simple Sauce Suggestions
While the stuffed chicken is flavorful on its own, a light sauce can truly elevate the dish. A quick pan sauce made with the drippings from the skillet, a splash of broth, and a squeeze of lemon is a fantastic choice.
A simple lemon-butter sauce or a very light cream sauce, perhaps infused with a touch of fresh thyme, would also complement the asparagus and chicken wonderfully, adding an extra layer of elegance.
Storing and Reheating Your Delicious Leftovers
Enjoying your Asparagus and Cheese Stuffed Chicken doesn’t have to end with the first meal. With proper storage and reheating, leftovers can be just as delightful.
Proper Storage Techniques for Freshness
Allow any leftover Asparagus and Cheese Stuffed Chicken to cool completely before storing. Transfer the chicken to an airtight container and refrigerate promptly. Properly stored, it will stay fresh for 3-4 days.
Ensure the container is sealed tightly to prevent air exposure, which can dry out the chicken and compromise its flavor.
Best Way to Reheat Without Losing Juiciness
For best results, reheat your stuffed chicken in the oven or an air fryer to maintain its juiciness and crispness. Preheat your oven to 300°F (150°C) and place the chicken in an oven-safe dish, perhaps with a splash of broth or water to add moisture.
Heat for 15-20 minutes, or until warmed through, avoiding the microwave if possible, as it can make the chicken rubbery. An air fryer at 325°F (160°C) for 8-12 minutes also works well for restoring a tender interior and crisp exterior.
Can I Freeze Asparagus and Cheese Stuffed Chicken?
Yes, you can freeze cooked Asparagus and Cheese Stuffed Chicken. Once cooled, wrap each breast tightly in plastic wrap, then again in aluminum foil, or place in a freezer-safe bag or container.
It can be frozen for up to 2-3 months. Thaw overnight in the refrigerator before reheating using the oven or air fryer method for best texture.
I genuinely hope this comprehensive guide inspires you to create the most incredible Asparagus and Cheese Stuffed Chicken you’ve ever tasted. This recipe truly is a game-changer for anyone seeking a consistently juicy, flavor-packed chicken dinner.
Don’t be shy – dive in, follow these expert tips, and prepare to impress yourself and your loved ones. Once you’ve mastered this dish, I’d love to hear about your experience in the comments below!
Stuffed Chicken
Course: Main CourseCuisine: AmericanDifficulty: easy2
servings20
minutes30
minutes480
kcal60
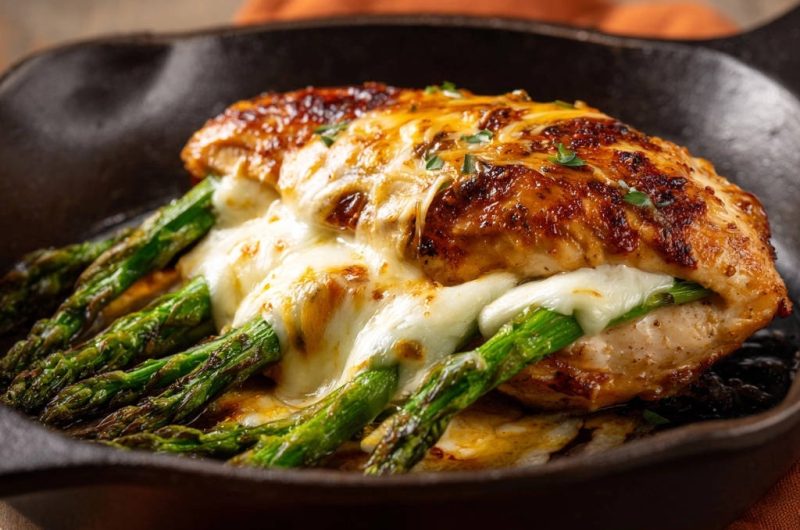
minutesSay goodbye to dry chicken! This recipe reveals the secret to perfectly juicy, tender chicken breasts, stuffed with fresh asparagus and melty cheese. A quick sear and oven finish lock in moisture and flavor for a delicious meal every time.
Ingredients
2 boneless, skinless chicken breasts
1 bunch asparagus spears, tough ends trimmed
1 cup shredded mozzarella cheese (or preferred melty white cheese)
2 tablespoons olive oil
1 teaspoon garlic powder
1 teaspoon paprika
1/2 teaspoon salt
1/4 teaspoon black pepper
1 tablespoon fresh or dried parsley, chopped (for garnish)
Directions
- Preheat your oven to 375F (190C).
- Prepare the chicken breasts: Place each chicken breast on a cutting board. Carefully butterfly each breast by slicing horizontally almost all the way through, leaving about a half inch intact on one side. Open the breast like a book. Place a piece of plastic wrap over the chicken and gently pound it with a meat mallet or rolling pin until it’s about 1/2 to 3/4 inch thick evenly. This crucial step ensures the chicken cooks evenly and doesn’t dry out.
- Season the chicken: In a small bowl, combine garlic powder, paprika, salt, and black pepper. Sprinkle this seasoning mixture generously over both sides of the flattened chicken breasts.
- Stuff the chicken: Arrange a small handful of asparagus spears and about 1/4 cup of the shredded cheese on one half of each chicken breast. Fold the other half of the chicken over the filling to create a stuffed pocket. If needed, secure with toothpicks to keep the filling inside.
- Sear the chicken: Heat the olive oil in a large oven-safe skillet (like cast iron) over medium-high heat. Once the oil is shimmering, carefully place the stuffed chicken breasts into the hot skillet. Sear for 3-4 minutes per side until beautifully golden brown. This quick sear develops a delicious crust and helps lock in the moisture.
- Finish in the oven: Transfer the skillet directly to the preheated oven. Cook for 15-20 minutes, or until the internal temperature of the thickest part of the chicken reaches 165F (74C) when measured with a meat thermometer. This gentle oven finish is key to cooking the chicken through without drying it out.
- Melt the cheese: During the last 5 minutes of cooking, sprinkle the remaining shredded cheese over the tops of the chicken breasts. Continue cooking until the cheese is bubbly and melted, and slightly golden.
- Rest the chicken: Remove the skillet from the oven. This is another critical step for juicy chicken: let the chicken rest in the skillet for 5-10 minutes before serving. This allows the juices to redistribute throughout the meat, keeping it incredibly tender and moist.
- Garnish with fresh or dried parsley and serve hot.
Notes
- Pounding chicken to an even thickness and resting it after cooking are critical steps for ensuring juicy, tender results.