Cheesy Baked Chicken Sliders: Say Goodbye to Soggy Bottoms!
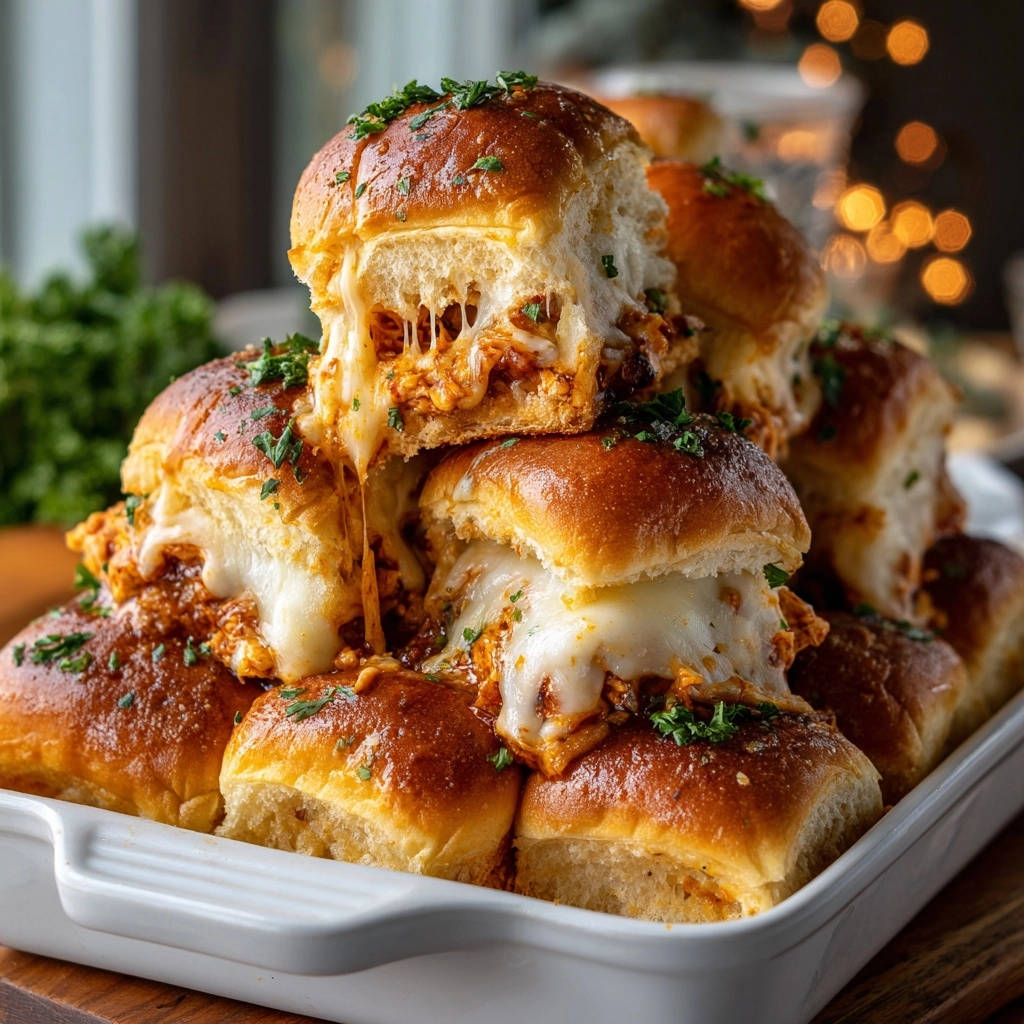
There’s nothing more frustrating than pulling a pan of what should be delicious baked sliders from the oven, only to find the bottoms have turned into a soggy, disappointing mess. I used to struggle with this constantly, but after much experimentation, I finally cracked the code to keeping them perfectly toasted! Now, every single one of my Cheesy Baked Chicken Sliders emerges golden, with a gooey, cheesy filling, and never a soggy bottom in sight-a true game-changer for any gathering or easy weeknight meal.
Why These Cheesy Baked Chicken Sliders Are Your New Go-To Recipe
The Secret to Perfectly Toasted Bottoms (No More Soggy Buns!)
The common problem with many baked slider recipes is that the moist filling can steam the bottom buns, turning them limp and unappetizing. Our recipe strategically employs two crucial layers – melted butter and a solid shield of mozzarella cheese – to create an impenetrable barrier. This innovative approach ensures your slider bottoms remain delightfully toasted and firm, just as they should be.
Effortless Entertaining: A Crowd-Pleaser for Any Occasion
These Cheesy Baked Chicken Sliders are a dream come true for entertaining. They’re incredibly easy to assemble in advance, bake in one dish, and serve a crowd with minimal fuss.
Whether it’s a game day feast, a casual get-together, or a simple family dinner, their universal appeal and irresistible flavor guarantee rave reviews from everyone.
Irresistible Flavor and Texture in Every Bite
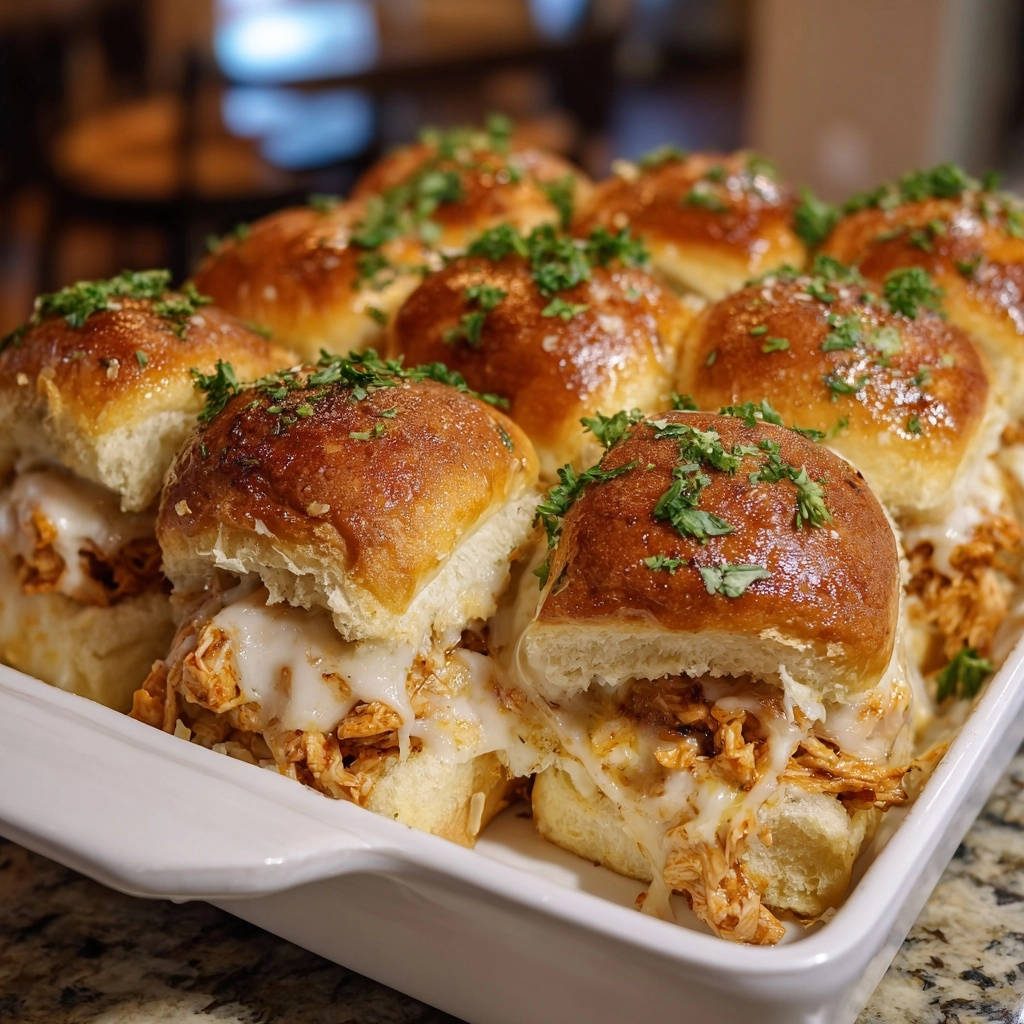
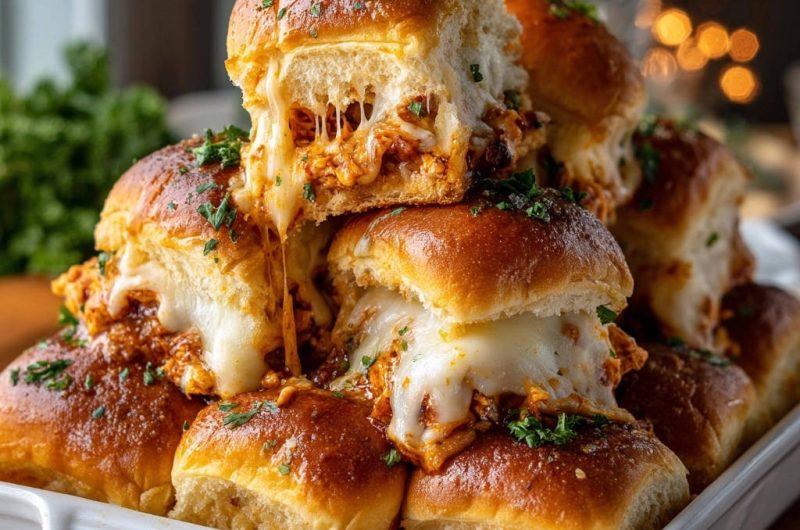
Imagine biting into a slider where tangy, zesty buffalo-coated chicken meets gooey, melted mozzarella, all nestled between soft Hawaiian sweet rolls. The tops are brushed with garlicky butter, baking to a beautiful golden crispness, perfectly contrasting the tender filling.
This symphony of flavors and textures makes these baked sliders recipe truly unforgettable.
Gather Your Goodies: Essential Ingredients for Flavorful Sliders
The Foundation: Picking the Perfect Slider Buns
Hawaiian sweet rolls are the ideal choice for these sliders. Their slightly sweet flavor perfectly complements the savory, spicy chicken, and their sturdy yet soft texture holds up beautifully to baking.
If Hawaiian rolls aren’t available, look for similar soft, pull-apart slider buns that come in a connected slab for easier assembly.
The Heart of the Filling: Shredded Chicken & Zesty Buffalo Sauce
Using pre-cooked shredded chicken (like rotisserie chicken) makes this recipe incredibly quick and convenient. For the best flavor and texture, ensure your chicken is moist, not dry.
A good quality buffalo sauce is key here; it provides that iconic tangy heat that makes these sliders so addictive. You can adjust the spice level by choosing a mild or hot variety.
The Gooey Factor: Mozzarella Cheese and Melted Butter
Mozzarella cheese is paramount not just for its incredible melt and gooey texture, but also for its role as a protective barrier on the bottom buns. It prevents the sauce from seeping into the bread.
Melted butter serves a dual purpose: it forms the initial flavor barrier on the bottom rolls and ensures a gorgeous golden-brown crust on the tops, infused with garlic powder for extra deliciousness.
Finishing Touches: Garlic Powder & Fresh Parsley
Garlic powder amplifies the savory notes in the butter, permeating the buns with aromatic goodness. Fresh chopped parsley is more than just a garnish; it adds a vibrant pop of color and a fresh, herbaceous note that brightens the entire dish, making your easy chicken sliders look as good as they taste.
Gear Up! Tools for Perfect Cheesy Baked Chicken Sliders
Your Essential Baking Companions
9×13 Inch Baking Dish: This standard size is perfect for neatly arranging a dozen sliders, allowing for even heat distribution and baking.
Mixing Bowls (Small & Large): You’ll need a small bowl for whisking the butter mixture and a larger one for combining the chicken filling efficiently.
Pastry Brush: This tool is crucial for evenly applying the melted butter mixture to the buns, ensuring maximum flavor and browning.
If you’re enjoying asparagus as a side, you might also try it stuffed inside a chicken breast with melted cheese, like this asparagus and cheese stuffed chicken.
Sharp Serrated Knife: A good serrated knife allows you to slice the entire slab of slider buns cleanly through the middle without tearing or squishing them.
Aluminum Foil: Essential for the initial covered bake, the foil traps steam to melt the cheese and heat the filling without drying out the buns.
Crafting Culinary Bliss: A Step-by-Step Guide to Baked Chicken Sliders
- Prepare Your Oven:
Preheat your oven to 375°F (190°C). Reaching the correct temperature before baking ensures even cooking and proper browning from the moment your sliders enter the oven.
- Slice the Slider Buns:
Using a sharp serrated knife, carefully slice the entire slab of slider rolls horizontally through the middle, aiming to keep the bottoms and tops connected if possible. Place the bottom half of the rolls evenly into your 9×13 inch baking dish.
- Create the Flavor Barrier:
In a small bowl, whisk together the melted butter and garlic powder until they are well combined. Brush about half of this aromatic mixture generously over the cut sides of the bottom rolls.
This buttery layer is your initial and delicious defense against sogginess, infusing the bread with irresistible garlic flavor and providing a protective coating.
- Lay the Cheesy Shield:
Layer the mozzarella cheese slices directly over the buttered bottom rolls, ensuring good, even coverage across the entire surface. If using shredded mozzarella, spread it uniformly.
This crucial cheese layer acts as a second, strong protective shield, physically preventing the saucy chicken mixture from soaking into the delicate bread below.
- Mix the Fiery Filling:
In a separate, larger bowl, combine the cooked shredded chicken with the buffalo sauce. Stir diligently until the chicken is thoroughly and evenly coated with the zesty sauce.
- Assemble the Sliders:
Carefully spread this saucy chicken mixture evenly over the cheese layer in the baking dish. Distribute it so each future slider gets a generous and consistent portion of chicken and sauce.
- Top it Off & Brush:
Gently place the top half of the rolls back over the chicken filling, aligning them as best as possible. Brush the remaining butter and garlic powder mixture generously over the tops of these rolls.
This final buttery glaze is key for achieving beautiful golden-brown tops and adding another layer of savory, garlicky flavor to your game day sliders.
- First Bake (Covered):
Cover the baking dish tightly with aluminum foil. Place it in the preheated oven and bake for 15 minutes.
This initial covered bake allows the cheese to melt into glorious gooeyness and the filling to heat through thoroughly without drying out or over-browning the buns prematurely.
- Second Bake (Uncovered) & Golden Perfection:
Remove the foil from the baking dish. Return it to the oven and bake for an additional 5 to 10 minutes, or until the tops of the rolls are a beautiful golden brown.
For a perfect pairing, try our Stuffed Chicken with Asparagus and Cheese: Perfectly Juicy, Never Dry.
The cheese should be bubbly and fully melted, and critically, any excess moisture from the bottom of the pan should have evaporated. Keep a close eye during this stage to achieve your desired crispness and color.
- Rest, Slice, and Garnish:
Carefully remove the baked sliders from the oven. Let them rest for 5-10 minutes before slicing them apart along their original roll lines.
Garnish generously with fresh chopped parsley for a bright burst of color and herbaceous flavor. Serve these incredible Cheesy Baked Chicken Sliders warm and enjoy!
Chef’s Secrets: Elevating Your Cheesy Baked Chicken Sliders Game
The Ultimate Soggy-Bottom Prevention Strategy
Layering is Key: Never skip the butter brush on the bottom buns, and always ensure a solid, complete layer of cheese directly on top of that butter. These two foundational layers are your best defense, creating an effective barrier that keeps the bread crisp and delicious.
Uncovered Bake for Moisture Release: The final 5-10 minutes of uncovered baking are absolutely crucial for achieving perfectly toasted bottoms. This stage allows any trapped steam or excess moisture from the filling to evaporate, ensuring those coveted golden, non-soggy bottoms.
Perfect Chicken Prep for Optimal Texture
Moist Shredded Chicken: Regardless of whether you’re using a store-bought rotisserie chicken or cooking your own, it’s essential that your shredded chicken remains moist. Overcooked or dry chicken will result in a less appealing, tougher filling that can negatively impact the overall texture of your sliders.
Customizing Your Slider’s Kick
Buffalo Sauce Control: You have full control over the spice level of your sliders. Adjust the amount of buffalo sauce to match your family’s preference. For a milder version, consider mixing in a tablespoon or two of ranch or blue cheese dressing with the buffalo sauce before combining it with the chicken.
Achieving Golden Brown Perfection
Don’t Skimp on the Butter Brush: The melted butter and garlic powder mixture isn’t just for flavor; it’s absolutely essential for achieving that beautiful, glossy, golden-brown crust on the top buns. Apply it generously and evenly for the best results.
Resting for Success
The Importance of Resting: Allowing your sliders to rest for a few minutes after they come out of the oven is a vital step. This brief resting period helps the cheese and filling set properly, making the sliders much easier to slice and preventing them from falling apart when served.
Perfect Pairings: What to Serve with Your Cheesy Baked Chicken Sliders
Side Dish Sensations
Crisp celery sticks and carrot sticks, served with a cool ranch or creamy blue cheese dip, are classic companions. They provide a refreshing crunch that perfectly balances the heat and richness of the buffalo chicken.
For a lighter option, a simple green salad dressed with a bright vinaigrette or a creamy, tangy coleslaw offers a wonderful contrasting texture and flavor to these hearty sliders.
You might also consider serving them alongside something vibrant like Crispy Baked Asparagus for a fresh green vegetable side.
Beverage Complements
Ice-cold beverages are ideal for cutting through the richness and heat. A crisp lager or a refreshing pale ale complements the flavors beautifully. For non-alcoholic options, sparkling lemonade or even a chilled glass of rosé are excellent choices.
Ideal Occasions
These Cheesy Baked Chicken Sliders are tailor-made for any gathering where delicious, easy-to-eat food is appreciated. They are perfect for game day parties, casual get-togethers, potlucks, or simply as a fun and satisfying weeknight dinner for the family.
Plan Ahead: Make-Ahead & Storage Tips for Your Sliders
Prepping in Advance
You can assemble these delicious sliders up to 12 hours before baking. Layer everything in your baking dish-buns, butter, cheese, chicken filling, top buns, and the final butter brush-then cover tightly with plastic wrap and refrigerate.
Pair These With Your Sliders
Once those cheesy chicken sliders come out of the oven, round out the meal with a cold side and a warm, shareable bread.
- A creamy, tangy Loaded Creamy Potato Salad cuts through the rich cheese and adds a cool, chunky texture.
- For another pull-apart experience, the Spinach Artichoke Pull-Apart Bread shares the same gooey, cheesy appeal and lets guests grab a piece with their hands.
If baking from cold, simply add an extra 5-10 minutes to the initial covered baking time to ensure everything heats through properly.
Reheating for Freshness
Leftover sliders reheat beautifully in the oven. Place them on a baking sheet and reheat at 300°F (150°C) until they are warmed through and the cheese is melted and bubbly again, typically about 10-15 minutes.
Loosely covering them with foil during reheating can help prevent the buns from drying out, preserving their tenderness.
Storing Leftovers
Store any leftover Cheesy Baked Chicken Sliders in an airtight container in the refrigerator for up to 3-4 days. While the bottoms may lose some of their initial crispness after refrigeration, the amazing flavor will remain fantastic.
Troubleshooting Common Slider Setbacks
My Sliders Are Dry
Ensure your shredded chicken is adequately moist before you mix it with the buffalo sauce. It’s also crucial not to overbake, especially during the uncovered stage; pull them from the oven as soon as the tops are golden and the cheese is visibly bubbly.
Buns Aren’t Golden Brown
Make sure you generously brush the tops of the buns with the melted butter-garlic mixture before baking. If they appear too pale after the recommended baking time, return them to the oven for a few extra minutes uncovered, watching them closely to prevent any burning.
Too Much Moisture on the Bottom
This is often due to not enough barrier. Double-check that you used both the initial butter brush on the bottom buns and created a complete, solid layer of cheese directly on top of it. Additionally, ensure the final uncovered baking step is long enough for any excess moisture at the bottom of the pan to fully evaporate.
Not Enough Kick from the Buffalo Sauce
If you prefer a spicier slider, simply increase the amount of buffalo sauce used in the chicken mixture, or opt for a hotter brand of sauce. You can also drizzle a little extra hot sauce over the chicken layer before adding the top buns for an extra punch.
Your Top Questions About Cheesy Baked Chicken Sliders, Answered!
Can I use different types of cheese?
Absolutely! While mozzarella provides the ideal gooey texture and a neutral base for the buffalo chicken, other cheeses like Colby Jack, sharp cheddar, or a spicy pepper jack blend would also be delicious. Just ensure you choose a cheese known for melting well.
What if I don’t like buffalo sauce?
No problem at all! You can easily substitute the buffalo sauce with other delicious options such as BBQ sauce, a sweet chili sauce, or even a tangy honey mustard blend. Each alternative will create a completely different but equally delicious flavor profile for your party sliders.
Can I use fresh chicken breasts instead of pre-cooked?
Yes, you certainly can! Simply cook two large chicken breasts by boiling, baking, or pan-frying, then shred them once cooled. This recipe is also fantastic for utilizing any leftover roasted chicken you might have on hand.
How do I prevent the sliders from being too spicy for kids?
To significantly reduce the heat, use a mild buffalo sauce variety. Another excellent strategy is to mix your chosen buffalo sauce with an equal amount of ranch dressing or a touch of honey before combining it with the shredded chicken. This mellows the spice while retaining that beloved tangy flavor.
Can I freeze leftover Cheesy Baked Chicken Sliders?
While you can freeze them, be aware that the texture of the buns might change slightly upon thawing and reheating, often becoming a bit softer than when fresh. For the best quality and enjoyment, it’s generally recommended to savor them fresh or within a few days from the refrigerator.
Unleash Your Inner Slider Superstar! Share Your Creation
Now that you’re armed with the ultimate recipe for Cheesy Baked Chicken Sliders – and the invaluable secret to a perfectly toasted, never-soggy bottom – it’s time to get baking! This dish is a guaranteed crowd-pleaser that consistently delivers on flavor, convenience, and pure, comforting deliciousness.
Don’t be shy! We’d absolutely love to see your incredible slider creations. Snap a picture and share it with us on social media using #NailedItRecipes. And for more fantastic, easy-to-make recipes that will impress every time, explore our full collection of appetizers and main dishes.
Cheesy Baked Chicken
Course: Main CourseCuisine: AmericanDifficulty: easy12
sliders15
minutes25
minutes240
kcal40
minutesTired of soggy slider bottoms? This recipe cracks the code to perfectly toasted, golden buns filled with gooey, cheesy buffalo chicken. Enjoy an easy, crowd-pleasing dish with no more disappointment!
Ingredients
12 Hawaiian sweet rolls or similar slider buns
2 cups cooked shredded chicken
1 cup buffalo sauce
8 slices mozzarella cheese, or 1.5 cups shredded
1 tablespoon butter, melted
1/2 teaspoon garlic powder
2 tablespoons fresh parsley, chopped, for garnish
Directions
- Preheat your oven to 375 degrees Fahrenheit (190 degrees Celsius).
- Carefully slice the entire slab of slider rolls horizontally through the middle, keeping the bottoms and tops connected. Place the bottom half of the rolls in a 9×13 inch baking dish.
- In a small bowl, whisk together the melted butter and garlic powder. Brush about half of this mixture generously over the cut sides of the bottom rolls. This creates a flavor barrier.
- Layer the mozzarella cheese slices directly over the buttered bottom rolls. This crucial layer helps protect the bread from the saucy filling.
- In a separate bowl, combine the cooked shredded chicken with the buffalo sauce, ensuring the chicken is evenly coated. Spread this saucy chicken mixture evenly over the cheese layer in the baking dish.
- Place the top half of the rolls back over the chicken filling. Brush the remaining butter and garlic powder mixture over the tops of the rolls. This promotes beautiful golden browning.
- Cover the baking dish tightly with aluminum foil. Bake for 15 minutes. This allows the cheese to melt and the filling to heat through without drying out the buns.
- Remove the foil and bake for an additional 5 to 10 minutes, or until the tops of the rolls are golden brown and the cheese is bubbly and fully melted, and any excess moisture has evaporated from the bottom.
- Carefully remove from the oven. Let the sliders rest for a few minutes before slicing them apart. Garnish with fresh chopped parsley and serve warm.
Notes
- Follow the layering steps to ensure perfectly toasted buns and no soggy bottoms.