Banana Pudding Mini Tarts: Perfectly Firm & Creamy
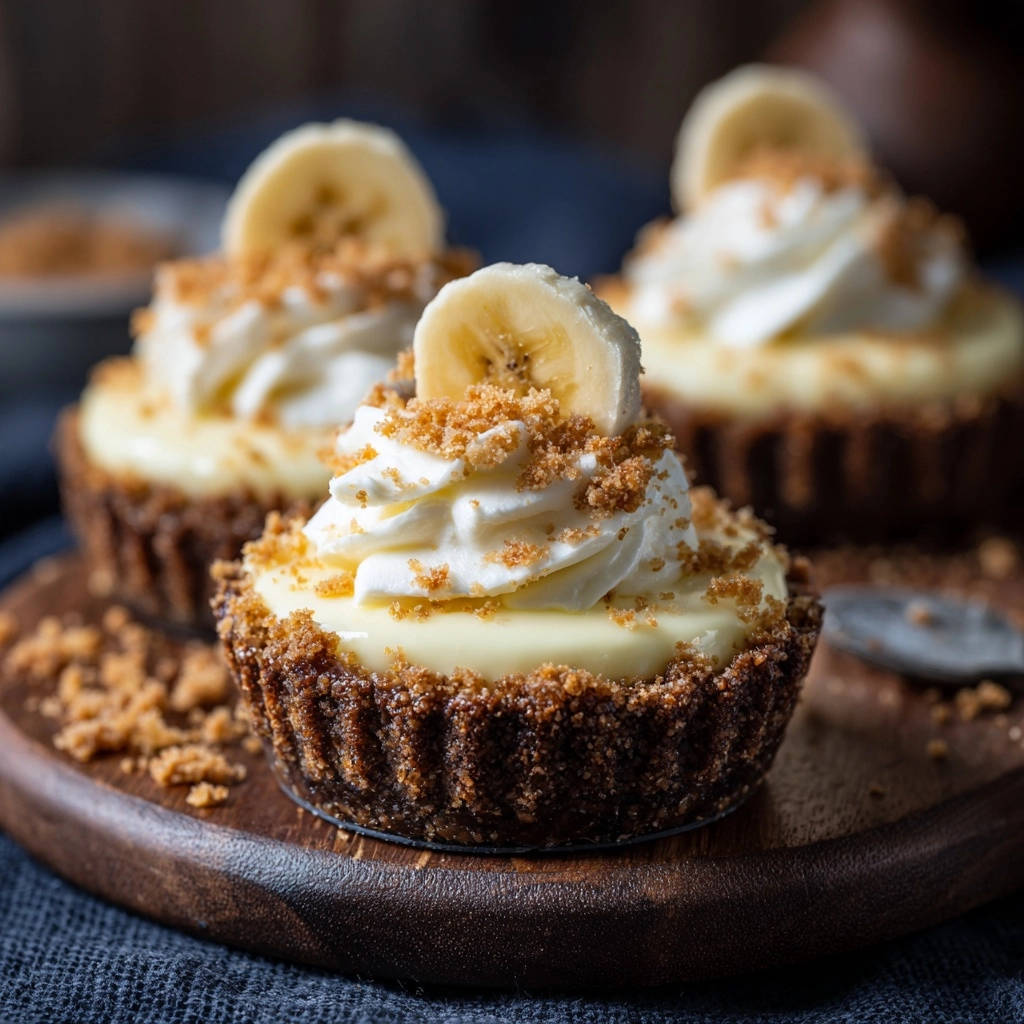
There’s nothing more frustrating than a banana pudding that refuses to hold its shape, leaving you with a delicious but messy dessert. As a seasoned baker, I’ve personally perfected the art of creating a truly stable, wonderfully creamy filling that ensures your Banana Pudding Mini Tarts are firm and sliceable every single time.
This recipe offers an exceptional solution, delivering individual portions of classic banana pudding joy, free from any dreaded runniness. Get ready to impress with these perfectly set, delightful treats!
Why This Recipe Shines: No More Runny Pudding!
The Secret to a Sturdy, Luscious Filling
The core of this recipe’s success lies in meticulously activating the cornstarch. Whisking constantly and allowing the pudding to boil for a full 1-2 minutes ensures the starch molecules fully expand and thicken, creating an incredibly stable base.
Additionally, tempering the egg yolks prevents scrambling, integrating them smoothly for an even richer and creamier texture without compromising the set. Finally, adequate chilling time is non-negotiable for a truly firm, sliceable pudding.
Bite-Sized Bliss: Perfect Portions Every Time
Our mini tart format transforms a beloved classic into an elegant, easy-to-serve dessert. These individual treats eliminate the need for messy slicing, making them ideal for gatherings or portion control.
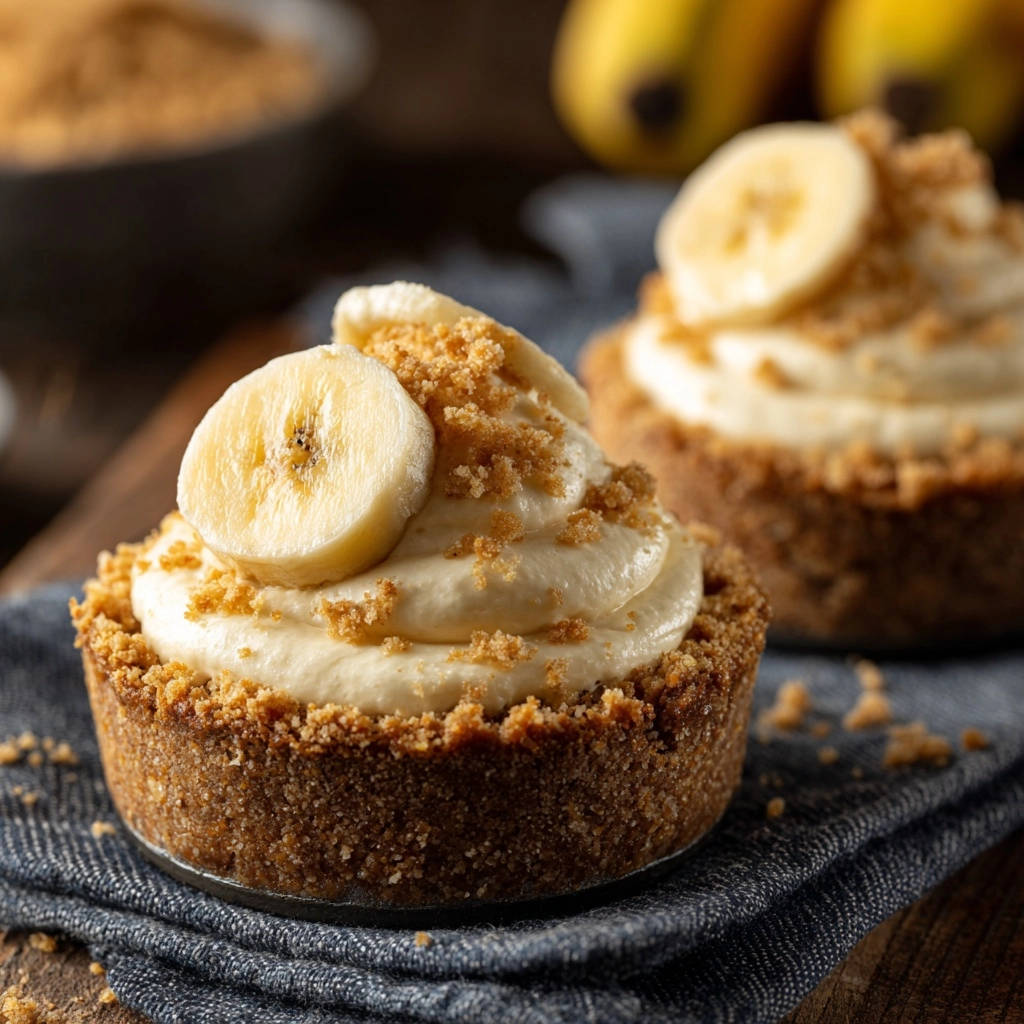
Each perfectly sized tart provides a complete experience, from the crunchy graham cracker crust to the luscious pudding and fluffy whipped cream, all in one delightful bite.
A Crowd-Pleaser for Any Occasion
These delightful Banana Pudding Mini Tarts are universally adored, making them the ultimate dessert for any event. Whether it’s a potluck, a family dinner, a party, or just a treat for yourself, they always disappear quickly.
For a richer chocolate twist on these creamy tarts, try making these mini chocolate peanut caramel tarts instead.
Their classic flavor profile appeals to all ages, ensuring your baking efforts are always met with smiles and requests for the recipe.
Essential Tools for Seamless Tart Creation
Must-Have Baking Gear
A reliable 12-cup muffin tin or dedicated mini tart pans are essential for shaping the crusts. Invest in non-stick options for easy removal.
You’ll also need a selection of mixing bowls (medium and small), along with accurate measuring cups and spoons, to ensure precise ingredient ratios.
Kitchen Utensils for Pudding Perfection
A sturdy whisk is crucial for preventing lumps and ensuring even thickening of the pudding, particularly during the critical boiling phase. A heavy-bottomed saucepan is also vital for consistent heat distribution and to prevent scorching.
For the whipped cream topping, an electric mixer (handheld or stand mixer) with a whisk attachment is highly recommended to achieve stiff peaks effortlessly.
The Core Components: What You’ll Need
Crafting the Perfect Graham Cracker Base
Graham cracker crumbs form the quintessential foundation, offering a delightful crunch and a hint of honeyed sweetness.
Granulated sugar adds a touch more sweetness to the crust, balancing the richness of the filling. Melted unsalted butter is the binding agent, transforming the crumbs into a cohesive, pressable mixture that bakes into a firm, tender shell.
The Rich, Creamy Pudding Stars
Granulated sugar provides the primary sweetness for the velvety pudding. Cornstarch is the hero thickener, crucial for achieving that desirable firm, yet creamy, consistency.
A pinch of salt balances the flavors, enhancing the overall taste. Whole milk is highly recommended for its richness, contributing to the pudding’s luxurious mouthfeel. Large egg yolks add a deep yellow hue and an extra layer of richness and stability when properly tempered. Unsalted butter enriches the pudding, making it incredibly smooth and glossy, while vanilla extract provides that classic, comforting aroma and flavor that defines banana pudding.
Delightful Toppings & Fresh Garnishes
Cold heavy cream, when whipped with powdered sugar and a touch of vanilla extract, creates a light, airy topping that perfectly complements the rich pudding. Ripe bananas, sliced just before serving, provide fresh fruitiness and are the signature garnish for these Banana Pudding Mini Tarts.
A final sprinkle of extra graham cracker crumbs adds textural contrast and reinforces the crust’s flavor, completing the iconic presentation.
Your Step-by-Step Guide to Irresistible Mini Tarts
Building the Foundations: Crust Preparation
- Preheat & Prepare Pans:
Set your oven to 350°F (175°C) and lightly grease your muffin tin or mini tart pans. Proper greasing ensures easy removal later.
- Combine Crust Ingredients:
In a medium bowl, thoroughly mix graham cracker crumbs, granulated sugar, and melted butter until it resembles wet sand.
- Press & Bake the Crusts:
Firmly press about 2 tablespoons of the mixture into each cup, extending slightly up the sides. Bake for 8-10 minutes until golden, then cool completely. Cooling is crucial to prevent a soggy crust when the warm pudding is added.
Unlocking the Creamy Dream: The Pudding Process
- Whisk Dry Ingredients & Milk:
In a medium saucepan, whisk together granulated sugar, cornstarch, and salt. Gradually add milk, whisking until perfectly smooth, with no lumps remaining. Starting with dry ingredients helps prevent cornstarch clumps.
- Cook & Thicken the Pudding:
Place the saucepan over medium heat. Cook, whisking constantly, until the mixture thickens significantly, comes to a boil, and visibly bubbles. Continue boiling gently for 1 to 2 full minutes, whisking vigorously. This vital step fully activates the cornstarch for proper thickening and prevents a starchy taste.
- Temper the Egg Yolks:
In a small bowl, lightly whisk the egg yolks. Slowly drizzle about half a cup of the hot pudding mixture into the egg yolks while whisking constantly. This ‘tempering’ process gradually raises the temperature of the yolks, preventing them from scrambling when added to the hot pudding.
- Return & Finish Cooking:
Pour the tempered egg yolk mixture back into the saucepan with the remaining hot pudding. Whisk well and continue to cook for another 1 minute, stirring constantly, until the mixture thickens further. This ensures the yolks are fully incorporated and cooked.
- Add Flavor & Prevent Skin:
Remove from heat and stir in the 2 tablespoons of unsalted butter and vanilla extract until melted and combined. Immediately pour the warm pudding evenly into the cooled graham cracker crusts. Immediately press a piece of plastic wrap directly onto the surface of the pudding in each tart to prevent a skin from forming as it cools.
The Crucial Chill: Setting for Success
- Refrigerate Thoroughly:
Refrigerate for at least 4 hours, or preferably overnight, until the pudding is completely chilled and firmly set. This extended chilling time is absolutely essential for the pudding to reach its perfect, non-runny texture and allows the flavors to meld beautifully.
Elevating with Toppings: The Grand Finale
- Whip the Cream:
In a cold bowl, combine cold heavy cream, powdered sugar, and vanilla extract. Beat with an electric mixer on high speed until stiff peaks form. Using cold ingredients and a cold bowl helps the cream whip up quickly and hold its shape.
- Assemble & Serve:
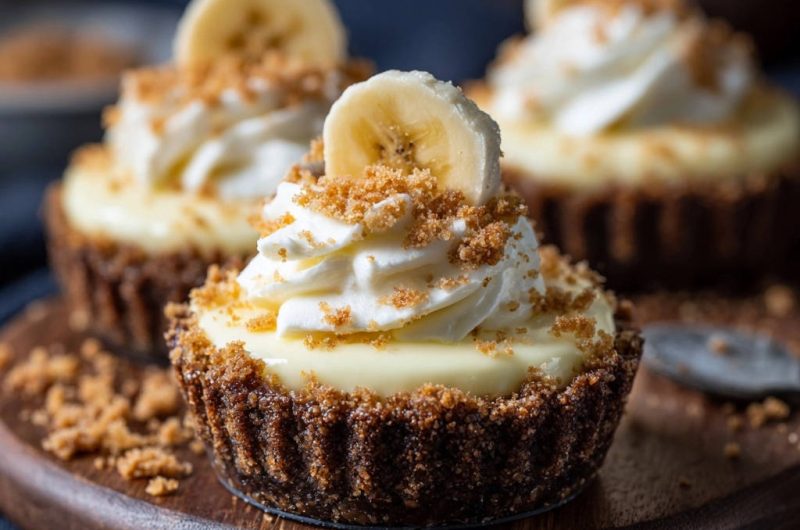
Just before serving, carefully remove the tarts from the pans. Top each tart with a generous dollop of whipped cream, a few fresh banana slices, and a sprinkle of extra graham cracker crumbs. Serve immediately for best enjoyment, as bananas can brown quickly.
Expert Tips for Banana Pudding Mini Tart Perfection
Banana Selection and Preservation
Choose Ripe, Not Overripe: Select bananas that are yellow with a few brown speckles for optimal sweetness and flavor. Avoid green bananas which lack sweetness, or completely brown ones which can be too mushy.
Prevent Browning: Slice bananas just before serving. To further prevent browning if preparing slightly ahead, you can lightly brush them with a tiny amount of lemon juice or a fruit protector, but this may subtly alter the flavor.
Mastering the Pudding Consistency
Whisk, Whisk, Whisk! Constant and vigorous whisking during cooking is crucial to prevent lumps and ensure even thickening, especially when the cornstarch activates. Don’t stop whisking!
Don’t Skimp on Boil Time: The 1-2 minute boil for the pudding is non-negotiable. This ensures the cornstarch is fully cooked out and provides the ultimate firm set, preventing a starchy aftertaste.
Embrace the Chill: Resist the urge to serve early! The extended chilling time allows the pudding to fully set and achieve its desired firm, yet creamy, texture. Patience is key here.
Presentation Pointers
Garnish Just Before Serving: Always add whipped cream and fresh banana slices right before serving to maintain optimal freshness and appearance. This prevents the bananas from browning and the cream from deflating.
Creative Topping Ideas: For extra flair, consider a dusting of cinnamon, a drizzle of caramel sauce, or a few mini chocolate chips. These additions can elevate your Banana Pudding Mini Tarts even further.
Solving Common Mini Tart Challenges
My Pudding Isn’t Setting!
Ensure you boiled the pudding for the full 1-2 minutes after it came to a rolling boil, as cornstarch needs adequate heat and time to fully activate and thicken properly. Insufficient boiling is the most common culprit.
Also, make sure it’s been chilled for at least 4 hours, or preferably overnight, as the setting process continues significantly during refrigeration.
Crust Concerns: Too Hard or Too Crumbly?
If your graham cracker crust is too hard, you might have pressed it too firmly into the pans or overbaked it. Reduce baking time slightly next time.
For a crumbly crust, ensure the graham cracker mixture was well combined with the melted butter before pressing, and that it was pressed firmly enough into the pans to compact properly.
Preventing Brown Bananas
The best and most effective way to prevent bananas from browning is to slice them just before assembling and serving the tarts. Bananas oxidize quickly when exposed to air.
If you must slice them earlier, a very light brush of citrus juice (like lemon or lime) can help, but be aware it may introduce a slight tartness to the flavor profile.
Planning Ahead: Storage & Make-Ahead Options
Optimal Freshness: Storing Your Tarts
Store assembled Banana Pudding Mini Tarts, without the whipped cream and fresh banana slices, in an airtight container in the refrigerator for up to 2-3 days. This protects them from odors and maintains their texture.
Add the whipped cream and fresh banana toppings just before serving for the best texture and appearance. Pre-topped tarts will not store well.
Can You Make Them in Advance?
Absolutely! The graham cracker crusts can be baked and cooled a day in advance, stored at room temperature. The pudding can also be made and chilled overnight, ensuring it’s perfectly set and ready for assembly.
This allows for quick assembly on the day of serving, greatly reducing last-minute stress.
Serving Suggestions for Every Occasion
These mini tarts are incredibly versatile. They are perfect for dessert buffets, picnics, or individual treats at family gatherings. Serve them chilled, perhaps alongside a cup of coffee, a glass of cold milk, or even a scoop of vanilla bean ice cream.
Frequently Asked Questions About These Mini Tarts
Ingredient Substitutions: What Works?
While whole milk is highly recommended for the creamiest pudding, 2% milk can also be used, though it might result in a slightly less rich consistency. For the crust, other crushed cookie crumbs like vanilla wafers or shortbread can be substituted for graham crackers for a different flavor profile.
Gluten-Free or Dairy-Free Adaptations?
For a gluten-free version, simply use certified gluten-free graham cracker crumbs, which are widely available. For dairy-free, you can experiment with plant-based milks and butter alternatives in the pudding, though the pudding’s consistency and flavor may vary slightly from the traditional recipe.
Freezing Your Banana Pudding Tarts
It is generally not recommended to freeze Banana Pudding Mini Tarts. The fresh bananas will turn mushy and brown upon thawing, and the pudding’s texture can become watery or grainy due to the crystallization of water within the pudding. They are best enjoyed fresh or within a few days of chilling.
Your Delicious Banana Pudding Mini Tarts Await!
You’re now equipped with the knowledge and techniques to create Banana Pudding Mini Tarts that are consistently firm, wonderfully creamy, and utterly delightful. Say goodbye to runny puddings and hello to perfectly portioned dessert bliss!
We encourage you to try this recipe, share your creations with friends and family, and savor every bite of these irresistible treats. Happy baking!
Banana Pudding
Course: DessertCuisine: AmericanDifficulty: medium12
mini tarts45
minutes20
minutes150
kcal65
minutesSay goodbye to runny desserts! This recipe guarantees perfectly firm, creamy banana pudding mini tarts that hold their shape beautifully. Enjoy dessert perfection with every bite.
Ingredients
For the Crust:
1 1/2 cups graham cracker crumbs
1/4 cup granulated sugar
1/2 cup unsalted butter, melted
For the Filling:
1/2 cup granulated sugar
1/4 cup cornstarch
1/4 teaspoon salt
2 cups milk (whole milk recommended for creaminess)
2 large egg yolks
2 tablespoons unsalted butter
1 teaspoon vanilla extract
For the Topping:
1 cup cold heavy cream
2 tablespoons powdered sugar
1/2 teaspoon vanilla extract
2 ripe bananas, sliced (for garnish)
Extra graham cracker crumbs, for sprinkling
Directions
- Preheat oven to 350°F (175°C). Lightly grease a 12-cup muffin tin or mini tart pans.
- For the Crust: In a medium bowl, combine graham cracker crumbs, granulated sugar, and melted butter. Mix until well combined and mixture resembles wet sand.
- Press about 2 tablespoons of the mixture firmly into the bottom and up the sides of each muffin cup or tart pan. Bake for 8-10 minutes, or until edges are lightly golden. Let cool completely on a wire rack.
- For the Filling (The Secret to No More Runny Pudding!): In a medium saucepan, whisk together granulated sugar, cornstarch, and salt. Gradually whisk in the milk until smooth and no lumps remain.
- Place the saucepan over medium heat. Cook, whisking constantly, until the mixture thickens significantly, comes to a boil, and visibly bubbles. Continue boiling gently for 1 to 2 full minutes, whisking vigorously, to ensure the cornstarch fully activates and thickens properly. This is key!
- In a small bowl, lightly whisk the egg yolks. Slowly drizzle about half a cup of the hot pudding mixture into the egg yolks while whisking constantly. This tempers the yolks, preventing them from scrambling.
- Pour the tempered egg yolk mixture back into the saucepan with the remaining hot pudding. Whisk well and continue to cook for another 1 minute, stirring constantly, until the mixture thickens further.
- Remove from heat and stir in the 2 tablespoons of unsalted butter and vanilla extract until melted and combined.
- Pour the warm pudding evenly into the cooled graham cracker crusts.
- Immediately press a piece of plastic wrap directly onto the surface of the pudding in each tart to prevent a skin from forming.
- Refrigerate for at least 4 hours, or preferably overnight, until the pudding is completely chilled and firmly set. This chilling time is essential for the pudding to reach its perfect texture.
- For the Topping: In a cold bowl, combine cold heavy cream, powdered sugar, and vanilla extract. Beat with an electric mixer on high speed until stiff peaks form.
- Just before serving, carefully remove the tarts from the pans. Top each tart with a generous dollop of whipped cream, a few banana slices, and a sprinkle of extra graham cracker crumbs. Enjoy!
Notes
- The extended chilling time is crucial for perfectly set pudding.