Mini Chocolate Peanut Caramel Tarts: Gooey Perfection Guaranteed
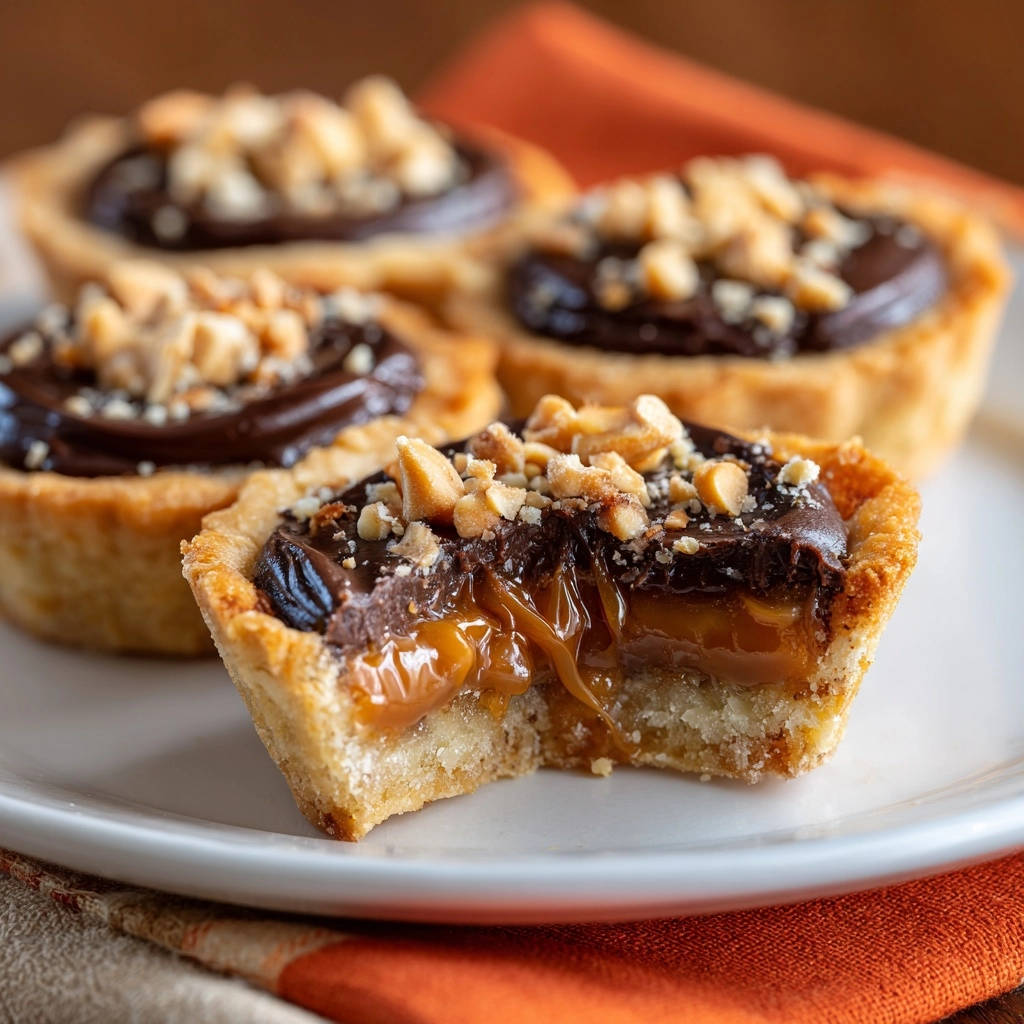
Biting into a caramel tart only to have the caramel yank out a filling is a universal baking frustration. I’ve been there! After countless attempts to master that ideal gooey, yet perfectly set, caramel texture, I finally cracked the code for these irresistible Mini Chocolate Peanut Caramel Tarts. This recipe promises lusciously soft caramel every single time, ensuring your dessert experience is pure joy, not a dental emergency.
Why These Mini Chocolate Peanut Caramel Tarts Will Be Your New Favorite Treat
The Secret to Caramel That Never Disappoints
The true magic of these tarts lies in their caramel layer. This recipe employs specific techniques, like carefully adding warmed cream and allowing a crucial resting period, which ensures your caramel remains incredibly smooth, soft, and never hardened. Say goodbye to rock-solid caramel for good.
Petite Portions, Grand Flavor: Perfect for Any Occasion
These individual mini tarts are both charming and convenient. They’re ideal for effortless entertaining, offering perfect portion control for parties, or simply providing a delightful bite-sized treat for yourself. Their elegant presentation and compact size make them an instant crowd-pleaser for any gathering.
For a perfect pairing, try our Red Velvet Cinnamon Rolls with Tangzhong Fluff.
A Rewarding Baking Experience for All Levels
Don’t let the multi-layered description intimidate you; this recipe for Mini Chocolate Peanut Caramel Tarts is designed for success. With clear, expert-guided instructions and thoughtful tips, even novice bakers can achieve stunning, delicious results. The process is enjoyable, and the outcome is incredibly satisfying.
Gathering Your Culinary Components: The Essential Ingredients
For the Flaky, Golden Tart Crust
A truly exceptional tart begins with a perfectly flaky crust. Cold butter is crucial here; it creates pockets of steam during baking, resulting in a tender, crisp texture. The egg yolk adds richness and helps bind the dough, contributing to its golden hue.
- 1 1/2 cups all-purpose flour
- 1/2 cup granulated sugar
- 1/2 teaspoon salt
- 1/2 cup (1 stick) unsalted butter, very cold and cubed
- 1 large egg yolk
- 2 tablespoons cold water
Crafting the Luscious Caramel Heart
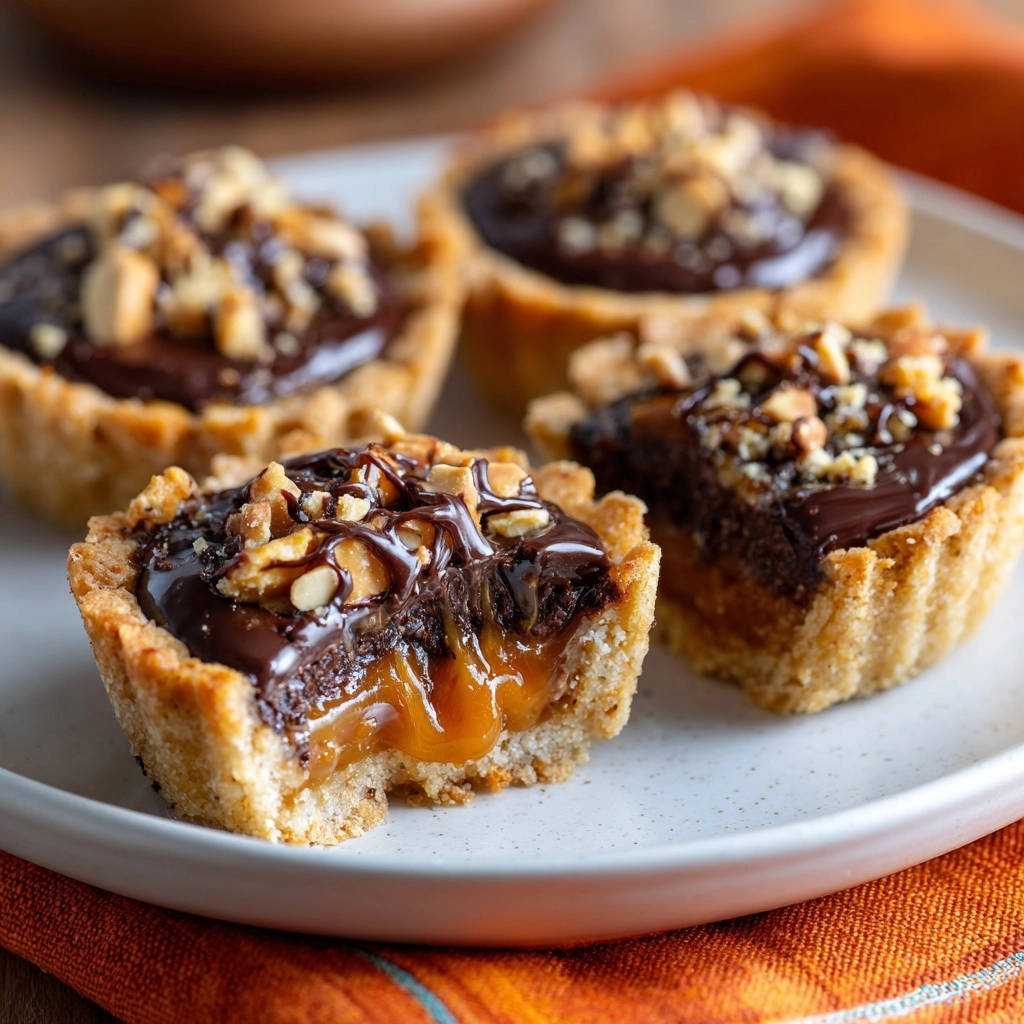
The caramel is the star of these tarts, requiring precise temperature control for that ideal gooey consistency. Heavy cream and butter are essential for transforming the cooked sugar into a rich, silky, and pliable filling. Vanilla extract enhances the overall sweetness with a warm, comforting note.
- 1 cup granulated sugar
- 1/4 cup water
- 1/2 cup heavy cream, warmed
- 4 tablespoons (1/2 stick) unsalted butter, cubed
- 1/2 teaspoon vanilla extract
The Silky-Smooth Chocolate Ganache
The ganache provides a decadent, bittersweet counterpoint to the sweet caramel. High-quality bittersweet or semi-sweet chocolate ensures a deep, rich flavor, while heavy cream creates that irresistibly glossy, smooth texture that sets beautifully.
- 6 ounces bittersweet or semi-sweet chocolate, finely chopped
- 1/2 cup heavy cream
The Crunchy Peanut Crown
Roasted peanuts are more than just a garnish; they provide a delightful textural contrast. Their nutty, slightly salty flavor perfectly complements the rich chocolate and sweet caramel layers, adding a satisfying crunch to every bite.
- 1/2 cup roasted peanuts, finely chopped
Your Toolkit for Tart-Making Success
Must-Have Baking Essentials
To embark on your tart-making journey, ensure you have standard kitchen tools readily available. This includes a large mixing bowl for the crust and separate small bowls for liquids and the ganache. Whisks are essential for combining dry ingredients, incorporating egg yolk, and achieving smooth ganache.
Accurate measuring cups and spoons are also critical for precise ingredient quantities, ensuring the correct balance of flavors and textures in your Mini Chocolate Peanut Caramel Tarts.
Specialized Equipment for Precision
A mini muffin or tart pan is indispensable for creating these delightful individual portions. Opt for a 12-cup pan to make a full batch efficiently. A pastry blender or a good set of fingertips is vital for cutting cold butter into the flour, which is key for a flaky crust.
For the caramel, a heavy-bottomed saucepan is non-negotiable. Its thick base distributes heat evenly, preventing the sugar from burning and ensuring a consistent caramelization. A heatproof bowl is also needed for cooling the caramel safely.
Step-by-Step Perfection: Crafting Your Mini Chocolate Peanut Caramel Tarts
- Building the Foundation: The Crust
Start by whisking flour, sugar, and salt in a large bowl. This ensures all dry ingredients are evenly distributed for a consistent crust. Next, use a pastry blender or your fingertips to cut in the very cold, cubed butter until the mixture resembles coarse crumbs with some pea-sized butter pieces remaining. Keeping the butter cold is vital for flakiness.
In a separate small bowl, whisk the egg yolk and cold water. Add this liquid mixture to the flour and butter, stirring just until a dough forms. Avoid overmixing, which can lead to a tough crust. Gently press the dough into a disk, wrap it tightly in plastic, and refrigerate for at least 30 minutes; chilling makes the dough easier to handle.
- Achieving Golden-Brown Tart Shells
Preheat your oven to 375 degrees F (190 degrees C) and lightly grease a 12-cup mini muffin or tart pan. On a lightly floured surface, roll out the chilled dough to about 1/8-inch thickness. Use a round cutter (2.5 to 3 inches) to cut out circles. Carefully press each dough circle into the prepared muffin/tart cups, molding it to fit the bottom and sides smoothly.
Prick the bottom of each crust several times with a fork. This prevents the crust from puffing up excessively during baking. Bake for 12-15 minutes, or until they achieve a beautiful light golden brown. Remove from the oven and let them cool completely in the pan on a wire rack before filling.
- Unlocking the Gooey Caramel Mystery
In a medium heavy-bottomed saucepan, combine the granulated sugar and water. Stir gently to moisten all the sugar. Cook over medium heat without stirring until the sugar dissolves and the mixture begins to boil. Once boiling, resist the urge to stir to prevent crystallization. Continue cooking, occasionally swirling the pan gently, until the sugar syrup transforms into a rich, amber color. This deep color indicates a fully developed, complex caramel flavor.
The key to gooey, non-seizing caramel: Once the sugar reaches an amber hue, immediately and carefully pour in the warmed heavy cream while whisking constantly. Be prepared for the mixture to bubble up vigorously. The warm cream helps temper the hot sugar, preventing it from seizing and hardening. Continue whisking until the mixture is smooth. Remove the pan from the heat and whisk in the cubed butter and vanilla extract until completely smooth and melted, creating a truly luscious caramel.
Pour the warm caramel into a heatproof bowl and allow it to cool slightly, about 10-15 minutes. It should still be pourable but noticeably thicker. This resting period is critical for achieving the perfect soft-set consistency that distinguishes these Mini Chocolate Peanut Caramel Tarts.
- Layering the Decadence: Assembly
Once the tart shells are completely cool, spoon or pour a layer of the slightly cooled caramel into each, filling about one-third of the way up. The caramel should be thick enough to hold its shape but still easy to work with. Refrigerate the tarts for at least 30 minutes, or until the caramel layer is set but still soft to the touch.
- The Final Flourish: Ganache & Peanuts
While the caramel sets, prepare your chocolate ganache. Place the finely chopped chocolate in a medium heatproof bowl. In a small saucepan, heat the 1/2 cup heavy cream over medium heat until it just begins to simmer around the edges; do not bring it to a rolling boil. Pour the hot cream over the chopped chocolate and let it sit undisturbed for 5 minutes. This allows the heat from the cream to melt the chocolate evenly.
After 5 minutes, gently whisk the chocolate and cream together. Begin whisking from the center of the bowl and gradually work your way outwards until the mixture is completely smooth and beautifully glossy. This ensures a uniform, lump-free ganache. Pour or spoon the warm chocolate ganache over the set caramel layer in each tart, filling almost to the top.
Immediately after adding the ganache, sprinkle the chopped roasted peanuts generously over the chocolate. This ensures they adhere to the still-wet ganache before it sets, creating a perfect crunchy topping.
- The Chill Factor: Setting Your Tarts
Finally, refrigerate the Mini Chocolate Peanut Caramel Tarts for at least 1-2 hours, or until the chocolate ganache is fully set and firm. This chilling time is crucial for the tarts to hold their shape and for the flavors to meld beautifully. For the very best texture, remove the tarts from the refrigerator about 15 minutes before serving, allowing the caramel and ganache to soften slightly to a perfect melt-in-your-mouth consistency.
Elevate Your Tarts: Expert Tips & Tricks
Mastering Your Crust: Flakiness Guaranteed
Always use very cold butter and cold water when making your tart crust. This helps prevent the butter from fully incorporating into the flour, creating those desirable pockets for a flaky texture. Avoid overworking the dough, as too much kneading develops gluten, leading to a tough crust. Handle it minimally and chill thoroughly before rolling.
For a perfect pairing, try our Orange Peel Cinnamon Rolls with Tangzhong for Fluffy Texture.
Caramel Alchemy: Ensuring That Perfect Texture
When cooking the sugar for caramel, resist the urge to stir once it starts boiling; this can cause crystallization. Swirl the pan gently instead. The precise moment to add the warmed cream is critical: ensure the sugar is a rich amber, not too dark (burnt) or too light (underdeveloped flavor). Warming the cream prevents temperature shock, which is a common cause of seized caramel. The 10-15 minute cooling period for the caramel before filling is essential for a soft, set consistency.
Ganache Glossary: Smoothness & Shine
Use high-quality chocolate for the best ganache flavor and texture. Do not boil the heavy cream; just bring it to a simmer around the edges. When whisking, start in the center and expand outwards to emulsify the chocolate and cream smoothly, achieving that beautiful, glossy finish. Patience is key for a perfect ganache.
The Art of Chilling: Patience Pays Off
Adequate chilling at various stages is paramount for the success of these Mini Chocolate Peanut Caramel Tarts. Chilling the dough makes it manageable, chilling the caramel helps it set without hardening, and the final chill allows the ganache to firm up properly. Don’t rush these steps, as they are crucial for both structure and optimal flavor development.
Common Conundrums & Simple Solutions
“My Caramel Seized or Is Too Hard!”
If your caramel seized, it likely means the temperature difference between the hot sugar and the cream was too great, or you stirred too early. To prevent this, always ensure your heavy cream is warmed before adding it to the hot sugar. If it’s already seized, try gently reheating it with a tablespoon or two of hot water or cream over low heat, stirring constantly, until it re-melts. For hard caramel after setting, it may have been overcooked. The resting period helps mitigate this.
“My Tart Crust Is Tough or Shrinks!”
A tough crust often results from overmixing the dough, which develops too much gluten. Work the dough minimally and only until just combined. Shrinkage can occur if the dough isn’t chilled enough or if the molds aren’t adequately pricked. Ensure the dough is thoroughly chilled, and prick the bottoms of the crusts several times with a fork before baking to allow steam to escape.
“My Ganache Won’t Set Properly!”
This can happen if the cream wasn’t hot enough to melt the chocolate completely or if there’s an incorrect chocolate-to-cream ratio. Ensure the cream is simmering hot when poured over the chocolate. If it’s too loose after whisking and chilling, you might need to add a bit more finely chopped chocolate, gently re-melt, and whisk again. Ensure sufficient refrigeration time for a firm set.
Beyond the Recipe: Creative Variations & Substitutions
Flavor Twists & Topping Alternatives
Experiment with different chocolate types! Dark chocolate provides a richer, less sweet tart, while milk chocolate offers a sweeter, creamier profile. For a delightful twist, sprinkle a touch of flaky sea salt over the finished tarts just before the ganache sets for a irresistible salted caramel effect. Instead of peanuts, consider toasted pecans, walnuts, or even a sprinkle of mini chocolate chips for extra indulgence. You could also drizzle with a little melted white chocolate.
For another nutty twist, consider making your own no-bake peanut butter fudge pie if you love the peanut-chocolate combination, as it can inspire further creativity with these tarts.
Adapting for Dietary Needs
For a gluten-free version, substitute the all-purpose flour in the crust with a good quality gluten-free all-purpose baking blend (ensure it contains xanthan gum for structure). While dairy is integral to this recipe’s texture, you can explore dairy-free heavy cream alternatives (often coconut or oat-based) and dairy-free butter and chocolate, though the final texture of the caramel and ganache may vary slightly. For nut-free options, simply omit the peanuts and top with sprinkles, shredded coconut, or a drizzle of plain chocolate.
Storing & Serving Your Divine Creations
Optimal Storage for Freshness
To maintain the freshness and texture of your Mini Chocolate Peanut Caramel Tarts, store them in an airtight container in the refrigerator for up to 3-4 days. Placing parchment paper between layers can help prevent them from sticking together. While they can be frozen for longer storage (up to 2-3 weeks), thaw them slowly in the refrigerator before serving for best results.
Planning Ahead: Make-Ahead Tips
You can prepare the tart crust dough up to 2 days in advance, keeping it tightly wrapped in the refrigerator. The baked and cooled tart shells can also be made a day ahead and stored in an airtight container at room temperature. The caramel can be made and stored in the refrigerator for up to a week; gently reheat it over low heat or in a microwave to a pourable consistency when ready to assemble.
Best Practices for Serving
For the most enjoyable texture, remove your Mini Chocolate Peanut Caramel Tarts from the refrigerator about 15 minutes before serving. This allows the caramel and ganache to soften slightly, enhancing their creamy, gooey qualities. Arrange them on a platter for an elegant presentation, perfect for any dessert table or as a delightful individual treat.
Frequently Asked Questions About Mini Chocolate Peanut Caramel Tarts
Can I make these ahead of time for a party?
Absolutely! These Mini Chocolate Peanut Caramel Tarts are excellent make-ahead desserts. You can prepare the individual components like the crust, caramel, and even the ganache in advance as outlined in our “Make-Ahead Tips” section. Assemble them fully a day before your event, and store them in the refrigerator, pulling them out briefly before serving.
How do I know when the caramel is ready and won’t seize?
The key is reaching that rich, amber color in the sugar syrup without burning it, and then immediately adding warmed heavy cream while whisking constantly. The warm cream prevents the shock that causes seizing. The resting period after adding butter and vanilla also ensures a soft, set caramel. You’re looking for a smooth, homogenous mixture after whisking in the cream, butter, and vanilla.
Can I use different types of chocolate or nuts?
Yes, absolutely! While bittersweet or semi-sweet chocolate is recommended for balance, you can use milk chocolate for a sweeter profile. For nuts, toasted pecans, walnuts, or even macadamia nuts would work beautifully in place of peanuts. Feel free to explore different flavor combinations to customize these delicious chocolate desserts to your preference.
Your Turn to Create Sweet Memories
Now that you’re equipped with all the secrets to perfect gooey caramel and a truly expert guide, it’s time to create your own batch of these incredible Mini Chocolate Peanut Caramel Tarts. Imagine the joy of biting into that flaky crust, luscious caramel, rich chocolate, and satisfying peanut crunch. These little treats are more than just dessert; they’re an experience waiting to be shared.
What to Serve Next
These tarts are rich with chocolate and peanut, so you can keep that nutty, sweet theme going with another dessert or balance it with something lighter and fruity for breakfast.
- If you want more of that peanut-candy flavor, scoop up the Loaded Peanut Butter Toffee Dip for a shareable snack that hits the same salty-sweet notes.
- For a morning treat that contrasts the heavy chocolate tarts, make the Fluffy Blueberry Pancakes; the tart berries cut through the richness and the soft texture is a nice change from the tart shells.
Don’t hesitate to dive in and transform your kitchen into a haven of sweet aromas. Share your creations with loved ones, or simply savor them yourself. We’d love to hear how your tarts turn out in the comments below!
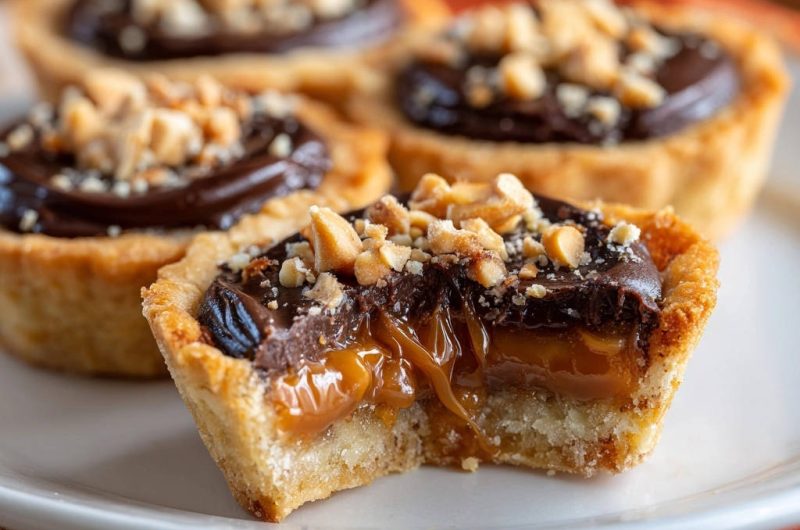
Chocolate Peanut Caramel Tarts
Course: DessertCuisine: AmericanDifficulty: medium12
tarts180
kcalDiscover the secret to perfectly gooey caramel in these irresistible Mini Chocolate Peanut Caramel Tarts. Featuring a flaky crust, luscious caramel, rich chocolate ganache, and a sprinkle of peanuts, these treats are sure to impress.
Ingredients
For the Crust:
1 1/2 cups all-purpose flour
1/2 cup granulated sugar
1/2 teaspoon salt
1/2 cup (1 stick) unsalted butter, very cold and cubed
1 large egg yolk
2 tablespoons cold water
For the Caramel Layer:
1 cup granulated sugar
1/4 cup water
1/2 cup heavy cream, warmed
4 tablespoons (1/2 stick) unsalted butter, cubed
1/2 teaspoon vanilla extract
For the Chocolate Ganache:
6 ounces bittersweet or semi-sweet chocolate, finely chopped
1/2 cup heavy cream
For Topping:
1/2 cup roasted peanuts, finely chopped
Directions
- Prepare the Crust: In a large bowl, whisk together the flour, sugar, and salt. Add the cold, cubed butter and cut it into the flour mixture using a pastry blender or your fingertips until it resembles coarse crumbs with some pea-sized pieces of butter remaining. In a separate small bowl, whisk the egg yolk and cold water. Add this mixture to the flour and butter mixture, stirring until just combined and a dough forms. Do not overmix. Gently press the dough into a disk, wrap in plastic, and refrigerate for at least 30 minutes.
- Preheat your oven to 375 degrees F (190 degrees C). Lightly grease a 12-cup mini muffin or tart pan. On a lightly floured surface, roll out the chilled dough to about 1/8-inch thickness. Use a round cutter (about 2.5 to 3 inches) to cut out circles. Gently press each dough circle into the prepared muffin/tart cups, molding it to fit the bottom and sides. Prick the bottom of each crust several times with a fork.
- Bake the crusts for 12-15 minutes, or until lightly golden brown. Remove from oven and let cool completely in the pan on a wire rack.
- Make the Caramel (The Gooey Secret!): In a medium heavy-bottomed saucepan, combine the 1 cup granulated sugar and 1/4 cup water. Stir gently to moisten the sugar. Cook over medium heat without stirring until the sugar dissolves and the mixture begins to boil. Once boiling, stop stirring. Continue to cook, occasionally swirling the pan gently, until the sugar syrup turns a rich, amber color. This is crucial for flavor and texture.
- The key to preventing hard caramel: Once the sugar is amber, immediately and carefully pour in the warmed heavy cream while whisking constantly. The mixture will bubble up vigorously, so be careful. Continue whisking until smooth. The warm cream helps temper the hot sugar, preventing it from seizing and becoming too firm later. Then, remove from heat and whisk in the cubed butter and vanilla extract until completely smooth and melted.
- Pour the warm caramel mixture into a heatproof bowl and let it cool down slightly, for about 10-15 minutes, until it’s still pourable but has thickened a little. This resting period also contributes to its perfect, softer set.
- Assemble the Tarts: Spoon or pour a layer of the slightly cooled caramel into each cooled tart shell, filling about one-third of the way up. Refrigerate the tarts for at least 30 minutes, or until the caramel is set but still soft.
- Prepare the Chocolate Ganache: While the caramel sets, place the finely chopped chocolate in a medium heatproof bowl. In a small saucepan, heat the 1/2 cup heavy cream over medium heat until it just begins to simmer around the edges (do not boil). Pour the hot cream over the chopped chocolate. Let it sit for 5 minutes without stirring.
- After 5 minutes, gently whisk the chocolate and cream together, starting from the center and working your way out, until the mixture is completely smooth and glossy.
- Pour or spoon the warm chocolate ganache over the set caramel layer in each tart, filling almost to the top.
- Immediately sprinkle the chopped peanuts over the chocolate ganache before it sets.
- Refrigerate the tarts for at least 1-2 hours, or until the chocolate ganache is fully set. Remove from the refrigerator about 15 minutes before serving for the best texture.
Notes
- Achieve perfect gooey caramel by using warmed heavy cream and allowing the caramel to cool slightly before assembling.