Cheesy Baked Dip: Perfectly Creamy, Never Oily
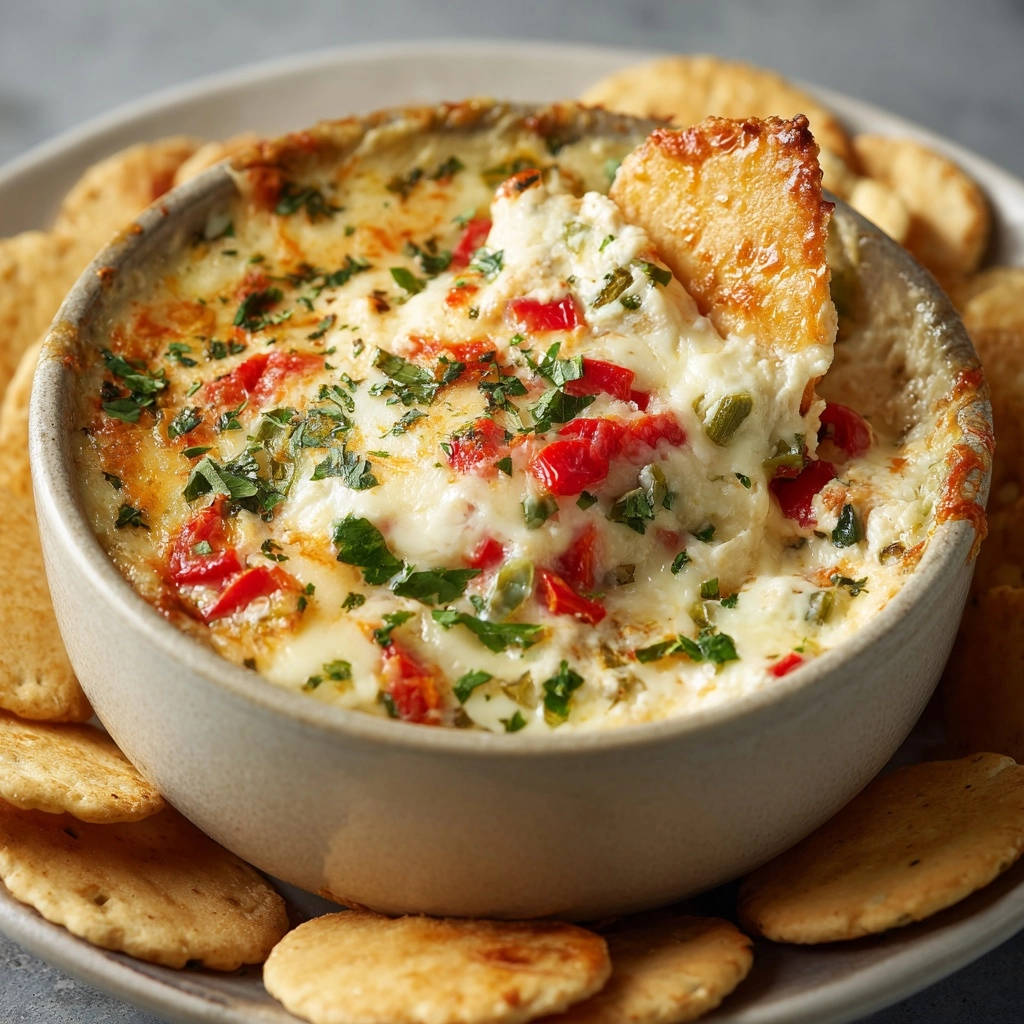
I remember the frustration of serving a beautiful baked dip, only for it to separate into an oily mess or turn disappointingly watery. It’s a common kitchen woe when you’re craving that ideal, scoopable texture, but I’ve finally perfected a Cheesy Baked Dip recipe that holds its creamy integrity beautifully every single time, without fail.
This isn’t just another appetizer; it’s a reliable, crowd-pleasing showstopper that guarantees perfect consistency and incredible flavor, making every occasion feel special.
Finally! A Cheesy Baked Dip That’s Always Perfectly Creamy
This particular Cheesy Baked Dip stands out because it consistently delivers on its promise: never watery, never separating, just pure, perfectly scoopable creaminess. We tackle common issues head-on, ensuring a reliable recipe for everyone.
Its robust texture holds up beautifully, making it an ideal choice for any gathering, from casual game nights to elegant holiday parties. You’ll achieve impressive results with minimal fuss, making it a true comfort food champion.
Each rich, savory bite is a testament to clever ingredient ratios and crucial technique, elevating this easy party dip into an unforgettable culinary experience.
The Flavor Foundation: Key Ingredients for Your Cheesy Baked Dip
The Dynamic Cheese Trio: Cream Cheese, Mozzarella, and Monterey Jack
Cream cheese provides the essential creamy base and a delightful tang, crucial for the dip’s luxurious mouthfeel.

Mozzarella adds that highly desirable stringy, melty factor, creating those irresistible cheese pulls.
Monterey Jack contributes a mild, buttery flavor and excellent meltability, blending seamlessly with the other cheeses.
Creamy Binders: Mayonnaise and Sour Cream
Mayonnaise adds a rich, savory depth and helps emulsify the entire dip, ensuring a smooth, cohesive mixture.
Sour cream provides a slight tang and lightens the texture, preventing the hot dip recipe from feeling too heavy.
Piquant Kicks: Red Bell Pepper and Drained Green Chiles
Diced red bell pepper offers a sweet crunch and vibrant color, adding both texture and visual appeal.
Crucially, well-drained diced green chiles provide a mild, smoky heat without introducing any excess moisture, which is vital for preventing a watery dip.
Aromatic Boosters: Garlic Powder and Onion Powder
Garlic powder delivers a foundational savory note that beautifully complements the rich cheeses.
Onion powder adds a subtle, sweet onion flavor, rounding out the dip’s aroma and enhancing its depth.
Essential Seasoning: Salt and Black Pepper
Salt is vital for enhancing all the other flavors, making them pop; season carefully to your preference.
Freshly ground black pepper adds a hint of spice and an aromatic finish, elevating the overall taste profile.
Garnish and Serving: Parsley and Crackers
Fresh chopped parsley adds a pop of vibrant color and a fresh, herbaceous counterpoint to the rich Cheesy Baked Dip.
Crackers are the classic vehicle for scooping up this delightful baked cheese appetizer, so choose your favorite sturdy variety.
Essential Tools for Your Cheesy Baked Dip Success
Medium Mixing Bowl: Large enough to comfortably combine all your ingredients without spillage.
Electric Mixer (or Sturdy Spoon): An electric mixer makes achieving that perfectly smooth cream cheese base effortless, though a sturdy spoon works with a bit more effort.
Fine-Mesh Sieve or Paper Towels: Absolutely critical for thoroughly draining the green chiles to prevent a watery dip. Do not skip this!
Small Oven-Safe Baking Dish (approx. 1-quart): The ideal vessel for baking your Cheesy Baked Dip to golden perfection, ensuring even heat distribution.
Spatula or Spoon: Essential for mixing the ingredients and smoothly spreading the dip into the prepared dish.
From Prep to Perfection: Your Step-by-Step Cheesy Baked Dip Guide
-
Preheat and Prep Your Dish:
Preheat your oven to 375°F (190°C) and lightly grease a small oven-safe baking dish, about 1-quart size. This essential step ensures easy cleanup and prevents any sticking.
-
Combine the Creamy Base:
In a medium mixing bowl, combine the softened cream cheese, mozzarella cheese, Monterey Jack cheese, mayonnaise, and sour cream.
Beat with an electric mixer on medium speed or stir vigorously with a sturdy spoon until everything is thoroughly combined and smooth. Achieving a lump-free base here is paramount for a luscious, velvety dip.
-
The Critical Draining Step (Avoid Watery Dip!):
This is the key to avoiding a watery dip: Ensure your canned diced green chiles are extremely well-drained.
Press out as much liquid as possible using a fine-mesh sieve or by squeezing them firmly in several layers of paper towel. Excess moisture from the chiles is the number one culprit for a thin, unappealing dip, so be meticulous.
Add the well-drained chiles to the cheese mixture, along with the diced red bell pepper, garlic powder, onion powder, salt, and black pepper.
-
Mix Until Evenly Distributed:
Stir the mixture until all ingredients, especially the peppers and spices, are evenly distributed throughout the creamy base. This ensures every single bite is packed with consistent flavor.
-
Transfer to Baking Dish:
Spoon the dip into your prepared baking dish, spreading it out evenly. A smooth, level surface ensures even baking and a beautiful, golden-brown presentation.
-
Bake to Golden Perfection:
Bake for 20 to 25 minutes, or until the dip is bubbly around the edges and lightly golden brown on top.
Keep a close eye on it during the last few minutes to prevent over-browning; the goal is melted and bubbly perfection, not scorched cheese.
-
Rest and Garnish:
Remove from the oven and let it cool for a few minutes before serving. This brief resting period allows the Cheesy Baked Dip to set slightly, making it even more scoopable and less likely to collapse.
Garnish generously with fresh chopped parsley just before serving for a vibrant pop of color and invigorating freshness.
-
Serve Warm and Enjoy!
Serve warm with your favorite crackers, sturdy tortilla chips, or crusty bread. Enjoy that perfectly creamy, never watery, Cheesy Baked Dip that you masterfully created!
Unlock Maximum Creaminess: Expert Tips for Your Cheesy Baked Dip
Softened Cream Cheese is Non-Negotiable: Ensure your cream cheese is truly at room temperature. This makes it incredibly easy to beat smooth, preventing any lumps and guaranteeing a uniform, creamy texture from the very start of your easy party dip.
Drain Those Chiles (Seriously!): This cannot be stressed enough. Any residual liquid from the canned green chiles will inevitably make your hot dip recipe watery. Press, squeeze, blot – get every last drop out!
Don’t Skimp on the Mix: Whether by hand or with an electric mixer, ensure the creamy base (cream cheese, mayo, sour cream, cheeses) is perfectly smooth before adding the other ingredients. This foundational step guarantees a silky, luscious finished product.
Quality Cheeses Make a Difference: While pre-shredded works, shredding your own cheese often results in a smoother, more even melt as it lacks anti-caking agents. Choose good quality cheeses for the best flavor and texture in your baked cheese appetizer.
Bake Until Just Golden: Overbaking can cause the dip to dry out, become rubbery, or separate into an oily mess. Look for bubbly edges and a lightly golden top – that’s your visual cue it’s perfectly ready.
Season Generously and Taste: Add salt and pepper gradually, tasting the mixture as you go. Remember, baked dips often need more seasoning than you might initially think to stand up to the richness, so don’t be shy.
The Power of Fresh Garnish: Don’t skip the fresh parsley! It adds a critical element of freshness, vibrant color, and a subtle herbaceous note that beautifully cuts through the richness of the cheesy dip, enhancing the overall experience.
Solving Common Dilemmas: Troubleshooting Your Cheesy Baked Dip
Why is My Dip Watery or Oily?
This is almost always due to insufficient draining of the green chiles or slight overbaking. Ensure chiles are bone-dry before adding them to the mixture. For oily dips, slightly reduce baking time or ensure your cheeses aren’t excessively high in fat, as some can render out more.
My Dip Isn’t Smooth Enough.
The likely culprit is cold cream cheese. Always allow cream cheese to come to room temperature, ensuring it is very soft. Beat the cream cheese, mayonnaise, and sour cream until perfectly smooth and lump-free before incorporating other ingredients.
The Top Isn’t Golden Brown.
Your oven might run a little cool, or the dip simply needs a few more minutes to develop that beautiful color. You can also briefly place it under the broiler for 1-2 minutes to achieve a golden crust, but watch it extremely carefully to prevent burning!
It Tastes Bland.
This usually means it needs more salt and possibly a touch more garlic or onion powder. Taste the mixture before baking and adjust seasonings proactively. The baking process can sometimes mellow flavors, so a bold seasoning initially helps the final Cheesy Baked Dip shine.
Serving Your Masterpiece: Perfect Pairings for Your Cheesy Baked Dip
This versatile Cheesy Baked Dip is a superstar on any appetizer spread. Classic dippers like sturdy crackers (think buttery Ritz or Wheat Thins) and crispy tortilla chips are always a hit, offering satisfying crunch.
For a gourmet touch, consider toasted baguette slices or warm pita bread, which beautifully absorb the creamy dip. Beyond the basics, try serving it with fresh vegetable sticks like carrots, celery, or bell pepper strips for a lighter, refreshing option. Apple slices can also offer a surprising, delightful sweet-savory contrast.
Plan Ahead: Make-Ahead & Storage Tips for Your Cheesy Dip
Can I Prepare Cheesy Baked Dip in Advance?
Absolutely! You can assemble the dip mixture up to 24 hours in advance. Simply spoon it into your baking dish, cover tightly with plastic wrap, and refrigerate. When ready to bake, let it sit at room temperature for about 15-20 minutes while your oven preheats, then bake as directed (you might need a few extra minutes).
How to Store Leftover Dip
Any leftover Cheesy Baked Dip should be stored in an airtight container in the refrigerator for up to 3-4 days. While the texture is always best fresh from the oven, it still makes for incredibly delicious leftovers.
Reheating for Best Results
To reheat, spoon individual portions into a microwave-safe dish and heat in 30-second intervals until warm and bubbly, stirring gently in between. For larger portions, cover the baking dish loosely with foil and reheat in a 350°F (175°C) oven for 10-15 minutes, or until thoroughly heated through and bubbly.
Your Cheesy Baked Dip Questions Answered
Can I Use Different Cheeses?
Yes, absolutely! Feel free to experiment with your favorite melting cheeses. Sharp cheddar, Colby, or even a smoked gouda could add an interesting and complex twist. Just ensure you maintain a good balance of flavor and meltability for a consistent Cheesy Baked Dip.
What if I Don’t Have an Electric Mixer?
No problem at all! A sturdy spoon and some elbow grease will work just fine for combining the creamy base. Just be prepared for a bit more vigorous stirring to ensure the cream cheese base is perfectly smooth and lump-free before moving on.
Can This Dip Be Made Spicy?
Easily! For an extra kick, add a pinch of cayenne pepper, a dash of your favorite hot sauce to the mixture, or include finely minced jalapeños. If using fresh jalapeños, ensure they are also extremely well-drained to prevent a watery dip. You could even garnish with sliced fresh jalapeños for visual appeal and heat.
Is There a Dairy-Free Alternative?
While challenging to replicate the exact texture and rich melt, you can explore dairy-free cream cheese, shredded dairy-free mozzarella, and vegan mayonnaise and sour cream alternatives. Results may vary slightly in texture and melt, but it’s certainly worth a try for dietary needs to create a similar creamy dip experience.
Ready to Impress? Share Your Cheesy Baked Dip Masterpiece!
You now possess the ultimate blueprint for crafting a Cheesy Baked Dip that will consistently deliver on its promise of perfect creaminess, without a hint of watery disappointment. This easy party dip recipe isn’t just a dish; it’s a guaranteed crowd-pleaser, a comfort food champion, and a testament to clever kitchen techniques.
For a perfect pairing, try our Peach Streusel Cheesecake: Crack-Free Perfection.
So, gather your ingredients, follow these expert steps, and prepare to delight your guests (or just yourself!) with every perfectly scoopable bite. Don’t forget to share your creations and rave reviews – we love seeing your culinary success with this incredible baked cheese appetizer!
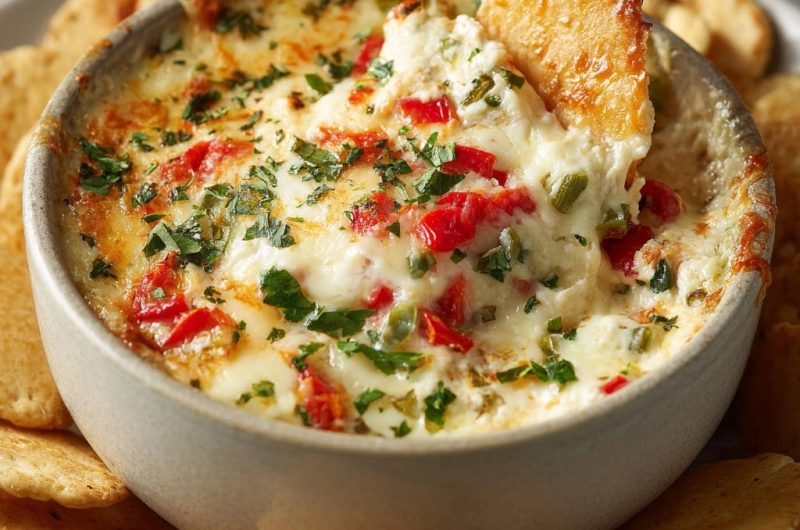
Cheesy Baked Dip
Course: AppetizerCuisine: AmericanDifficulty: easy8
servings15
minutes25
minutes240
kcal45
minutesSay goodbye to watery dips! This Cheesy Baked Dip recipe guarantees a perfectly creamy, scoopable texture every time. Enjoy a rich blend of cheeses, chiles, and bell pepper, baked to golden perfection for any gathering.
Ingredients
8 ounces cream cheese, softened
1 cup shredded mozzarella cheese
1/2 cup shredded Monterey Jack cheese
1/4 cup mayonnaise
1/4 cup sour cream
1/4 cup diced red bell pepper
1 (4 ounce) can diced green chiles, very well-drained
1/2 teaspoon garlic powder
1/4 teaspoon onion powder
Salt to taste
Black pepper to taste
2 tablespoons fresh chopped parsley, for garnish
Crackers, for serving
Directions
- Preheat your oven to 375°F (190°C). Lightly grease a small oven-safe baking dish (about 1-quart size).
- In a medium mixing bowl, combine the softened cream cheese, mozzarella cheese, Monterey Jack cheese, mayonnaise, and sour cream. Beat with an electric mixer on medium speed or stir vigorously with a spoon until everything is well combined and smooth.
- This is the key to avoiding a watery dip: Ensure your canned diced green chiles are extremely well-drained. Press out as much liquid as possible using a fine-mesh sieve or by squeezing them in a paper towel. Add the well-drained chiles to the cheese mixture, along with the diced red bell pepper, garlic powder, onion powder, salt, and black pepper.
- Stir the mixture until all ingredients are evenly distributed.
- Spoon the dip into your prepared baking dish, spreading it out evenly.
- Bake for 20 to 25 minutes, or until the dip is bubbly around the edges and lightly golden brown on top.
- Remove from the oven and let it cool for a few minutes before serving. Garnish with fresh chopped parsley.
- Serve warm with your favorite crackers. Enjoy that perfectly creamy, never watery, dip!
Notes
- Key tip: Ensure green chiles are very well-drained to prevent a watery dip.