No-Bake Caramel Swirl Dream Pie: Effortless & Stunning Results!
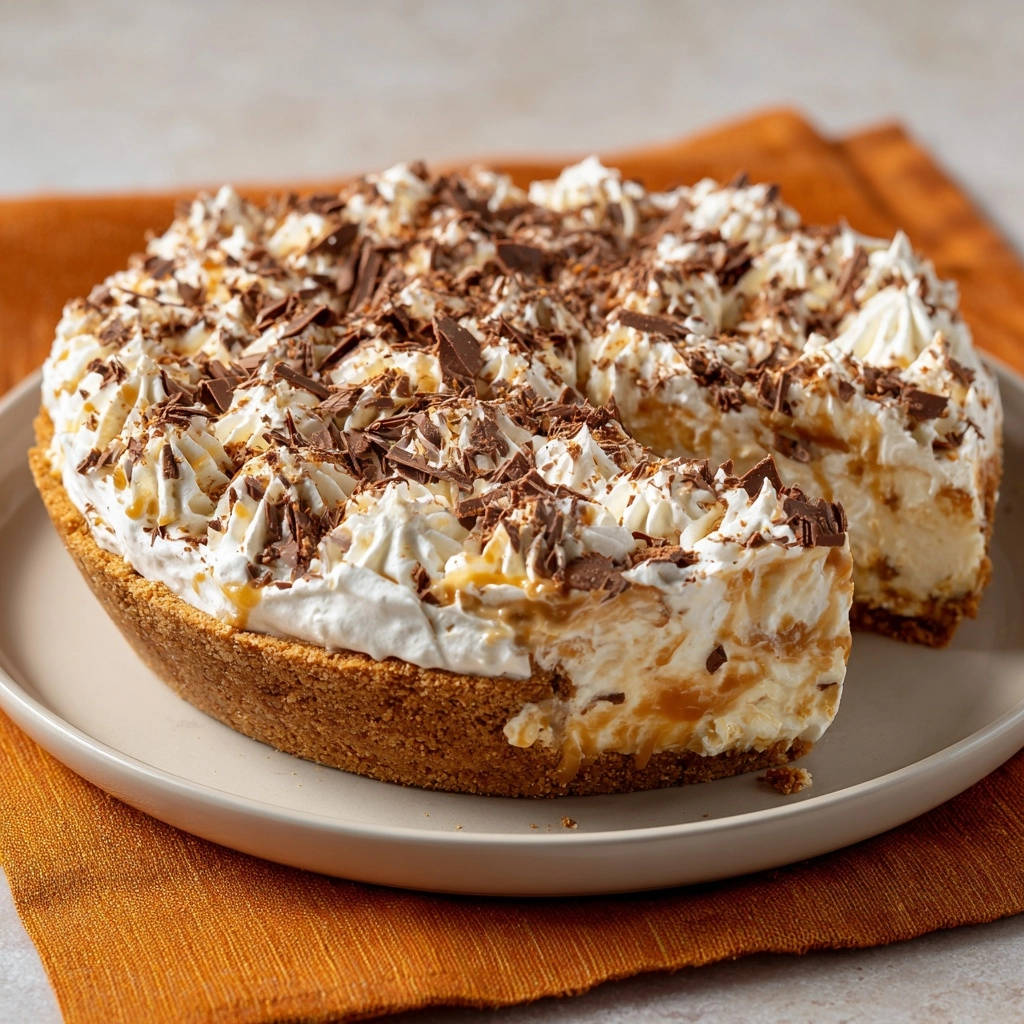
There’s nothing quite like the satisfaction of serving a show-stopping dessert that looks professionally made, especially when it comes with minimal effort. I used to wrestle with no-bake pies that fell apart at the first slice, but I’ve perfected the technique to ensure every piece of this No-Bake Caramel Swirl Dream Pie is absolutely flawless.
This recipe isn’t just about ease; it’s about a dessert that holds its shape beautifully and delivers a truly unforgettable caramel-infused experience. Get ready to impress with this stable, creamy, and utterly delicious chilled dessert.
The No-Bake Caramel Swirl Dream Pie: Your Secret to Stress-Free Perfection
This specific No-Bake Caramel Swirl Dream Pie recipe is a game-changer for anyone craving an elegant dessert without the oven-bound fuss. It combines a foolproof method with decadent flavors, ensuring a delightful experience every time.
Effortless Elegance: Why “No-Bake” Changes Everything
The “no-bake” aspect of this pie is its inherent superpower, offering unparalleled convenience and flexibility. It eliminates the need for oven preheating and baking times, making it ideal for warmer months or when your oven is otherwise occupied.
This easy pie recipe is also incredibly forgiving, making it perfect for novice bakers and seasoned pros alike. You achieve a sophisticated dessert with minimal stress, leaving you more time to enjoy the occasion.
Beyond Basic: The Clean-Slice Secret Revealed
The most crucial innovation in this No-Bake Caramel Swirl Dream Pie is its guaranteed clean slice. The secret lies in a dedicated, extended chilling period that transforms the pie’s texture.
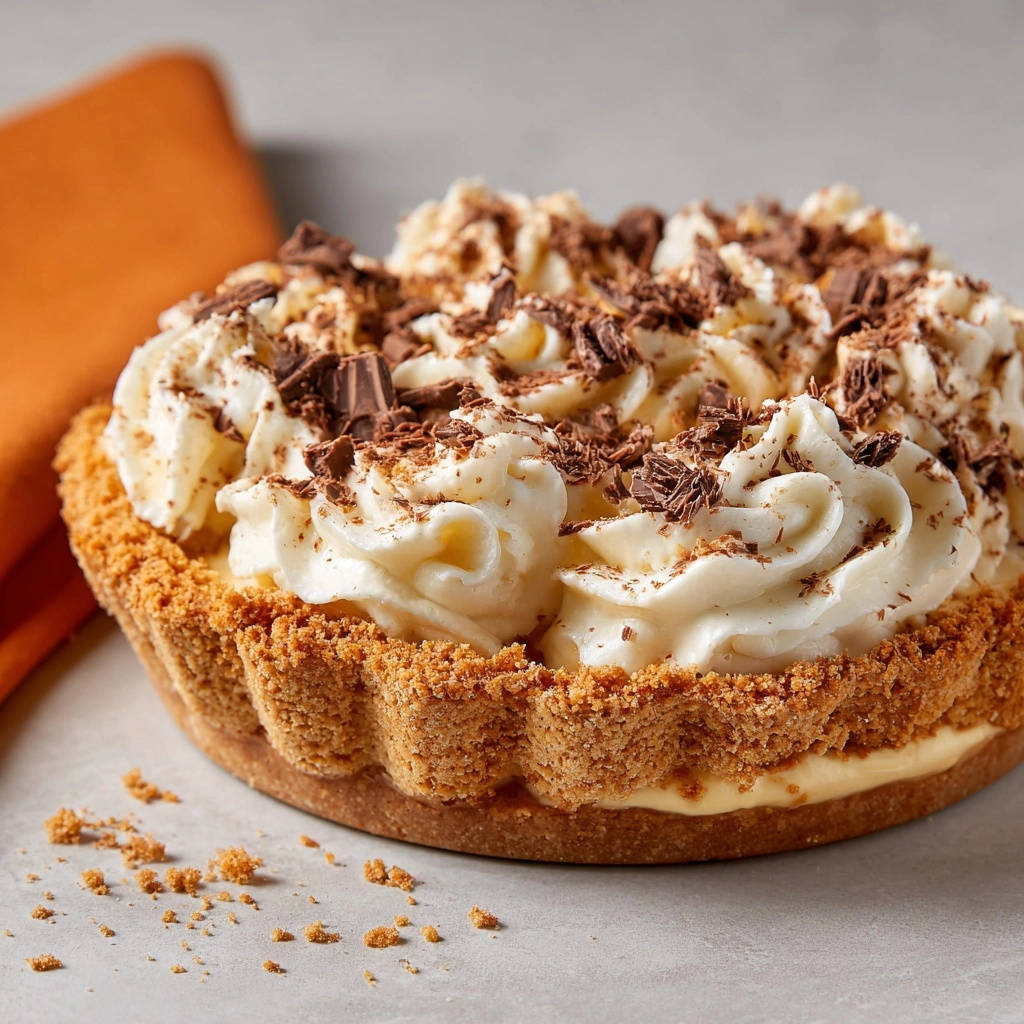
This allows the fats in the rich cream cheese and heavy cream to fully solidify, creating a firm yet creamy filling that holds its form beautifully. The result is a stable crust and a pie that slices with precision, ensuring every serving is picture-perfect.
A Symphony of Sweetness: Unpacking the Flavor Profile
Each component of this pie contributes to a harmonious blend of textures and tastes. The buttery graham cracker crust provides a delightful textural contrast and classic flavor foundation.
Above this, the creamy filling offers a luxurious, melt-in-your-mouth experience, perfectly balanced by the sweet and slightly salty notes of the rich caramel swirl. It’s a truly irresistible caramel dessert that caters to every sweet tooth.
Tools of the Trade: What You’ll Need for Your Dream Pie
Having the right equipment ensures a smooth and enjoyable pie-making process. While many items are standard kitchen staples, a few specialized tools will elevate your experience.
Key Kitchen Essentials
Medium and Large Mixing Bowls: Essential for combining ingredients without spills and for whipping cream separately.
Rubber Spatula: Crucial for gently folding ingredients and scraping down bowls, ensuring no deliciousness is left behind.
Measuring Cups and Spoons: Accuracy is key in baking, even in no-bake recipes, for consistent results.
Specialized Equipment for Best Results
Electric Mixer (Handheld or Stand): A must-have for achieving smooth cream cheese and perfectly stiff whipped cream peaks. This significantly reduces effort and ensures consistent texture.
9-inch Pie Plate: The ideal vessel for shaping and chilling your pie. A glass pie plate allows you to admire the crust’s evenness.
Vegetable Peeler or Sharp Knife: For creating elegant chocolate shavings, adding a professional touch to your garnish.
Building Blocks of Bliss: Decoding Your Dream Pie Ingredients
Understanding each ingredient’s role is fundamental to mastering this No-Bake Caramel Swirl Dream Pie. Quality and preparation are crucial for achieving the perfect texture and flavor.
The Foundation: Perfecting the Graham Cracker Crust
Graham Cracker Crumbs: These form the classic, slightly sweet, and crunchy base. Ensure they are finely crushed for a uniform texture.
Granulated Sugar: A small amount enhances the sweetness of the crust, balancing the buttery richness.
Melted Unsalted Butter: This binds the crumbs together, creating a sturdy and flavorful graham cracker crust. Unsalted butter allows you to control the overall salinity.
The Velvety Heart: Crafting the Creamy Caramel Filling
Full-Fat Cream Cheese: Absolutely essential for a rich, stable, and luxuriously creamy filling. Ensure it’s softened at room temperature for a lump-free base.
Powdered Sugar: Incorporates seamlessly into the cream cheese, adding sweetness without grittiness. It also helps to stabilize the filling.
Vanilla Extract: A splash of pure vanilla enhances all the other flavors, adding warmth and depth to the creamy filling.
Heavy Cream (for filling): When whipped, it creates an airy, light texture that beautifully complements the dense cream cheese. Its high fat content is crucial for stability.
Caramel Sauce: The star of the show! Use a high-quality, thick caramel sauce for the best flavor and for creating those beautiful swirls. Homemade or good-quality store-bought will work wonders for this caramel dessert.
Finishing Touches: Whipped Cream and Chocolate Shavings
Remaining Heavy Cream (for topping): Whipped just before serving, it provides a fresh, light counterpoint to the rich pie filling.
Optional Powdered Sugar: A tablespoon can be added to the topping whipped cream for a touch more sweetness and stability.
Milk or Dark Chocolate Bar: Shaved just before serving, it adds a touch of elegance, visual appeal, and a delightful chocolatey bite. Choose your preferred intensity.
Your Step-by-Step Journey to No-Bake Caramel Swirl Dream Pie
- Crafting the Sturdy Crust: The Foundation of Success
Begin by combining the graham cracker crumbs and granulated sugar in a medium bowl, ensuring they are well mixed. Pour in the melted unsalted butter and stir until every crumb is evenly moistened, resembling wet sand.
Press this mixture very firmly and evenly into the bottom and up the sides of a 9-inch pie plate. The more densely packed the graham cracker crust, the less likely it is to crumble when sliced. Chill the crust in the refrigerator for at least 30 minutes while you prepare the filling, allowing the butter to solidify and set the base.
- Whipping Up the Velvety Cream Cheese Base
In a large bowl, use an electric mixer to beat the softened, full-fat cream cheese until it is completely smooth and creamy. Softened cream cheese is vital here to avoid lumps in your creamy filling.
Add the powdered sugar and vanilla extract, continuing to beat until the mixture is well combined, light, and fluffy. This aeration contributes to the luxurious texture of the pie’s heart.
- Achieving Stiff Peaks: Your Whipped Cream Game Changer
In a separate, chilled bowl, beat 1 cup of the heavy cream with an electric mixer until stiff peaks form. Stiff peaks mean the cream holds its shape when the beaters are lifted, indicating it’s incorporated enough air to provide stability to your pie filling.
This stability is absolutely critical for ensuring your No-Bake Caramel Swirl Dream Pie holds its form beautifully when sliced. Cold cream and a cold bowl help achieve these peaks faster and more effectively.
- The Magical Swirl: Combining & Layering for Visual Appeal
Gently fold the stiff-peak whipped cream into the cream cheese mixture using a spatula. Take great care to do this slowly and gently, ensuring you don’t deflate the airy whipped cream, which would compromise the filling’s texture.
Pour about two-thirds of this combined creamy filling into your chilled graham cracker crust. Drizzle half of the caramel sauce evenly over this layer. Next, add the remaining pie filling mixture, spreading it carefully.
Finally, drizzle the rest of the 1/2 cup caramel sauce on top. Use a knife or skewer to gently swirl the caramel through the filling, creating beautiful patterns. This step is where the “swirl” in No-Bake Caramel Swirl Dream Pie truly comes to life.
- The Golden Rule: Extended Chilling for Flawless Slices
This is arguably the most crucial step for a perfect slice. Loosely cover the pie with plastic wrap and refrigerate it for a minimum of 6 hours, though ideally overnight.
This extended chilling time is non-negotiable for achieving the perfect slices this easy pie recipe promises. It allows the fats in the cream cheese and whipped cream to fully solidify, resulting in a firm filling and a stable crust that will slice beautifully and hold its shape. Do not rush this step!
- The Grand Finale: Topping & Garnishing Your Masterpiece
Just before serving, beat the remaining 1/2 cup heavy cream until stiff peaks form. If desired, you can sweeten it with a tablespoon of powdered sugar for a little extra sweetness.
Spread or pipe this freshly whipped cream generously over the chilled pie. Using a vegetable peeler or a sharp knife, create delicate chocolate shavings from your chosen chocolate bar and sprinkle them generously over the top of the pie for an elegant finish.
For an extra touch of indulgence, drizzle with a bit more caramel sauce if you like. Your perfectly firm, absolutely delicious No-Bake Caramel Swirl Dream Pie is now ready to slice and enjoy!
Chef’s Secrets: Elevating Your No-Bake Caramel Swirl Dream Pie Experience
Crust Compression is Key: Don’t underestimate the power of a firmly packed graham cracker crust. This is your foundation for a pie that holds together perfectly, preventing any crumbling when you slice.
Chill for Better Whipping: For the fluffiest, most stable whipped cream, always chill your mixing bowl and beaters beforehand. Cold tools lead to colder cream and significantly better, stiffer peaks, crucial for your creamy filling.
Mastering the Fold: When combining whipped cream with the cream cheese mixture, use a gentle folding technique with a rubber spatula. Overmixing can deflate the cream, leading to a less airy and stable filling.
Patience Pays Off: The Ultimate Chilling Guide: The 6-hour minimum (ideally overnight) chill time is non-negotiable for that picture-perfect slice. It allows the fats to solidify and flavors to meld beautifully, creating a stable, firm caramel dessert.
Customizing Your Swirl: Experiment with different swirling patterns using a knife or skewer for the caramel. Each pie can be a unique work of art, adding a personal touch to your No-Bake Caramel Swirl Dream Pie.
Fresh Garnishes, Maximum Impact: Shave chocolate and whip the final cream just before serving for the best texture and presentation. This ensures the whipped cream is light and fluffy and the chocolate is vibrant.
No-Bake Caramel Swirl Dream Pie Troubleshooting & FAQs
“Why Is My Pie Filling Too Soft?” (Troubleshooting)
This is often due to insufficient chilling time; the fats in the cream cheese and heavy cream need ample time to solidify. Ensure you chill the pie for the recommended 6 hours, or ideally, overnight, for a perfectly firm creamy filling.
Other culprits can include overmixing the whipped cream (causing it to deflate) or not using full-fat cream cheese and heavy cream, which are essential for stability.
“My Crust Crumbled! What Went Wrong?” (Troubleshooting)
A crumbling graham cracker crust usually means it wasn’t packed down firmly enough into the pie plate. It’s crucial to press it very tightly to form a solid base.
Alternatively, there might have been too little melted butter to bind the crumbs effectively, or you tried to slice the pie before the crust had fully set after chilling.
Can I Make This Gluten-Free? (FAQ)
Absolutely! To make this No-Bake Caramel Swirl Dream Pie gluten-free, simply substitute the traditional graham cracker crumbs with gluten-free graham cracker crumbs. The rest of the ingredients are naturally gluten-free, making it an accessible caramel dessert for everyone.
Can I Use Store-Bought Whipped Cream? (FAQ)
While convenient, store-bought whipped cream (like from a can) is generally not recommended for the filling itself as it lacks the stability needed to help the pie set firmly. For the topping, it can be used, but fresh whipped cream offers a superior taste and texture.
Homemade whipped cream (as detailed in the recipe) is crucial for the structural integrity of the creamy filling and provides a much richer flavor.
How Long Does It Last in the Refrigerator? (FAQ)
This No-Bake Caramel Swirl Dream Pie will last beautifully in the refrigerator for 3-4 days when properly covered. Ensure it’s sealed airtight to prevent it from absorbing odors from other foods and to maintain its freshness and creamy texture.
Serving Suggestions & Storage Savvy for Your Dream Pie
The Perfect Slice: Presentation Matters
For pristine slices of your No-Bake Caramel Swirl Dream Pie, use a sharp, thin-bladed knife. Dip the knife in hot water and wipe it clean between each cut; this will ensure a smooth, clean slice every time, showcasing your beautiful caramel swirl.
Serve each piece on a chilled plate to maintain its firm texture, perhaps with an extra drizzle of caramel sauce or a few fresh berries for a pop of color.
Make-Ahead Magic: Prepping for Guests
This easy pie recipe is a dream for entertaining as it must be made ahead. Prepare the entire pie, including the critical overnight chilling, up to 24 hours in advance. This allows all the flavors to meld beautifully and the pie to set perfectly.
Add the final whipped cream, chocolate shavings, and extra caramel drizzle just before serving to ensure the freshest presentation and texture.
Storing Leftovers: Keeping Your Pie Fresh
To store any leftover No-Bake Caramel Swirl Dream Pie, cover the pie plate tightly with plastic wrap or transfer individual slices to an airtight container. Refrigerate promptly to maintain its quality and prevent drying out.
Proper storage is key to keeping the creamy filling and graham cracker crust fresh for several days.
Freezing Your No-Bake Caramel Swirl Dream Pie?
While you can technically freeze this pie, it’s not ideal if you prioritize the absolute best texture. Freezing can sometimes alter the creamy filling’s consistency, making it a bit grainier upon thawing.
If you choose to freeze, wrap the pie tightly in plastic wrap and then foil. Thaw overnight in the refrigerator before serving, but be aware the texture may not be as pristine as a freshly chilled pie.
Ready to Create Your Own No-Bake Caramel Swirl Dream Pie?
With these detailed steps, expert tips, and troubleshooting advice, you’re now equipped to create a truly spectacular No-Bake Caramel Swirl Dream Pie. This easy pie recipe promises not just a delicious caramel dessert, but a dessert that’s effortlessly elegant and reliably perfect, right down to the last clean slice.
For a perfect pairing, try our No-Bake Peanut Butter Pie: The Secret to a Perfectly Set Slice.
Embrace the joy of no-bake baking and prepare to delight friends and family with this stunning creation. Give it a try, and share your experience – your journey to perfect, stress-free pie making begins now!
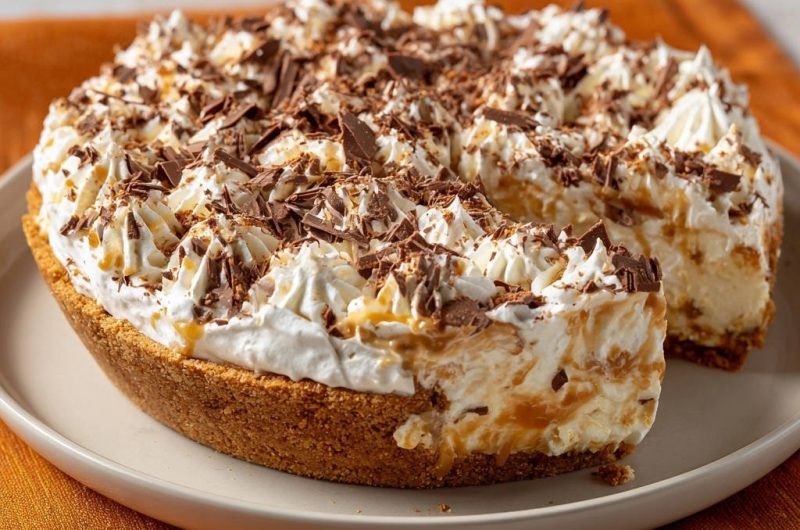
Dream Pie
Course: DessertCuisine: AmericanDifficulty: easy1
(9-inch) pie (8-10 servings)30
minutes450
kcal360
minutesSay goodbye to messy pie slices! This No-Bake Caramel Swirl Dream Pie features a sturdy graham cracker crust, a creamy, luscious caramel-swirled filling, and a fluffy whipped cream topping. With a secret for clean, picture-perfect slices, every serving is effortless.
Ingredients
1 and 1/2 cups graham cracker crumbs (from about 10 full sheets)
1/4 cup granulated sugar
1/2 cup unsalted butter, melted
8 ounces full-fat cream cheese, softened at room temperature
1 cup powdered sugar
1 teaspoon vanilla extract
1 and 1/2 cups heavy cream, divided
1/2 cup caramel sauce, plus more for drizzling
1 ounce milk or dark chocolate bar, for shaving
Directions
- For the Crust: In a medium bowl, combine the graham cracker crumbs and granulated sugar. Pour in the melted butter and mix well until all crumbs are moistened. Press this mixture very firmly and evenly into the bottom and up the sides of a 9-inch pie plate. The key to a solid crust is ensuring it’s really packed down. Place the crust in the refrigerator to chill for at least 30 minutes while you prepare the filling.
- For the Filling Base: In a large bowl, using an electric mixer, beat the softened cream cheese until smooth and creamy. Add the powdered sugar and vanilla extract, beating until well combined and fluffy.
- For the Whipped Cream: In a separate, chilled bowl, beat 1 cup of the heavy cream until stiff peaks form. The stiffer the peaks, the more stable your filling will be.
- Combine and Swirl: Gently fold the whipped cream into the cream cheese mixture using a spatula, until just combined and no streaks remain. Take care not to deflate the whipped cream. Pour about two-thirds of this mixture into the chilled pie crust. Drizzle half of the caramel sauce over the filling. Add the remaining pie filling mixture, then drizzle the rest of the 1/2 cup caramel sauce on top. Use a knife or skewer to gently swirl the caramel through the filling.
- The Secret to Clean Slices: This is the most crucial step! Cover the pie loosely with plastic wrap and refrigerate for a minimum of 6 hours, but ideally overnight. This extended chilling time allows the fats in the cream cheese and whipped cream to fully solidify, resulting in a firm filling and a stable crust that will slice beautifully and hold its shape. Do not rush this step!
- For the Topping: Just before serving, beat the remaining 1/2 cup heavy cream until stiff peaks form. You can sweeten it with a tablespoon of powdered sugar if desired. Spread or pipe this whipped cream over the chilled pie. Using a vegetable peeler or a sharp knife, create chocolate shavings from the chocolate bar and sprinkle them generously over the top of the pie. Drizzle with a bit more caramel sauce if you like. Slice and enjoy your perfectly firm, absolutely delicious pie!
Notes
- Extended chilling (minimum 6 hours, ideally overnight) is crucial for a firm filling and clean slices.