Mastering Crispy Panko Popcorn Chicken with the Anti-Soggy Hack
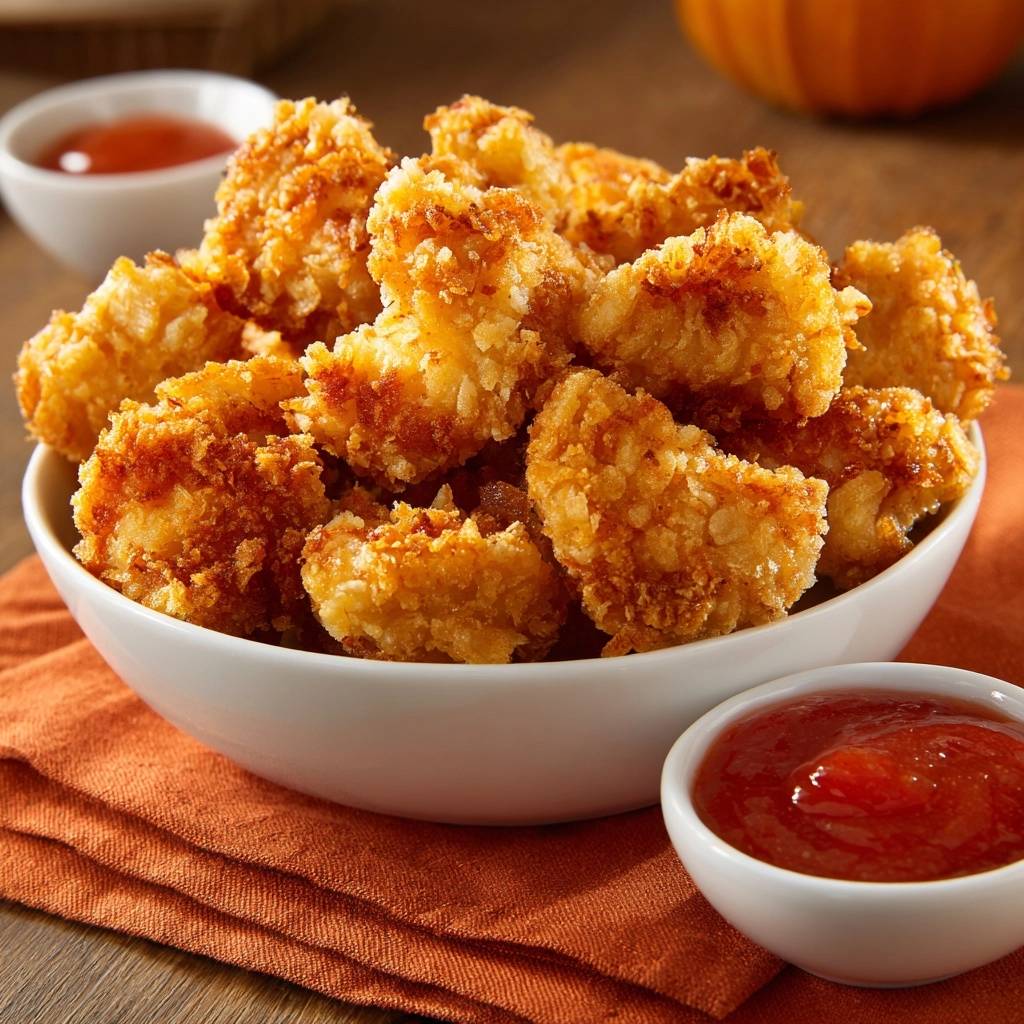
Nothing ruins a movie night or a quick dinner faster than biting into a piece of breaded chicken only to find a limp, greasy coating that slides right off the meat. You want that high-definition, shattering crunch that echoes with every bite, but home kitchens often struggle to replicate the texture of a professional deep fryer. Most recipes leave you with a “soggy bottom” because they ignore the basic physics of moisture and steam.
The secret to achieving a crust that stays crispy for hours lies in a specific cornstarch-panko blend and a double-dredge technique that locks out moisture. By changing how you prep the meat and how you set the breading, you can create a barrier that keeps the chicken juicy while the exterior turns into a golden, brittle shell. It’s about controlling the environment of the chicken before it ever touches the oil.
I’ve found that the real game-changer is the resting period on a wire rack. Most people rush the chicken from the breading bowl straight into the pan, but giving the coating ten minutes to hydrate ensures the flour and egg form a structural bond. This simple pause prevents the breading from falling off in the skillet and creates a professional-grade finish every single time.
The Science of the Shattering Panko Crust
Creating a truly crispy crust is a lesson in moisture management. When chicken hits hot oil, the water inside the meat turns to steam and tries to escape. If your breading is too dense or lacks structural integrity, that steam gets trapped between the meat and the crust, resulting in a soggy, detached layer. Panko breadcrumbs are the first line of defense because their jagged, airy structure provides a massive surface area that allows steam to vent while the crumbs themselves crisp up.
However, Panko alone isn’t enough to provide that signature “shatter.” By introducing cornstarch into the initial flour dredge, you are essentially creating a moisture-proof seal. Cornstarch is a pure starch that contains no gluten, which means it doesn’t develop the elastic, chewy texture that regular flour can sometimes produce when it gets wet. Instead, it fries up into a very thin, very brittle layer that acts as a secondary barrier against the chicken’s natural juices.
This combination creates a multi-textured experience. The cornstarch-flour base provides the “snap,” while the Panko provides the “crunch.” Because Panko is baked by an electric current rather than heat, the crumbs are lighter and more porous than traditional breadcrumbs. They don’t absorb as much oil, which keeps the popcorn chicken feeling light on the palate rather than heavy and saturated with grease.
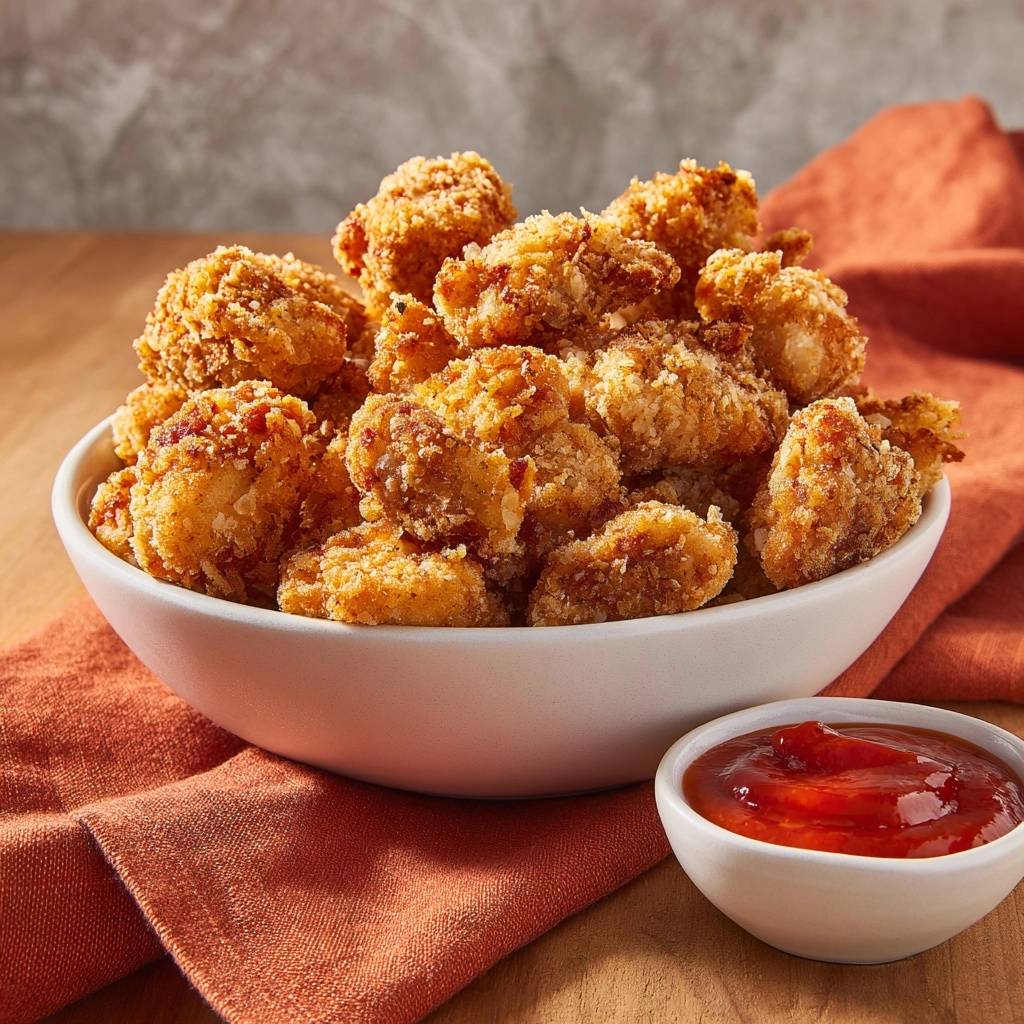
Why Cornstarch Outperforms Standard Flour
In this recipe, we use a specific ratio of two parts flour to one part cornstarch. This balance is critical because while flour provides the necessary proteins to help the egg wash stick, the cornstarch prevents the coating from becoming a doughy mess. Cornstarch actually interferes with the gluten development in the all-purpose flour, ensuring the final product is crisp rather than tough.
Furthermore, cornstarch has a higher amylose content than wheat flour, which is the secret to its superior crisping abilities. When it hits the hot oil, it undergoes a rapid dehydration process that forms a rigid, glassy film. This film is what gives the popcorn chicken its long-lasting crunch, even as the chicken begins to cool down on the plate.
Essential Components for Crispy Panko Popcorn Chicken
Quality ingredients are the foundation of any great dish, and for popcorn chicken, the texture of the meat is just as important as the coating. I always recommend using boneless, skinless chicken breasts for this recipe. They are easy to cut into uniform 1-inch pieces, which ensures that every single nugget cooks at the exact same rate. If the pieces are uneven, you’ll end up with some that are overcooked and dry while others are still pale and soft.
The egg wash is another vital component that acts as the “glue” for our Panko. By adding two tablespoons of milk to the eggs, you thin out the proteins just enough to create a smooth, even coating. The small amount of fat in the milk also helps the breading brown more evenly in the oil. Without the milk, the egg can be too thick, leading to clumpy patches of breading that are more likely to fall off during the frying process.
Don’t overlook the importance of the Panko itself. Look for a brand that has large, flaky crumbs rather than fine, sandy ones. The larger the flake, the more “nooks and crannies” you have to catch the heat of the oil. This creates those beautiful golden peaks and valleys on the surface of the chicken that make it look as good as it tastes.
Choosing the Right Frying Oil
When you are frying at 350°F, you need an oil that can handle the heat without breaking down or smoking. Neutral vegetable oils like canola or peanut oil are the gold standard here. They have high smoke points and won’t impart any unwanted flavors to your chicken. Peanut oil is a favorite among professionals because it produces a particularly clean, crisp finish, though canola is a more budget-friendly and accessible alternative.
Avoid using extra virgin olive oil or butter for this recipe. Olive oil has a low smoke point and a strong flavor that will clash with the spices in the breading. Butter contains milk solids that will burn almost instantly at frying temperatures, leaving your chicken with bitter, black specks. Stick to neutral oils to let the aromatics in the seasoning shine through.
The Spice Profile: Beyond Salt and Pepper
The seasoning in this recipe is designed to be savory and approachable, using pantry staples like garlic powder, onion powder, and paprika. Garlic and onion powders provide a deep, aromatic base that permeates the crust, while the paprika adds a subtle earthiness and a beautiful reddish-gold hue to the finished product. Because these are dried spices, they won’t burn as easily as fresh garlic or onions would in the hot oil.
For the best results, check the freshness of your spices. If your garlic powder is clumped together or your paprika has lost its vibrant red color, it’s time for a new jar. High-quality, fresh spices have a much higher oil content, which means more flavor is released the moment they hit the hot frying oil. A teaspoon of fresh sea salt and cracked black pepper rounds out the profile, ensuring the chicken is seasoned from the inside out.
The Critical Pre-Fry Preparation Phase
The most common mistake home cooks make happens before the chicken even touches the flour. If your chicken pieces are damp when you start the dredging process, you are setting yourself up for failure. Moisture on the surface of the meat creates a layer of steam the moment the chicken hits the oil. This steam pushes the breading away from the meat, causing that frustrating “shucking” effect where the crust falls off in one piece.
To prevent this, you must pat the chicken pieces completely dry with paper towels. I mean really dry—the meat should feel tacky to the touch, not slippery. This allows the flour and cornstarch mixture to adhere directly to the protein fibers of the chicken. By removing that surface moisture, you ensure that the “glue” of the egg wash and Panko has a solid foundation to grip onto.
Step-by-Step: The Press and Set Dredging Method
Setting up an efficient three-bowl station is the key to a mess-free kitchen and perfectly coated chicken. Your first bowl contains the flour, cornstarch, and spices; the second holds the egg and milk; and the third is filled with Panko. Use your left hand for “dry” steps and your right hand for “wet” steps to avoid developing “club hand,” where your fingers become encased in thick layers of dough.
The “Press and Set” technique is what separates amateur popcorn chicken from the pros. After dipping the chicken in the egg wash, drop it into the Panko. Instead of just tossing it around, use the palms of your hands to firmly press the crumbs into the meat. You want to physically anchor the Panko into the egg-washed flour layer. This pressure ensures total coverage and creates a dense, rugged exterior that won’t flake off in the pan.
Work in small batches during the dredging phase. If you crowd too many pieces into the Panko bowl at once, the crumbs will become damp from the egg wash and start to clump. By doing five or six pieces at a time, you keep the Panko dry and flaky, which is essential for that light, airy texture we are aiming for. Once a piece is coated, move it immediately to a wire rack.
The 10-Minute Wire Rack Rest
Patience is a vital ingredient in this recipe. Once the chicken is breaded, let it sit on a wire rack for at least 10 minutes before frying. During this “hydration period,” the moisture from the egg wash seeps into the flour and cornstarch, creating a cohesive, glue-like bond. This structural “skin” becomes much tougher than a freshly breaded coating, making it resilient enough to withstand the bubbling turbulence of the hot oil.
If you skip this step, the breading is much more likely to flake off the moment you flip the chicken. The rest also allows the Panko to slightly adhere to the egg wash, ensuring that the crumbs stay put. Think of it like letting paint dry; you need that bond to set before you subject it to the high-intensity environment of the frying pan.
Precision Frying for Maximum Crunch
Temperature control is the difference between a greasy nugget and a crispy masterpiece. You want your oil at exactly 350°F (175°C). If the oil is too cold, the breading will act like a sponge, soaking up grease before the crust has a chance to set. If the oil is too hot, the Panko will burn to a bitter dark brown before the chicken inside is safely cooked through. A clip-on kitchen thermometer is your best friend here.
For that same tender, juicy chicken, try this effortless shredded chicken with gravy—it stays moist without any fuss.
When you add the chicken to the pan, do it in small batches. Adding too much cold meat at once will cause the oil temperature to plummet, leading to that dreaded sogginess. You should see a vigorous, steady bubbling around each piece of chicken. If the bubbles are lazy and slow, your oil is too cold. If the oil is popping and splashing violently, turn the heat down immediately.
The visual cue you are looking for is a deep, golden brown. This usually takes about 3 to 4 minutes. Because the chicken is cut into small 1-inch pieces, it cooks very quickly. Use a slotted spoon or a spider strainer to gently move the pieces around, ensuring they brown evenly on all sides. Once they reach that perfect amber color, they are ready to be pulled from the heat.
The Wire Rack Drainage Secret
Most people instinctively reach for paper towels to drain fried food, but this is a mistake for popcorn chicken. When you place hot, fried chicken on a flat surface like a paper towel, the heat from the bottom of the chicken creates steam. That steam has nowhere to go, so it gets absorbed back into the breading, turning your crispy crust soft in seconds. This is the primary cause of the “soggy bottom.”
Instead, drain your chicken on a clean wire rack set over a baking sheet. This allows air to circulate 360 degrees around each piece of chicken. The steam can escape from the bottom just as easily as the top, keeping the entire crust brittle and dry. Any excess oil will simply drip down onto the baking sheet, leaving you with chicken that is light, crunchy, and completely grease-free.
Troubleshooting Your Popcorn Chicken
If you find that your breading is getting very dark but the chicken is still pink in the middle, your oil is definitely too hot. The exterior is cooking faster than the heat can penetrate the meat. Simply turn the heat down and wait a few minutes for the oil to stabilize at 350°F. You can also finish the chicken in a 350°F oven for a few minutes to ensure it’s cooked through without burning the crust.
On the flip side, if the chicken looks pale and feels heavy or oily, your oil was too cold. This often happens when the pan is overcrowded. To fix this for the next batch, wait for the oil to come back up to temperature between rounds. You can also try increasing the heat slightly just before adding the chicken to compensate for the initial temperature drop. If the breading is falling off, refer back to the “Pat Dry” and “Resting” steps—those are almost always the culprits.
Optimal Pairings and Dipping Profiles
Because fried chicken is inherently rich, it pairs beautifully with sauces and sides that offer a bit of acidity or heat. A sweet chili sauce provides a nice balance of sugar and spice that complements the savory garlic and onion in the breading. If you prefer something creamier, a honey mustard or a zesty ranch with plenty of fresh herbs can cut through the fried coating perfectly.
For sides, think about textures that contrast with the crunch. A crisp, vinegar-based coleslaw is a classic choice because the acidity of the dressing cleanses the palate between bites. You could also serve these over a bed of fluffy white rice or alongside some quick-pickled cucumbers. The goal is to provide a bright, fresh element that prevents the meal from feeling too heavy.
Make-Ahead and Reheating Instructions
You can actually prep this popcorn chicken in advance, which is perfect for busy weeknights. After you have breaded the chicken and let it rest on the wire rack, you can freeze the pieces instead of frying them. This allows you to have “homemade” frozen chicken nuggets ready to go whenever the craving strikes. The quality is significantly higher than anything you’ll find in a box at the grocery store.
When it comes to reheating leftovers, stay away from the microwave. Microwaves heat the water molecules inside the chicken, which creates steam and turns the Panko into a mushy mess. Instead, use an air fryer at 375°F for about 3 to 5 minutes, or a standard oven at 400°F. This dry heat will reactivate the oils in the breading and restore that original shattering crunch without drying out the meat inside.
Freezing the Breaded Chicken Pieces
To freeze the chicken properly, use the “flash-freeze” method. Place the breaded, uncooked chicken pieces in a single layer on a parchment-lined baking sheet, making sure they aren’t touching. Put the whole sheet in the freezer for about an hour until the pieces are frozen solid. This prevents them from sticking together in a giant clump once you transfer them to a freezer bag.
Once they are frozen individually, you can toss them all into a zip-top bag and squeeze out as much air as possible. They will stay fresh for up to three months. When you’re ready to eat, you can fry them straight from frozen—just add an extra minute or two to the cook time to ensure the centers are hot. This is the ultimate “fast food” hack for a high-quality dinner.
Expert Tips for Batch Cooking
If you are cooking for a crowd, maintaining the quality of the oil is your biggest challenge. As you fry, small bits of Panko will inevitably fall off and settle at the bottom of the pan. These tiny crumbs will continue to cook and eventually burn, turning the oil bitter and leaving black specks on your subsequent batches of chicken. Use a fine-mesh skimmer to clear out these debris between every batch.
Also, remember that the oil level will drop slightly as the chicken absorbs a tiny amount and some is lost to splashing. Keep a little extra oil nearby to top off the pan if needed. Just make sure to let the new oil come up to temperature before adding more chicken. If you are making a very large amount, you might even want to swap out the oil entirely halfway through to keep the flavor clean and bright.
How to Scale for Large Groups
Scaling this recipe is simple, but you need to scale your workspace too. If you are doubling the recipe, use larger bowls for your dredging station so you don’t have to refill them as often. You can also keep the first few batches of fried chicken warm in a 200°F oven while you finish the rest. Just make sure they stay on a wire rack inside the oven so they don’t lose their crispness while they wait.
When doubling the ingredients, keep the flour-to-cornstarch ratio the same. You might find you need an extra egg or a splash more milk as the dredging station gets “messy” over time. If the flour mixture starts to get too many “clumps” from the egg wash dripping into it, simply sift it or replace it with a fresh batch to ensure the coating stays light and even on every piece of chicken.
Frequently Asked Questions
Can I use an air fryer for this recipe?
Yes, you can definitely use an air fryer, though the texture will be slightly different. To get that golden color, you must generously spray the breaded chicken pieces with a neutral oil spray before cooking. Air fry at 400°F for 8 to 10 minutes, shaking the basket halfway through. The oil spray is essential because Panko needs fat to brown and crisp properly; without it, the crumbs will stay pale and taste dry.
Why is my breading falling off in the pan?
This usually happens for two reasons: the chicken was too wet before dredging, or you didn’t let the breaded chicken rest. If the meat is damp, steam will push the crust away. If you don’t let it rest for 10 minutes on a wire rack, the “glue” doesn’t have time to set. Ensure you pat the meat bone-dry and give it that crucial hydration break before it hits the oil.
Can I substitute gluten-free flour?
Absolutely. You can replace the all-purpose flour with a 1:1 gluten-free flour blend or even use straight rice flour. Rice flour actually fries up incredibly crisp and works very well with the cornstarch. Just make sure your Panko breadcrumbs are also a gluten-free variety, as traditional Panko is made from wheat bread. The cornstarch itself is naturally gluten-free and should remain in the recipe for the best results.
How long does the crunch last?
Thanks to the cornstarch and the wire rack drainage method, this chicken stays remarkably crunchy for about 1 to 2 hours at room temperature. However, for the absolute best experience, serve it within 15 minutes of frying. If you need to store leftovers, keep them in an airtight container in the fridge for up to 3 days, but be sure to reheat them in an oven or air fryer to bring back the crunch.
What is the best way to cut the chicken uniformly?
To get perfect 1-inch cubes, try putting your chicken breasts in the freezer for about 15 to 20 minutes before cutting. You don’t want them frozen solid, just firm enough that the meat doesn’t slide around under your knife. This allows for much cleaner, more precise cuts. Using a very sharp chef’s knife will also prevent you from tearing the delicate meat fibers, resulting in better texture once fried.
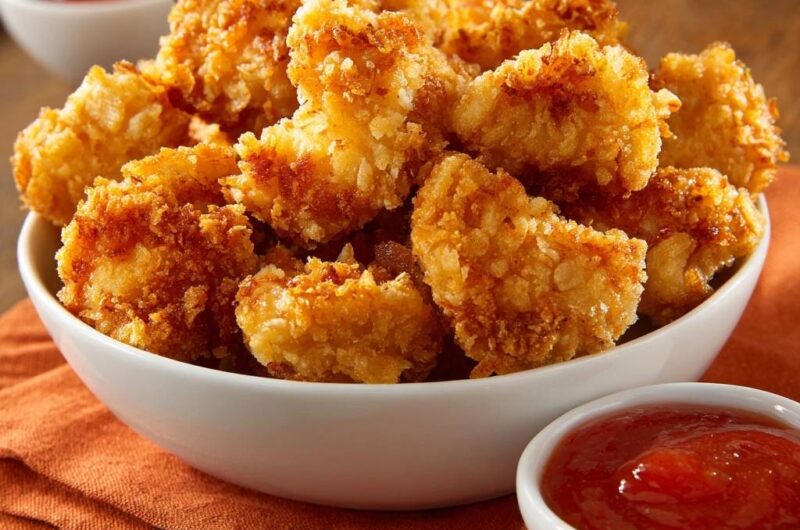
Popcorn Chicken
Course: Main CourseCuisine: AmericanDifficulty: easy4
servings15
minutes10
minutes340
kcal25
MinutesA specialized method for popcorn chicken that uses a cornstarch-panko coating and a resting period to ensure a shattering crunch that stays crispy for hours.
Ingredients
1.5 pounds boneless skinless chicken breasts, cut into 1-inch pieces
2 cups Panko breadcrumbs
1/2 cup all-purpose flour
1/4 cup cornstarch (the secret for extra crispness)
2 large eggs
2 tablespoons milk
1 teaspoon garlic powder
1 teaspoon onion powder
1/2 teaspoon paprika
1 teaspoon salt
1/2 teaspoon black pepper
Neutral vegetable oil for frying (canola or peanut oil)
Sweet chili sauce or ketchup for dipping
Directions
- Pat the chicken pieces completely dry with paper towels. This is the critical first step in preventing steam from softening the crust from the inside out.
- Set up three bowls. In the first, mix the flour, cornstarch, salt, pepper, garlic powder, onion powder, and paprika. In the second, whisk the eggs and milk. In the third, place the Panko breadcrumbs.
- To solve the soggy coating issue, use the Press and Set method. Dredge chicken in the flour/cornstarch mixture, shaking off the excess. Dip in the egg wash, and then roll in the Panko. Once coated in Panko, firmly press the crumbs into the meat with your palms to ensure total coverage.
- Place the breaded chicken on a wire rack for 10 minutes before cooking. This resting period allows the flour and egg to hydrate and form a structural bond, ensuring the coating does not slide off or absorb excess oil during frying.
- Heat 1 inch of oil in a heavy skillet to 350°F (175°C). Use a thermometer to ensure the oil is hot enough; if the oil is too cool, the breading will absorb grease and become soggy.
- Fry the chicken in small batches to avoid crowding the pan. Fry for 3 to 4 minutes, turning occasionally, until the exterior is a deep golden brown and the chicken is cooked through.
- Drain the chicken on a clean wire rack set over a baking sheet rather than paper towels. This allows air to circulate around the entire piece, keeping the bottom as crispy as the top. Serve immediately with your favorite dipping sauce.
Notes
- Always drain fried chicken on a wire rack instead of paper towels to allow air circulation and prevent a soggy bottom. Ensure oil temperature stays at 350 degrees Fahrenheit for optimal results.