Strawberry Dream Cake: Unlock the Secret to Fluffy Perfection
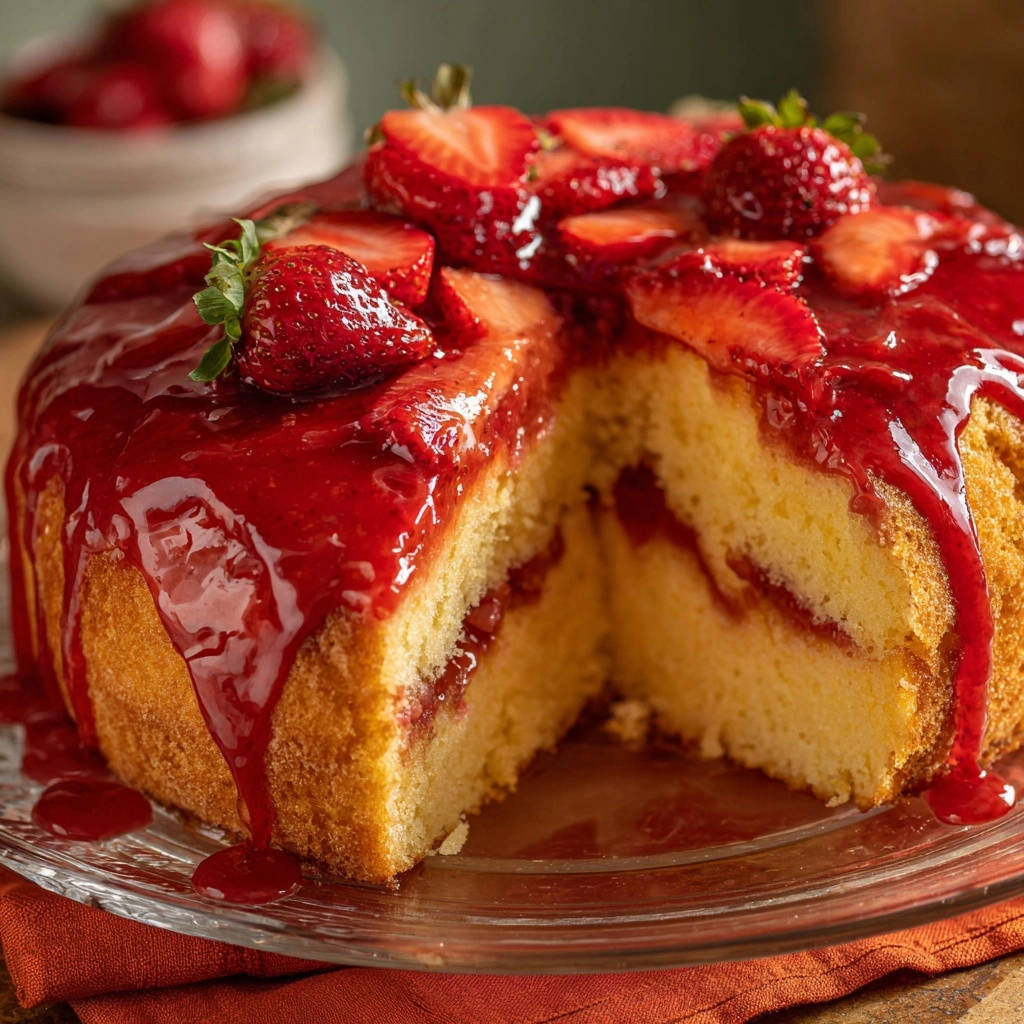
For years, achieving that elusive, perfectly fluffy cake felt like a culinary Everest. After countless attempts and tweaks, I’ve finally cracked the code, and I’m thrilled to share the secret to a Strawberry Dream Cake with a guaranteed tender, melt-in-your-mouth crumb every single time.
This isn’t just another cake recipe; it’s a celebration of fresh flavors and simple techniques that will transform your baking, delivering a showstopping dessert that’s as delightful to make as it is to eat.
Why This Strawberry Dream Cake Will Be Your New Favorite
Unlike many recipes that promise a light cake but deliver density, our Strawberry Dream Cake truly lives up to its name. The secret lies in a meticulous creaming process and precise ingredient balance, ensuring unparalleled fluffiness.
This recipe demystifies the art of cake baking, making it accessible for home cooks while consistently producing a tender, melt-in-your-mouth crumb. You’ll be amazed by the reliable results and the vibrant, fresh strawberry flavor.
Gather Your Ingredients: The Heart of Your Strawberry Masterpiece
The Cake’s Foundation: Dry Essentials
All-Purpose Flour: This forms the primary structure of our cake. Sifting your flour before measuring adds extra air, contributing to a lighter texture.
Baking Powder & Soda: This powerful duo works together to create the lift and aeration needed for a truly light cake. Baking soda reacts with the buttermilk, while baking powder provides consistent rise.
Salt: Often overlooked, salt is crucial for enhancing all the other flavors in the cake, creating a balanced and complex taste that prevents it from being overly sweet.
Moisture & Richness: Wet Ingredients for a Tender Crumb
Unsalted Butter (Room Temp): Softened butter is vital for the creaming process. It traps air, which expands during baking to create a tender, airy crumb. Unsalted butter allows you to control the total sodium.
Granulated Sugar: Beyond sweetness, sugar contributes to the cake’s moisture and tenderness, ensuring it stays soft and delicious. It also helps with browning and caramelization.
Large Eggs (Room Temp): Eggs act as a binder, provide richness, and contribute to the cake’s structure. Room temperature eggs emulsify better with the butter and sugar, leading to a smoother batter.
Buttermilk (Room Temp): The star ingredient for an incredibly moist and subtly tangy cake. Its acidity reacts with the baking soda, boosting the cake’s rise and tenderness. For another delightful cake that uses buttermilk for incredible moisture, check out our Zesty Lemon Bundt Cake.
Vanilla Extract: A classic flavor enhancer, vanilla brings warmth and depth, complementing the sweetness and brightness of the strawberries.
Sweet & Tangy: Crafting the Irresistible Strawberry Glaze & Filling
Fresh Strawberries: The undisputed star of our Strawberry Dream Cake. Choose ripe, vibrant red berries for the best flavor. Hulling and slicing them evenly ensures consistent texture in the glaze.
Granulated Sugar (Glaze): Sweetens the fresh strawberries. You can adjust the quantity based on the natural sweetness of your berries and your personal preference.
Fresh Lemon Juice: A splash of lemon juice is essential. It brightens the strawberry flavor and provides a necessary tang to balance the sweetness, making the glaze incredibly vibrant.
Cornstarch & Cold Water Slurry: This mixture is our thickening agent. Creating a slurry first prevents lumps and ensures a smooth, glossy glaze that coats the cake beautifully.
Essential Tools for Baking Bliss
Electric Mixer (Stand or Handheld): Indispensable for creaming the butter and sugar to the perfect airy consistency. This step is a cornerstone of the Strawberry Dream Cake’s fluffy texture.
9-inch Round Cake Pan: The ideal size for this recipe, ensuring proper baking and layer height. Proper greasing and flouring are crucial for a clean release.
If you enjoy garnishing with fresh fruit, you’ll love how juicy berries top this glazed blueberry lemon bundt cake.
Wire Cooling Rack: Allows air circulation around the cake as it cools. This prevents condensation and keeps the bottom of the cake from becoming soggy.
Saucepan: A medium-sized saucepan is perfect for simmering the strawberries and transforming them into the luscious glaze and filling.
Fine-Mesh Sieve (Optional): If you prefer a perfectly smooth, seedless glaze for an extra elegant finish, a fine-mesh sieve will achieve this beautifully.
Mastering the Bake: A Step-by-Step Guide to Perfection
- Prepare Your Workspace:
Preheat your oven to 350°F (175°C).
Thoroughly grease and flour a 9-inch round cake pan to ensure easy release. This small step prevents sticking and frustration, setting you up for success.
- Whisk the Dry Ingredients:
In a medium bowl, combine the flour, baking powder, baking soda, and salt.
Whisking them together ensures uniform distribution throughout the batter, which is key for an even rise and consistent texture in your cake.
- Cream Butter and Sugar: The Air Incorporation Secret:
In a large bowl, use an electric mixer to cream the softened butter and granulated sugar for 3-5 minutes on medium-high speed.
This “creaming” step is vital; it incorporates essential air, creating the light and fluffy texture our Strawberry Dream Cake is famous for. Look for a pale, fluffy mixture.
- Add Eggs and Vanilla:
Beat in the eggs one at a time, ensuring each is fully incorporated before adding the next. This prevents the batter from curdling.
Mix in the vanilla extract. This gradual addition helps maintain the emulsification and air within the batter, contributing to the cake’s structure.
- Alternate Dry and Wet Ingredients: Avoid Overmixing!
With the mixer on low speed, gradually add the dry ingredients in three additions, alternating with the buttermilk in two additions.
Begin and end with the dry ingredients. Mix just until combined; overmixing can develop gluten, leading to a dense cake, which we absolutely want to avoid for our tender crumb.
- Bake to Golden Perfection:
Pour the prepared batter into your greased and floured cake pan and smooth the top gently with a spatula.
Bake for 30-35 minutes, or until a wooden skewer inserted into the center comes out clean. This is the reliable indicator that your cake is perfectly cooked through.
- Cooling Protocols:
Let the cake cool in the pan on a wire rack for 10 minutes. This allows the cake to firm up slightly before handling.
Then, carefully invert it onto the wire rack to cool completely. Cooling completely prevents the cake from breaking when sliced and ensures the glaze doesn’t melt upon contact.
For a perfect pairing, try our Mastering the Glazed Lemon Blueberry Loaf.
- Crafting the Strawberry Glaze and Filling:
While the cake cools, combine 3 cups of sliced strawberries, ½ cup sugar, and lemon juice in a medium saucepan. Reserve 1 cup of fresh strawberry slices for later garnish.
Cook over medium heat, stirring, until the strawberries soften and release their juices, about 5-7 minutes. The aroma will be intoxicating!
- Thicken the Glaze:
In a small bowl, whisk cornstarch and cold water to create a smooth slurry. Ensure there are no lumps.
Stir this slurry into the simmering strawberry mixture. Continue cooking and stirring for 1-2 minutes until the mixture thickens to a beautiful, glossy glaze consistency. For other desserts that benefit from a delicious fruit topping, consider our No-Bake Strawberry Cheesecake recipe.
- Cool the Glaze and Prepare for Assembly:
Remove the glaze from heat and let it cool slightly. For a smoother glaze, press some through a fine-mesh sieve, discarding any seeds or large pieces.
For the filling, gently mash some of the strawberries with a fork if you prefer a chunky texture, ensuring some whole pieces remain for visual appeal.
- Assemble Your Strawberry Dream Cake:
Once the cake is completely cool, carefully slice it horizontally into two even layers using a serrated knife.
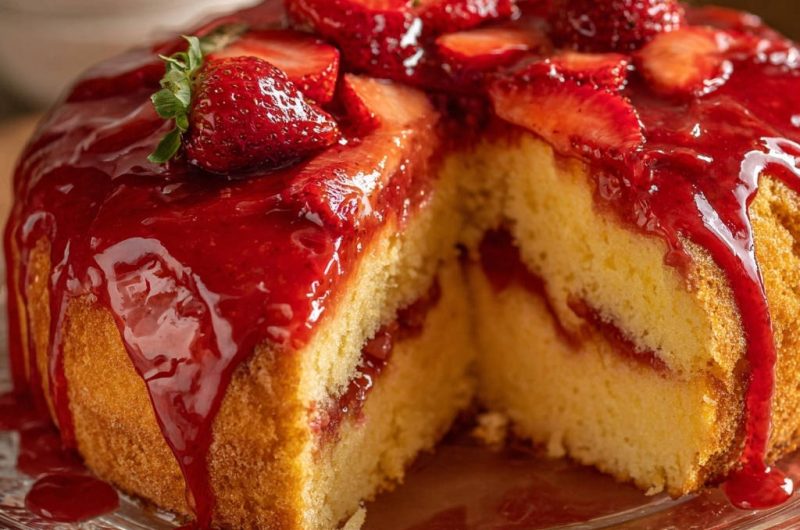
Spread about half of the cooled strawberry mixture evenly onto the bottom layer, then carefully place the top layer over it, aligning the edges.
- Final Touches and Garnish:
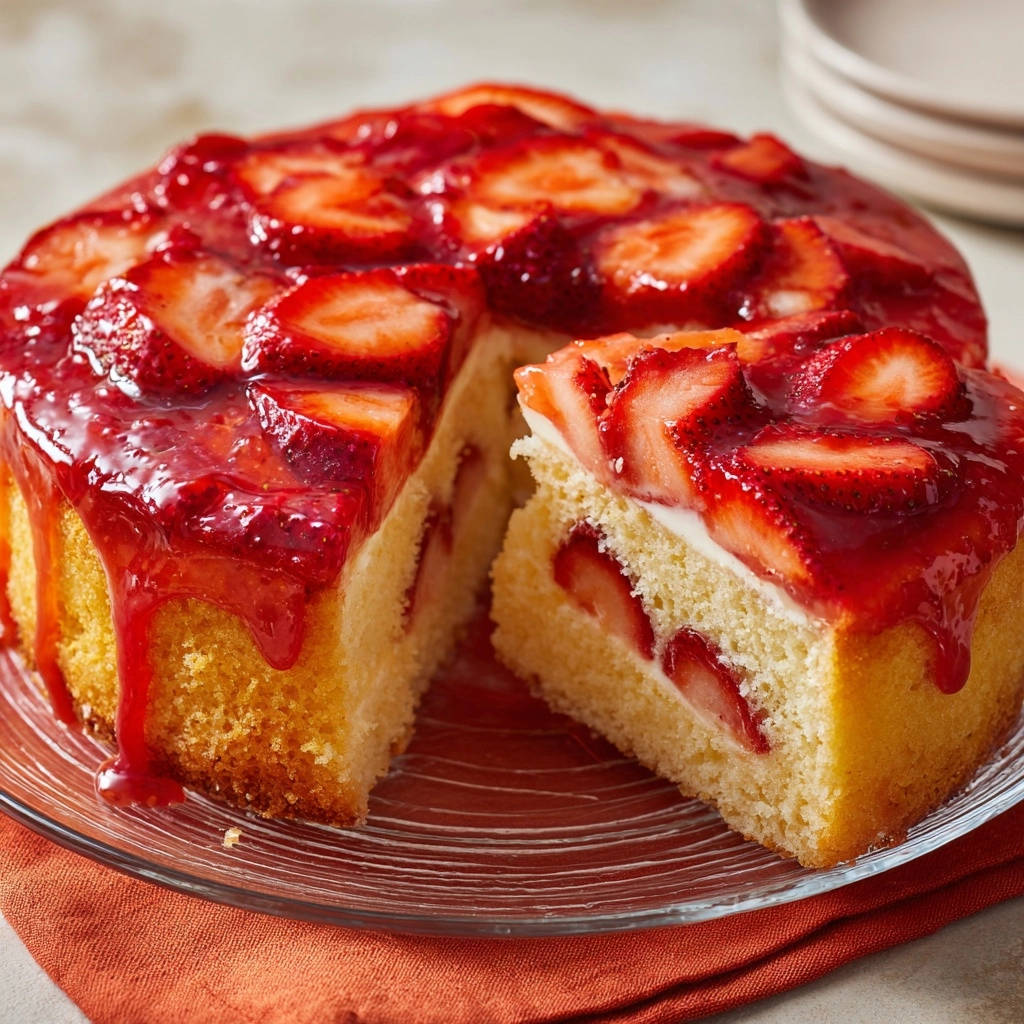
Pour the remaining strawberry glaze over the top of the cake, letting it beautifully drip down the sides for an elegant finish.
Artfully arrange the reserved fresh strawberry slices on top for an inviting garnish. Serve immediately or refrigerate.
Unlock Pro Secrets: Tips for Your Best Strawberry Dream Cake
Room Temperature Ingredients are Key: Ensure your butter, eggs, and buttermilk are all at room temperature. This allows them to emulsify properly, creating a smoother, more stable batter and a more uniform, tender crumb in your finished cake.
Don’t Overmix the Batter: After adding the dry ingredients, mix just until combined. Overmixing develops gluten, leading to a tough, dense cake. A few small lumps in the batter are perfectly acceptable and won’t affect the final texture.
Accurate Measuring Matters: Especially for flour, spoon and level to avoid packing too much into your cup, which can significantly dry out the cake. For the best accuracy, consider using a kitchen scale for all your dry ingredients.
Cool Completely Before Glazing: Rushing this step will cause your beautiful glaze to melt and slide right off the cake. Patience ensures a perfectly set, vibrant topping that adheres beautifully.
Adjust Glaze Sweetness and Texture: Always taste your strawberry mixture before thickening. Add more sugar if your berries aren’t very sweet, or add a splash more lemon juice to brighten the flavor. For a silkier glaze, don’t skip the optional sieving step.
Solving Common Cake Conundrums: Troubleshooting Your Bake
My Cake is Dense and Heavy, Not Fluffy!
This is usually due to overmixing the batter. Over-developing the gluten makes the cake tough and chewy. Next time, mix only until the ingredients are just combined, even if small lumps of flour remain.
Also, ensure your leavening agents (baking powder and baking soda) are fresh and not expired, as old leaveners won’t provide the necessary lift for a light cake.
More Ways with Strawberries
If you want to keep the strawberry theme going, these baked goods use the same fruit for a different texture.
- For a denser, sliceable option that avoids the common problem of fruit sinking, try this Perfect Strawberry Loaf with its even crumb.
- For something smaller and spiced, the Cinnamon Sugar Mini Loaves offer a warm contrast to the cake’s bright berry flavor.
The Strawberry Glaze Isn’t Thickening!
Ensure your cornstarch slurry is fully whisked and smooth before adding it to the hot strawberries. If it’s still too thin, you can make a small additional slurry (1 teaspoon cornstarch to 1 tablespoon cold water) and stir it into the simmering mixture, cooking for another minute until the desired thickness is reached.
It’s also important to ensure the mixture reaches a gentle simmer for the cornstarch to properly activate and thicken; it needs heat to do its job effectively.
My Cake is Dry or Crumbly!
Overbaking is a very common culprit for dry cakes. Always check for doneness using the wooden skewer test at the minimum bake time. Investing in an oven thermometer can also help ensure your oven is at the correct temperature.
Using too much flour can also lead to dryness. Measure your flour precisely by spooning it into the measuring cup and leveling off with a straight edge, or, for ultimate accuracy, use a kitchen scale.
Your Strawberry Dream Cake Questions Answered
Can I use frozen strawberries for the glaze?
Yes, you can absolutely use frozen strawberries for the glaze! Thaw them completely first, then drain any excess liquid to prevent the glaze from becoming too watery. The cooking time might be slightly longer to reduce the extra moisture, but the flavor will still be wonderfully delicious.
What can I use if I don’t have buttermilk?
You can easily make a homemade buttermilk substitute! Combine 1 cup of regular milk (dairy or non-dairy works) with 1 tablespoon of fresh lemon juice or white vinegar. Let it sit for 5-10 minutes until it slightly curdles. This acidulated milk works perfectly in this recipe to activate the baking soda and create a tender crumb.
How far in advance can I make this Strawberry Dream Cake?
For optimal freshness and flavor, it’s best to assemble and glaze the cake within 1 day of serving. However, the cake layers can be baked up to two days in advance, wrapped tightly in plastic wrap, and stored at room temperature. The glaze can also be made a day ahead and refrigerated in an airtight container.
Can I make this cake in different pan sizes?
Yes, you can adjust the pan size, but keep in mind that baking times will vary. For instance, if you use two 8-inch round pans, the baking time will likely be slightly shorter. For a 13×9 inch rectangular cake, the baking time might be similar, but always use the wooden skewer test to accurately check for doneness.
Beyond the Bake: Serving, Storing, and Enjoying Your Cake
Elegant Serving Suggestions
This Strawberry Dream Cake is a showstopper on its own, but you can elevate it further. Serve individual slices with a delicate dollop of freshly whipped cream or a scoop of premium vanilla bean ice cream for an extra touch of indulgence.
For a professional presentation, garnish each plate with a small sprig of fresh mint or a few extra, perfectly sliced fresh strawberry pieces.
Storing for Ultimate Freshness
Due to the fresh fruit glaze, this cake is best stored in an airtight container in the refrigerator. It will maintain its freshness and deliciousness for approximately 3-4 days when properly stored.
For the best flavor and texture experience, allow refrigerated slices to come to room temperature for about 30 minutes before serving. This truly enhances the cake’s tenderness and the vibrancy of the strawberry notes.
Make-Ahead Tips for Stress-Free Entertaining
The cake layers can be baked up to two days in advance. Once they are completely cool, wrap them tightly in plastic wrap and store at room temperature. For longer storage, you can freeze them for up to a month; simply thaw overnight in the refrigerator.
The strawberry glaze can also be prepared a day ahead and stored in an airtight container in the refrigerator. If it becomes too thick to pour after chilling, gently reheat it on the stovetop or in the microwave until it reaches the desired consistency.
Your Culinary Triumph Awaits: Share the Strawberry Dream!
Now that you have all the secrets to a perfectly fluffy, melt-in-your-mouth Strawberry Dream Cake, it’s time to bring this luscious dessert to life in your own kitchen. This recipe is more than just a cake; it’s an experience of sweet, tender perfection, guaranteed to impress anyone who takes a bite.
We encourage you to share your baking journey and finished masterpieces with us! Tag us on social media or leave a comment below with your experience. Happy baking, and enjoy every sweet, strawberry-filled moment!
Strawberry Cake
Course: DessertCuisine: AmericanDifficulty: medium8
servings45
minutes45
minutes450
kcal180
minutesDiscover the secret to a perfectly fluffy, melt-in-your-mouth cake. This delightful Strawberry Dream Cake features a tender crumb base topped with a luscious homemade strawberry glaze and fresh berries, guaranteeing cake perfection every time.
Ingredients
For the Cake:
2 and 1/4 cups all-purpose flour
1 and 3/4 cups granulated sugar
1 cup (2 sticks) unsalted butter, softened to room temperature
4 large eggs, at room temperature
1 cup buttermilk, at room temperature
2 teaspoons baking powder
1/2 teaspoon baking soda
1 teaspoon vanilla extract
1/2 teaspoon salt
For the Strawberry Glaze and Filling:
4 cups fresh strawberries, hulled and sliced (about 1.5 lbs)
1/2 cup granulated sugar (adjust to taste)
2 tablespoons fresh lemon juice
1 tablespoon cornstarch
2 tablespoons cold water
Directions
- Preheat your oven to 350 degrees F (175 C). Grease and flour a 9-inch round cake pan.
- In a medium bowl, whisk together the flour, baking powder, baking soda, and salt. Set aside.
- In a large bowl, using an electric mixer, cream together the softened butter and granulated sugar for the cake on medium-high speed for 3-5 minutes, until light and fluffy. This step is crucial for incorporating air, which makes the cake light.
- Add the eggs one at a time, beating well after each addition. Mix in the vanilla extract.
- With the mixer on low speed, gradually add the dry ingredients to the wet ingredients in three additions, alternating with the buttermilk in two additions, beginning and ending with the dry ingredients. Mix just until combined; be careful not to overmix, as this can make the cake dense.
- Pour the batter into the prepared cake pan and smooth the top. Bake for 30-35 minutes, or until a wooden skewer inserted into the center comes out clean.
- Let the cake cool in the pan on a wire rack for 10 minutes before inverting it onto the rack to cool completely.
- While the cake cools, prepare the strawberry glaze and filling. In a medium saucepan, combine 3 cups of the sliced strawberries (reserve 1 cup for topping), 1/2 cup sugar, and lemon juice. Cook over medium heat, stirring occasionally, until the strawberries soften and release their juices, about 5-7 minutes.
- In a small bowl, whisk together the cornstarch and cold water to create a slurry. Stir the slurry into the simmering strawberry mixture. Continue to cook, stirring, until the mixture thickens to a glaze consistency, about 1-2 minutes.
- Remove from heat and let cool slightly. For the filling, you can mash some of the strawberries gently with a fork. For the glaze, you can press some through a fine-mesh sieve for a smoother texture, or leave it chunky as is.
- Once the cake is completely cool, slice it horizontally in half to create two layers. Spread about half of the cooled strawberry mixture on the bottom layer. Place the top layer over it.
- Pour the remaining strawberry glaze over the top of the cake, allowing it to drip down the sides. Arrange the reserved fresh strawberry slices on top for garnish. Serve immediately or refrigerate.
Notes
- For best results, do not overmix the cake batter and ensure butter and sugar are creamed until very light and fluffy.