Cheesy Baked Stuffed Shells: Never Gummy, Always Perfect
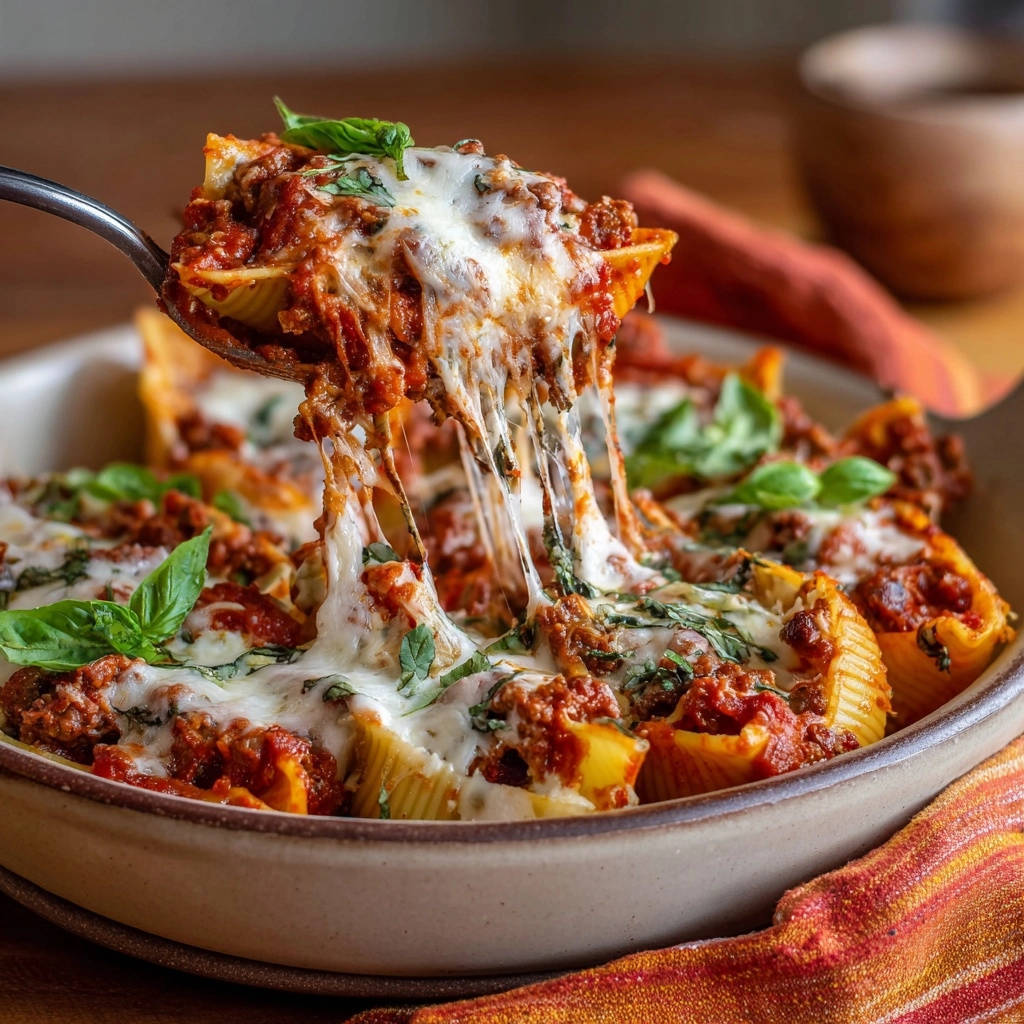
There’s nothing more disheartening than anticipating a plate of warm, comforting Cheesy Baked Stuffed Shells, only to find the pasta has turned into a mushy, sticky mess after baking. I’ve refined this recipe over years to conquer that common challenge, ensuring every single shell is perfectly tender, yet firm.
This foolproof method delivers Cheesy Baked Stuffed Shells that are rich in flavor, incredibly satisfying, and truly live up to their name – never gummy, always perfect. Get ready to enjoy a hearty Italian meal that your family will rave about.
Why This Cheesy Baked Stuffed Shells Recipe Will Be Your New Favorite
The “Never Gummy” Secret: Perfect Pasta Every Time
The foundation of exceptional Cheesy Baked Stuffed Shells lies in the pasta’s texture. This recipe employs a crucial technique of undercooking the shells initially, allowing them to finish perfectly in the oven while absorbing rich sauce.
This method guarantees tender-but-firm pasta every time, completely eliminating the dreaded mushy texture that often plagues baked pasta dishes. It’s the secret to consistently satisfying results.
Rich, Hearty Flavor Your Family Will Crave
Beyond texture, this recipe boasts incredible depth of flavor. A slow-simmered, savory meat sauce provides a robust base, perfectly complementing the creamy, indulgent ricotta cheese filling.
Each bite offers a harmonious blend of meaty richness, tangy tomato, and luxurious cheese, making this a truly comforting and deeply satisfying hearty Italian meal.
This same logic applies when making pasta e fagioli so the noodles stay firm instead of turning to mush.
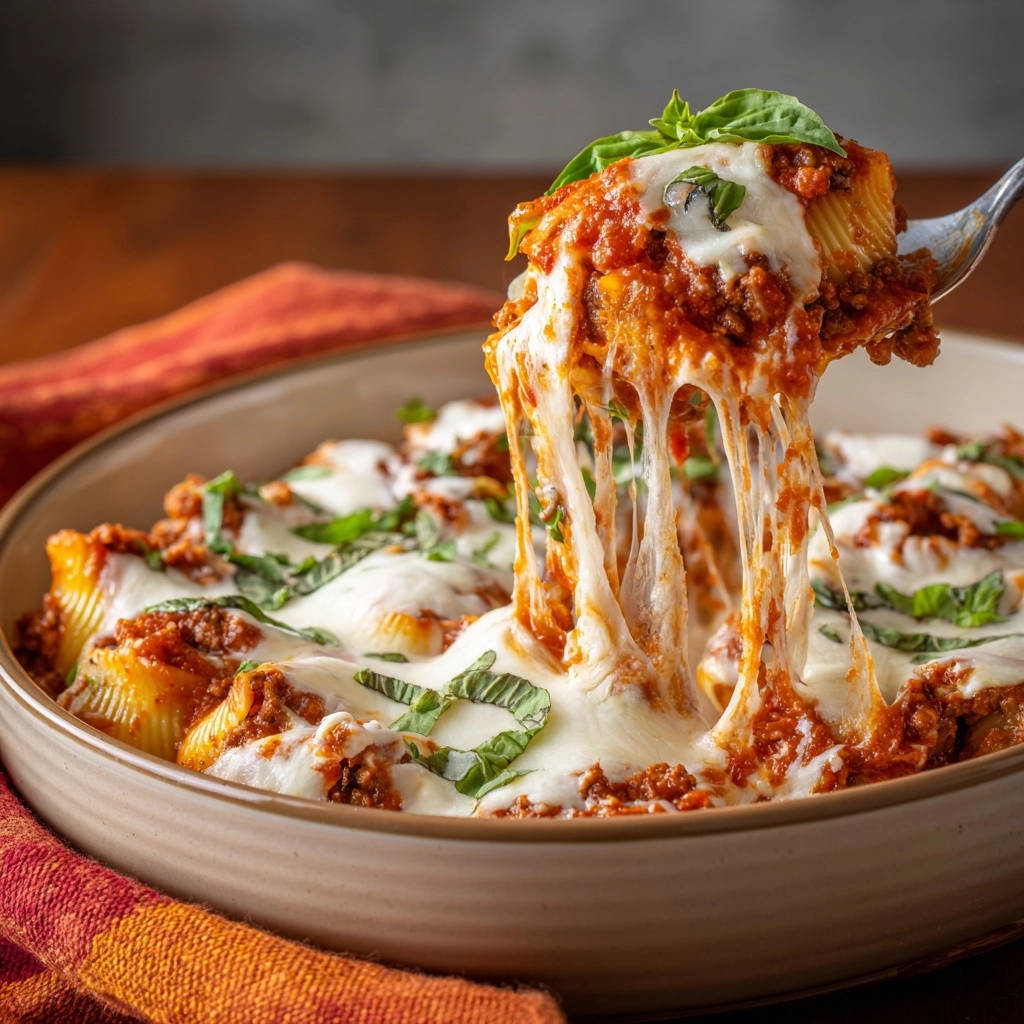
Effortless Elegance for Weeknights and Gatherings
While the final dish looks impressive and tastes gourmet, this recipe for Cheesy Baked Stuffed Shells is surprisingly approachable. It’s designed to be manageable for a busy weeknight dinner.
Yet, it also carries an air of elegance that makes it perfectly suited for entertaining guests or special family gatherings. It’s a versatile dish that delivers on both convenience and culinary appeal.
Gather Your Gear: Essential Tools for Stuffed Shell Success
Large Pots for Pasta & Sauce
You’ll need two substantial pots. A large stockpot is essential for boiling the pasta, ensuring shells have ample room to cook evenly.
A large Dutch oven or heavy-bottomed pot is ideal for simmering the meat sauce, allowing flavors to meld beautifully without scorching.
Mixing Bowls & Baking Dish
Prepare a medium mixing bowl for your creamy ricotta cheese filling. This provides enough space for thorough mixing.
A 9×13 inch baking dish is the standard size for baking these stuffed pasta shells, accommodating a single, snug layer for even cooking.
Basic Kitchen Utensils
- Measuring cups and spoons for accurate ingredient portions.
- A sturdy spoon or spatula for browning meat and stirring sauce.
- A colander for draining pasta efficiently.
- A ladle for saucing the dish.
- Aluminum foil for covering the baking dish during part of the baking process.
Building Blocks of Flavor: What You’ll Need for Our Cheesy Stuffed Shells
The Pasta: Perfecting the Shells
We use one pound of large pasta shells, specifically Conchiglioni, which are perfect for holding generous amounts of filling. The specific preparation method detailed later is crucial for their non-gummy texture.
Choosing a good quality pasta will enhance the overall experience, providing a satisfying bite to this baked pasta dish.
Savory Meat Sauce Staples
Our rich sauce starts with lean ground beef, which provides a hearty base without excessive grease. Finely chopped onion and minced garlic are sautéed to build aromatic complexity.
Canned crushed tomatoes and tomato sauce form the liquid foundation, deepened with dried Italian seasoning, salt, and black pepper. This blend creates a deeply satisfying, homemade marinara sauce.
The Irresistible Cheesy Filling
The heart of our Cheesy Baked Stuffed Shells is the creamy ricotta cheese. It provides a light, fluffy texture and mild dairy flavor.
A large egg acts as a binder, ensuring the filling holds its shape, while grated Parmesan and shredded mozzarella contribute layers of savory, melty cheese goodness.
Fresh Finishes & Seasoning
Fresh chopped basil serves as a vibrant garnish, adding a burst of herbaceous freshness that brightens the entire dish. It’s an essential touch for both flavor and visual appeal.
Salt and black pepper are vital for balancing and enhancing all the flavors in both the sauce and the filling. Don’t underestimate their role in perfecting this hearty Italian meal.
Your Path to Stuffed Shells Perfection: A Detailed Cooking Guide
Crafting the Rich Meat Sauce
Step 1: Prepare the Meat Sauce Base. Heat 1 tablespoon of olive oil in a large pot or Dutch oven over medium heat. Add 1 pound of lean ground beef and cook, breaking it up with a spoon, until it is thoroughly browned. Drain any excess fat to keep the sauce light.
Next, add 1 medium finely chopped onion to the pot and cook until it softens, which typically takes about 5 minutes. Stir in 2 cloves of minced garlic and cook for just 1 minute more, until it becomes fragrant but not browned, ensuring its sweet aroma infuses the beef.
Step 2: Simmer for Deep Flavor. Pour in 1 (28 ounce) can of crushed tomatoes and 1 (15 ounce) can of tomato sauce. Stir in 1 teaspoon of dried Italian seasoning, 1/2 teaspoon of salt, and 1/4 teaspoon of black pepper.
Bring the sauce to a gentle simmer, then reduce the heat to low, cover the pot, and let it gently cook while you prepare the shells and filling. This slow simmer is crucial for developing a rich, robust flavor profile that elevates the entire dish.
The “No Gummy” Shell Preparation Method
Step 3: Perfectly Tender Shells. Bring a large pot of heavily salted water to a rolling boil. Add the large pasta shells (Conchiglioni) and cook according to package directions, but critically, reduce the cooking time by 2-3 minutes from al dente.
You want them to be very firm, just shy of al dente, as they will finish cooking in the oven and absorb moisture from the sauce. Immediately drain the shells and rinse briefly with cool water to halt cooking and prevent them from sticking. Gently lay them out on a baking sheet or clean surface to cool slightly.
Whipping Up the Creamy Ricotta Filling
Step 4: Create the Creamy Filling. In a medium bowl, combine 15 ounces of ricotta cheese, 1 large egg, 1/2 cup of grated Parmesan cheese, and 1 cup of the shredded mozzarella cheese. Mix until all ingredients are thoroughly combined and the mixture is smooth and cohesive.
Assembling Your Cheesy Masterpiece
Step 5: Preheat Oven & Sauce the Dish. Preheat your oven to 375 degrees Fahrenheit (190 degrees Celsius). Spread about 1 cup of the prepared meat sauce evenly in the bottom of a 9×13 inch baking dish. This layer prevents the shells from sticking and adds initial flavor.
Step 6: Stuff and Arrange the Shells. Carefully stuff each slightly undercooked pasta shell with a generous spoonful of the creamy ricotta mixture. Arrange the stuffed shells snugly in a single layer over the sauce in the baking dish, ensuring they fit without being overly crowded.
Step 7: Cover with Sauce & Cheese. Spoon the remaining meat sauce evenly over the stuffed shells, making sure to cover them well. This is key to ensuring the pasta finishes cooking without drying out and for infusing them with flavor. Sprinkle the remaining 1 cup of shredded mozzarella cheese evenly over the top.
Baking to Golden, Bubbly Perfection
Step 8: Bake to Bubbly Perfection. Cover the baking dish tightly with aluminum foil and bake for 25 minutes. This traps steam and helps the pasta cook through.
Remove the foil and bake for another 10-15 minutes, or until the cheese is beautifully bubbly and lightly golden brown. This final uncovered bake creates an irresistible golden crust on your Cheesy Baked Stuffed Shells.
The Crucial Resting and Garnish
Step 9: Rest & Garnish. Remove the dish from the oven and let it rest for 5-10 minutes before serving. This resting period allows the sauces and cheeses to set, preventing the filling from oozing out when cut.
Garnish generously with fresh chopped basil for a bright burst of flavor and a beautiful visual finish. This final touch truly elevates the dish.
Chef’s Secrets: Elevate Your Baked Stuffed Shells Experience
The Art of Undercooking Your Pasta: Remember, the shells will continue to cook in the oven, absorbing moisture from the sauce. Slightly undercooking them initially is the number one secret to avoiding a gummy texture. Don’t go for al dente, go for very firm.
Maximizing Sauce Flavor with a Slow Simmer: The longer your meat sauce simmers (within reason), the deeper and richer its flavors will become. Don’t rush this step; it’s worth the wait for a truly robust base for your stuffed pasta shells.
Why Cooling Shells Matters: Rinsing and laying out the shells briefly helps stop the cooking process and prevents them from sticking together while you prepare the filling. This makes them much easier to handle and stuff without tearing.
Ensuring Even Baking and Golden Tops: Covering the dish initially traps steam, helping the pasta cook through without drying out. Removing the foil allows the cheese to get beautifully golden and bubbly, adding texture and visual appeal to your baked pasta dish.
Don’t Skip the Resting Time!: Allowing the dish to rest for 5-10 minutes after baking helps the sauces and cheeses set, preventing the filling from oozing out and making for cleaner, more enjoyable servings of your Cheesy Baked Stuffed Shells.
Stuffed Shells SOS: Solving Common Cooking Quandaries
“My Shells are Still Gummy!”
The most common culprit is overcooking the pasta before baking. Ensure you only boil them until very firm, 2-3 minutes shy of al dente.
Also, make sure the shells are adequately covered with sauce during baking, as this helps them absorb moisture and finish cooking to the perfect tenderness.
“The Filling is Too Dry/Runny!”
If your filling is too dry, you might have used too much Parmesan or not enough ricotta. If it’s runny, ensure your ricotta cheese is well-drained of any excess liquid before mixing.
Using a large egg is important for proper binding and moisture balance in the ricotta cheese filling.
“My Sauce is Lacking Flavor!”
A short simmer time can lead to underdeveloped flavors. Allow your meat sauce to simmer for at least 30-45 minutes (or longer if time permits) to deepen its richness.
Taste and adjust seasonings – don’t be afraid to add a pinch more salt, pepper, or Italian seasoning to enhance its profile.
“Cheese Isn’t Brown Enough!”
If your mozzarella isn’t as golden as you’d like, continue baking uncovered for a few extra minutes until it reaches your desired color.
For a quicker browning, you can place the dish under the broiler for 1-2 minutes, watching it very carefully to prevent burning.
Beyond the Baking Dish: Serving & Customizing Your Cheesy Stuffed Shells
Perfect Pairings: What to Serve Alongside
These Cheesy Baked Stuffed Shells are a complete meal on their own, but they pair beautifully with simple sides. A crisp green salad with a light vinaigrette offers a refreshing contrast.
If you love the rich, creamy sauce in these stuffed shells, you’ll enjoy the hearty texture of this hearty rigatoni bolognese too.
Warm, crusty garlic bread is perfect for soaking up any extra sauce, completing this classic hearty Italian meal experience.
Creative Variations: Make It Your Own
Feel free to customize your Cheesy Baked Stuffed Shells. For a vegetarian option, swap the ground beef for finely chopped mushrooms or lentils in the sauce.
Add 1/2 cup of frozen, thawed, and well-squeezed spinach to the ricotta cheese filling for extra greens and flavor. Experiment with different cheeses like provolone or fontina for unique twists.
Make-Ahead Magic: Prepare for Later
This recipe is excellent for meal prep! You can prepare the meat sauce and the ricotta filling up to 2 days in advance, storing them separately in the refrigerator.
Alternatively, assemble the entire baking dish up to 24 hours ahead, cover tightly, and refrigerate. Add an extra 10-15 minutes to the covered baking time if baking from cold.
Storing Leftovers for Maximum Freshness
Leftover Cheesy Baked Stuffed Shells store wonderfully. Allow them to cool completely, then transfer to an airtight container.
They will keep fresh in the refrigerator for up to 3-4 days. This makes for delicious and convenient lunches or quick dinners throughout the week.
Your Cheesy Baked Stuffed Shells Questions Answered
Can I make this recipe vegetarian?
Absolutely! Simply omit the ground beef from the sauce. You can replace it with finely diced mushrooms, lentils, or a combination of cooked spinach and zucchini for added substance and flavor.
Alternatively, use your favorite store-bought vegetarian marinara sauce. The creamy ricotta filling remains vegetarian-friendly.
What’s the best way to reheat stuffed shells?
For best results, reheat individual servings in the microwave, covered, until heated through. For larger portions, place them in an oven-safe dish, cover with foil, and bake at 300°F (150°C) until warm, about 20-30 minutes.
A splash of extra sauce or water before reheating can help keep them moist and prevent drying out.
Can I freeze baked stuffed shells?
Yes, Cheesy Baked Stuffed Shells freeze beautifully! After baking and cooling completely, you can freeze the entire dish (if freezer-safe) or individual portions in airtight containers for up to 3 months.
To reheat from frozen, bake covered at 350°F (175°C) for about 60-75 minutes, then uncover and bake for an additional 10-15 minutes, or until bubbly and heated through.
What if I don’t have large pasta shells?
While large shells are ideal for stuffing, you can adapt this recipe. Lasagna noodles can be cooked, cut in half, spread with filling, rolled, and arranged like cannelloni.
Alternatively, you could make a “lazy” version by layering wide egg noodles with sauce and cheese filling, creating a deconstructed baked pasta dish.
Ready to Impress? Share Your Cheesy Baked Stuffed Shells Masterpiece!
Now that you’re armed with the secrets to perfect, never-gummy Cheesy Baked Stuffed Shells, it’s time to bring this incredible dish to life in your own kitchen. This recipe delivers a hearty Italian meal that truly satisfies every time.
What to Serve Alongside
These stuffed shells are rich and cheesy, so a crisp, acidic salad or a shareable bread starter balances the meal nicely.
- A tangy Chopped Antipasto Salad brings vinegar-bright crunch and cured meats that cut through the baked cheese.
- For a warm, pull-apart starter, the Spinach Artichoke Pull-Apart Bread echoes the creamy, savory notes of the shells with a buttery, shareable texture.
I can’t wait for you to experience the rich flavors and perfect texture! Go ahead, make this family dinner recipe your own, and share your delicious results with us!
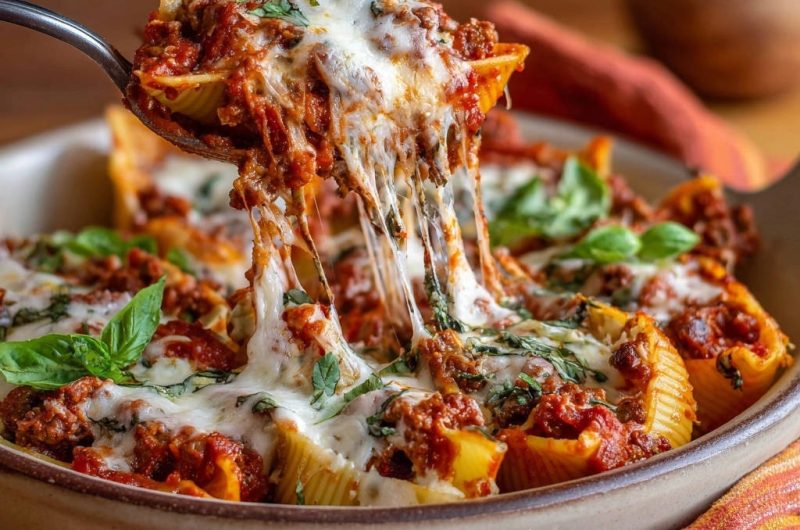
Stuffed Shells
Course: Main CourseCuisine: Italian-AmericanDifficulty: medium6
servings45
minutes40
minutes550
kcal85
minutesTired of mushy stuffed shells? This recipe guarantees perfectly tender-but-firm pasta, filled with a rich ricotta mixture and savory meat sauce. A hearty, cheesy dish that’s never gummy, perfect for a satisfying family meal.
Ingredients
1 pound large pasta shells (Conchiglioni)
1 tablespoon olive oil
1 pound lean ground beef
1 medium onion, finely chopped
2 cloves garlic, minced
1 (28 ounce) can crushed tomatoes
1 (15 ounce) can tomato sauce
1 teaspoon dried Italian seasoning
1/2 teaspoon salt, plus more for pasta water
1/4 teaspoon black pepper
15 ounces ricotta cheese
1 large egg
1/2 cup grated Parmesan cheese, plus more for topping
2 cups shredded mozzarella cheese, divided
1/4 cup fresh basil, chopped, plus more for garnish
Directions
- Prepare the meat sauce. Heat olive oil in a large pot or Dutch oven over medium heat. Add ground beef and cook, breaking it up with a spoon, until browned. Drain any excess fat. Add chopped onion and cook until softened, about 5 minutes. Stir in minced garlic and cook for 1 minute more until fragrant. Cook until no pink remains and it reaches 160°F (71°C).
- Pour in crushed tomatoes, tomato sauce, Italian seasoning, 1/2 teaspoon salt, and black pepper. Bring to a simmer, then reduce heat to low, cover, and let it gently cook while you prepare the shells and filling. This slow simmer helps develop a rich flavor.
- This is the key to perfectly tender, not gummy, shells! Bring a large pot of salted water to a rolling boil. Add the large pasta shells and cook according to package directions, but reduce the cooking time by about 2-3 minutes from al dente. You want them to be very firm, just shy of al dente, as they will finish cooking in the oven and absorb moisture from the sauce. Immediately drain the shells and rinse briefly with cool water to stop the cooking and prevent sticking. Gently lay them out on a baking sheet or clean surface to cool slightly.
- In a medium bowl, combine the ricotta cheese, egg, 1/2 cup Parmesan cheese, and 1 cup of the shredded mozzarella cheese. Mix until well combined.
- Preheat your oven to 375 degrees Fahrenheit (190 degrees Celsius). Spread about 1 cup of the meat sauce evenly in the bottom of a 9×13 inch baking dish.
- Carefully stuff each slightly undercooked pasta shell with a generous spoonful of the ricotta mixture. Arrange the stuffed shells snugly in a single layer over the sauce in the baking dish.
- Spoon the remaining meat sauce evenly over the stuffed shells, making sure to cover them well. This ensures the pasta finishes cooking without drying out and becoming gummy. Sprinkle the remaining 1 cup of shredded mozzarella cheese over the top.
- Cover the baking dish tightly with aluminum foil and bake for 25 minutes. Remove the foil and bake for another 10-15 minutes, or until the cheese is bubbly and lightly golden.
- Remove from oven and let rest for 5-10 minutes before serving. Garnish with fresh chopped basil for a burst of flavor.
Notes
- Reduce pasta cooking time for shells that finish perfectly tender in the oven, never gummy.