Cheesy Chicken Enchiladas: No More Broken Tortillas!
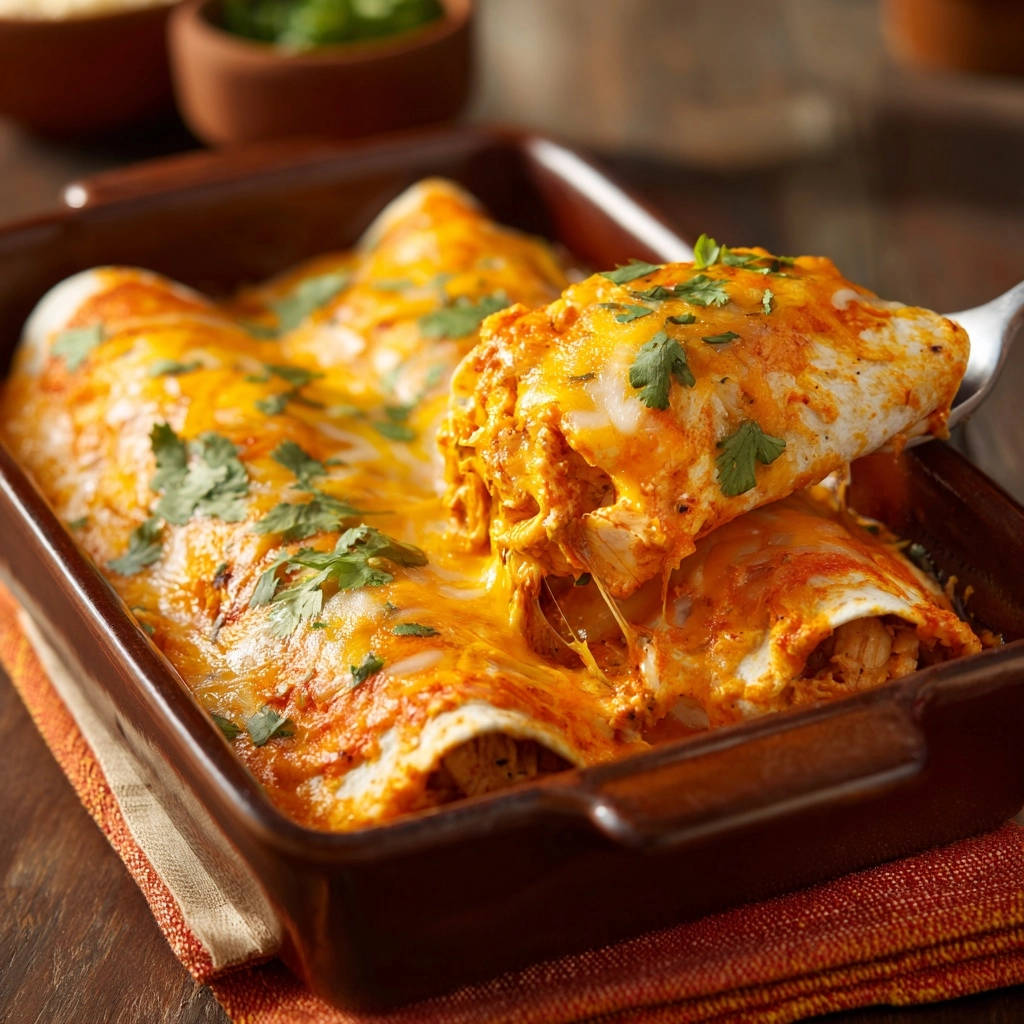
There’s nothing quite as frustrating as attempting to roll perfectly saucy, cheesy enchiladas only to have your tortillas crack and fall apart. I’ve been there countless times, but after perfecting one simple trick, making these incredible Cheesy Chicken Enchiladas became a joyous, stress-free experience. This recipe delivers supremely flavorful, saucy, and cheesy enchiladas every single time, without a single tear in sight!
Why This Cheesy Chicken Enchiladas Recipe Changes Everything
The dreaded cracking tortilla is a common barrier to homemade enchilada bliss. Many recipes overlook the crucial step that transforms stiff tortillas into pliable, rollable perfection. This often leads to messy, disappointing results.
Our method introduces a simple yet powerful technique that guarantees your tortillas will be supple and tear-free. Beyond that, this recipe focuses on a robust, well-seasoned chicken filling and a generous blanket of sauce and cheese, making it the ultimate comfort food.
It’s a true crowd-pleaser and a relatively simple weeknight dinner that feels like a special occasion. Get ready for stress-free enchilada night where deliciousness reigns supreme.
What to Serve with Cheesy Chicken Enchiladas
These enchiladas are rich and filling, so you want sides that add contrast without competing. Here are two solid options.
- Bake a pan of Cheesy Beef Jalapeño Cornbread for a warm, crumbly side with a spicy kick that matches the enchilada filling.
- Balance the cheesy heat with a crisp Ultimate Ground Beef Salad, where the cool lettuce and tomatoes cut through the richness.
The Essential Flavor Builders for Your Enchiladas
Every great dish starts with quality ingredients, and these Cheesy Chicken Enchiladas are no exception. Understanding the role of each component elevates your cooking from good to unforgettable.
The Heart of the Filling: Chicken & Savory Aromatics
Cooked, Shredded Chicken: This is the anchor of our enchiladas. Using pre-cooked chicken, like a rotisserie chicken, makes prep incredibly fast. If cooking chicken yourself, ensure it’s tender enough to shred easily, whether boiled, baked, or pan-fried.
Yellow Onion & Garlic: These aromatic vegetables form the foundational layer of savory flavor. Finely chopping the onion ensures it softens beautifully and blends seamlessly into the filling without large chunks.
Chili Powder, Cumin, Salt, and Black Pepper: This classic blend of spices provides the warm, earthy, and slightly smoky flavor profile essential to Tex-Mex cuisine. Adjust the chili powder to your preferred heat level, or add a pinch of cayenne for extra kick.
Sauce and Cheese: The Cheesy, Saucy Core
Red Enchilada Sauce: This provides the signature saucy goodness and moistness. Using a good quality store-bought red enchilada sauce saves time, but you can also make your own for a deeper, custom flavor. Ensure it’s not too thick or thin.
Shredded Monterey Jack or Cheddar Cheese Blend: The cheese is paramount for that irresistible gooey, bubbly top and creamy texture within. Monterey Jack offers superior meltiness, while cheddar adds a sharper, more pronounced flavor. A blend gives you the best of both worlds.
The Unsung Hero: Choosing and Prepping Your Tortillas
Flour Tortillas (6-inch or 8-inch): Flour tortillas are chosen for their flexibility and ability to roll without breaking, especially after our special prepping step. Choose a size that fits your baking dish and desired portion size.
Vegetable Oil (for tortilla prep): This is the secret weapon against cracking tortillas. A quick dip in warm oil makes the tortillas incredibly pliable, ensuring smooth, effortless rolling. Don’t skip this critical step!
Pantry Staples & Fresh Finishes
Olive Oil: Used for sautéing the aromatics, providing a base for the filling. Any neutral cooking oil works fine here.
Fresh Cilantro, Chopped: A vibrant garnish that adds a burst of freshness and a touch of color to the finished dish. It brightens the rich flavors of the enchiladas.
Your Culinary Journey: Crafting Perfect Cheesy Chicken Enchiladas
Follow these steps closely, and you’ll be enjoying perfectly rolled, incredibly delicious Cheesy Chicken Enchiladas in no time.
Step 1: Preheat and Prep Your Dish
Preheat your oven to 375°F (190°C) to ensure it’s ready when your enchiladas are assembled. Lightly grease a 9×13 inch baking dish; this prevents sticking and helps with even baking.
Step 2: Sautéing for Savory Depth (The Aromatic Base)
Heat 1 tablespoon of olive oil in a large skillet over medium heat. Add your finely chopped yellow onion and cook until it becomes soft and translucent, which usually takes about 5 minutes. This step draws out the onion’s natural sweetness.
Next, add the minced garlic, chili powder, cumin, salt, and pepper to the skillet. Cook for just 1 minute more, stirring constantly, until the spices become wonderfully fragrant. This short toast deepens their flavor. Remove the skillet from the heat to let it cool slightly.
Step 3: Building the Robust Chicken Filling
In a large bowl, combine your cooked, shredded chicken with the aromatic onion and spice mixture from the skillet. Add about 1/2 cup of your red enchilada sauce and 1/2 cup of the shredded cheese to this mixture.
Stir everything together thoroughly until all ingredients are well combined. This ensures every bite of your enchilada is packed with flavor and moisture.
The Game-Changer: Softening Tortillas (The No-Tear Secret!)
Heat 1/4 cup of vegetable oil in a small skillet over medium heat. This is the crucial step for preventing cracked tortillas!
Using tongs, quickly dip each flour tortilla into the warm oil for just a few seconds per side. The goal is to make them softened and pliable, not crispy. This quick dip warms the tortilla and makes its gluten more elastic, allowing for easy rolling.
Once warmed, place the tortillas on a paper towel-lined plate to blot off any excess oil. This prevents your enchiladas from becoming greasy.
Filling & Rolling with Confidence
Lay a softened tortilla flat on your work surface. Spoon about 1/4 to 1/3 cup of the chicken filling down the center, forming a neat line. The exact amount depends on your tortilla size and how full you like them.
Sprinkle a little extra shredded cheese over the filling for added richness. Then, roll the tortilla tightly, tucking in the ends as you go, and place it seam-side down in your prepared baking dish. Repeat this process with the remaining tortillas and filling, arranging them snugly in the dish.
Saucing & Cheesy Topping Generously
Once all your enchiladas are rolled and arranged, pour the remaining red enchilada sauce evenly over the top. Ensure every enchilada is coated for maximum flavor and moisture.
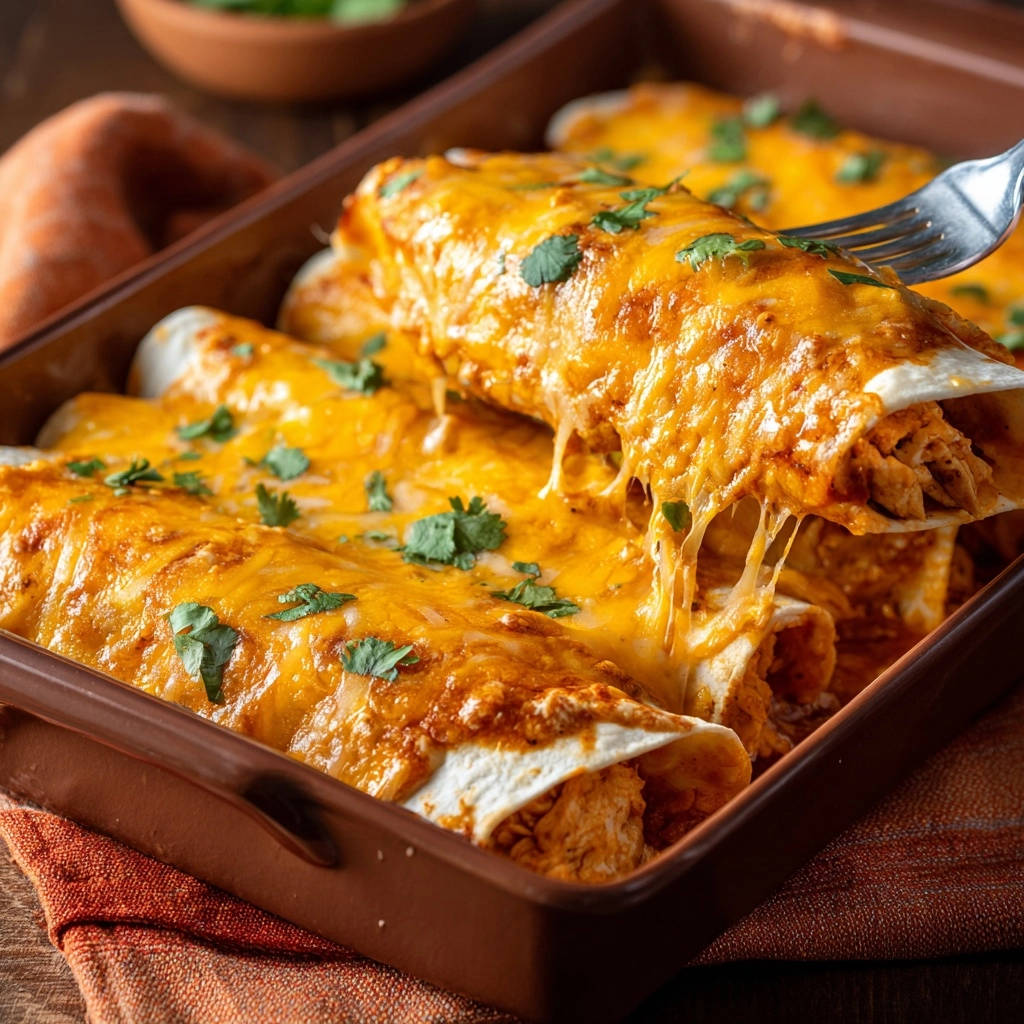
Finally, generously sprinkle the remaining shredded cheese over the sauced enchiladas. This layer will melt into a beautiful, bubbly crust during baking.
Baking to Golden, Bubbly Perfection
Bake the enchiladas in your preheated oven for 20-25 minutes. Look for the cheese to be perfectly melted and bubbly, and the enchiladas heated through to the center.
For an extra golden-brown, slightly crispy cheese topping, you can carefully broil them for 1-2 minutes at the very end. Be sure to watch them continuously to prevent burning, as broilers can be very powerful.
The Final Touch: Resting & Garnish
Once baked, remove the Cheesy Chicken Enchiladas from the oven and let them rest for a few minutes before serving. This allows the sauce and cheese to set slightly, making them easier to scoop and preventing them from falling apart.
Before serving, garnish generously with fresh chopped cilantro. The bright, herbaceous flavor is a perfect counterpoint to the rich, savory enchiladas.
Mastering Your Enchiladas: Expert Tips & Tricks
Elevate your Cheesy Chicken Enchiladas from delicious to absolutely legendary with these pro tips.
Choosing Your Chicken: Best Practices for Shredded Goodness
For convenience, a store-bought rotisserie chicken is a fantastic shortcut. It’s already cooked, seasoned, and tender, making shredding a breeze. If cooking your own, boiling or baking boneless, skinless chicken breasts or thighs yields perfectly shreddable meat.
Aim for about 2 cups of shredded chicken, which is typically one large breast or two smaller ones. Ensure the chicken is cool enough to handle comfortably before shredding.
Enchilada Sauce Varieties: Beyond Store-Bought Red
While red enchilada sauce is traditional, don’t hesitate to experiment! Green enchilada sauce offers a brighter, tangier flavor profile. You could also mix red and green for a “Christmas” style enchilada.
For an even richer flavor, consider a creamy white sauce or even a homemade mole. Just ensure the consistency is suitable for pouring over the enchiladas.
Cheese Blends for Ultimate Melty Goodness (and Flavor)
Monterey Jack and mild cheddar are fantastic for their meltability and classic flavor. For a more authentic kick, try a blend with a little Oaxaca cheese or Asadero.
A touch of pepper jack can add a subtle spice, perfectly complementing the chicken and sauce. Always use freshly shredded cheese if possible, as pre-shredded varieties can contain anti-caking agents that affect melt.
Broiling for that Perfect Golden Crust
If you love a slightly crispy, golden cheese topping, broiling is your friend. Place the baking dish about 6-8 inches from the broiler element.
Keep a close eye on it, as cheese can go from perfectly golden to burnt in seconds. Remove as soon as you achieve your desired color and bubbling.
Making Ahead for Easy Weeknight Meals
You can assemble the entire dish, including pouring the sauce and adding the cheese, up to 24 hours in advance. Cover it tightly with foil and refrigerate.
If you’re prepping this dish ahead, the same make-ahead strategy works beautifully for this cheesy chicken bacon potato casserole.
When ready to bake, let it sit on the counter for 30 minutes to an hour to come closer to room temperature, then bake as directed, adding 5-10 minutes to the baking time if needed.
Freezing Enchiladas for Later Enjoyment
Enchiladas freeze beautifully! Assemble them in a freezer-safe baking dish, cover tightly with plastic wrap and then foil. Freeze for up to 2-3 months.
To bake from frozen, remove foil and plastic, cover with new foil, and bake at 375°F for 45-60 minutes, then uncover and bake for an additional 15-20 minutes until heated through and bubbly. Alternatively, thaw in the fridge overnight before baking.
Common Enchilada Conundrums & How to Solve Them
Even with the best intentions, sometimes things go awry. Here’s how to troubleshoot common issues when making Cheesy Chicken Enchiladas.
Why are my tortillas still cracking even after the oil dip?
The oil dip is key, but timing matters. Ensure the oil is warm enough, but not smoking hot. If the oil is too hot, the tortillas might get too crispy instead of pliable.
Also, don’t leave them in the oil too long; just a few seconds per side is plenty to soften them. If they’re too cold when you start, they might also resist softening; let them come to room temperature first.
My Cheesy Chicken Enchiladas are tasting a bit dry.
Dry enchiladas usually mean not enough sauce or overbaking. Ensure you’re generous with the enchilada sauce, especially over the top of the rolled tortillas.
To prevent overbaking, keep an eye on the oven; once the cheese is bubbly and the filling is heated through, they’re done. You can also loosely tent the dish with foil during baking to trap moisture.
The cheese on top isn’t as bubbly or golden as I’d like.
This is often a quick fix! If your cheese isn’t bubbly and golden, it likely needs more time in the oven or a boost from the broiler. Ensure your oven is fully preheated.
A quick 1-2 minute stint under the broiler (watching very closely) will give you that perfect, golden-brown crust. Also, using a good melting cheese blend helps achieve this texture.
My filling seems bland or lacks depth.
Bland filling can be due to under-seasoning or not fully toasting the spices. Always taste your chicken filling before rolling the enchiladas and adjust salt, pepper, chili powder, and cumin as needed.
A squeeze of lime juice or a dash of hot sauce can brighten the flavors, and don’t forget the power of fresh cilantro for a final pop of taste.
Frequently Asked Questions About Cheesy Chicken Enchiladas
Here are answers to some common questions you might have about making these delicious enchiladas.
Can I use corn tortillas instead of flour for these Cheesy Chicken Enchiladas?
Yes, you can use corn tortillas, but they require a slightly different prep to prevent cracking. Traditionally, corn tortillas for enchiladas are briefly fried in oil or dipped in warm sauce to soften them before filling and rolling. The texture and flavor will be different but equally delicious. For other delightful cheesy chicken dishes, you might enjoy our Ultimate Cheesy Chicken Pockets too!
How long do cooked Cheesy Chicken Enchiladas last in the fridge?
Cooked Cheesy Chicken Enchiladas, properly stored in an airtight container or covered tightly in the baking dish, will last for 3-4 days in the refrigerator. Reheat individual portions in the microwave or oven until heated through.
What are the best side dishes to serve with Cheesy Chicken Enchiladas?
Classic sides like Mexican rice and refried or black beans are perfect. Other great options include a simple green salad, a fresh pico de gallo, or a side of Loaded Fiesta Potatoes for an extra Tex-Mex flair. Don’t forget a dollop of sour cream or a scoop of guacamole!
If you are working with a similar shredded chicken base, you might prefer the texture of this cheesy chicken casserole instead.
Can I make a vegetarian version of this recipe?
Absolutely! This recipe is easily adaptable. Instead of chicken, use a hearty mixture of black beans, corn, bell peppers, and possibly some cooked sweet potato. Ensure your vegetarian filling is well-seasoned to maintain the robust flavor of the dish.
Is it possible to make these Cheesy Chicken Enchiladas spicier?
Definitely! To kick up the heat, you can add a pinch of cayenne pepper to the chicken filling, use a spicier enchilada sauce, or include finely diced jalapeños or serrano peppers (seeds removed for less heat, left in for more) in the filling. Using pepper jack cheese in your blend will also add a nice zing.
Embrace Enchilada Night: A Family Favorite Awaits
There’s a special kind of satisfaction that comes from pulling a bubbling, golden pan of Cheesy Chicken Enchiladas from the oven. With the “no more broken tortillas” secret firmly in your grasp, you’re ready to master this comforting classic.
This recipe isn’t just about food; it’s about creating happy memories and a delicious experience for everyone at your table. Don’t let past tortilla tragedies deter you any longer!
Whip up a batch, share your successes, and perhaps even pass on this game-changing tip to fellow home cooks. Happy cooking!
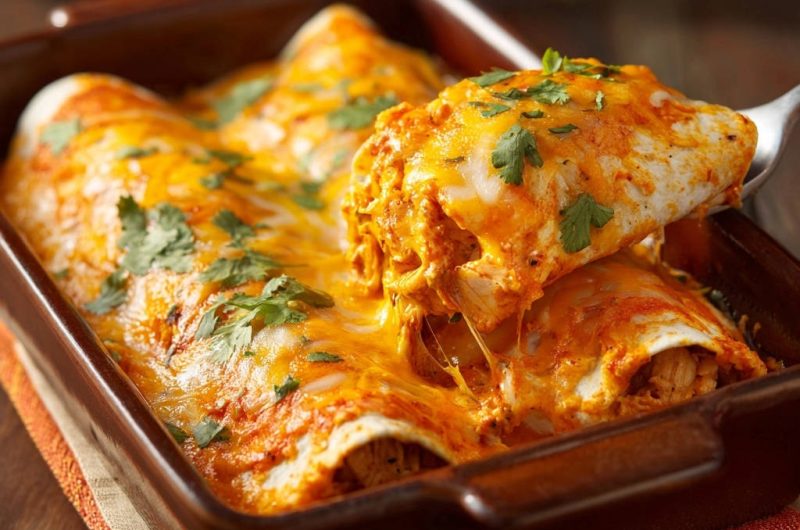
Chicken Enchiladas
Course: Main CourseCuisine: MexicanDifficulty: medium10
enchiladas (4-6 servings)25
minutes25
minutes450
kcal50
minutesTired of torn tortillas? This recipe for Cheesy Chicken Enchiladas reveals the secret to perfectly pliable tortillas every time, ensuring easy rolling and delicious, saucy, cheesy results without the frustration.
Ingredients
2 cups cooked, shredded chicken (from about 1 pound boneless, skinless chicken breast or thighs)
1 tablespoon olive oil
1/2 cup finely chopped yellow onion
2 cloves garlic, minced
1 teaspoon chili powder
1/2 teaspoon ground cumin
1/4 teaspoon salt
1/4 teaspoon black pepper
10-12 flour tortillas (6-inch or 8-inch)
1/4 cup vegetable oil (for tortilla prep)
2 cups red enchilada sauce, divided
2 cups shredded Monterey Jack or cheddar cheese blend, divided
Fresh cilantro, chopped, for garnish
Directions
- Preheat oven to 375°F (190°C). Lightly grease a 9×13 inch baking dish.
- Prepare the filling: Heat 1 tablespoon olive oil in a large skillet over medium heat. Add onion and cook until softened, about 5 minutes. Add minced garlic, chili powder, cumin, salt, and pepper. Cook for 1 minute more until fragrant. Remove from heat.
- In a large bowl, combine the shredded chicken with the cooked onion mixture. Add about 1/2 cup of the enchilada sauce and 1/2 cup of the shredded cheese to the chicken mixture. Stir well to combine.
- The Secret to No Cracking Tortillas: Heat the 1/4 cup vegetable oil in a small skillet over medium heat. One by one, quickly dip each tortilla into the warm oil for just a few seconds per side using tongs, until softened and pliable. Do not make them crispy. This step makes them flexible and less prone to tearing when rolled. Place the warmed tortillas on a paper towel lined plate to blot excess oil before filling.
- Lay a softened tortilla flat. Spoon about 1/4 to 1/3 cup of the chicken filling down the center. Sprinkle with a little extra cheese. Roll tightly and place seam-side down in the prepared baking dish. Repeat with remaining tortillas and filling.
- Pour the remaining enchilada sauce evenly over the rolled enchiladas.
- Top generously with the remaining shredded cheese.
- Bake for 20-25 minutes, or until the cheese is melted and bubbly and the enchiladas are heated through. If desired, broil for 1-2 minutes at the end for extra browning on the cheese, watching carefully to prevent burning.
- Remove from oven and let rest for a few minutes before serving. Garnish with fresh chopped cilantro.
Notes
- Includes a crucial tip for perfectly pliable tortillas, preventing cracks and tears during rolling.