Sweet Crumb Topped Buns: Unlocking Unbelievably Fluffy Goodness
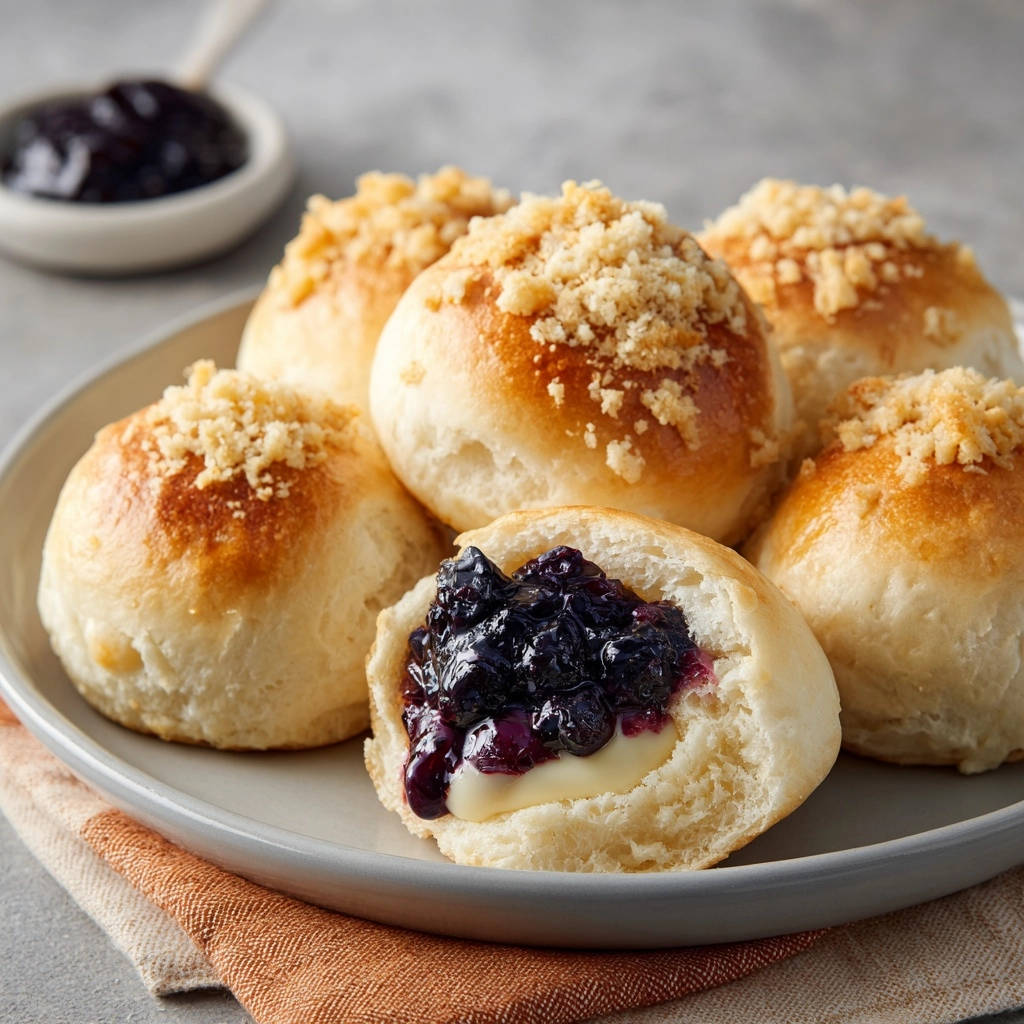
For years, I chased that elusive bakery-perfect fluffy bun, often ending up with disappointing, dense results. Then, I cracked the code to truly light and airy yeast dough. Now, every batch of my Sweet Crumb Topped Buns emerges unbelievably soft, crowned with a delightful, buttery crumb, promising a melt-in-your-mouth experience that feels straight from a professional patisserie, right in your kitchen.
Why These Sweet Crumb Topped Buns Will Be Your New Favorite Bake
The “Never Dense” Promise: Achieving Unrivaled Softness
This recipe meticulously guides you through the process of developing gluten and achieving the perfect proof. The result is a bun that’s consistently light, airy, and never disappointingly dense, even a day later.
A Simple Path to Bakery-Quality Results
Don’t be intimidated by yeast baking; this recipe breaks down each step into simple, actionable insights. You’ll create beautiful, professional-looking buns with confidence, impressing everyone who tastes them.
More Than Just a Bun: A Symphony of Flavors and Textures
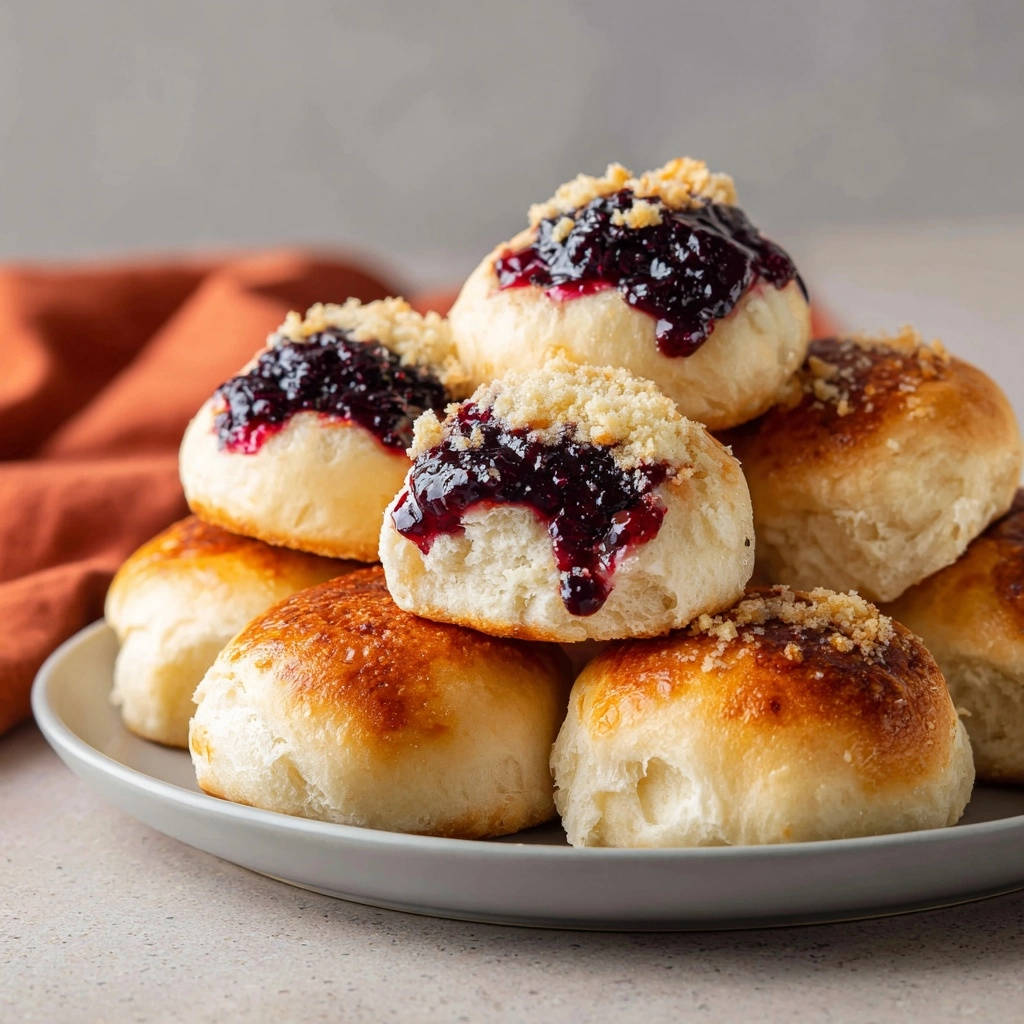
Imagine the contrast: a tender, slightly sweet bun, topped with a buttery, crisp crumb, and then filled with creamy butter or tangy fruit jam. These Sweet Crumb Topped Buns offer a multi-textured delight in every bite.
Gather Your Essentials: Key Ingredients for Perfect Sweet Crumb Topped Buns
For the Light-as-Air Dough Base
Each component plays a vital role in crafting the unbelievably fluffy texture.
Warm Milk (105-115°F): This is crucial for activating the yeast. Too hot will kill it, too cold won’t awaken it.
Active Dry Yeast: The leavening agent responsible for the bun’s incredible rise and airy structure. Ensure it’s fresh and active.
Granulated Sugar: Not just for sweetness, it also feeds the yeast, encouraging a vigorous rise and contributing to a tender crumb.
Large Egg, Room Temperature: Adds richness, moisture, and helps create a soft, golden bun. Room temperature ensures it incorporates smoothly.
Unsalted Butter, Melted and Cooled: Provides richness and keeps the buns moist. Using unsalted butter allows you to control the overall salt content.
Salt: Balances the sweetness, enhances flavor, and regulates yeast activity, preventing over-proofing.
All-Purpose Flour: The primary structural component. Using the right amount is key to avoiding dense buns; start with 3 cups and add more sparingly.
Crafting the Signature Crumb Topping
This simple combination creates that irresistible crispy, sweet counterpoint.
All-Purpose Flour & Granulated Sugar: Form the dry base for the crumb, providing structure and sweetness.
Unsalted Butter, Cold and Cubed: The secret to a perfect crumb. Cold butter prevents it from melting too quickly, ensuring distinct, crispy clusters rather than a greasy topping.
Optional Fillings to Elevate Your Bake
These fillings transform a simple bun into a decadent treat.
Softened Butter or Cream Cheese: Adds a rich, creamy element, enhancing the bun’s moistness and flavor.
Blueberry Jam or Fruit Compote: Provides a burst of fruity sweetness and a delightful tangy contrast to the soft bun and crumb topping.
Essential Tools for Baking Success
Having the right equipment makes the baking process smoother and ensures consistent results for your Sweet Crumb Topped Buns.
Large Mixing Bowls: Essential for activating yeast, preparing dough, and the crucial first rise.
Whisk & Wooden Spoon: For combining ingredients and initially mixing the dough.
Measuring Cups and Spoons: Accuracy in baking ensures the right balance of ingredients for perfect texture.
Parchment Paper: Prevents sticking and makes cleanup a breeze for your baking sheet.
Baking Sheet: The surface where your beautiful buns will rise and bake to golden perfection.
Wire Rack: Allows air circulation for cooling the buns, preventing them from becoming soggy on the bottom.
Pastry Blender or Fingertips: Ideal for cutting cold butter into the crumb topping mixture efficiently.
Your Step-by-Step Guide to Fluffy Crumb Topped Buns Perfection
Preparing the Dough for Optimal Softness
- Activate the Yeast:
In a large bowl, combine warm milk and 1 tablespoon of sugar, then sprinkle the active dry yeast over the top. Let it sit for 5-10 minutes until it becomes foamy. This crucial step confirms your yeast is alive and ready to make your buns beautifully fluffy.
- Prepare the Dough:
Add the remaining sugar, room temperature egg, slightly cooled melted butter, and salt to the yeast mixture. Whisk everything well to combine thoroughly. Gradually add 3 cups of the all-purpose flour, mixing with a wooden spoon until a shaggy dough forms.
- Knead for Fluffiness:
Turn the dough onto a lightly floured surface. Knead for 8-10 minutes, incorporating more flour a tablespoon at a time only if the dough is too sticky. Be careful not to add too much flour, as this can lead to dense buns.
The goal is a smooth, elastic, and slightly tacky dough. Proper kneading is essential for developing the gluten, which traps air and creates that unbelievably fluffy texture. A good indicator of readiness is the “windowpane test”: you should be able to stretch a small piece of dough thin enough to see light through it without tearing.
The Magic of Proofing: Ensuring a Perfect Rise
- First Rise (Proofing):
Lightly grease a large bowl, then place the kneaded dough in it, turning once to coat. Cover the bowl tightly with plastic wrap or a clean kitchen towel. Place it in a warm, draft-free spot and let rise for 1 to 1.5 hours, or until the dough has visibly doubled in size. This crucial first rise allows the yeast to work its magic, creating essential air pockets for the desired fluffy texture.
- Form the Buns:
Once the dough has doubled, gently punch it down to release the accumulated air. Divide the dough into 12 equal pieces. Roll each piece into a smooth, round ball. This precise shaping ensures even baking and a consistent, soft crumb in every bun.
- Second Rise (Proofing):
Arrange the shaped buns on a parchment-lined baking sheet, ensuring there’s ample space between them for expansion. Cover them loosely with plastic wrap or a kitchen towel. Let them rise again in a warm place for another 30-45 minutes, or until they are noticeably puffy and light. When gently pressed with a finger, the indentation should slowly spring back, indicating they are ready. This second rise is vital for achieving a super soft, airy final product.
Assembling and Baking Your Sweet Masterpiece
- Prepare Crumb Topping:
While the buns are on their second rise, prepare the irresistible crumb topping. In a small bowl, combine the flour and sugar. Add the cold, cubed butter. Use your fingertips or a pastry blender to cut the butter into the dry ingredients until the mixture resembles coarse crumbs. This creates the signature crispy topping.
- Bake the Buns:
Preheat your oven to 375°F (190°C). Gently brush the tops of the risen buns with the beaten egg wash; this helps achieve a beautiful golden crust and ensures the crumb topping adheres perfectly. Generously sprinkle the prepared crumb topping over each bun, covering them thoroughly.
- Bake until Golden:
Bake for 15-20 minutes, or until the tops are beautifully golden brown. It’s important to avoid over-baking, as this can easily dry out your perfectly fluffy buns.
- Cool and Serve:
Once baked, remove the buns from the oven and let them cool slightly on a wire rack. When they are cool enough to handle, carefully slice each bun in half. Spread generously with softened butter or cream cheese and a dollop of your favorite blueberry jam or fruit compote. Enjoy your guaranteed fluffy, irresistible buns!
Baking Wisdom: Pro Tips for Sweet Crumb Topped Buns Success
These expert tips will ensure your Sweet Crumb Topped Buns are flawless every time.
Mastering Dough Consistency: The Key to Fluffiness
Resist the urge to add too much flour during kneading, even if the dough seems sticky. A slightly tacky dough is exactly what you want for maximum softness. The “windowpane test” is your ultimate guide, ensuring optimal gluten development.
Ensuring a Perfect Rise Every Time
Yeast loves warmth! Find a consistently warm, draft-free spot. If your kitchen is cool, you can create a proofing environment by warming your oven to its lowest setting (or just turning the light on for 10-15 minutes), then turning it off before placing the covered dough inside.
Secrets to a Golden, Crispy Crumb
Always use cold butter for your crumb topping. This ensures the butter melts slowly during baking, creating distinct, crispy clusters rather than a flat, greasy layer. The egg wash acts as a perfect adhesive, helping the crumb stick securely to the buns for a beautiful finish.
Preventing Dryness: Knowing When Your Buns Are Done
The biggest culprit for dry buns is over-baking. Keep a close eye on them towards the end of the baking time. They should be golden brown on top, and a quick check with a thermometer (if you have one) should show an internal temperature of about 200-205°F (93-96°C).
Troubleshooting Your Bake: Common Buns Blunders & Fixes
Why Are My Buns Dense or Heavy?
This is often due to adding too much flour during kneading, which stifles the dough’s ability to rise. It could also be from under-kneading, preventing proper gluten development, or using inactive yeast. Always check yeast activity first.
My Crumb Topping Isn’t Sticking!
The most common reason is insufficient egg wash, or the bun surface was too dry when applied. Ensure a thin, even coat of egg wash over the entire bun top to give the crumb something to adhere to.
The Buns Look Good But Are Dry Inside.
The primary culprit here is almost always over-baking. Even a few extra minutes in the oven can transform perfectly fluffy buns into dry ones. Bake just until golden brown and follow the suggested bake time closely.
My Dough Isn’t Rising. What Went Wrong?
This typically points to an issue with the yeast. It could be expired yeast, water that was too hot (killing the yeast) or too cold (inhibiting activation), or a proofing environment that is too cold. Always ensure your water temperature is within the specified range (105-115°F).
Serving & Storing Your Irresistible Sweet Crumb Topped Buns
Creative Serving Suggestions Beyond Butter and Jam
While butter and jam are classics, don’t stop there! Try Nutella or a rich chocolate spread for a decadent treat. Lemon curd or a berry compote offers a vibrant, tangy twist. For a truly unique experience, consider lightly toasting and topping with fresh fruit and a dollop of whipped cream, or explore other delicious crumb-topped creations like these. These buns are also wonderful served alongside coffee or tea as a delightful breakfast or afternoon snack.
For a sweeter twist on your baking, try this glazed lemon blueberry loaf that pairs bright citrus with juicy berries.
Storing for Lasting Freshness
Once completely cooled, store your Sweet Crumb Topped Buns in an airtight container at room temperature for up to 2-3 days. For longer storage, refrigeration can extend their freshness, though they may lose a little softness. Reheat briefly in the microwave or oven for a “fresh from the oven” feel.
Make-Ahead Tips for Busy Bakers
You can prepare the dough ahead of time! After the first rise, punch down the dough, then cover and refrigerate overnight (up to 24 hours). Let it come to room temperature for about 30 minutes before shaping and proceeding with the second rise. For another fantastic make-ahead option that uses similar dough techniques, try these irresistible Cinnamon Sugar Pull Apart Rolls.
Your Top Questions About Sweet Crumb Topped Buns, Answered!
Can I Use Different Flours? (e.g., Whole Wheat, Gluten-Free)
Substituting flours like whole wheat or gluten-free blends will significantly alter the texture and require adjustments in liquid. For your first attempt, stick to all-purpose flour to ensure the promised fluffiness. Whole wheat will yield a denser bun, and gluten-free flours require specific binders and ratios.
What if I Don’t Have Active Dry Yeast?
You can substitute instant yeast directly, typically in the same quantity. Instant yeast doesn’t require activation; you can mix it directly with the dry ingredients, then add the warm liquid. However, activating active dry yeast first confirms its potency.
Can I Make the Dough in a Stand Mixer?
Absolutely! A stand mixer with a dough hook makes kneading much easier. After activating the yeast, add all remaining dough ingredients to the mixer bowl. Knead on low speed for 6-8 minutes, checking the consistency. The dough should be smooth and pull away from the sides of the bowl.
Can I Freeze the Dough or Baked Buns?
Yes to both! To freeze raw dough: After the first rise, punch down, divide, and shape the buns. Place them on a baking sheet and freeze until solid, then transfer to a freezer bag for up to 2-3 weeks. Thaw overnight in the fridge, then let rise at room temperature before baking. Baked buns can be frozen in an airtight container for up to 1 month; thaw at room temperature and warm before serving.
Are There Savory Variations for These Buns?
While this recipe highlights the sweet aspect, the base bun recipe is versatile! You can omit the sugar from the dough or reduce it significantly, then top with herbs, cheese, or even garlic butter for savory rolls. The crumb topping would be replaced with a savory alternative.
Your Journey to Baking Bliss Starts Here!
Making your own Sweet Crumb Topped Buns is a truly rewarding experience, transforming simple ingredients into something unbelievably delicious. The warmth, the aroma, and that first bite of fluffy dough with a crispy, sweet crumb is pure culinary joy. Don’t hesitate to dive in and create these incredible treats for your family and friends.
If you enjoy working with this dough, the same techniques translate beautifully to these golden skillet dinner rolls.
Once you master these, remember to explore other delightful recipes on our site. Happy baking!
What to Serve Next
These sweet crumb topped buns are a treat on their own, but if you want more baked goods with that same soft, fluffy texture, try these next.
- For a similar pillowy texture with a cinnamon sugar coating, these Fluffy Cinnamon Sugar Donuts are just as light and skip the greasy aftertaste.
- If you loved the tender crumb of the buns, these Glazed Donut Holes deliver that same golden, airy bite in a smaller form.
Buns
Course: BreadCuisine: AmericanDifficulty: medium12
buns50
minutes20
minutes150
kcal180
minutesEver longed for truly light and airy homemade buns? This recipe unlocks the secret to unbelievably fluffy, melt-in-your-mouth sweet buns with a delightful crumb topping. Simple to achieve, irresistible to eat!
Ingredients
For the Buns:
1 cup warm milk (about 105-115°F)
2 and 1/4 teaspoons active dry yeast (one standard packet)
1/4 cup granulated sugar
1 large egg, at room temperature
1/4 cup unsalted butter, melted and cooled slightly
1 teaspoon salt
3 to 3 and 1/2 cups all-purpose flour, divided
For the Crumb Topping:
1/2 cup all-purpose flour
1/4 cup granulated sugar
1/4 cup unsalted butter, cold and cut into small pieces
For Assembly:
1 tablespoon melted unsalted butter (for brushing buns)
1 large egg, beaten (for egg wash)
1/2 cup softened butter or cream cheese, for filling
1/2 cup blueberry jam or fruit compote, for filling
Directions
- Activate the Yeast: In a large bowl, combine the warm milk and 1 tablespoon of the granulated sugar. Sprinkle the active dry yeast over the top. Let it sit for 5-10 minutes until foamy. This shows your yeast is alive and ready to make your buns beautifully fluffy!
- Prepare the Dough: Add the remaining granulated sugar, egg, melted butter, and salt to the yeast mixture. Whisk well to combine. Gradually add 3 cups of the flour, mixing with a wooden spoon until a shaggy dough forms.
- Knead for Fluffiness: Turn the dough out onto a lightly floured surface. Knead for 8-10 minutes, adding more flour a tablespoon at a time if the dough is too sticky, but be careful not to add too much flour. You want the dough to be smooth, elastic, and slightly tacky. Proper kneading is essential for developing the gluten that traps air and makes the buns light and fluffy. A good test: it should pass the “windowpane test” (you can stretch a small piece thin enough to see light through without tearing).
- First Rise (Proofing): Lightly grease a large bowl. Place the dough in the bowl, turning once to coat. Cover the bowl tightly with plastic wrap or a clean kitchen towel. Place in a warm, draft-free spot and let rise for 1 to 1 and a half hours, or until the dough has visibly doubled in size. This crucial first rise allows the yeast to work its magic and create air pockets for that desired fluffy texture.
- Form the Buns: Gently punch down the risen dough to release the air. Divide the dough into 12 equal pieces. Roll each piece into a smooth, round ball. This shaping ensures even baking and a consistent crumb.
- Second Rise (Proofing): Arrange the shaped buns on a parchment-lined baking sheet, leaving some space between them. Cover loosely with plastic wrap or a kitchen towel. Let them rise again in a warm place for another 30-45 minutes, or until noticeably puffy and light. When gently pressed with a finger, the indentation should slowly spring back. This second rise is vital for a super soft, airy final product.
- Prepare Crumb Topping: While the buns are on their second rise, prepare the crumb topping. In a small bowl, combine the flour and sugar. Add the cold, cubed butter. Use your fingertips or a pastry blender to cut the butter into the dry ingredients until the mixture resembles coarse crumbs.
- Bake the Buns: Preheat your oven to 375°F (190°C). Gently brush the tops of the risen buns with the beaten egg wash. This helps achieve a beautiful golden crust and helps the crumb topping stick. Sprinkle the prepared crumb topping generously over each bun.
- Bake until Golden: Bake for 15-20 minutes, or until the tops are golden brown. Avoid over-baking, as this can dry out your perfectly fluffy buns.
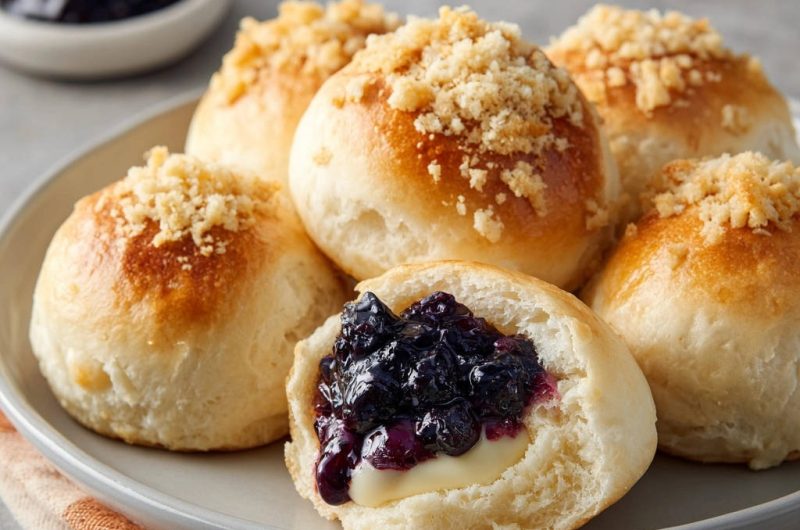
- Cool and Serve: Let the buns cool slightly on a wire rack. Once cooled enough to handle, carefully slice each bun in half. Spread with softened butter or cream cheese and a generous dollop of blueberry jam or compote. Enjoy your guaranteed fluffy, irresistible buns!
Notes
- Essential tips for perfectly fluffy buns included: windowpane test, proper rising, and gentle handling.