Ultimate Cheesy Chicken Pockets: Crispy Crust, Easy Dinner!
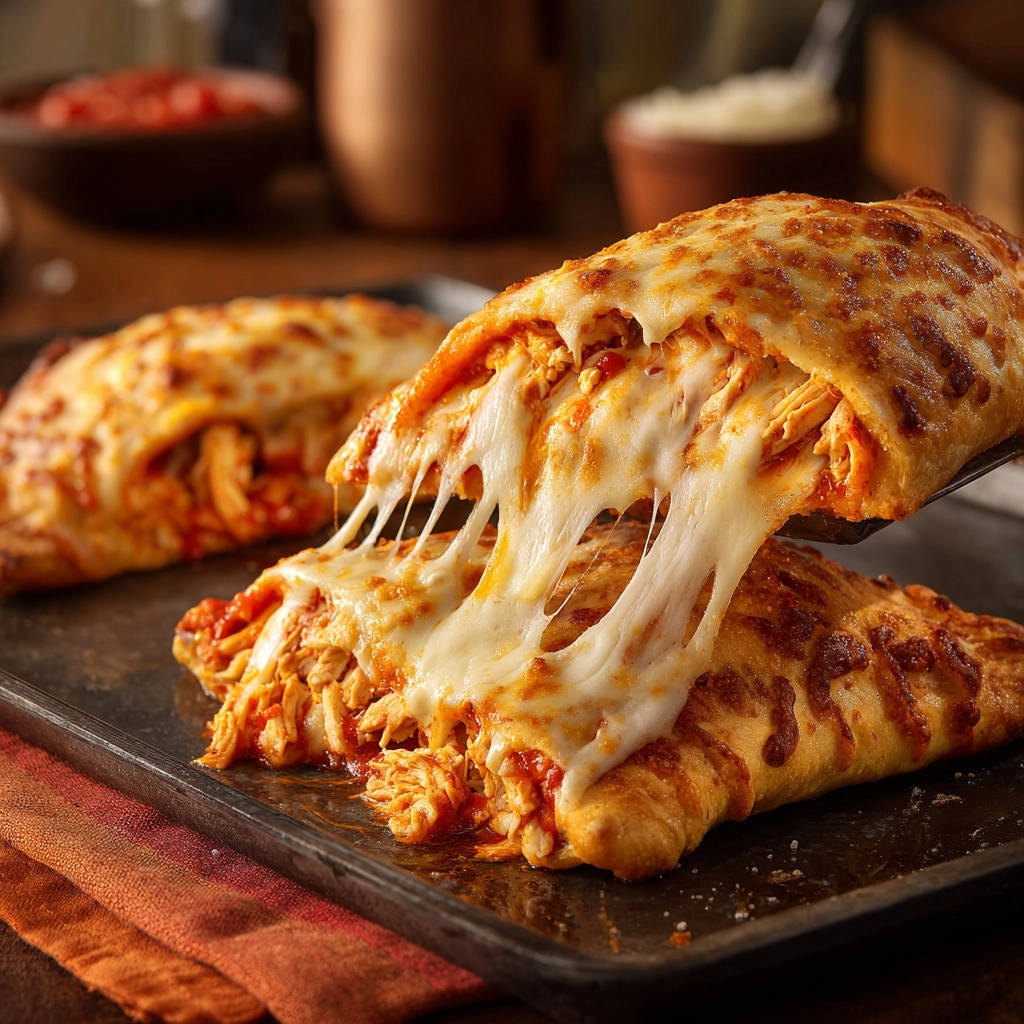
You know that familiar frustration when your homemade cheesy pockets look perfect on top, but the bottom is disappointingly soft or undercooked? I’ve been there! But I’m here to share the simple, game-changing trick I use to get a perfectly golden, undeniably crispy crust on these Ultimate Cheesy Chicken Pockets every single time.
Get ready for a weeknight meal that’s a total winner, from its savory filling to that coveted golden bottom, perfect for busy families craving comfort food without the fuss.
The Secret to Crispy Ultimate Cheesy Chicken Pockets: Your New Family Favorite
These Ultimate Cheesy Chicken Pockets aren’t just easy; they’re engineered for success. They address common baking frustrations head-on, ensuring a delightful texture and flavor in every bite.
No More Soggy Bottoms: The Hot Sheet Pan Advantage
The core secret to these incredibly crispy Ultimate Cheesy Chicken Pockets lies in preheating your baking sheet. Placing the dough on a scorching hot surface immediately kick-starts the browning process.
This rapid heat transfer prevents the dreaded soggy bottom, ensuring a uniformly crisp crust that’s a joy to bite into.
Effortless Weeknight Meals: Simple Ingredients, Big Flavor
This recipe shines in its simplicity, utilizing readily available ingredients you likely already have on hand. It delivers robust, comforting flavors with minimal effort, making it ideal for busy weeknights.
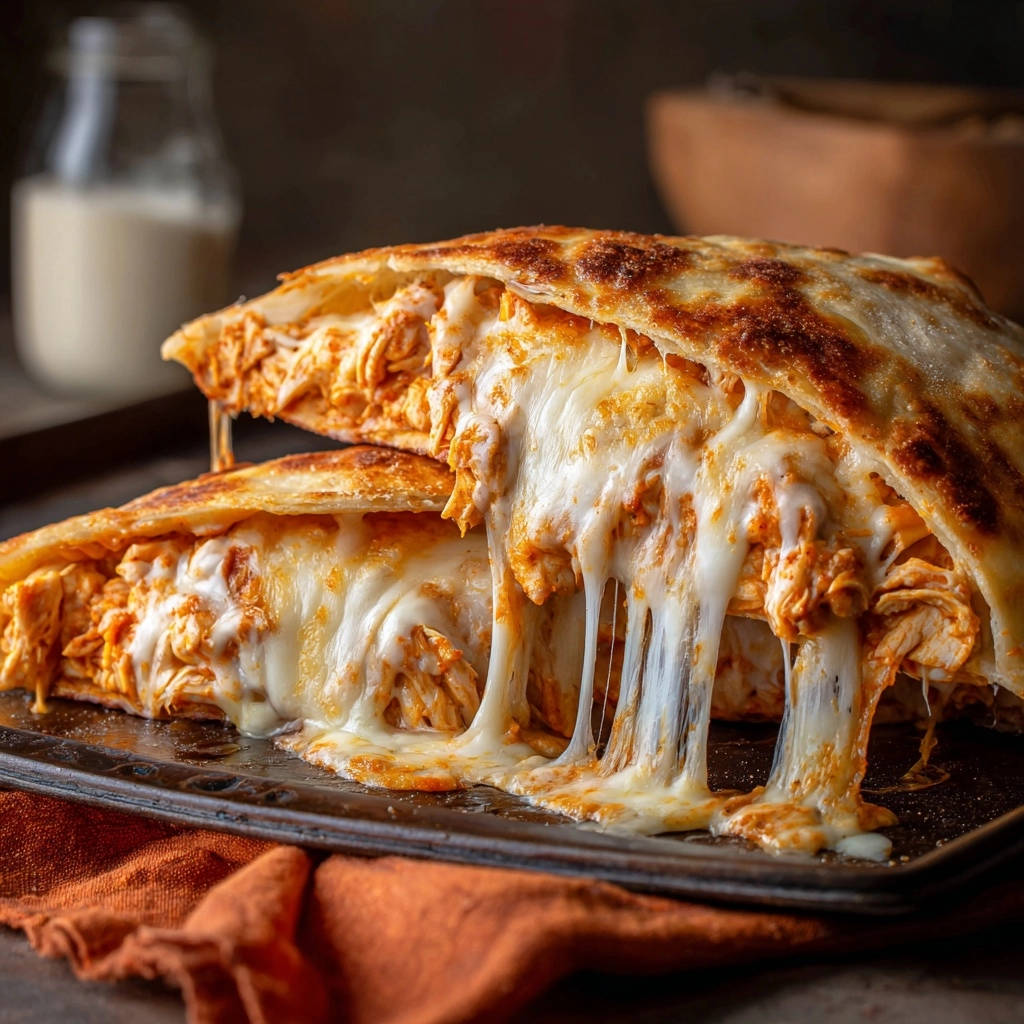
You can have these delicious pockets assembled and baking in no time, proving that impressive meals don’t have to be complicated.
Customizable Comfort: Make Them Your Own
Beyond their ease and crispiness, these Ultimate Cheesy Chicken Pockets offer incredible versatility. The basic framework is a canvas for your culinary creativity.
You can easily adapt the filling to suit different tastes or ingredients you have available, making them truly your own family staple.
Gathering Your Goodies: Essential Ultimate Cheesy Chicken Pockets Components
Choosing the right ingredients sets the stage for a truly exceptional meal. Here’s a closer look at what you’ll need to create these irresistible pockets.
The Hearty Filling: Chicken & Flavor Boosters
Cooked Shredded Chicken: Pre-cooked chicken is your time-saver here. You can use leftover roasted chicken, rotisserie chicken, or boil and shred chicken breasts specifically for this recipe.
Marinara or Pizza Sauce: A good quality sauce provides the essential moisture and classic pizza flavor. Choose one you genuinely enjoy, as its taste will define the filling.
Dried Oregano & Garlic Powder: These optional additions significantly boost the savory profile. They bring a subtle Italian herb and aromatic note that complements the chicken and cheese beautifully.
That Melty Goodness: Choosing Your Cheese
Shredded Mozzarella Cheese: Mozzarella is the star for its incredible melt and mild, creamy flavor. Opt for low-moisture, part-skim shredded mozzarella for the best melt and least water release.
While mozzarella is key, feel free to experiment with a blend of cheeses like provolone or a touch of Parmesan for added depth.
Crust Foundation: Dough Options Explained
Refrigerated Pizza Dough or Crescent Roll Dough Sheets: Both options provide a convenient and delicious crust. Pizza dough yields a chewier, more substantial bread-like pocket.
Crescent roll dough, on the other hand, bakes up light, flaky, and buttery, offering a softer, pastry-like experience. Choose based on your texture preference.
The Golden Touch: Oils & Toppings
Olive Oil: A light brush of olive oil on top of the pockets before baking helps achieve that beautiful golden-brown color and a slightly crisper finish on the top crust.
Extra Mozzarella for Topping: A final sprinkle of cheese adds extra visual appeal and creates a bubbly, browned cheesy crown that’s incredibly inviting.
Step-by-Step Success: Building Your Ultimate Cheesy Chicken Pockets
Follow these precise steps to ensure your Ultimate Cheesy Chicken Pockets turn out perfectly, with that desirable crispy crust every time.
- Prepping for Perfection: Heat the Oven and Pan
Preheat your oven to 425°F (220°C). This high temperature ensures a quick, crisp bake.
Crucially, place a large baking sheet into the oven as it preheats. This hot surface is the secret to a golden, non-soggy bottom crust.
- Mixing the Magic: Assemble the Filling
In a medium bowl, combine the cooked shredded chicken, marinara or pizza sauce, 1½ cups of shredded mozzarella cheese, and the optional oregano and garlic powder.
Mix thoroughly until all ingredients are well-coated and evenly distributed. This ensures every bite is flavorful.
- Dough Dynamics: Unroll and Prepare Your Base
On a lightly floured surface, carefully unroll your chosen dough. If using crescent roll dough, press the seams together firmly to create a single, solid rectangle without gaps.
- Divide and Conquer: Portioning the Dough
Divide the dough into 2 or 4 equal portions, depending on your desired pocket size. For larger, meal-sized pockets, opt for 2; for smaller, snack-friendly ones, go for 4.
- Spoon and Spread: Filling Your Pockets
Spoon an even amount of the chicken mixture onto one half of each dough portion. Remember to leave a small, clear border around the edges – this is essential for proper sealing.
- Sealing the Deal: Forming Your Pockets
Carefully fold the other half of the dough over the filling to create a pocket shape. Press down firmly around the edges to seal completely, then use the tines of a fork to crimp the edges for extra security and a decorative touch.
- The Golden Touch: Prepare for Baking
Carefully remove the preheated baking sheet from the oven (use oven mitts!). Lightly brush the top of each pocket with olive oil.
Sprinkle a little extra mozzarella cheese on top of each pocket for a beautiful golden, bubbly crust and added cheesy goodness.
- Baking Brilliance: Transfer and Bake
Gently transfer the assembled pockets to the hot baking sheet, ensuring there’s some space between them for even cooking.
Bake for 15 to 20 minutes, or until the crust is beautifully golden brown and the cheese filling is bubbly and melted.
- The Grand Reveal: Rest Before Serving
Once baked, let the Ultimate Cheesy Chicken Pockets cool on the baking sheet for a few minutes before serving. This allows the filling to set and prevents burns.
Unlock Pro-Level Ultimate Cheesy Chicken Pockets: Chef’s Secrets
Elevate your Ultimate Cheesy Chicken Pockets from good to truly exceptional with these expert tips and tricks.
The Preheated Pan: Non-Negotiable for Crispiness. This is the absolute game-changer for a non-soggy bottom crust. Don’t skip it! The initial high heat immediately sets the dough.
Don’t Overfill: A Common Pitfall Avoided. While tempting, too much filling can make pockets hard to seal and prone to bursting during baking. Stick to the recommended amount for best results.
Sealing for Success: Beyond the Fork Crimp. For extra security, you can slightly moisten the edges of the dough with a little water before pressing them together. This creates a stronger seal, especially important for saucy fillings.
Golden Brown is Key: Knowing When They’re Done. Don’t pull them out too early! The deep golden-brown color on the crust indicates proper cooking and ensures flakiness and flavor. Ovens vary, so adjust baking time as needed.
Cooling Patience: A Must for Structure. Letting the pockets cool for a few minutes allows the hot filling to set, preventing spills and making them easier to handle and eat.
Solving Common Ultimate Cheesy Chicken Pockets Conundrums
Encountering issues? Here are solutions to common challenges when making Ultimate Cheesy Chicken Pockets, ensuring your success every time.
Why Are My Pockets Soggy on the Bottom?
The most common culprit is not preheating the baking sheet with the oven. The direct, immediate heat from a hot pan is crucial for achieving that crispy bottom crust.
My Filling Leaked Out!
This usually happens due to inadequate sealing or overfilling. Ensure you press the edges firmly, use a fork to crimp, and don’t overpack the pockets with filling.
The Dough Is Too Sticky/Hard to Work With
If the dough is too sticky, lightly flour your surface and hands. If it’s too stiff, it might be too cold; let it sit at room temperature for a few minutes. Avoid overworking the dough, as it can make it tough.
Pockets Aren’t Golden Enough
Your oven temperature might be slightly off, or they need more time. Ensure your oven is accurately calibrated, and extend baking time until they reach a deep golden brown, especially on the edges.
Your Kitchen Arsenal: Tools for Ultimate Cheesy Chicken Pockets Success
Having the right tools makes the process of creating these delicious pockets smooth and efficient.
Large Baking Sheet: Essential for baking, especially the one you’ll preheat for crispy bottoms.
Mixing Bowls: For combining your delicious chicken filling.
Measuring Cups and Spoons: For accurate ingredient proportions.
Rolling Pin (Optional): If you need to slightly roll out or smooth your dough.
Fork: Crucial for crimping and sealing the edges.
Pastry Brush: For evenly applying that olive oil sheen to the tops of your pockets.
Oven Mitts: Absolutely necessary for handling the hot baking sheet!
Enjoying & Storing Your Ultimate Cheesy Chicken Pockets
Once your Ultimate Cheesy Chicken Pockets are baked to perfection, here’s how to best enjoy and store them.
Serving Suggestions: Perfect Pairings
These cheesy chicken pockets are a complete meal on their own, offering satisfying protein and delicious flavor. For a more balanced meal, they pair wonderfully with a fresh green salad tossed in a light vinaigrette.
If you love the cheesy filling in these pockets, try this recipe for asparagus and cheese stuffed chicken next.
A side of steamed vegetables, like broccoli or green beans, or a warm bowl of tomato soup also makes for a cozy and complete dinner.
If you like the cheesy filling in these pockets, try this stuffed chicken with asparagus and cheese for a similar creamy bite.
Storing Leftovers: Keeping Them Fresh
Leftover Ultimate Cheesy Chicken Pockets can be stored in an airtight container in the refrigerator for up to 3-4 days. Ensure they are completely cooled before storing to prevent condensation, which can make the crust soggy.
What to Serve with Cheesy Chicken Pockets
These crispy chicken pockets are rich and filling, so you want sides that cut through the cheese with acidity and crunch.
- A Chopped Antipasto Salad brings a sharp, vinegary bite and crisp vegetables that balance the warm, gooey chicken pockets.
- For extra crunch that stays firm, these Crispy Pepperoni & Cheese Bites share the same cheesy appeal but add a salty, crispy contrast on the side.
Make-Ahead Magic: Prep for Later
For ultimate convenience, you can prepare the chicken filling mixture a day in advance. Store it in an airtight container in the refrigerator until you’re ready to assemble and bake.
This simple step makes assembling the Ultimate Cheesy Chicken Pockets even quicker on a busy weeknight, saving you precious time.
Ultimate Cheesy Chicken Pockets FAQs: Your Questions Answered
Here are answers to some frequently asked questions about making the best Ultimate Cheesy Chicken Pockets.
Can I Use Other Meats or Fillings?
Absolutely! The beauty of these pockets is their adaptability. You could easily swap the chicken for cooked ground beef or turkey, or even a vegetarian filling like sautéed mushrooms and spinach. Adjust seasonings to match your chosen filling for a delightful variation.
Is There a Gluten-Free Option?
Yes, you can use a gluten-free refrigerated pizza dough for this recipe. Be aware that gluten-free doughs can sometimes be a bit more delicate and may require gentle handling. Always follow the specific baking instructions for your chosen gluten-free dough if they differ.
Can I Freeze Ultimate Cheesy Chicken Pockets?
Yes, these pockets freeze exceptionally well! You can freeze them after baking (once cooled completely) or even before baking. If freezing raw, place them on a parchment-lined tray until solid, then transfer to a freezer-safe bag.
To reheat cooked pockets, thaw first and bake until warm. If baking from frozen raw, add an extra 10-15 minutes to the baking time, or until golden brown and cooked through.
What’s the Best Dough to Use? Pizza Dough vs. Crescent Rolls?
Both work wonderfully, but offer slightly different results. Pizza dough will give you a chewier, more substantial, bread-like crust that holds up well as a main meal. Crescent roll dough results in a flakier, buttery, and lighter texture, feeling more like a savory pastry.
Choose based on your texture preference and what you’re craving! Both make fantastic Ultimate Cheesy Chicken Pockets.
Your New Weeknight Hero: Embrace the Ultimate Cheesy Chicken Pockets!
With this recipe, you’re not just making Ultimate Cheesy Chicken Pockets; you’re mastering the art of the perfect crispy crust and unlocking a reliable, delicious meal solution for any night of the week.
Say goodbye to soggy bottoms and hello to golden-brown perfection that your family will rave about. We encourage you to try this simple trick and experience the difference yourself. Don’t forget to share your culinary creations with us – we love seeing your masterpieces!
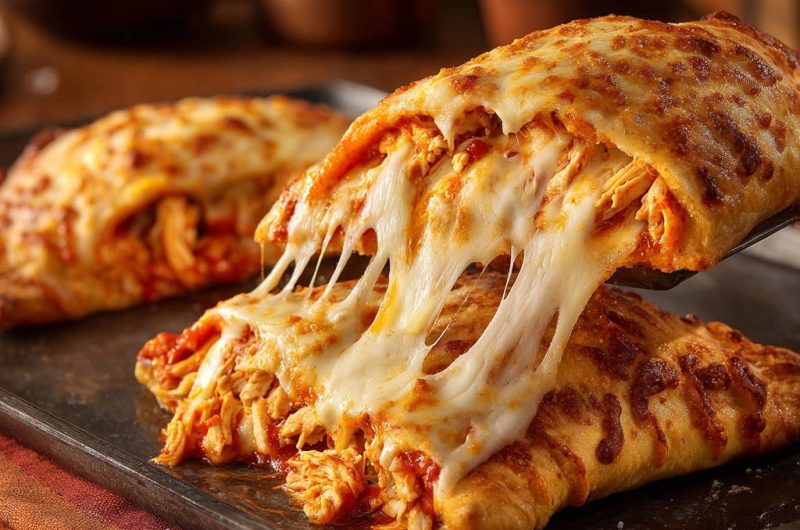
Cheesy Chicken Pockets
Course: Main CourseCuisine: Italian-AmericanDifficulty: easy2
pockets15
minutes15
minutes650
kcal30
minutesSay goodbye to soggy bottoms! This recipe reveals the simple trick for achieving perfectly golden, crispy-crusted cheesy chicken pockets every single time. A total weeknight winner, these savory pockets are packed with flavorful chicken and melty cheese.
Ingredients
1 pound cooked shredded chicken
1 cup marinara or pizza sauce
1 and 1/2 cups shredded mozzarella cheese, plus more for topping
1 teaspoon dried oregano (optional)
1/2 teaspoon garlic powder (optional)
1 package refrigerated pizza dough or crescent roll dough sheets
1 tablespoon olive oil
Directions
- Preheat your oven to 425 degrees Fahrenheit. Place a large baking sheet into the oven as it preheats. This step is crucial for achieving a crispy bottom crust.
- In a medium bowl, combine the shredded chicken, marinara sauce, 1 and 1/2 cups of mozzarella cheese, oregano, and garlic powder if using. Mix well until everything is evenly coated.
- On a lightly floured surface, unroll the pizza dough. If using crescent roll dough, press the seams together to form a solid rectangle.
- Divide the dough into 2 or 4 equal portions, depending on your desired pocket size.
- Spoon an even amount of the chicken mixture onto one half of each dough portion, leaving a small border around the edges.
- Fold the other half of the dough over the filling to create a pocket. Press down firmly around the edges to seal, using a fork to crimp them for extra security.
- Carefully remove the preheated baking sheet from the oven. Brush the top of each pocket lightly with olive oil and sprinkle with a little extra mozzarella cheese for a golden, bubbly top.
- Carefully transfer the assembled pockets to the hot baking sheet, leaving some space between them.
- Bake for 15 to 20 minutes, or until the crust is golden brown and the cheese is bubbly and melted.
- Let the pockets cool for a few minutes before serving.
Notes
- Preheating the baking sheet is crucial for a perfectly crispy bottom crust.