Cheesy Stuffed Shells: The Secret to Supreme Creaminess
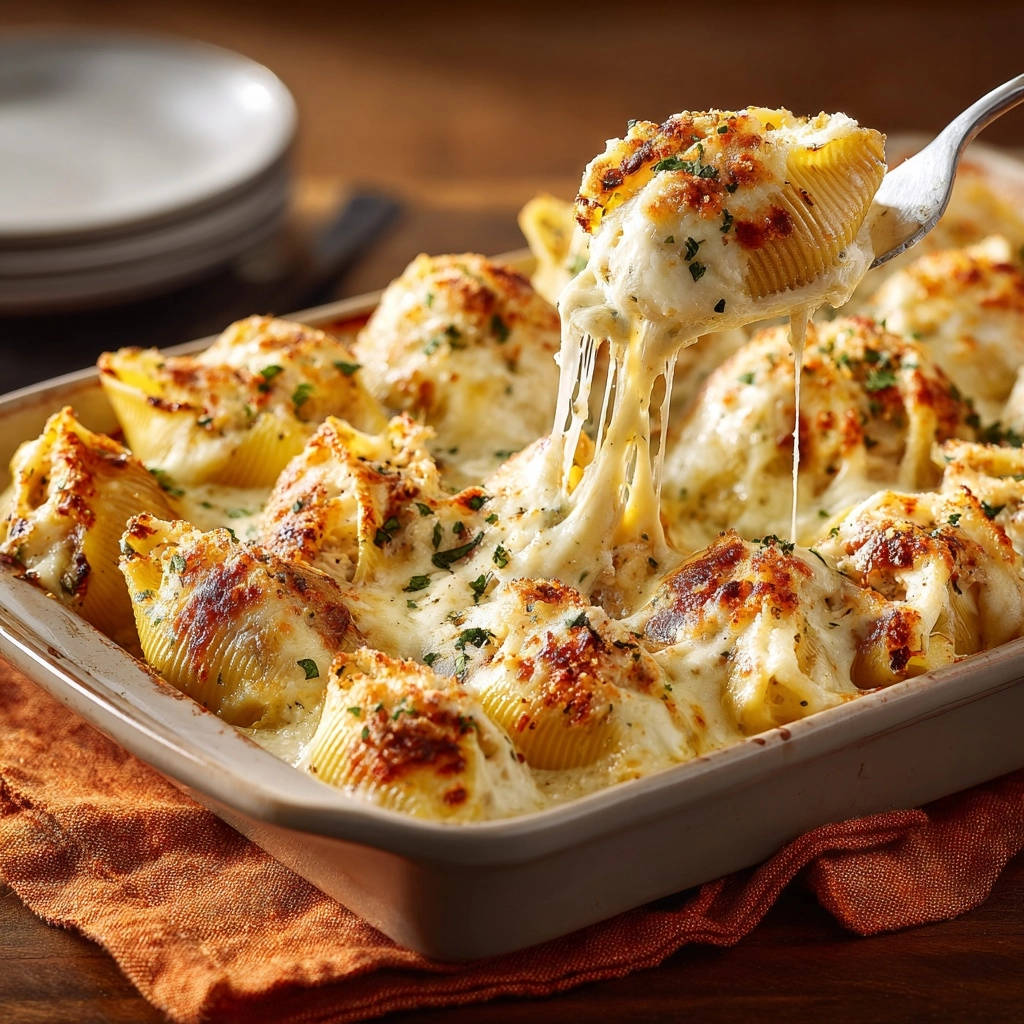
For years, I faced the common dilemma of dry, uninspired stuffed shells, despite my best efforts. That frustration ended when I perfected a simple yet transformative technique for truly luscious Cheesy Stuffed Shells that consistently exceed expectations. This recipe isn’t just about assembling ingredients; it’s about a reliable method that guarantees every bite is moist, rich, and utterly irresistible.
Why This Cheesy Stuffed Shells Recipe Will Be Your New Favorite
The ‘Never Dry’ Secret: Our Creamy Sauce Advantage
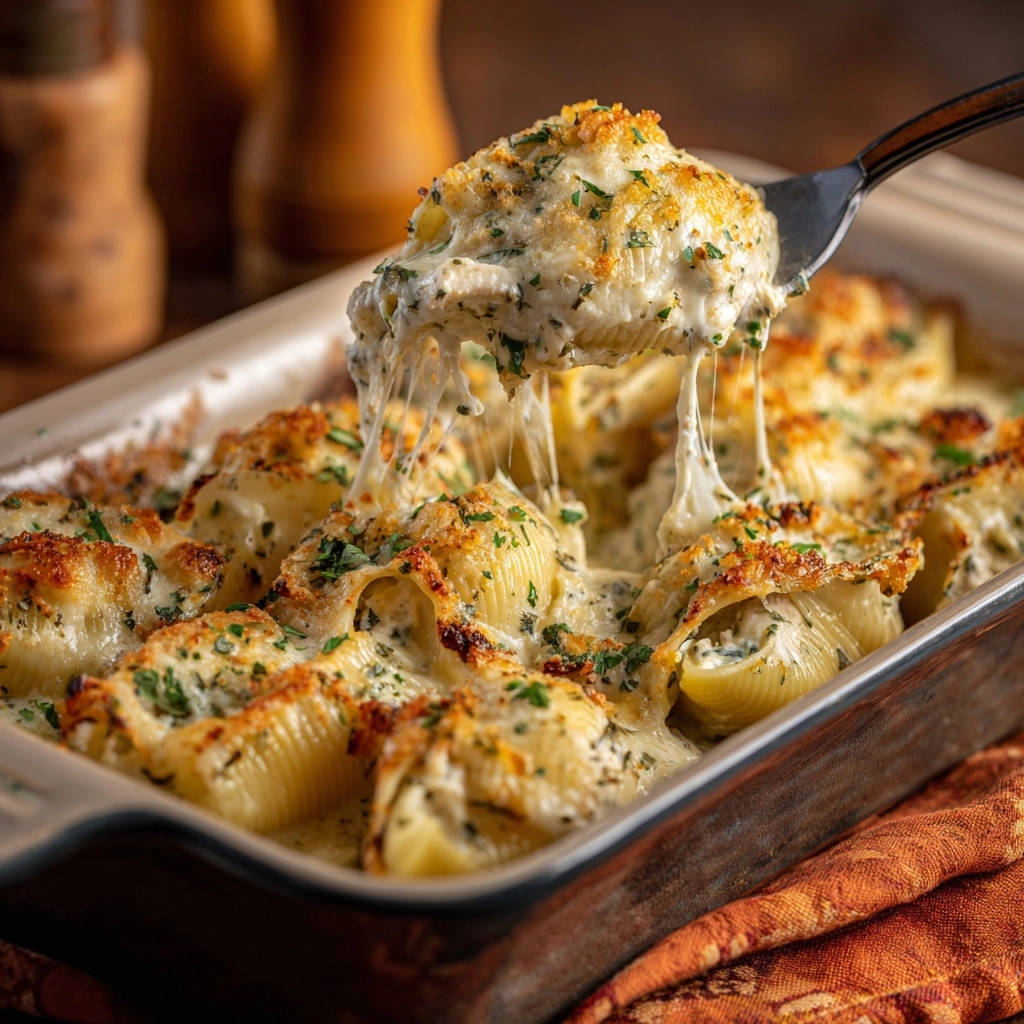
Our unique approach starts with a generous base layer of creamy béchamel sauce poured directly into the baking dish. This crucial foundation, combined with covered baking, ensures your pasta shells stay incredibly hydrated and infuse every bite with moisture from below. Say goodbye to dry, tough pasta forever.
Effortless Elegance for Weeknights or Gatherings
Despite its impressive appearance and rich flavor, this recipe for Cheesy Stuffed Shells is surprisingly straightforward. It delivers restaurant-quality comfort food without the fuss, making it ideal for a comforting family dinner or a show-stopping meal when entertaining guests.
A Comfort Food Classic That Always Delivers
There’s a reason stuffed shells are a beloved classic. This recipe brings a new level of satisfaction to this cherished dish, offering consistent, crowd-pleasing results every single time. It’s the ultimate creamy pasta bake that truly warms the soul.
Gathering Your Ingredients: Building Blocks for Irresistible Shells
The Pasta Foundation: Jumbo Shells
Jumbo pasta shells are the ideal vessel for this dish, providing ample space to cradle a generous amount of the cheesy filling. Their large size ensures each shell is a satisfying, individual portion of flavor.
The Trio of Cheeses: Ricotta, Mozzarella, Parmesan
Ricotta cheese forms the creamy, light base of our filling, providing essential moisture and texture. Mozzarella offers that iconic melt and stretch, both within the filling and as a golden, bubbly topping. Grated Parmesan cheese adds a sharp, salty depth that elevates the overall cheese profile.
Crafting the Creamy Sauce: Butter, Flour, Milk, Nutmeg
Unsalted butter and all-purpose flour combine to create a classic roux, the thickening agent for our velvety béchamel sauce. Whole milk provides the creamy liquid base, while a pinch of nutmeg, though optional, subtly enhances the sauce with a warm, aromatic note, distinguishing it from an ordinary white sauce.
Fresh Herbs and Seasonings: Parsley, Garlic, Salt & Pepper
Fresh chopped parsley brightens the rich flavors of the cheese filling with a hint of herbaceous freshness. Garlic powder provides an aromatic foundation, and balanced amounts of salt and black pepper ensure every component is perfectly seasoned.
Essential Tools for Your Stuffed Shells Journey
Large Baking Dish (9×13 inch): Essential for even baking and presentation, accommodating a full batch of stuffed shells.
Large Pot: Crucial for cooking the jumbo pasta shells evenly until they reach the perfect al dente texture.
Medium Saucepan: Specifically for preparing the smooth, lump-free béchamel sauce with consistent heat.
Mixing Bowls: You’ll need one large bowl for combining the ricotta filling ingredients and a separate one for sauce preparation if you prefer.
Whisk: An absolute must for creating a perfectly smooth, lump-free béchamel sauce that is the heart of this creamy pasta bake.
Your Step-by-Step Guide to Perfect Cheesy Stuffed Shells
Prep & Par-Cook: Shells and Baking Dish Ready
Preheat your oven to 375°F (190°C) and lightly grease a 9×13 inch baking dish. Next, cook your jumbo pasta shells according to package directions until they are perfectly al dente. This means they should still have a slight bite and not be fully soft, as they will continue to cook in the oven. Drain the shells thoroughly, then rinse them immediately with cold water; this stops the cooking process and prevents them from sticking together, making them much easier to fill.
Whip Up the Ricotta Filling
In a spacious mixing bowl, combine the 15 ounces of ricotta cheese, 1 cup of shredded mozzarella, 1/4 cup of grated Parmesan, one large egg, 1/4 cup of fresh chopped parsley, 1/2 teaspoon of garlic powder, 1/2 teaspoon of salt, and 1/4 teaspoon of black pepper. Mix these ingredients gently until they are just combined, being careful not to overmix, which can sometimes lead to a tough filling.
Mastering the Luscious Béchamel Sauce
In a medium saucepan set over medium heat, melt 4 tablespoons of unsalted butter. Once melted, whisk in 4 tablespoons of all-purpose flour and cook for 1-2 minutes, stirring constantly, until a smooth, light golden paste, known as a roux, forms. Gradually whisk in 3 cups of whole milk, a little at a time, ensuring that no lumps form. Continue to cook, stirring frequently, until the sauce thickens to a smooth, velvety consistency, which typically takes about 5-7 minutes. If you’re using it, stir in a pinch of nutmeg now, then remove the saucepan from the heat.
The Game-Changing Base Layer: Sauce First!
This step is critical for preventing dry pasta in your Cheesy Stuffed Shells. Pour half of the freshly prepared creamy béchamel sauce into the bottom of your greased baking dish, spreading it evenly across the surface. This generous base layer of sauce is what truly ensures every bite of pasta remains hydrated and infused with moisture from below.
Generously Fill and Arrange the Shells
Carefully take each cooked pasta shell and fill it with a generous amount of the ricotta mixture. You can use a small spoon or even a piping bag without a tip for a cleaner process. Once filled, arrange the shells in a single layer over the sauce in the baking dish, fitting them snugly side-by-side to create an appealing presentation.
The Final Coating: Remaining Sauce & Cheeses
Pour the remaining creamy béchamel sauce evenly over the top of all the filled shells, making sure it seeps into and around them to maintain moisture. Then, sprinkle the remaining 1 cup of shredded mozzarella cheese and 1/4 cup of grated Parmesan cheese generously over the entire dish, creating a beautiful cheesy crust.
Covered Baking: The Key to Juiciness
Cover the baking dish tightly with aluminum foil. Place it in the preheated oven and bake for 25 minutes. This covered baking time is absolutely essential for preventing the shells from drying out and ensuring they cook through perfectly in the rich, luscious sauce, resulting in that incredible creamy texture we’re aiming for.
Uncover, Brown, and Rest for Perfection
After the initial covered baking, remove the foil from the dish. Return it to the oven and bake for an additional 15-20 minutes, or until the cheese topping is beautifully bubbly, melted, and golden brown with slightly crispy edges. Once baked, let the dish rest for 5-10 minutes before serving; this allows the sauce to set and the flavors to meld, ensuring every spoonful is perfect. Garnish with additional fresh chopped parsley if desired.
Chef’s Secrets: Elevate Your Cheesy Stuffed Shells Game
Achieving Perfect Al Dente Shells
Never overcook your pasta for stuffed shells! Aim for a firm al dente, as the shells will continue to absorb moisture and cook further in the oven. This ensures they maintain their structural integrity and offer a satisfying bite.
Don’t Skip the Cold Rinse
Rinsing cooked shells in cold water immediately after draining is a crucial step. It halts the cooking process, prevents the shells from sticking together, and makes them significantly easier to handle and fill without tearing.
Filling Shells with Ease
For a less messy and more efficient filling process, use a small cookie scoop or even a piping bag (without a tip) to neatly transfer the ricotta mixture into each shell. This ensures even portions and clean edges.
Personalizing Your Cheese Blend
While the classic trio of ricotta, mozzarella, and Parmesan is delicious, don’t hesitate to experiment! Incorporate a small amount of smoked provolone, sharp white cheddar, or even a touch of creamy Fontina to add new dimensions of flavor and texture to your filling or topping.
Ensuring a Lump-Free Béchamel
The secret to a perfectly smooth béchamel sauce lies in gradually whisking cold milk into your hot roux. Continuous whisking is key to preventing lumps. If any do appear, a quick pass with an immersion blender can effortlessly rescue your sauce.
Your Stuffed Shells FAQs: Troubleshooting & Customization
Can I prepare Cheesy Stuffed Shells in advance?
Absolutely! You can assemble the entire dish, including both sauce layers and cheese topping, up to one day ahead. Cover it tightly with aluminum foil and refrigerate. When ready to bake, add an extra 10-15 minutes to the covered baking time to ensure it heats through evenly and thoroughly.
How should I store leftover Stuffed Shells?
Store any leftover Cheesy Stuffed Shells in an airtight container in the refrigerator for up to 3-4 days. Reheat individual portions gently in the microwave or place the entire dish, covered, in the oven at 350°F (175°C) until warmed through.
Is it possible to freeze this recipe?
Yes, this dish freezes beautifully! Assemble the shells as directed but do not bake them. Cover the baking dish tightly with two layers of aluminum foil and freeze for up to 3 months. Thaw overnight in the refrigerator before baking, or bake directly from frozen, adding an additional 30-45 minutes to the covered baking time.
What are the best side dishes to serve with Stuffed Shells?
To complement the richness of these creamy stuffed shells, consider a fresh green salad with a light vinaigrette, some warm, crusty garlic bread, or a simple side of steamed green beans or asparagus. These options provide balance and freshness.
For a perfect pairing, try our Mastering Creamy Lobster Tagliatelle Without the Watery Mess.
Can I make this recipe dairy-free or gluten-free?
Yes, with thoughtful substitutions! Use gluten-free jumbo shells, dairy-free ricotta alternatives, dairy-free mozzarella shreds, and a plant-based milk (such as oat or almond milk) for the béchamel. Be aware that the texture and flavor might differ slightly, but it will still be a delicious and comforting meal.
For a perfect pairing, try our Mastering Creamy Shrimp Fettuccine Alfredo Without the Grit.
Can I use a different type of pasta?
While jumbo shells are specifically designed for stuffing and provide the best presentation, you can adapt this recipe for other large pasta shapes. Manicotti or cannelloni are excellent alternatives, or you could even use lasagna noodles for a layered, deconstructed version if you’re short on time for individual stuffing.
Beyond the Classic: Creative Twists & Dietary Swaps
Adding Meat or Vegetables
For a heartier meal, consider browning 1/2 pound of Italian sausage or ground beef and mixing it directly into the ricotta filling. Alternatively, sautéed spinach (ensure it’s well-drained), finely diced mushrooms, or bell peppers can add extra flavor and nutritional value. For a similar hearty pasta experience, you might enjoy our Cheesy Beef Shells Skillet.
Spicing Things Up
If you enjoy a bit of heat, introduce a pinch of red pepper flakes to the ricotta filling for a subtle kick. A dash of hot sauce in the béchamel can also add depth. Experiment with different fresh herbs like basil or oregano to customize the aromatic profile to your liking.
Dairy-Free & Gluten-Free Adaptations
As discussed, embracing plant-based cheese and milk alternatives, alongside gluten-free pasta, makes this satisfying dish accessible to a wider audience. Remember that dairy-free cheeses can vary significantly in flavor and melt characteristics, so taste and adjust your seasonings accordingly to achieve the best results.
Ready to Impress? Share Your Cheesy Stuffed Shells Masterpiece!
Now that you have the “secret” to perfectly creamy, never-dry Cheesy Stuffed Shells, it’s time to gather your ingredients and get cooking! This recipe is more than just a meal; it’s an experience that brings comfort and joy to any table, sure to become a cherished staple in your home.
What Goes With Stuffed Shells?
That creamy, cheesy main dish calls for something crusty and buttery on the side. These two garlic bread options soak up any leftover sauce and add a crunchy contrast to the soft shells.
- For pull-apart fun with extra cheese and garlic, grab a batch of Cheesy Garlic Pull-Apart Bread Bites — they bake up fast and let everyone pick their own piece.
- If you prefer larger, softer slices with the same garlicky punch, the Cheesy Garlic Pull-Apart Bread delivers moist centers and a crisp edge that matches the stuffed shells nicely.
Don’t forget to share your delicious creations with us on social media – we absolutely love seeing your culinary triumphs! If you enjoyed perfecting this creamy pasta bake, explore our other comfort food recipes for more delicious inspiration and satisfying meals.
Stuffed Shells
Course: Main CourseCuisine: Italian-AmericanDifficulty: medium6
servings30
minutes45
minutes450
kcal75
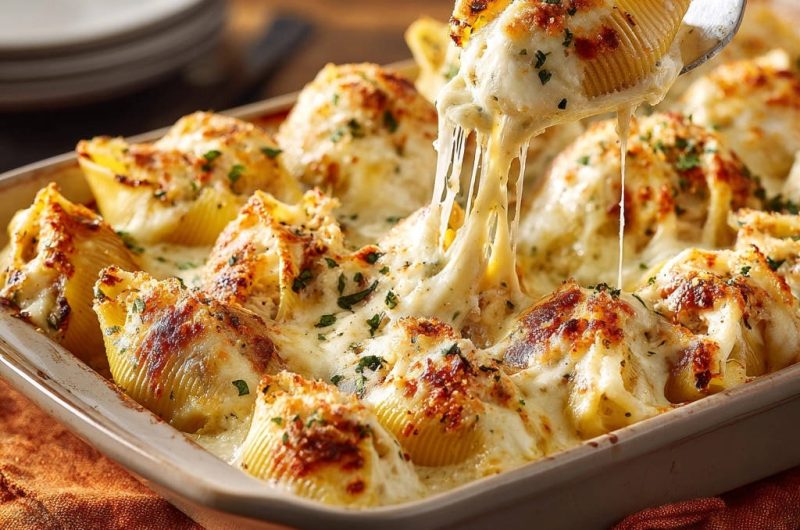
minutesTired of dry stuffed shells? This recipe reveals a simple trick to ensure your Cheesy Stuffed Shells are consistently luscious and irresistible. With a creamy sauce base and a rich ricotta filling, this dish will disappear from your table every time.
Ingredients
12 ounces jumbo pasta shells
15 ounces ricotta cheese
2 cups shredded mozzarella cheese, divided
1/2 cup grated Parmesan cheese, divided
1 large egg
1/4 cup fresh parsley, chopped, plus more for garnish
1/2 teaspoon garlic powder
1/2 teaspoon salt, plus more for pasta water
1/4 teaspoon black pepper
4 tablespoons unsalted butter
4 tablespoons all-purpose flour
3 cups whole milk
Pinch of nutmeg (optional)
Directions
- Preheat oven to 375°F (190°C). Lightly grease a 9×13 inch baking dish.
- Cook the jumbo pasta shells according to package directions until al dente. This means they should still have a slight bite and not be fully soft. Drain the shells, rinse with cold water to prevent sticking, and set aside.
- In a large bowl, combine the ricotta cheese, 1 cup of shredded mozzarella, 1/4 cup of grated Parmesan, egg, 1/4 cup chopped parsley, garlic powder, 1/2 teaspoon salt, and 1/4 teaspoon black pepper. Mix until well combined.
- Prepare the creamy sauce: In a medium saucepan over medium heat, melt the butter. Whisk in the flour and cook for 1-2 minutes, stirring constantly, until a smooth paste (roux) forms. Gradually whisk in the whole milk, a little at a time, ensuring no lumps form. Continue to cook, stirring frequently, until the sauce thickens to a smooth consistency, about 5-7 minutes. If using, stir in the pinch of nutmeg. Remove from heat.
- This is the secret to guaranteed creaminess: Pour half of the prepared creamy sauce into the bottom of the greased baking dish, spreading it evenly. This generous base layer of sauce is crucial for keeping the pasta hydrated and infusing every bite with moisture from below.
- Carefully fill each cooked pasta shell with a generous amount of the ricotta mixture. Arrange the filled shells in a single layer over the sauce in the baking dish.
- Pour the remaining creamy sauce evenly over the filled shells. Ensure some sauce seeps into and around the shells.
- Sprinkle the remaining 1 cup of shredded mozzarella cheese and 1/4 cup of grated Parmesan cheese over the top of the shells.
- Cover the baking dish tightly with aluminum foil. Bake for 25 minutes. This covered baking time is key to preventing dryness and ensuring the shells cook through in the luscious sauce, creating that perfect creamy texture.
- Remove the foil and bake for an additional 15-20 minutes, or until the cheese is bubbly and the top is golden brown and slightly crispy.
- Let the dish rest for 5-10 minutes before serving. Garnish with additional fresh chopped parsley, if desired.
Notes
- The secret to this recipe’s creaminess is a generous base layer of sauce and covered baking.